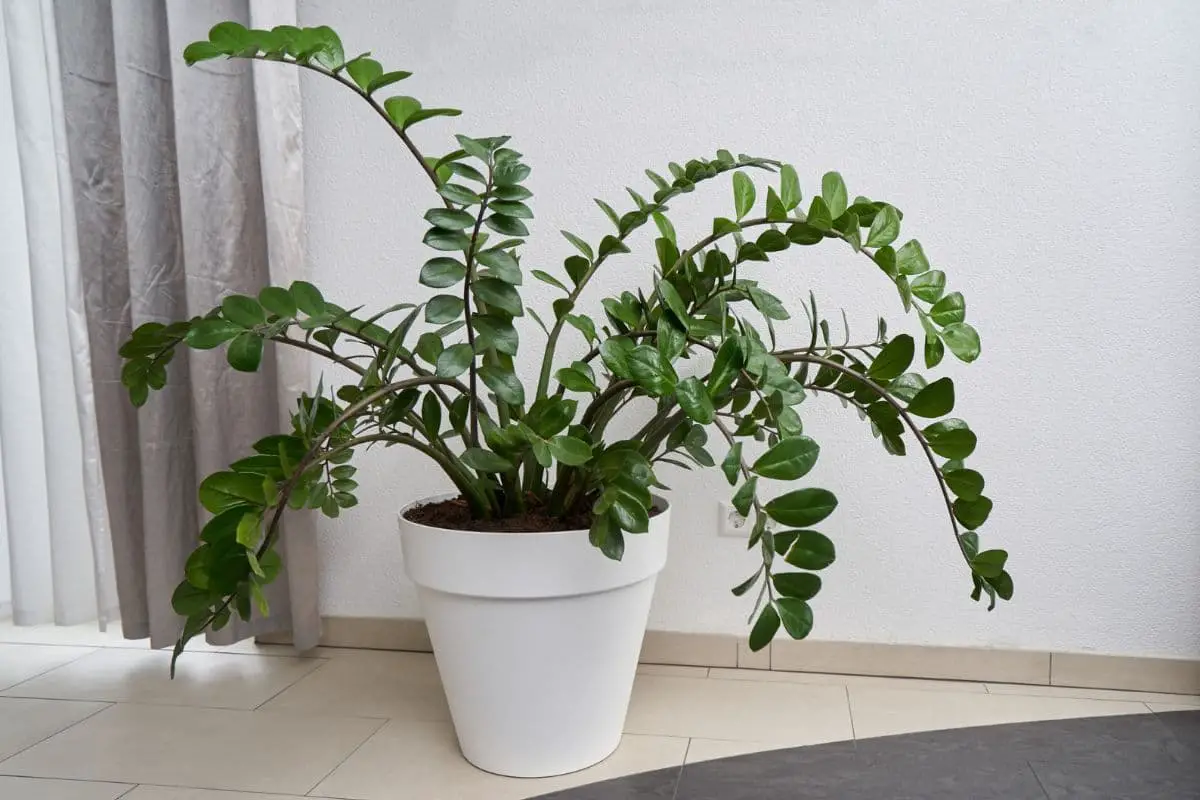
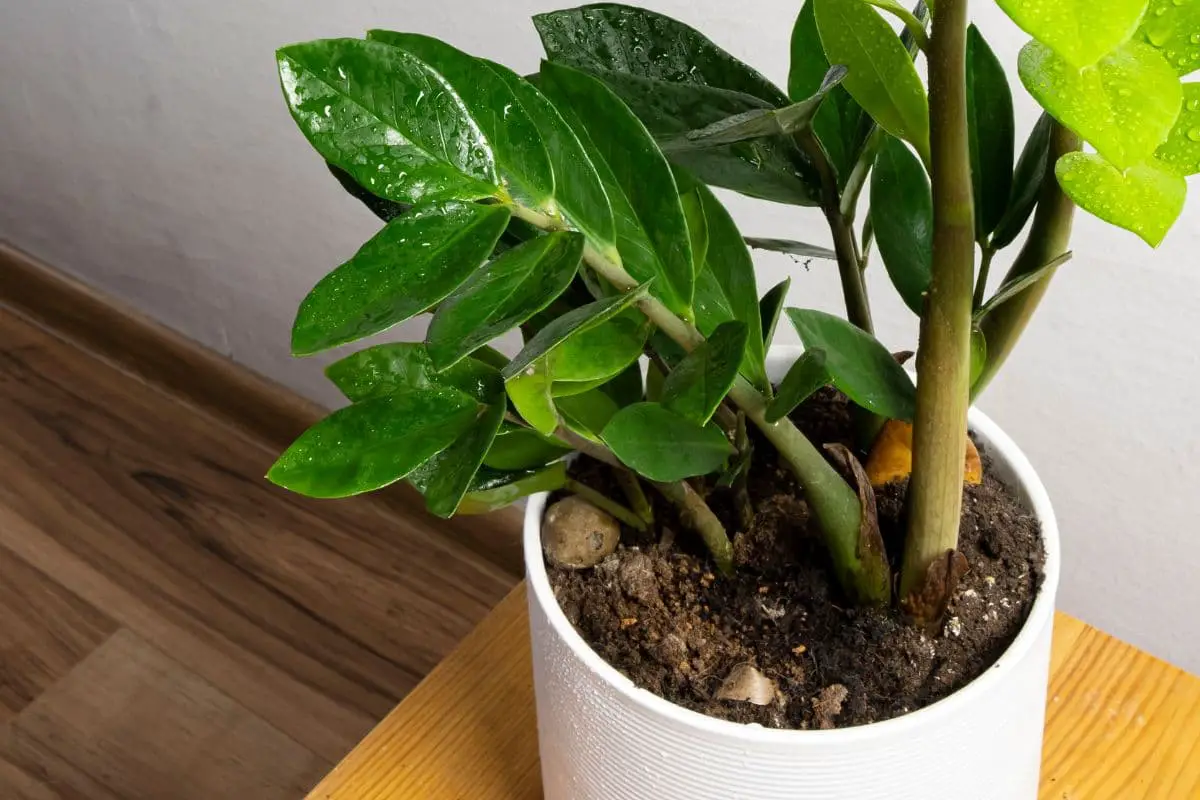
ZZ plants (Zamioculcas zamiifolia) are famous for their vibrant green leaves that can brighten any indoor space. In addition, they’re resilient and require relatively lower maintenance than other houseplants.
ZZ plants are generally grown from leaf or stem cuttings or root divisions. They thrive in loose soil rich in organic matter, partial shade, and moderate moisture. They can also grow in low-light conditions and periods of drought but are unforgiving to overwatering.
In the rest of the article, I’ll explore the growth requirements of ZZ plants. I’ll also discuss how to address some common problems and ensure your plant thrives in your home environment.
Quick Guide
| Common Name(s) | ZZ plant, Zanzibar gem |
| Botanical Name | Zamioculcas zamiifolia |
| Family | Araceae |
| Plant Type | Herbaceous perennial |
| Native Area | East and South Africa |
| Height & Spread | 2-4 feet (0.6-1.2 m) tall and wide |
| Bloom Time | Mid-summer to early autumn |
| Flower Structure | Spadix |
| Color | White or cream |
| Sun Exposure | Partial shade (2-4 hours of direct sunlight) Full shade/dappled light (less than 2 hours of direct sunlight) Bright, indirect light indoors |
| Soil Type | Loose soil with good drainage, rich in organic matter |
| Soil pH | 6.0-7.0 |
| Watering | Infrequent (every 10-14 days in bright light or 2-3 weeks in low light) |
| Pests, Diseases, Common Problems | Occasional pest problems (aphids, scale mites, mealybugs) Root rot if grown in dense soil |
| Toxicity | Toxic to pets and small kids. Ingesting the leaves can cause stomachache and diarrhea. Keep the pot out of reach for children and pets. |
| Required Maintenance | Low maintenance Repot every 2-3 years Divide every 3-5 years |
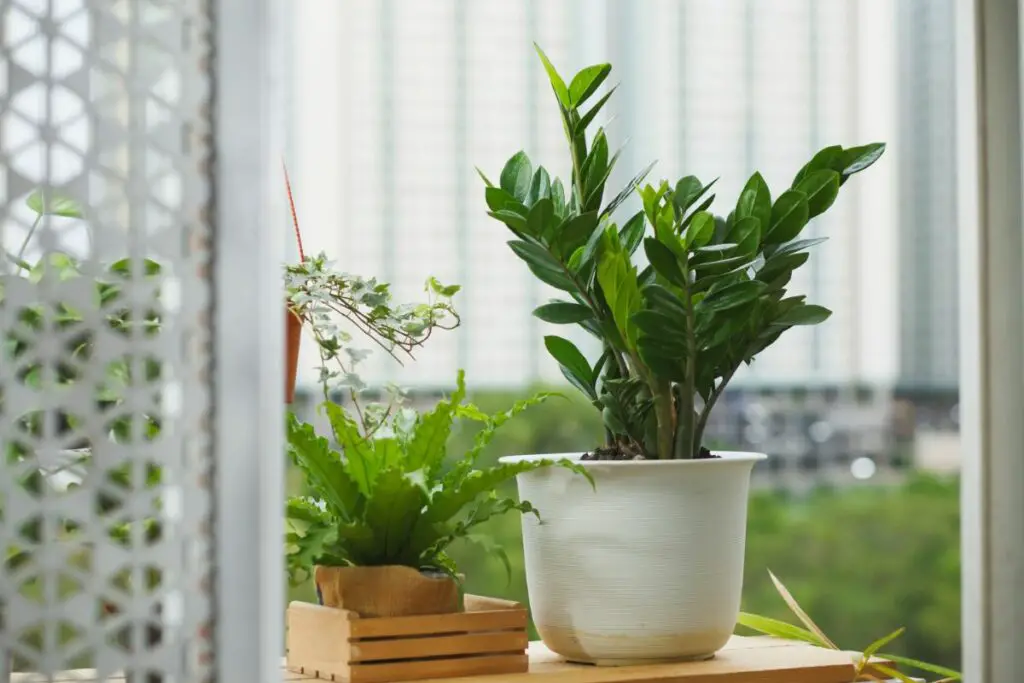
ZZ Plants: An Overview
ZZ plants are native to Eastern and Southern Africa. They’re sometimes called the “Zanzibar gem” because of their native origin and glossy leaves.
In the wild, they live in shady forests, receive scarce rainfall, and grow in sandy soil. To adapt to arid conditions, they have developed thick roots with potato-like rhizomes or bulbs and thick stems that store moisture, giving them drought tolerance.
These features make ZZ plants a favorite among indoor gardeners who prefer low-maintenance plants. They can be kept in low-light areas in your home and watered infrequently and still maintain their lush foliage.
Zamioculcas flowers grow close to the soil. Each flower is a white or cream spadix surrounded by a green spathe. They rarely bloom in the home environment, but the presence of flowers indicates that your plant is receiving excellent care.
The only downside is their toxicity. The leaves contain calcium oxalate, which can cause vomiting and diarrhea when ingested by curious kids or pets.
If you have small kids or dogs, keep these plants beyond their reach by placing the pots on tall tables or wall shelves. Cats may climb tall furniture easily, so it’s best to place your ZZ plants in a room inaccessible to them.
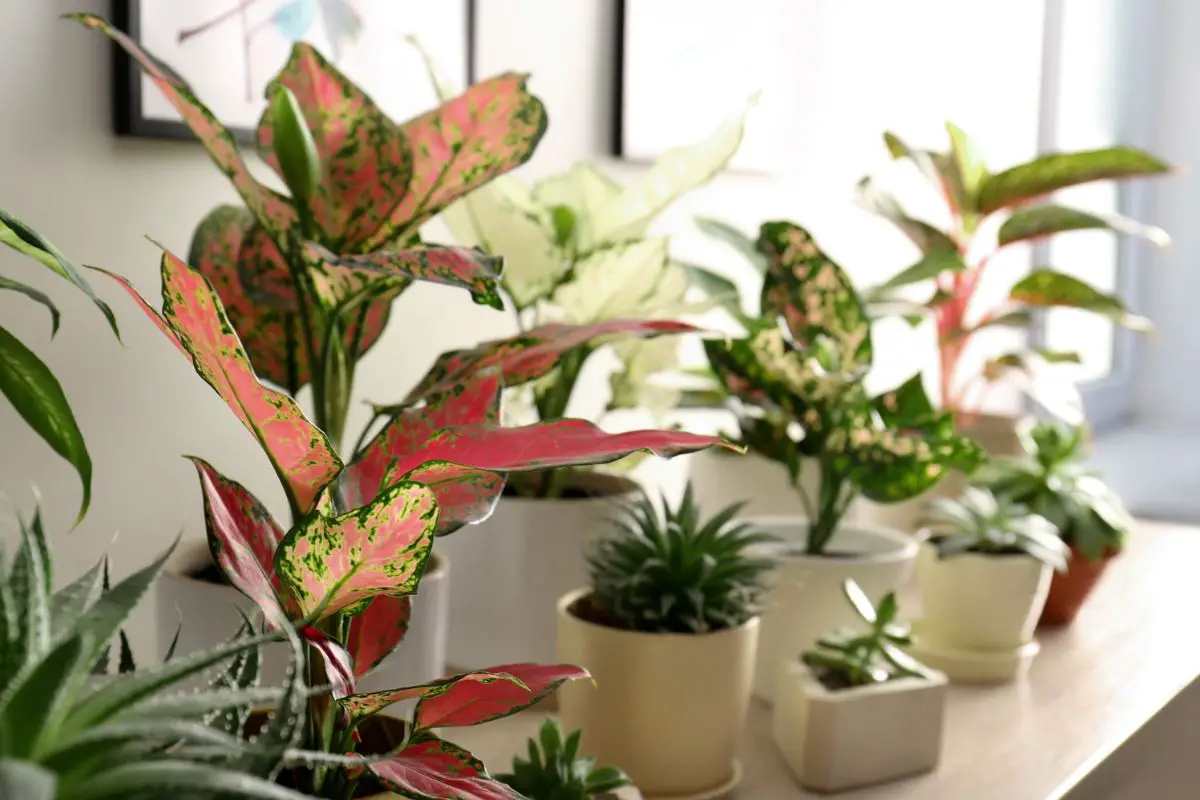
Selecting Your ZZ Plant
You can acquire ZZ plants from a reputable nursery or gardening store. However, they can be quite expensive because of the high demand and low supply. Most nurseries use plastic pots to restrict growth and keep the plant compact for selling.
To make the most of your purchase, here are some tips when choosing your plant:
- Avoid plants with yellow or spotted leaves. A healthy ZZ plant has glossy green leaves.
- Check below the leaves and along the stems for signs of pests. The common pests include aphids, scale mites, and mealybugs. Look for eggs and crawling larvae or adults.
- Choose a container with multiple stems, which indicates that the ZZ plant is ready for division.
- Opt for larger plants—about 10-12 inches (25-30 cm) tall—because they’re established and more forgiving to division, repotting, and occasional neglect.
Initial Planting
After your purchase, keep your ZZ plant isolated for about 8 weeks. This is enough time for any pest eggs to hatch and reveal an infestation.
If the plant doesn’t seem to be rootbound, you can keep it in the same pot until the next growing season.
Alternatively, you can transplant it with the following steps:
- Unpot the plant 1-2 days after watering. You can cut through the plastic if the roots have become potbound. Start from the drainage hole at the bottom and work your way up, being careful not to hurt the fleshy roots.
- Look for potential spots for division. Each division should have one bulbous rhizome and 2-3 stems with healthy leaves. You can pull them apart firmly, but be careful not to break too many roots or wound the rhizomes.
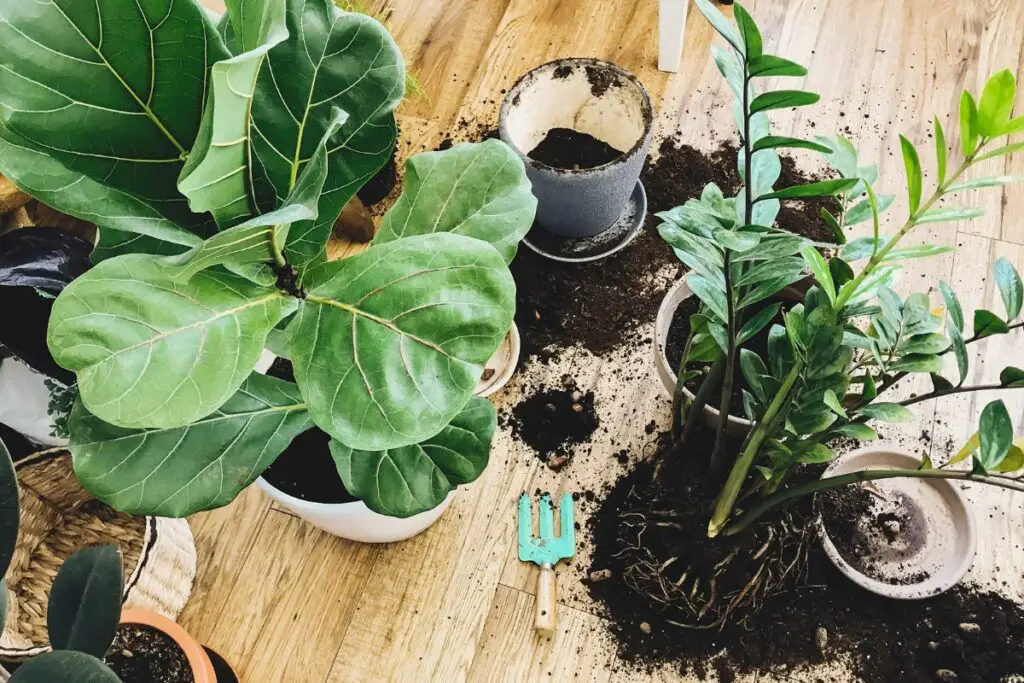
- Prepare a breathable pot with drainage holes. Choose one that’s 1-2 inches (2.5-5 cm) wider and 2-3 inches (5-7.6 cm) deeper than the rootball. A terracotta pot is perfect for ZZ plants because they can become top-heavy as they grow.
- Fill the bottom with 2-3 inches (5-7.6 cm) of a moist, high-quality potting mix. I recommend half compost and half horticultural sand or perlite.
- Don’t bury the roots and bulbs too deep. Place them over the soil and cover them with more potting mix. I suggest setting the bulbs no more than an inch (2.5 cm) below the surface to keep them from staying wet for too long.
- Leave an inch (2.5 cm) of space between the pot’s rim and the soil surface. This will prevent the soil from splashing out of the pot every time you water it. In addition, you’ll need that space as more bulbs will grow over time and push the soil upward.
- Don’t water the plant right away. The initial watering in step 1 and the moisture in the potting mix are enough to keep the plant hydrated without causing rot.

Optimal Growing Conditions
ZZ plants are slow-growing and low-maintenance. Their light, temperature, and humidity requirements are within the normal range that’s also convenient and comfortable for humans.
That said, here are some parameters to remember for optimum ZZ plant care:
Light
Choose a spot that receives bright, indirect sunlight, such as 4-8 feet (1.2-2.4 m) away from a bright window.
A ZZ plant can handle about 2 hours of direct sunlight but will be more susceptible to leaf scorch. It will also require more frequent watering in brighter conditions.
If it’s too hot and bright, you can hang sheer curtains to filter the light. It’s also important to rotate your plant by 90-180° regularly (weekly or every time you water it) to prevent sunburn.
Conversely, it can tolerate low light conditions, such as a spot next to a northern window. The plant will then require less frequent watering because the soil will take longer to dry out.
Temperature
ZZ plants prefer warm temperatures between 65 and 85 °F (18 and 29 °C). They can tolerate temperatures up to 90 °F (32 °C) for short periods.
However, they’re not frost-tolerant. Temperatures below 60 °F (15.6 C) can cause paler leaves, and they stop growing or get cold injury when it dips below 50 °F (10 °C).
Humidity
Moderate humidity levels between 40 and 50% are suitable for ZZ plants because they’re similar to their native environment. This range is also the comfortable level in most U.S. homes.
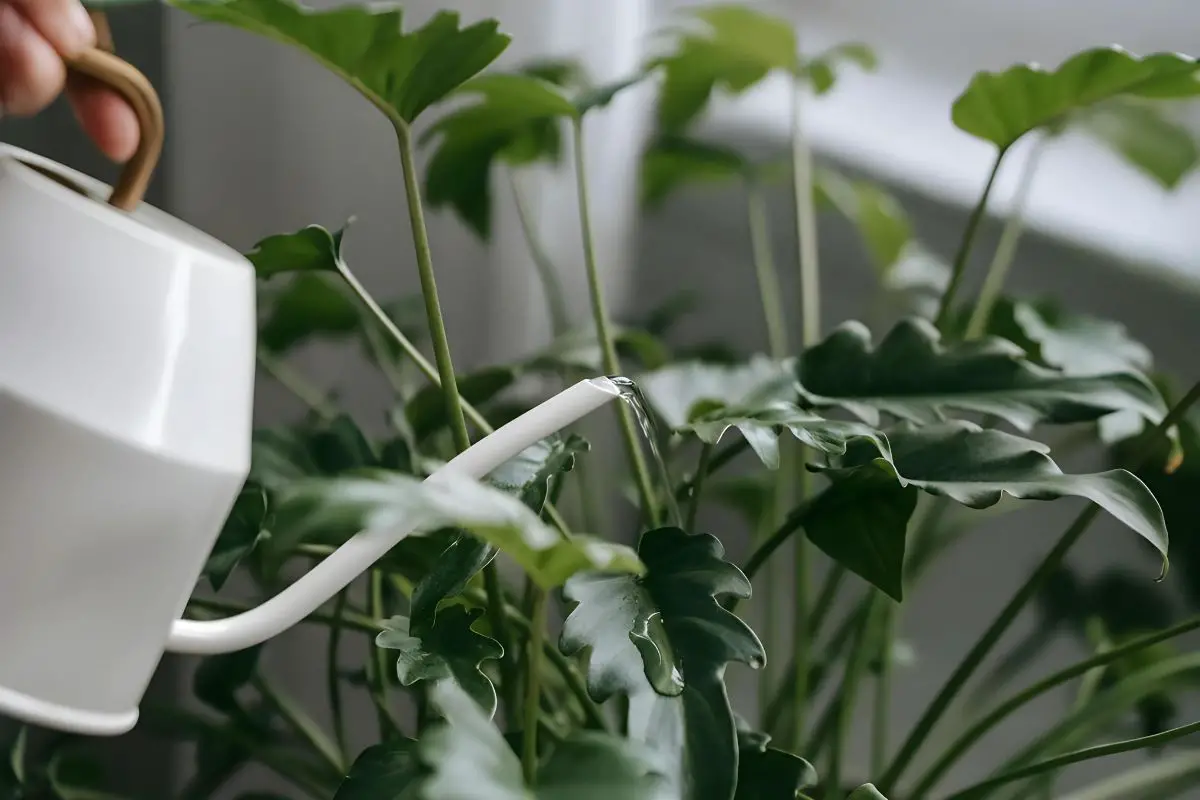
Watering
ZZ plants have low to moderate watering needs due to their rhizomes or bulbs, making them more tolerant of underwatering than overwatering.
You’ll know that they need water when the leaves start to droop. Watering the plant will help the leaves perk up within hours.
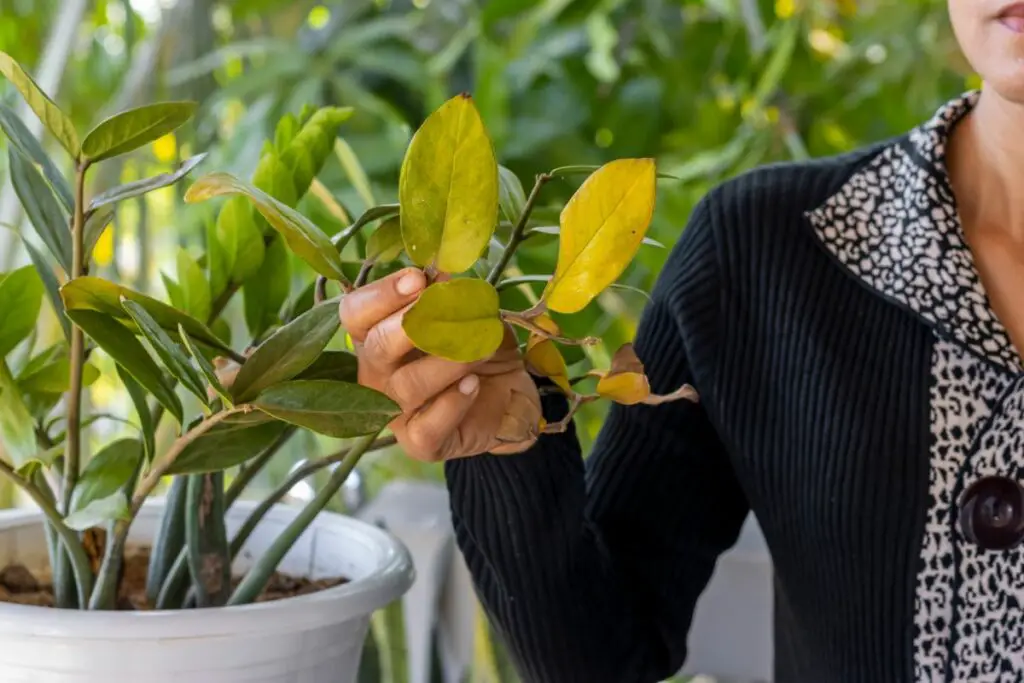
Chronically underwatered ZZ plants will have yellow, brown, or wrinkled leaves. These signs are similar to overwatering when the roots are too damaged to send moisture to the leaves.
Your plant can handle a few instances of overwatering if the soil has excellent drainage, but frequent overwatering can lead to root rot.
It’s important to let the soil dry enough (but not bone-dry) to prevent the fleshy roots from rotting.
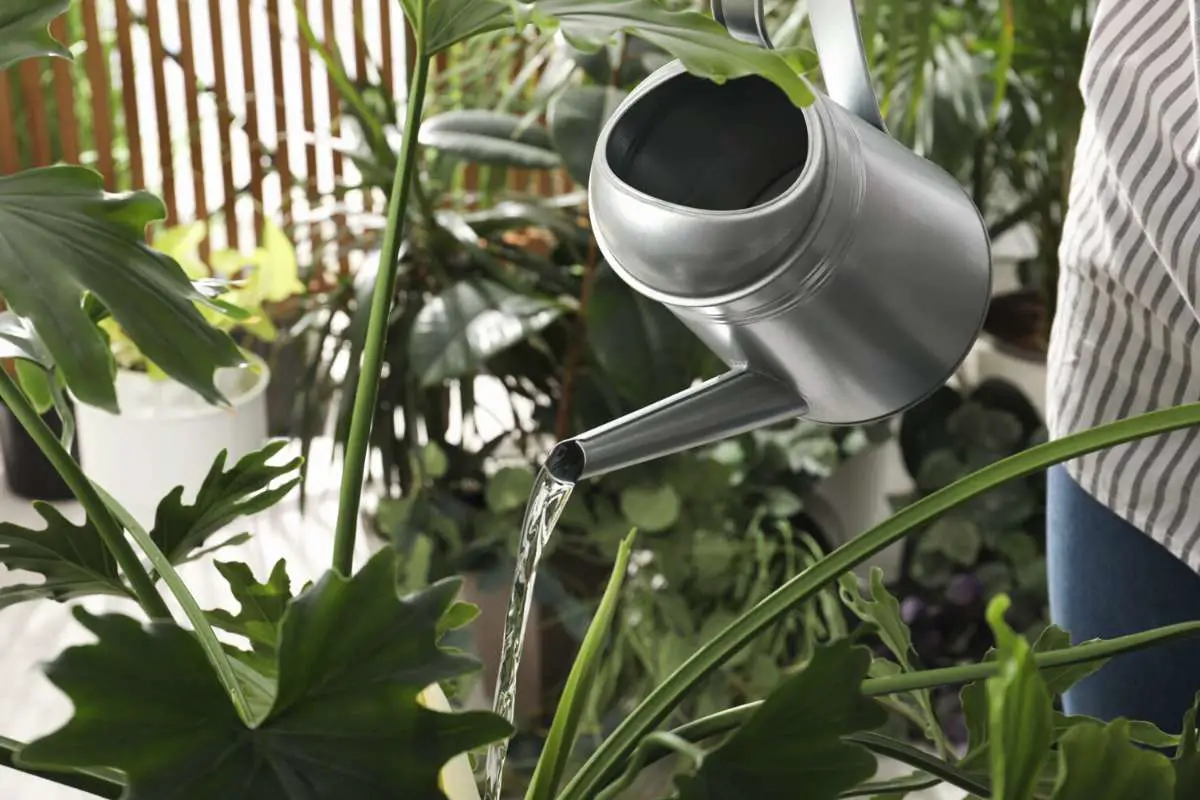
With proper watering, your plant can last 2-3 weeks before needing another drink. If kept in brighter and warmer conditions, it may need more frequent watering (every 10-14 days).
During winter, your plant may enter a period of rest but won’t shed its leaves. Even if your indoor conditions remain warm, drier air and lower light conditions will prompt your plant to grow even more slowly. So, in the fall and winter, you may reduce watering to once every 4-6 weeks.
Here are some tips to rehydrate your plant:
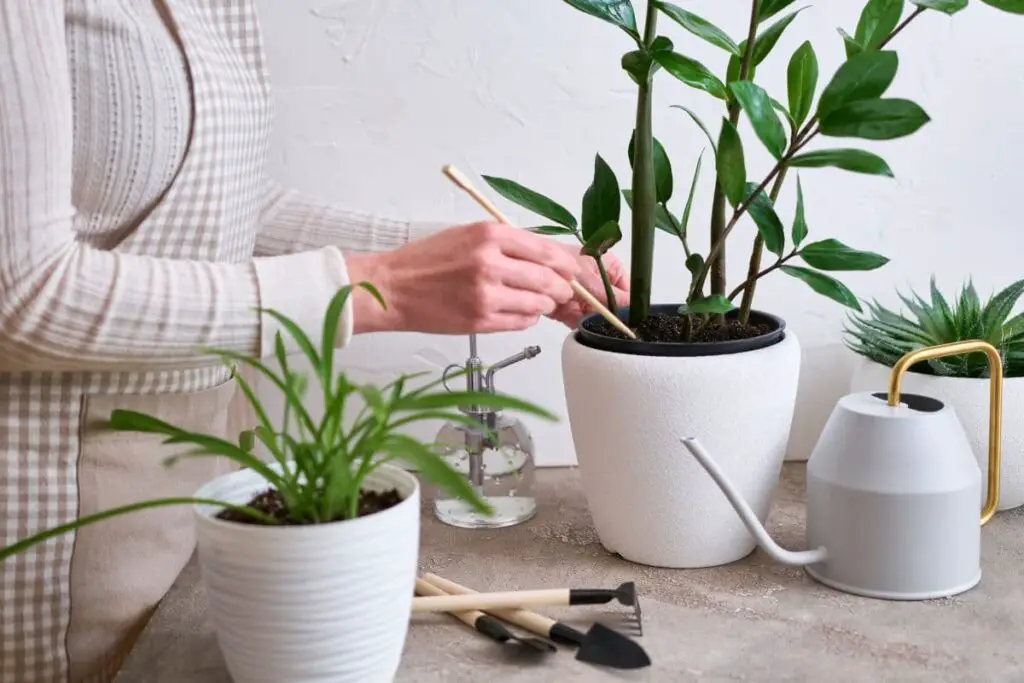
- Wait until the upper half of the potting mix is dry. You can use your finger or a wooden chopstick, but be careful not to cut through the fleshy roots.
- Water the plant deeply until the excess exits through the drainage holes. Avoid shallow watering because it won’t be enough to rehydrate the plant and store enough moisture in the bulbs.
Fertilizing and Nutrient Requirements
ZZ plants don’t require much fertilizer. Freshly repotted plants don’t need additional fertilizers because they can thrive from the organic matter in their substrate. That’s why it’s important to use high-quality compost in the potting mix.
The year after repotting, you can apply a slow-release, balanced 10-10-10 fertilizer once or twice a year (spring and/or early summer). You’ll know that your plant is hungry when the lower leaves start turning yellow, indicating nitrogen deficiency.
To fertilize your plant, follow these steps:
- Top up the potting mix to keep the bulbs an inch (2.5 cm) below the surface.
- Sprinkle a fine layer of the granular fertilizer on top of the potting mix.
- Water your plant to gradually release the nutrients for the roots to absorb.
Pruning and Maintenance
A healthy ZZ plant doesn’t require regular pruning and maintenance. It grows slowly, so they can remain compact for a long time.
As with most foliage plants, you may need to dust the leaves every 2 weeks or so to prevent dust or dirt buildup. This is also a good time to inspect the foliage for pests or damage.
I only prune my ZZ plants for the following reasons:
- Balancing the appearance: ZZ plants typically grow upright. However, the outermost stems in a crowded pot can grow outward, and some stems may look taller than others. Pruning can help you control your plant’s appearance.
- Removing discolored, sick, or leggy foliage: Poor watering practices, intense or inadequate sunlight, and pest infestations can affect the plant’s health and the appearance of the leaves. You can remove the old or damaged foliage because they won’t recover their color or growth pattern. Fixing your care routine will then ensure the new growth will be healthier.
- Propagating through leaf or stem cuttings: ZZ plants can easily be propagated through cuttings. I’ll discuss this in more detail later in the article.
Proper Pruning Techniques
Below are important things to remember when pruning ZZ plants:
- Schedule the pruning in spring to early summer. ZZ plants have a slightly faster growth rate during the warm seasons, allowing them to recover from the cuts more easily. In case of damage or disease, you can remove the affected sections anytime. However, your plant will take longer to grow new shoots when cut during the resting period in winter.
- Wear gloves. The calcium oxalate in the sap of ZZ plant leaves can cause skin irritation upon contact with susceptible individuals.
- Use a sterile knife or shears. No new growth will occur from the cut stems. It can take some time before the cut forms a callus and the stump dries out, so it’s important to use clean shears to prevent infection.
- Cut at a 45° angle when propagating. The angle is necessary to increase contact with water and form roots. On the other hand, you can simply cut across when removing damaged foliage or improving your plant’s appearance.
- Cut close to the soil surface. This will prevent the cut stem from consuming moisture and nutrients. A stump height of up to an inch (2.5 cm) should be fine.
- Don’t prune more than a third of the plant. Due to their slow-growing nature, it can take a while for the plant to replace the lost foliage, compromising its ability to photosynthesize properly.
Propagation Techniques
The best time to propagate your ZZ plant is in the mid-spring to early summer when it’s actively growing. It will give your plant enough daylight and warm temperatures to grow roots before becoming less active in winter.
There are two ways to do this: through stem and leaf cuttings. They’re pretty straightforward but can have different requirements and considerations.
Let’s explore them below:
Propagating Leaf Cuttings
My favorite method is to propagate ZZ plants from leaf cuttings because I can see the entire growth process.
It’s also practical if the plant shows signs of rot or legginess. The terminal leaves may remain green and vibrant because of the moisture stored in the stems during the early stages of root rot. Leggy stems will also look unattractive when propagated, so it’s best to salvage the leaves instead.
Pro-tip: Wear gloves every time you handle your ZZ plant, especially if the process involves cutting leaves or stems. Protect your skin from potential contact with plant sap, which can cause skin irritation.
Here’s how to do it:
- Prepare a seedling tray, small pots, or containers about 2 inches (5 cm) deep.
- Fill the container with moist coco peat. You can also use a compost-perlite mix.
- Choose healthy, green, glossy leaves. Avoid those that have discolored spots or sections.
- Pluck the petioles off with a bit of the node still attached.
- Dip the node into a rooting hormone. This step is optional but can speed up the rooting process.
- Let the cutting form a callus for 3-7 days to prevent it from drying out quickly.
- Bury the lower half-inch (1.3 cm) of the leaf into the substrate.
- Spray the substrate with a fine mist to avoid dislodging the leaf.
- Place the setup in a bright and humid room away from direct sunlight. Aim for a constant humidity of around 50%.
- Moisten the substrate as soon as the upper ½-1 inch (1.3-2.5 cm) feels dry.
Alternatively, you can root the cuttings in water; here’s how:
- Collect multiple healthy leaf cuttings and place them on a dry paper plate or towel.
- Keep them in a cool, dry room for about a week until the cut ends form a callus.
- Place each leaf in a small, narrow glass (i.e., a shot glass or medicine cup) with tepid water. The water should cover the bottom half-inch (1.3 cm) of the leaf.
- Place the setup in a bright room away from direct sunlight.
- Replace the water regularly to maintain the level.
It usually takes more than a month for leaf cuttings to grow enough roots and a bulb in soil and about three months in water. Once the bulb is about half an inch (1.3 cm) in diameter and the roots are an inch (2.5 cm) long, you can transplant the cuttings into their own pots.
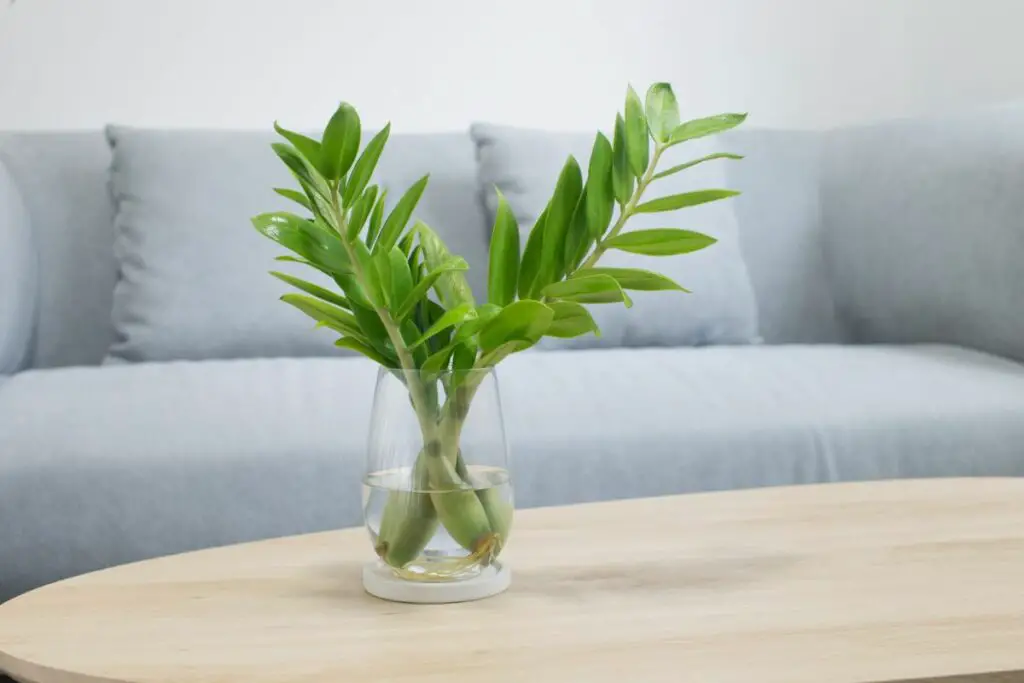
Propagating Stem Cuttings
You can also propagate your ZZ plant through stem cuttings, which you’ve collected from spring pruning.
Note that it can take 3-5 years for a ZZ plant to grow enough bulbs or rhizomes and be ready for a division. Therefore, propagating through stem cuttings is an excellent option if you want a medium-sized or large plant.
If you want to go this route, here are the steps and things to consider:
- Choose healthy stems. Avoid leggy stems because they already have longer internodal spaces, which won’t grow denser. A nice, bushy ZZ plant should have only about an inch (2.5 cm) of space between nodes and leaves pointing upward.
- Collect stalks from different sides of the pot. The stems grow out of the bulbs. Removing multiple stalks from one bulb will limit its ability to generate food and produce new shoots.
- Cut the stalk close to the soil surface. You can get away with cutting straight across, but I found that those cut at an angle of 45° root faster. You can conduct a little experiment trying varied cuts when collecting multiple stems.
- Dip the cut end in a rooting hormone. This step is optional but usually yields better and faster results. You can do another experiment by dipping some cuttings in the rooting hormone and labeling the container.
- Place the cutting in a slender glass vase, ensuring that the bottom 2-3 inches (5-7.6 cm) of the stem is submerged in water.
- Keep the setup in a bright room away from direct sunlight. Avoid low-light conditions because the roots will take longer to develop.
- Refill the water regularly to maintain the level and replace it when it starts becoming slimy or murky.
- Transplant into a compost-sand/perlite mix once the bulb and roots are an inch (2.5 cm) long. This can take about 3 months or more.
Division and Repotting
ZZ plants don’t mind being rootbound because of their slow growth and moderate moisture requirement. They usually thrive comfortably in the same pot for 2-3 years before repotting.
You’ll know that your plant is ready for repotting when you see these signs:
- The roots are poking out of the drainage holes.
- The bulbs are poking out of the soil surface. This can cause them to dry out faster.
- The outermost stems are leaning or spreading outward.
You can also divide your plant during the regular repotting schedule if it is large enough. This will save you time because the divisions are already established.
Pro-tip: Divide and repot your plant during active growth in spring.
To do so, remember the following steps and tips:
- Water the plant 1-2 days before repotting.
- Cut the roots poking out from the bottom of the pot to reduce resistance. Use sterile shears.
- Tip the pot to slide out the plant. If it doesn’t come out readily, loosen the soil by circling the edges of the pot with a flat knife or spatula. Rehydrated roots typically don’t stick too much to the pot walls.
- Remove the old potting mix using your hands.
- Look for easy division spots. Each rhizome or bulb should have 2-3 healthy stems with healthy leaves.
- Firmly disentangle the roots. Well-hydrated, plump roots are easier to disentangle than dry ones.
- Prune dried and mushy roots with sterile shears. Avoid pruning more than a third of the root system.
- Prepare breathable pots (unglazed clay or terracotta) with appropriate sizes. You can use a pot one size larger than the old one when simply repotting. When dividing, go for a pot about 2 inches (5 cm) wider than the rootball. There should also be 3 inches (7.6 cm) of soil space below the roots and at least 2 inches (5 cm) of space between the top of the bulb and the rim of the pot.
- Fill the bottom with 3 inches (7.6 cm) of moist potting mix.
- Place the bulb and spread the roots over the potting mix. Add more potting mix and gently tamp it down until the top of the bulb is buried about an inch (2.5 cm) deep.
- Place the newly repotted plants or divisions in the usual spot for your ZZ plants.
Watering Consideration
The soil of rootbound plants typically dries out quickly without properly rehydrating the rhizomes. If your plant was severely rootbound, the old potting soil would be almost dry by the time you unpot your plant.
In this case, you can water the new potting soil deeply right after repotting the plant. Let the excess drain out of the drainage holes completely before placing your new pot on its saucer.
Pest and Disease Management
ZZ plants have few pest problems or diseases because their soil and foliage are usually kept on the dry side. However, some pests might be attracted to their succulent stems, especially when overwatered.
Common Pests
- Aphids
- Mealybugs
- Scale mites
These common pests suck the sap out of the leaves or stems of a ZZ plant. A few pests won’t hurt your plant, and you can still save the plant, even during a moderate or high level of infestation. Still, it’s best to eliminate them to maintain your plant’s lush green foliage.
Diagnosis, Treatment, and Prevention
Here’s how to control and manage pest problems with ZZ plants:
- Inspect the underside of the leaves and the stems. Small, cottony structures indicate mealybugs and small brown bumps are scale mites. You can also recognize aphids through their translucent green or brown body.
- Spot-remove the pests using tweezers or a cotton swab dipped in 70% alcohol. Scale mites can be challenging to remove because they stick to the stems. You can scrape them using tweezers or a blunt object but be careful not to cut the stem.
- Drop the pests in a cup of soapy water.
- Spray a neem oil solution thoroughly once a week for up to six weeks to eliminate eggs and larvae.
- Continue the spray application once every two weeks to prevent re-infestation.
- Check the leaves every time you water the plant to spot and control pest populations.
Root Rot
ZZ plants thrive in low-light areas that few other houseplants like. They also prefer low humidity and drier soil, so there aren’t serious diseases to worry about. If you water your plant too often and the potting mix has poor drainage, you might come across root rot.
Signs include:
- Constantly wet soil
- Soft, mushy rhizomes or bulbs
- Black roots
- Foul odor coming from the roots and bulbs
How To Fix
You can divide the plant if there are still firm bulbs left with healthy roots. You can follow the repotting guidelines above with the following additional steps:
- Prune the decaying roots.
- Repot the plant in a fresh, moist, sterile, and well-draining potting mix.
- Hold off on watering until the top half of the potting mix is dry.
If the entire root system is damaged, you can propagate your plant through leaf or stem cuttings.
Troubleshooting Common Problems
Although resilient and can tolerate a bit of neglect, ZZ plants may come across some problems when left unattended for a long time.
Here are some common problems and ways to overcome them:
Overwatering
Overwatering only occurs when you water your plant too often and the soil or pot has poor drainage. The early symptoms include constantly wet soil and frequent guttation.
To prevent this issue from escalating to root rot, reduce the watering frequency or repot your plant in a suitable pot with well-draining soil in spring.
A standard cacti or succulent mix often works for ZZ plants, but they lack organic matter. My go-to recipe is a mix of equal parts compost and perlite (or horticultural sand).
Always check the soil before watering. This should be done about 10 days after the last watering session. If the upper half of the potting mix is still moist, give it a few more days to dry out enough.
Holes in Leaves
Holes in ZZ plant leaves can be caused by pests or sun damage (which I’ll discuss in more detail in the following section).
Some flying insects, like moths, can lay eggs that hatch into caterpillars or maggots that feed on your plant’s leaves and leave small holes. However, aphids only suck the sap, and it takes a large aphid infestation to chew through a ZZ plant leaf and create a hole.
You can treat the issue by manually removing these crawlers and dropping them in soapy water.
You can then prevent it from reoccurring by keeping your home pest-free. One example is to properly isolate newly purchased plants for at least 8 weeks before introducing them to your indoor garden. This will help you diagnose and treat existing pest problems accordingly.
Sunburn
A ZZ plant’s leaf is susceptible to sunburn when exposed to direct sunlight for extended periods, especially on hot days. Affected leaves will appear yellow or brown and crisp. Some crisp sections may also leave small, irregularly shaped holes.
You can fix the issue by moving the pot a few feet away (0.6+ m) from the windows where they can receive bright indirect light. You may pluck out the damaged leaves because they won’t recover.
To prevent sunburn:
- Give your plant bright, filtered/indirect light for half a day, preferably from an eastern window. If you have a western window window, it’s best to keep your pot farther and drape a white curtain over it. I recommend avoiding southern windows because they can be too hot and bright for a ZZ plant.
- Give your plant a quarter or a half turn every week or every time you water it.
Exposed Bulbs
A few exposed rhizomes or bulbs are usually not a cause for concern.
However, if your plant isn’t receiving adequate care, you may come across the following issues:
- The bulbs will dry out a bit faster than if they were covered with potting mix.
- The new stems growing from the exposed bulb may lean or fall over.
- The bulbs are at risk of accidental cuts.
- Aphids can feed on the exposed bulbs and secrete honeydew, which can attract sooty mold.
- Fungus gnats may be attracted to the sooty mold or lay eggs on the moist bulbs, especially when the plant is overwatered. When the eggs hatch, they will release larvae that will feed on the fleshy roots.
Here are some reasons they pop out of the soil surface and how to address them:
- Soil erosion from regular watering: You can cover the bulbs lightly with fresh potting mix. Considering the infrequent watering need of ZZ plants, it’s best to delay moisture loss from the rhizomes by covering them.
- Overcrowded roots and bulbs: Divide the overgrown plants and repot them in new pots with fresh potting mix.
Stems Falling Over
Your ZZ plant stems may fall over due to several reasons, including the following:
- Dehydration: ZZ plants store moisture in their stems. A severely underwatered plant will have weak stems that fall over. Watering your plant will rehydrate the stem and help it regain its upright growth within a few days.
- Exposed bulbs: Stems growing out of exposed bulbs may lean because of the lack of support from the soil. Keeping an inch (2.5 cm) of soil over the bulbs can help keep the young stems upright.
- Overcrowding: The outermost stems of an overgrown ZZ plant may lean or grow sideways. You can fix this issue by dividing and repotting your plant. If the stems are leaning at a large angle, you can cut them to soil level. The new growth will grow upright if the environmental conditions and care practices are optimal.
- Insufficient light: Although they handle low-light conditions better than most houseplants, your ZZ plant may lean toward the windows if they don’t receive enough light energy. This can make it seem like the stems are falling over. If the plant has plenty of stems, you can cut down the leggy ones. You can then move the pot closer to the light source and rotate your plant regularly.
- Old plant with long stems: Long and old stems are structurally weaker and prone to falling over. I recommend cutting them to soil level and collecting some healthy leaves for propagation.
Rejuvenating Old Plants
Old ZZ plants growing in the same pot for several years can become overcrowded.
When this happens, you’ll see several other issues affecting your plant’s health and appearance:
- Leaning stems
- Exposed bulbs
- Top-heavy foliage prone to falling over
- Potbound roots
- Displaced soil
- Nutrient-depleted soil
In addition, the rhizomes will lose vigor as they get older. The rate at which this happens depends on your overall plant care and the suitability of the growing environment. Older and weaker rhizomes stop producing new stems.
Pruning unruly foliage, dividing the rhizomes, and replanting them into fresh soil will rejuvenate your old plant and keep it thriving for many more years.
Final Thoughts
ZZ plants are ideal for gardeners looking for sturdy, low-maintenance greenery in their indoor space. These plants only ask for moderate things: water, light, humidity, and temperature. They don’t have many pests and diseases either.
They’re also a good investment. Although they might be expensive at first, you can propagate them at home and you’ll never have to buy a new ZZ plant again.
Get in touch by leaving comments if you have questions or additional expert tips. Follow us for more practical gardening tips and advice!