Soil drenching is a wonderful way to introduce specific chemicals or nutrients into the soil for plant health. Although it’s usually thought of as a purely outdoor activity, soil drenching is versatile enough that you can also use it for potted plants with minimal effort.
Here’s how to effectively soil drench your potted plants:
- Choose your drench.
- Measure the required amount.
- Gather a watering can, stirrer, and gloves.
- Apply the drench to the roots.
Soil drenching is a wonderful, if lesser-known method, to keep your plants in the best health possible. This guide will tell you everything you need to know on soil drenching and even provide a couple of alternatives to it.

1. Choose Your Drench
Soil drenching is a blanket term for introducing specific controlled substances to the soil surrounding plants. Compared to top watering, which is the usual way to fertilize or water plants, soil drenching is unique because it isolates a specific plant and provides everything it needs without disturbing the neighboring plants.
However, before you can get to this point, you must first decide what you need to use the drench for. After all, drenching is simply a technique, and it’s up to you to apply it as you see fit.
Here, I’ll tell you about a few of the most common drenches and what effect, positive or otherwise, each has on your potted plants:
Fertilizer
Fertilizer is by far one of the most common things to drench plants with. Plants constantly rely on nutrients for growth, and potted plants especially rely on you to add those nutrients to the soil for them.
With garden or farm plants, fertilizing can sometimes be skipped since the natural decaying matter in the soil breaks down to feed nutrients to the plants. However, since potted plants are isolated from the surrounding soil or simply placed indoors, fertilizer is key to their growth.
There are multiple types of fertilizers, but it’s key to understand that they’re not all equal. For soil drenching, you’ll need water-soluble fertilizers. Since the main point of drenching is to soak the soil, whatever fertilizer you use must be able to dissolve in the water properly.
Water-soluble fertilizers are usually easy to identify. Inorganic fertilizers (like NPK) are water-soluble due to the presence of soluble nitrogen, potassium, and phosphorous compounds, so keep an eye out for these ingredients.
However, most organic fertilizers are not water-soluble. Blood meal is a good example of this. It’s important to point out that organic fertilizers aren’t completely unusable, yet they’re far better suited to outdoor crops or plants.
Since organic fertilizers release slowly over months, it’s usually much better to use soluble fertilizers that work quicker. This should help avoid you manually leaching the pot every month or so to avoid dangerous nutrient buildup.
Pesticides
Soil drenching is one of the best ways to introduce pesticides to the soil. Pesticides are usually sprayed on leaves since many insects choose to live either on top or on the underside of leaves.
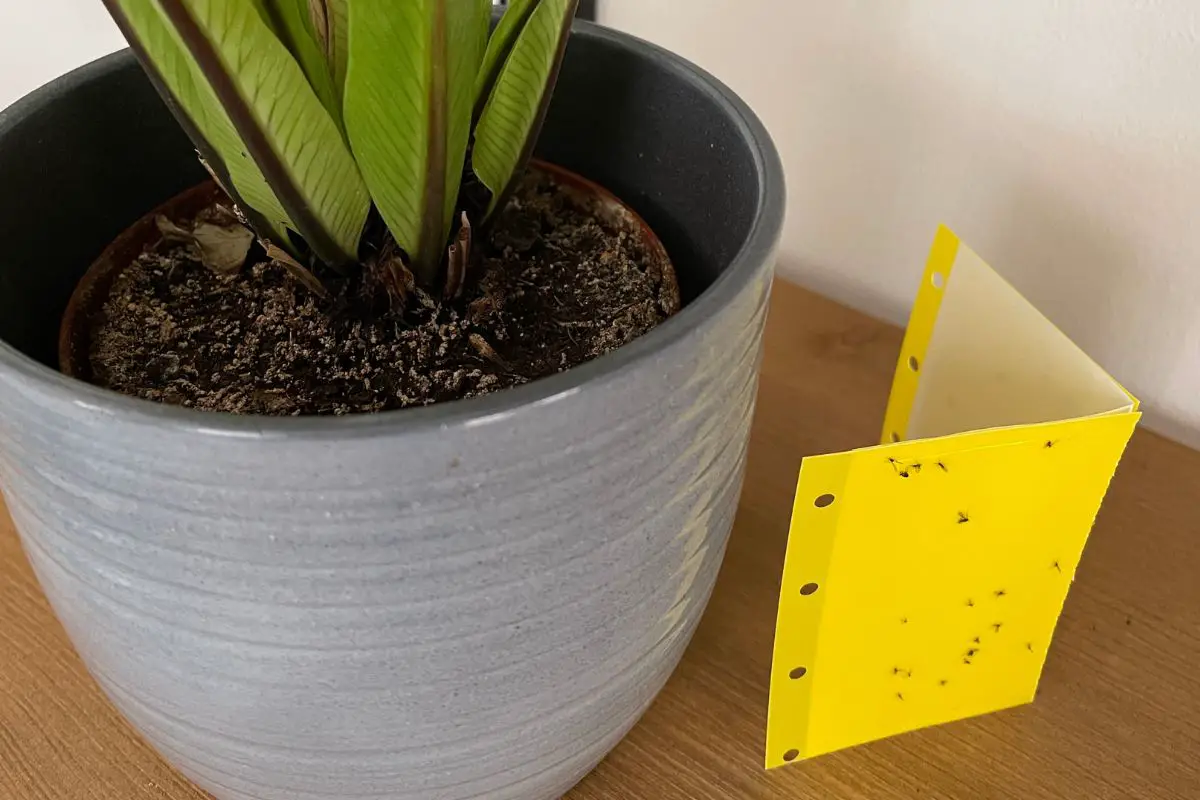
However, since many insects also breed in the soil surrounding the plants, soil drenching is a wonderful way to send them packing. One very good example of this is the fungus gnat.
Fungus gnats are a particularly nasty breed of insects that lay eggs in the soil surrounding plants and cause havoc when left unchecked. The main problem with gnats is they feed heavily on plant roots, making it incredibly difficult for the plant to sustain itself.
This root damage, given enough time, will eventually cause the plant to die. Soil drenching is key here, as one of the best ways to kill fungus gnats is to drench the soil surrounding the base of the plant in insecticidal soap.
Some other pests that are particularly susceptible to soil drenching are:
- Springtails
- Scale insects (e.g., mealybugs)
- Beetles
There is a wide range of pesticides you can use, and each insect responds best to different forms of chemical control.
One less talked-about benefit of applying pesticide this way is that you don’t have to worry as much about damage to the leaves from frequent insecticide sprays.
Although, since the pesticide still soaks into the soil, it’s important to leach it periodically to ensure chemicals don’t accumulate.
Neem Oil
Neem oil is a lot less popular than the previous members on this list. The good thing is that it’s no less effective. Depending on how you look at it, neem oil is potentially even more effective than many other options, given the variety of problems it solves.
Neem oil is a product of the neem tree and can be used for such a wide range of things that some people regard it as God’s gift to plants.
It’d be difficult to make a truly exhaustive lift given its potential, but here are some of its best advantages:
A Great Pesticide
Neem oil is one of the most versatile methods of organic control. It’s proven to work against hundreds of insects, including particularly troublesome ones like aphids and spider mites.
Can Be Used at Every Stage of the Growing Season
Some pesticides are very particular about what they act on and must be used at specific points in the growing season. However, since neem oil is so effective, it can be used at almost every point of the growing season and is applicable to various pests.
Controls Nematodes
Nematodes, especially root-knot nematodes, are notoriously difficult to control. Neem oil is one of the few proven counters to them.
Doubles as a Fertilizer
Although not the same as the oil, neem cake is also a product of the neem tree and is a great organic fertilizer.
Safe for Humans, Plants, and Wildlife
Neem oil is an entirely organic product and very rarely has any detrimental effects on you or your plants, provided it’s applied properly and in moderation. However, it’s still an oil, and using too much can make it difficult for plant roots to breathe.
Other Drench Options
This list of potential drenches is by no means exhaustive.
It contains a few of my favorites, but here are some other examples of drenches you can use for your potted plants:
- Compost tea
- Epsom Salt
- Fungicide
Note: Don’t use soil drenching for seedlings. Seedlings are at a tender stage in development, and regardless of the type of drench you choose, it’s incredibly dangerous for them. If you have a problem with plants at the seedling stage, it’s better to look for other options.
2. Measure the Required Amount
Now that you’ve chosen what you want to drench your soil with, the next thing is to decide the amount of input you want to use. Many people eyeball their amounts, and while the negative effects of this are limited in the short term, with time, it can be extremely bad for your plant and soil.
The right way to apply your drench is to measure the required amount before applying it. There are many contrasting ideas about how to go about this, but for most drenches, it’s best to follow the packaging advice.
However, for clarity’s sake (and since quite a few brands don’t have the clearest directions), here are a few pointers on the required amounts for each of the drenches I’ve talked about:
Fertilizers
For fertilizers, use about a quarter to half of a teaspoon per gallon of water. Along with this, it’s important to take note of the quantities of nutrients in the fertilizer you plan to use.
For example, NPK fertilizers have ratios of each nutrient present in them. Adjusting your fertilizer mix for this is a good way to ensure you do not overfeed your plants.
Pesticides
For pesticides, always follow the instructions given by the manufacturer when using pesticides. Pesticides can be particularly tricky to use and are designed to be extremely toxic. In high enough doses, this toxicity is dangerous to both humans and plants alike, so it’s best to follow the manufacturer’s label when applying it.
Neem Oil
For neem oil, mix a quarter-gallon of water with two tablespoons of neem oil and two teaspoons of soap. Neem oil is usually not toxic to plants, so you can be a bit laxer with the directions until you find what works for you.
3. Gather a Watering Can, Stirrer, and Gloves
Drenching is pretty straightforward, especially once you’ve gotten the decision-making process out of the way.
Once that’s done, then you only really need three things:
A Watering Can
The drench goes into your watering can, and you pour it from here. You’ll likely mix the drench and water in here, too, so make sure the watering can is both tall and wide enough to mix without issues.
A Stirrer
You can buy a dedicated stirrer to last longer, but in a pinch, any straight rod will do. If you have a long wooden spoon handy, that could also work.
A Pair of Gloves
Kitchen or garden gloves will serve you best here. Safety is important, especially when working with pesticides or fertilizers.
4. Apply the Drench to the Roots
Once you’ve gotten everything ready and are ready to proceed, the only thing left to do is apply the drench as needed. Usually, this simply involves pouring the drench at the base of the plant until your watering can or bucket is completely empty.

However, if you’re not completely sure of the drench you’re using, then one good tip is to apply a little first before you pour in the entire thing. Pour a cup or two of the drench and leave it for a few days to see how the plant takes it.
If you can’t see any adverse effects of the drench on the plant after a couple of days, then it’s safe to apply the rest of it. Understandably, this isn’t always possible.
Sometimes, a nutrient deficiency or pest infestation can strike without due warning, and it’d be difficult to drench plants this way. If this happens, it’s best to go with some of the popular drenches that many others have tried and had success with than to go with something you’re not completely sure of.
Benefits of Soil Drenching Potted Plants
Drenching plants is far more than just a gimmick and comes with many benefits difficult to get from regular application methods. Not only is it incredibly easy to do, soil drenching is a wonderful way to introduce specific plants to targeted benefits.
Here are some of the benefits of soil drenching potted plants:
Isolates a Problematic Plant
The primary benefit of soil drenching plants is to isolate a specific plant. This benefit is much more significant in gardens where all plants are grown in the same soil. However, it can also be very beneficial for potted plants with a similar light source, as you don’t have to worry about pesticide sprays drifting from one target plant to another.
Boosts Plant Health
Since soil drenching targets specific plants, it can sometimes be a better option to treat plants. Even in situations where many of the plants are suffering from a particular problem, targeting each plant with a soil drench can show significantly better results than spraying them all.
Saves Fertilizer/Pesticide
Soil drenching is a great way to save money on fertilizers and pesticides. Costs can stack up with time, especially with an inefficient use of your input. However, the ability to isolate one plant at a time makes it easy to use exactly what is needed rather than using up your entire stock.
Remove Excess Salts
Drenching soil with water is one of the best ways to flush excess salts from plant pots. With time salts from pesticides, fertilizers, and saline water can accumulate in the pot. With nowhere to go, they can make it increasingly difficult for plant roots to take in nutrients.
Drenching is a great way to flush them out, provided the plant has a perforated bottom for the water to drain.
Delivers Nutrients to the Roots
There are very few ways more direct than soil drenching if you want to introduce plants to nutrients. The nature of drenching means that whatever you mix into the drench comes into immediate, intimate contact with the plant’s roots.
Prevents Root Rot
A drench of neem oil can save plants from root rot. Since root rot is caused by fungal presence, neem oil can be a great way to counter it. However, since the primary cause of the rot is excess water, neem oil will do very little if you don’t cure the overwatering problem.
Introduces Different Treatments
Not all the plants you’re keeping might be having the same problem. One might have a pest infestation, and another might be suffering from a disease. Since drenching targets specific plants rather than a whole population, it can be a good way to treat each plant differently.
The Sprench Method
The “sprench” method is halfway between spraying and drenching and is a decent alternative to outright drenching. However, it’s a method that can sometimes be greater than the sum of the parts. Like a soil drench, it’s very easy to do and can be done with little more than you would use for a regular watering session.
Using the sprench method involves watering plants like you normally would but increasing the amount poured so it coats the plant and soaks into the soil.
One notable benefit of a sprench is that it can treat problems native to both the soil around the plant and the leaves of the plant. For example, if a particularly nasty fungus gnat infestation has found its way to the leaves of the plants, using the sprench method can treat leaves and the soil simultaneously.
Look at it as essentially killing two birds with one stone. Of course, this method is useful for more than just pest control. In fact, the sprench method is primarily not concentrated on fertilizers or pesticides. Rather, it’s used to apply growth regulators.
Bottom Watering
Bottom watering is another good alternative to drenching. It’s usually used as a way to evenly water plants, but if you need to soil-drench potted plants, then it can be a great way to do that too.
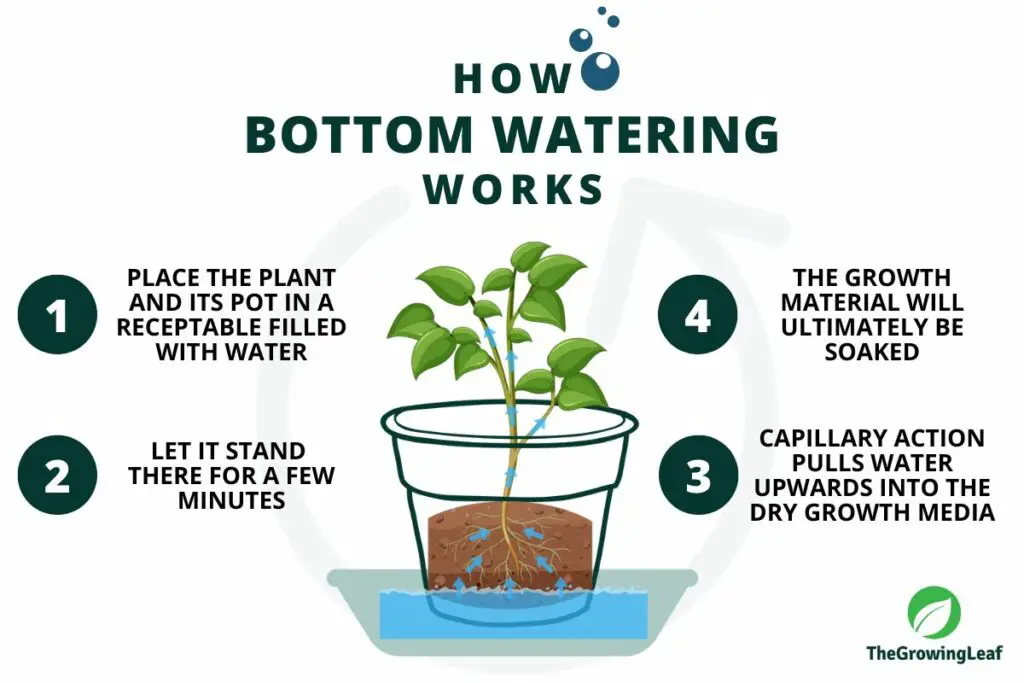
Although it’s a little more complicated than the method of drenching covered here, it comes with the added benefit of giving plants the optimal amount of water they can hold and evenly distributing input.
Bottom-watering means soaking one or multiple pots in water. The process can take 10-30 minutes, depending on factors, such as the size of the pot and the components of the potting mix. Be sure to check the soil moisture every few minutes after the ten-minute mark.
The only downside of this method, however, is that it can be a waste of resources. Note that when drenching, you are adding some components to the water, such as fertilizer or pesticides. Although you can technically mix these in the water used for bottom watering, the amount actually absorbed by the soil or the plant could be significantly less than they’ll need for the treatment to be effective.
Final Thoughts
If you grow a lot of potted plants, especially if you grow them in close proximity, then a soil drench could be just what you need to solve any diseases or problems that crop up. Drenching comes with many benefits, and the ability to isolate a particular plant and treat it properly can be the difference between optimal growth and death.
The best thing about a soil drench is that it’s extremely easy to do, and you usually won’t need anything more than you ordinarily would.