4 Ways To Keep Geraniums Alive Over the Winter
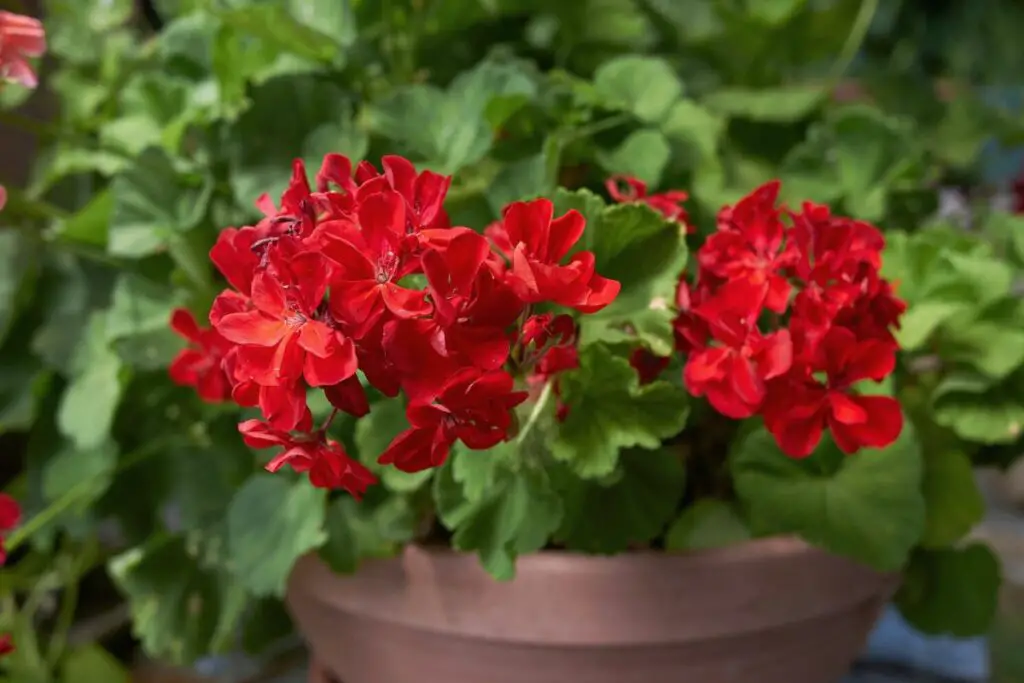
Geraniums (Pelargoniums), often cherished for their vibrant blooms, are versatile plants that can thrive throughout the year. While many treat them as annuals, true hardy geraniums are perennials that can endure the winter months. Here are some tips to help you keep your plants healthy and thriving during the colder months.
To keep geraniums alive over winter, you can either store them in a dormant state without soil or bring them indoors for semi-dormant growth. Putting the plants in cold storage is another possibility. Additionally, if you have limited indoor space, you can always save geranium cuttings.
In this article, I’ll explore four effective methods for keeping your geraniums healthy and flourishing during the colder seasons. I will also share some strategies for bringing geraniums out of dormancy.
1. Potting and Indoor Shelter
The first geranium overwintering method works best if you have plenty of storage space indoors. However, you want to make sure the temperature in the area is within the range of 55 to 65 °F (12 to 18 °C).
While flowers can perform excellently, even if you don’t expose them to direct sunlight, it is usually best to pick a sunny spot in your home to keep your geraniums. Choosing a sunny location ensures that your plants remain healthy all through winter.
Unlike the other overwintering methods I’ll discuss in this article, this one requires some preparation. Here’s what to do:
Dig Up the Plants Before the First Frost
If you grow your geraniums in beds, start digging them up around 6 weeks before the first frost in your region. You might want to repot your geraniums if they are already in pots.
I’ll briefly highlight how to find out the average frost date for your region further down in this article, so if you are unsure, just keep reading.
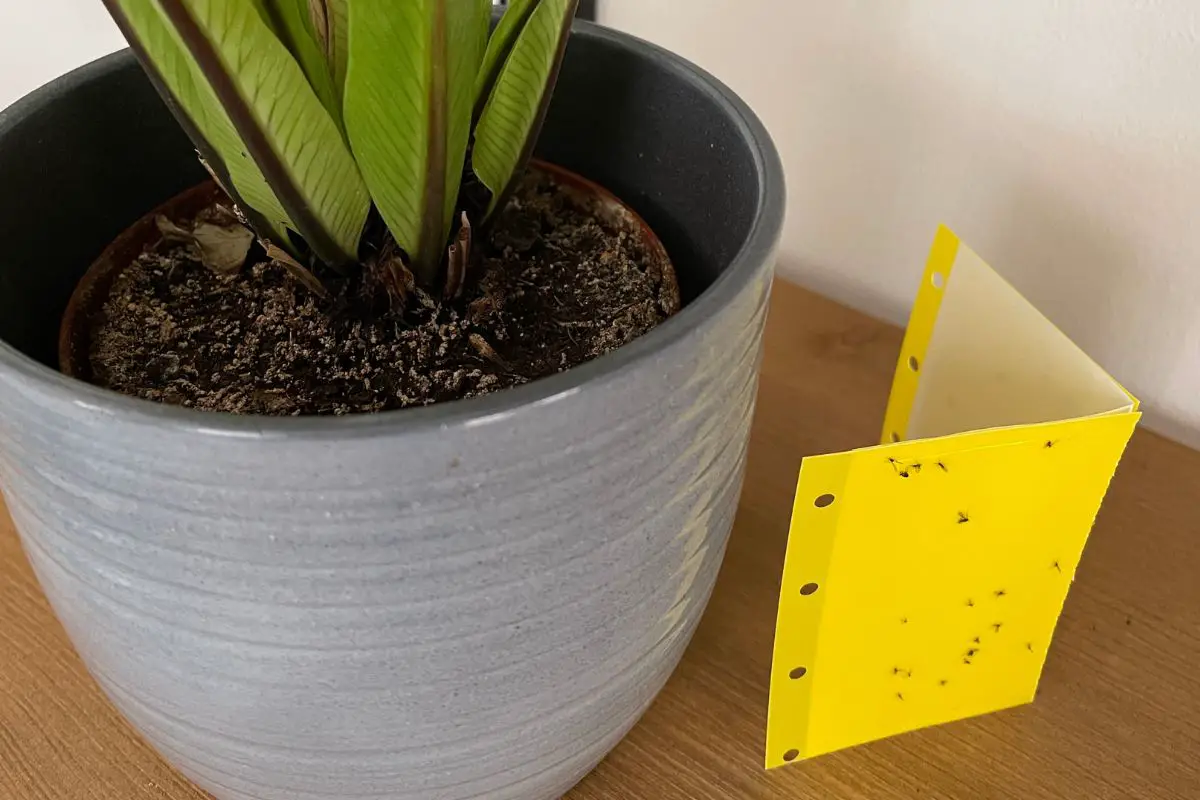
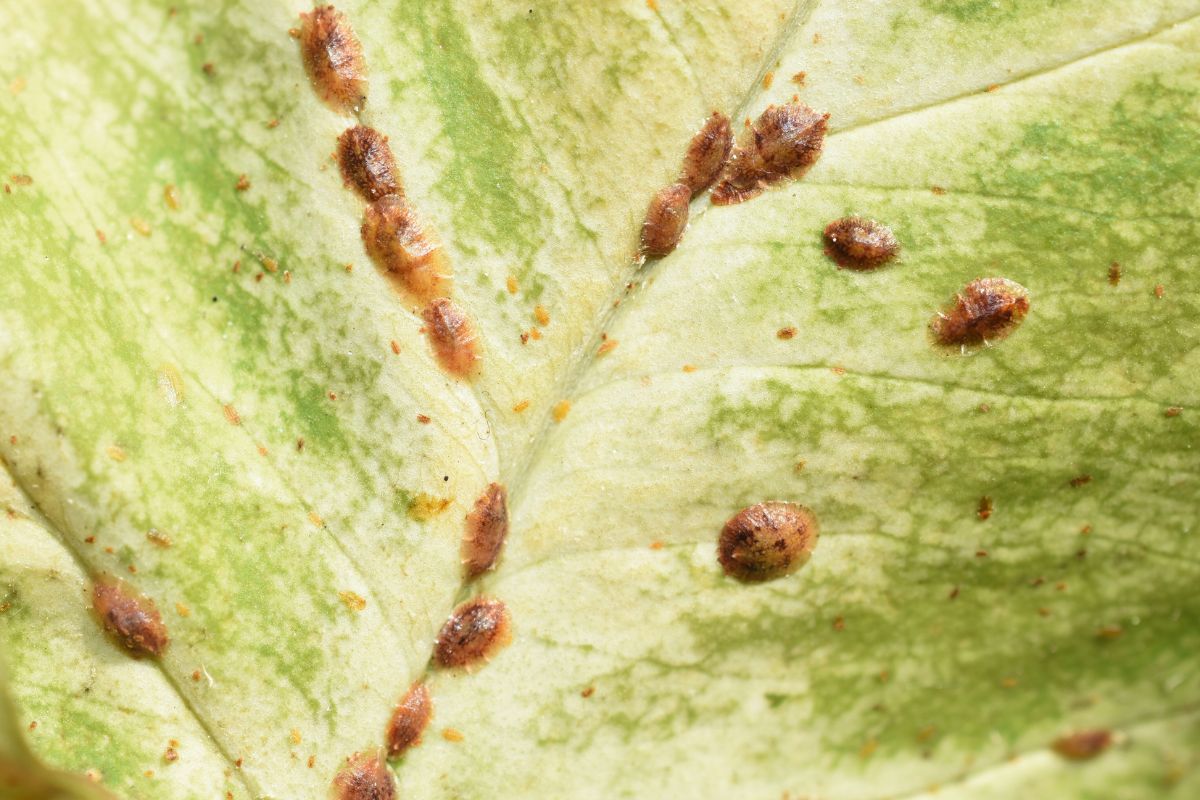
Inspect Plants for Bugs and Disease
- Check for fungus gnats, aphids, and other bugs. If necessary, apply a good-quality insecticide spray to remove any bugs.
- Remove unhealthy, damaged, and dead parts.
- Conduct a final inspection to make sure you haven’t missed anything. Most geranium pests are too small to spot with a naked eye, so you might need to use a magnifier.
Trim and Pot the Plant
- It is best to cut your geraniums by one-third before potting them. However, you might want to keep any buds on the stem if the plant is healthy.
- Trim any long roots.
- Plant about two geraniums in an 8-inch (20.3 cm) pot, three to four plants in a 10 to 12-inch (25.4 to 30.5 cm) pot, or four to six plants in a 14 to 16-inch (35.6 to 40.6 cm) container.
Bring the Geraniums Inside As Indoor Plants
- Place the potted plants inside your home where they can receive enough sunlight.
- Water the plants moderately.
- Make sure to keep the plant away from the elements if it’s placed in a semi-sheltered area (e.g., window sill). If necessary, invest in some good grow lights to achieve the right temperature level.
Keep Our Geraniums Moist Over the Winter
- Ensure that the plants are moist but not wet throughout the frosty season. On the other hand, you want to prevent them from getting completely dry.
- Allow adequate ventilation to prevent mold.
- Prune off any shoots that appear.
2. Bare-Root Storage
The bare-root method is widely popular because it takes up less space. Moreover, it is not difficult to store geraniums this way.
Consider this option if you want to store many geraniums but don’t have enough indoor space to store them in pots.
This method requires removing the plant from the soil, cleaning out the soil from around the roots (bare-root), and storing them in a dormant state over the winter.
You don’t need a greenhouse for this storage method. A shed, cellar, or garage should do the trick. You can even store the plants in your basement, provided you can maintain a temperature of around 45 to 50 °F (7 to 10 °C) in the storage location. Avoid storing geraniums in areas where the temperatures dip below freezing, as that will kill the plants.

Here’s how to use the bare-root storage method:
Dig Up the Plants
- Remove the plants from the soil in the fall before the first frost.
- Shake off the soil from the roots.
- Lay the plants out on old newspapers, allow them to air dry for a few days (preferably in a shady spot), and then shake off more loose dirt.
The goal is to store the plants when they are not damp to prevent mold, so don’t leave your geraniums out in the sun until they shrivel up.
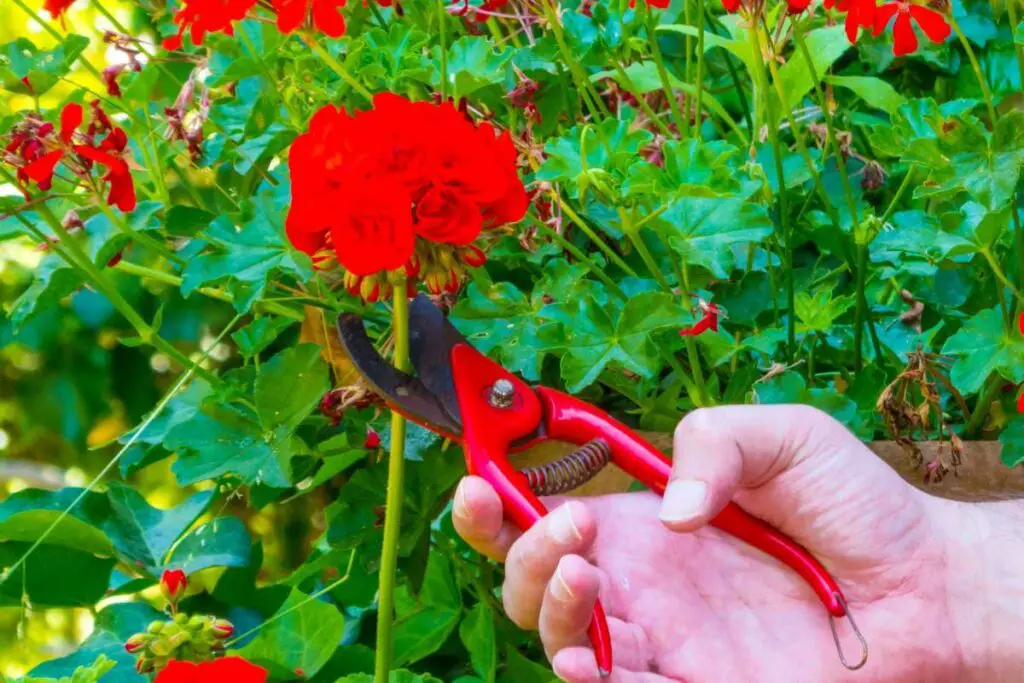
Trim the Stems and Roots
- Choose a sharp cutting tool that will get the job done with only a swipe or two. You don’t want to be struggling during the cutting process, as that could stress out the plant.
- Remove any leaves from the stems and cut them to approximately 4 in (10 cm).
- Trim the roots to about 2 in (5 cm).
Store Your Geraniums in a Cool, Dry Area
Find a cool, dry area in your home where you can keep the bare-root plants over the winter. You can choose to place the stems in any of the following:
- Put them in paper grocery bags with the roots inside the bag or sticking out.
- Wrap the plants in old newspapers.
- Place the stems in cardboard boxes.
Whatever you choose, you can set the plants on a shelf or hang them from ceiling hooks. While some people prefer to hang their geraniums upside-down through the winter, there is no science-backed evidence to show that doing so makes any difference.
Periodically Check the Plants
- Inspect the plants at least once every two weeks to ensure they are firm and not dry.
- Remove any unhealthy-looking stem or any plant with mold.
- If the plants are dry when you inspect them, soak the stems in water for a couple of hours. Allow them to dry properly before placing them back in paper bags, cardboard boxes, or newspapers.
3. Saving Geranium Stem Cuttings
Saving stem cuttings is a good option if you don’t want to bring your entire garden indoors during the icy cold season, perhaps because of space. It also works well for growing fresher plants the next planting season. You want to take cuttings from green stems because these are still new and fresh.
Taking geranium cuttings might sound like a complex process, but it is not. Just about anyone who can use a knife can take cuttings.
Here’s how to do it:
Get Your Supplies Ready
You will need a sharp knife and rubbing alcohol to clean the knife blades. Cleaning with alcohol will reduce the risk of transmitting any disease to the plant. As mentioned above, using a sharp, properly functioning tool can determine the success rate of this process, so make sure to choose carefully.
Make a Clean Cut at an Angle
- Clean the blade of your knife with rubbing alcohol.
- Choose new, healthy, and fat shoots on the parent plant, and make a clean cut just above a leaf joint or bud.
- Cut at an angle for the best results and minimize the risk of disease.
Trim and Store the Cuttings Near a Source of Sunlight
- Remove most of the leaves and flower buds from the stem and use a sharp knife to cut the stem short from the bottom. You will end up with the part nearest the growing tip as your cuttings. If you do this correctly, you should end up with cuttings that are about 4 to 6 in. long (10 to 15 cm).
- Keep the cuttings on a warm windowsill or somewhere they can receive sufficient sunlight over the cold season.
4. Cold Storage
This last method is pretty straightforward and only requires an ample storage place where the temperature doesn’t go below freezing. A cold cellar, basement, or garage should work well.
Here’s something worth mentioning, though.
Keeping geraniums in cold storage over the winter is not very reliable. Some gardeners find that storing their geraniums this way works well some years but may fail during others.
However, it is one of the easiest ways to overwinter geraniums. You might want to consider this method if you don’t have too many plants and don’t mind if they die.

The good news is that geraniums are more frost-hardy than some other flowers. So, this method might just work well for you.
Here’s what to do:
Prepare the Geraniums for Storage
- Remove moldy, diseased, or dead parts from your potted geraniums.
- Check the plants to see whether there’s any sign of pest invasion or disease.
- If you notice any sign of pest invasion or disease, you’ll want to make sure to take care of the issue before proceeding to the second step of this process. You don’t want to be bringing any infectious plant illnesses or parasites inside.
Water the Geraniums
- Water the potted plants.
- Bring them into the garage, cellar, or basement.
- You can hang a blanket over the plants to shade them while in a semi-dormant state, but this is optional.
Periodically Check the Plants
- Check the semi-dormant geraniums at least once every month and remove dead parts or molds.
- Water the plants lightly and infrequently.
Timing Is Crucial
Whichever geranium overwintering method you choose, it is important to get these plants ready for winter at the right time, or else they might not stay alive for long.
Although geraniums might survive a light frost, they won’t thrive in temperatures below freezing and will eventually die if they stay too long in freezing conditions.
The best time to overwinter geraniums is before the first frost. If you grow your geraniums in beds, you will need to dig them up and store them in a dormant state (bare-root) or pot them before storing them indoors in a semi-dormant state.
As you probably already know, the first frost date will vary depending on your region. It is important to find out this date for your region so that a light freeze will not hurt your delicate garden plants like geraniums.
You can use the USDA Plant Hardiness Zone Map to determine your planting or hardiness zone and then figure out the average frost date for your region.

Geranium Cuttings Can Be Taken in the Fall, Summer, or Spring
You can take geranium cuttings when the plant is in its active growing phase, and this period is usually around spring in many regions. However, you can take geranium cuttings in the fall if you plan to grow them indoors in the winter. You can also take cuttings in summer and pot them outdoors.
The good thing about geraniums is that they are perennials, meaning they come back year after year. So, you are not limited to only one planting window, and you can take cuttings at different times throughout the year.
Tips for Success
From the discussion so far, it’s easy to see that it is not too complex to overwinter geraniums. However, haphazardly storing them can reduce their chance of surviving the chilly winter season. For this reason, it is crucial to know how to properly store them, no matter the method you choose.
Here are a few essential tips to successfully overwinter your geraniums:
Inspect and Store Only Healthy Plants
Discard any plant that shows signs of rust, pest problems, dying flowers, or dead leaves.
Maintain Proper Moisture Levels
Check the plants at least once a month to ensure that the roots and stem are still moist. However, be careful not to wet the roots during winter. The goal is to keep them moist and not wet or soggy.
Ensure Sufficient Sunlight, Even During the Winter
Although you want to keep the plants in the shade during winter, ensure that they can get enough light. Ideally, you should store your geraniums somewhere not more than three feet (0.9 meters) away from a light source.
Prevent Frost Damage With Proper Care
Geraniums in pots will die if you expose them to frost, so it is best to store them in a greenhouse or conservatory to ensure the stems stay at an above-freezing temperature. You can also use a space heater, preferably a model with a built-in thermostat. Set the thermostat between 41 and 46 °F (5 and 8 °C) to preserve the stems. Alternatively, keep the plants on your porch.
Promote Airflow and Ventilation
Geraniums in storage need the air to move around as often as possible to prevent mold and rot. You can improve the chance of the plants staying alive over the winter by using fan heaters to increase airflow and controlling the internal humidity and temperature levels.
Bringing Geraniums Out of Dormancy
How you bring your geraniums out of dormancy will depend on the overwintering method you choose.
Gradually Transition Plants to Warmer and Brighter Conditions
It is important to ease the plants back to bright and warm growing conditions after a long period in cool temperatures, regardless of the overwintering method.
If you store your geraniums in pots, move them to a spot indoors where they can receive up to 12 hours of light. Move the plants to a warmer and brighter indoor spot around early spring (6 to 8 weeks before the last frost) to help them come out of dormancy. Remember not to water the plant too much during this period.
Repot if Necessary and Monitor for New Growth
If you store the plants bare-root, you will have to repot them before bringing them to a warmer location. Be sure to check the stems for any signs of rot or damage before repotting.
Remember that geraniums grow slower if you grow them from seed because they are naturally slow-growing. It can take 13 to 15 weeks for flowering to occur after sowing the seeds.
However, you should see new growth between 7 and 14 days after repotting your overwintered geraniums. The plant should blossom within 4 to 6 weeks after potting in preparation for transplanting outside.
If your geranium leaves are too short, the plant grows too slow, or the plant is not growing as tall as you know it should after coming out of dormancy, the problem could be due to the following:
- Improper watering (lack of water supply or excessive water supply).
- Too much or too little fertilizer.
- Insufficient light.
- Fungal or bacterial disease.
- Pest infestation (such as mealybugs).
Final Thoughts
Geraniums can survive for several years if you store them properly during winter months. Now that you know how to keep the plant alive over the winter, you can enjoy your favorite geranium variety for many years to come.
While geraniums are perennial plants, you can always consider starting a new one from a cutting if the plant starts to look shabby after keeping it alive for several years.