How to Plant, Grow, and Harvest Cherry Tomatoes
Cherry tomatoes are famous for their intense flavors and ease of growing. Growing them at home lets you enjoy your favorite varieties, even if they aren’t available at the supermarket. It’s economical, especially if you have a large family or use a lot of tomatoes in your cooking.
Cherry tomatoes like full sun and warm temperatures. They do best in sandy loam soil with good drainage and moisture retention. There are determinate and indeterminate cherry tomatoes. You just have to choose a variety that’s right for your gardening space, climate, soil, and taste buds.
In this article, I’ll discuss the best practices for growing and harvesting cherry tomatoes. I’ll also explain how to choose the best variety for your climate and share tips to store and preserve your crop so that you can enjoy these delightful fruits, even in the depths of winter.

Quick Guide
| Common Name(s) | Cherry Tomatoes |
| Botanical Name | Solanum lycopersicum var. cerasiforme |
| Family | Solanaceae or nightshade |
| Plant Type | Fruiting plants Determinates grow as annuals Indeterminates can grow as perennials when overwintered |
| Native Area | Peru and Ecuador and other parts of north-western South America |
| USDA Hardiness Zones | 2-11 |
| Height and Spread | Determinate: 4-6 feet (1.2-1.8 m) tall and 1.5-2 feet (45-60 cm) wide Indeterminate: 10-12 feet (3-3.6 m) tall and 2 feet (60 cm) wide |
| Plant Spacing | 2-3 feet (60-90 cm) Compact varieties can be planted 1 foot (30 cm) apart |
| Planting Depth | Seeds: ¼ inch (0.6 cm) Seedlings: Bury ⅔ of the plant |
| Planting Season | Spring |
| Days to Maturity | 45-80 days |
| Sun Exposure | Full sun (at least 6 hours of direct sunlight) |
| Soil Type | Sandy loam |
| Soil pH | 6.2-6.5 |
| Watering | 1-2 inches (2.5-5 cm) weekly |
| Pollinators | Wind, bumble bees |
| Pests | Aphids, whiteflies, cutworms, spider mites, hornworms, slugs, snails, leafminers, root-knot nematodes |
| Diseases | Septoria Leaf Spot, Early Blight, Mold, Mosaic virus, Fusarium Wilt, Verticillium Wilt, Powdery Mildew |
| Plant With | Asparagus, chives, French marigold, basil, calendula, sage, nasturtiums, radishes |
| Don’t Plant With | Potatoes, eggplants, walnuts, cabbage, broccoli, cauliflower, fennel |
Cherry Tomatoes: An Overview
Cherry tomatoes (Solanum lycopersicum var. cerasiforme) are miniature versions of the traditional beefsteak tomatoes. Although small, they’re intensely flavorful and pack loads of nutrients.
Here are some of their traits:
- Color: They come in a rainbow of colors, from red, pink, and yellow to green, mahogany, and purple.
- Flavor: They have mild, sweet, or tangy flavors with varying degrees of tartness.
- Pollination: Cherry tomatoes are self-pollinating, meaning that their flowers contain both male and female parts. You don’t need more than one plant to obtain a crop. A gentle breeze or insects, such as bumble bees, landing on the flowers releases the pollen. However, you may need to hand-pollinate the flowers if your plants are growing in a sheltered environment.
- Toxicity: Tomato leaves and stems and unripe fruits contain solanine that can be mildly toxic to some people and small animals like dogs and cats. So, be mindful of where you house the plants in your garden or on your patio.
Determinate vs. Indeterminate
Cherry tomatoes can be determinate or indeterminate.
- Determinate varieties are bushy plants that set fruits all at once and then die.
- Indeterminate varieties have a vine-like growth habit and produce fruits throughout the growing season until the first frost kills the plant. Most cherry tomato varieties are indeterminate.
You can decide what type to grow based on the length of the growing season in your area, the garden space you have, and how you want to use the fruits.
Here’s a table to explain the differences between them:
| Traits | Determinate Cherry Tomato | Indeterminate Cherry Tomato |
| Plant Structure | Grows to a specific height before the side shoots begin to flower and bear fruit Sets fruit all at once about 4-5 weeks after planting Is compact and bushy Can be grown without support | Will grow tall and produce side shoots as long as you water and fertilize it Sets fruit throughout the growing season over 2-4 months Is a vine with long stems Needs to be supported with a trellis, cage, or stake |
| Approximate Height at Maturity | 4-6 feet (1.2-1.8 m) | 10-12 feet (3-3.6 m) |
| Suitable Planting Space | Containers | Garden beds |
| Ideal Climate | Cold climates with a short growing season | Warm climates with a long growing season Can live as a perennial in frost-free regions |
| Ideal Use | For canning and preserving For the market For mechanical harvesting | For a continuous supply of fresh fruits |
Varieties
Below, I’ve listed some of the most popular varieties of cherry tomatoes, their growing characteristics, and flavor profiles. This table will help you choose varieties that suit your growing conditions and culinary needs.
| Variety | Growing Habit | Days to Maturity | Fruits Per Plant | Fruit Characteristics |
| Sungold | Hybrid indeterminate Resistant to wilt, nematodes, and mosaic virus | 55-65 | 120 | Sweet, fruity Golden-orange Low acid Juicy and tender |
| Suncherry Premium | Hybrid indeterminate Ideal for growing in a greenhouse or polytunnel | 65 | 126 | Sweet Red Slightly flat-shaped |
| Sakura | Indeterminate Well-suited for an unheated greenhouse or open field | 55 | 165 | Sweet Bright red Medium-large sized Perfectly spherical Firm and crack-resistant |
| Black Cherry | Indeterminate | 75 | 120-150 | Sweet, slightly tangy, and smoky flavor Mahogany-brown Thin-skinned with firm and juicy flesh |
| Super Sweet 100 | Indeterminate Drought- and heat-tolerant Resistant to wilt and nematodes | 70 | 500 | Very sweet flavor Red |
| Gardener’s Delight | Indeterminate heirloom | 65 | 75 | Sweet flavor balanced with traces of acidity Bright red Juicy and medium-firm |
| Midnight Snack | Indeterminate Heat-resistant | 65-70 | 100+ | Sweet-savory with a hint of tartness Low acid Red when mature with a black or purple overlay Juicy and tender |
| Rosada | Indeterminate Suitable for growing in a greenhouse | 90 | 140 | Very sweet Plum-shaped |
| Gold Nugget | Determinate Only up to 2 feet (60 cm) tall | 56 | 100+ | Sweet Golden yellow The same size as a ping pong ball |
| Red Robin | Determinate Up to 12 inches (30 cm) tall Can grow and bear fruits indoors | 50-55 | Up to 100 Fewer fruits when grown indoors | Sweet Red About an inch (2.5 cm) in diameter |
| Tiny Tim | Determinate Around 12 inches (30 cm) tall Tolerant to lower light and Alternaria disease | 60 days | Up to 100 Fewer when grown in low light | Sweet, tart, juicy Reddish orange Less than an inch (2.5 cm) in diameter |
Nutritional Benefits
Although small, cherry tomatoes pack nutrients in higher concentrations than other tomatoes.
They are rich in antioxidants and the following:
- Vitamins A, C, and E
- Folate
- Potassium
- Calcium
- Manganese
- Phosphorus.
The health benefits of consuming cherry tomatoes include:
- Decreased risk of strokes: The various compounds in cherry tomatoes can decrease inflammation and promote improved blood flow to the brain.
- Decreased risk of several types of cancer: Several compounds in tomatoes can decrease the risk of developing cancer, especially breast and prostate cancers.
- Improved heart health: Cherry tomatoes contain compounds like lycopene and chlorogenic acid that promote heart health by decreasing the incidence of developing blood clots, lowering blood pressure, and affecting how the body metabolizes cholesterol.
- Improved bone health: Lycopene can improve bone health by slowing the rate of loss of bone density.
- Improved skin health: Lycopene and beta-carotene found in tomatoes can protect the skin from the harmful effects of UV rays.
Preparing for Planting
The best way to prepare for planting cherry tomatoes is to plan the location and amend the soil as needed.
Choosing the Right Location
Tomatoes are warm-loving crops. They thrive best in a spot where they can receive 6-8 hours of direct sunlight every day.
Keep the following in mind when choosing where to plant your tomatoes:
- An east-facing garden is ideal for cherry tomatoes because it gives them gentle morning sunlight.
- Ensure that your plant is shaded from the afternoon sun if your garden faces west or south. You can install shade covers that you can unfurl when the temperatures rise on summer afternoons.
- Practice crop rotation for 2-3 years. Avoid growing cherry tomatoes in the same spot where you previously planted members of the Solanaceae family, such as potatoes, eggplants, and peppers.
- Consider placing tomato containers near a sunny balcony or porch that receives ample sunlight during the day. The plants can climb up the railings, meaning you can save some money on trellises and cages.
Soil Preparation
Below are some factors to keep in mind to create the ideal soil conditions for your tomatoes:
Soil Type
Cherry tomatoes grow best in loam and sandy loam soil. They require high moisture during the flowering and fruit-bearing stages. However, they still need proper drainage to prevent root rot.
Heavy soils can lead to waterlogged conditions, which cause root rot or attract fungus and bacteria. If your garden soil is clayey and heavy, amend it with coarse sand or sawdust to make it loose and improve drainage.
Alternatively, you can work 2-3 inches (5-7.6 cm) of organic matter, such as well-rotted animal manure or finished compost, into 8 inches (20 cm) of loose soil to improve its texture and moisture retention.
Soil pH
Tomatoes grow best in slightly acidic soil with a pH value between 6.2 and 6.5. You can get a soil sample from your garden and have it tested at the laboratory or buy a soil testing kit to check for pH levels.
Add elemental sulfur to the soil to make it more acidic. If you have acidic soil, you can add limestone or wood ash to decrease its acidity. Be sure to amend the soil in the fall (before spring planting), as it can take several months for these materials to alter the soil pH.
If you can’t amend the soil, you can grow your cherry tomatoes in containers using potting soil.
Planting
You can grow cherry tomatoes from seeds or transplant seedlings bought from the garden center. How you choose to grow depends on the length of the growing season in your area and the amount of effort and resources you’re willing to put into gardening.
Seeds vs. Seedlings
Here’s a brief guide on the pros and cons of the following methods:
| Planting Method | Pros | Cons |
| Seeds | Inexpensive Get a jumpstart on the growing season, especially if you live in a cold climate Enjoy early and multiple harvests if you are growing indeterminate varieties Choose from a large number of varieties that may not be available in the garden centers Create ideal conditions that increase the rate and speed of germination Regrow your favorite varieties from the seeds you save | Need to time the sowing, ideally when soil temperatures are around 65 °F (18 °C) when direct-sowing When starting indoors, you need to invest in grow lights, heat mats, seed-starting trays, and seed-starting mixes Requires much time and effort to prevent losses |
| Seedlings | Convenient for beginner gardeners No need to buy a lot of supplies No need to keep tabs on seed-sowing dates Faster results | Expensive if you want to grow multiple plants Varieties limited to what your local garden center carries Risk of transplant shock |
Weigh your options and resources carefully when choosing the planting method.
Once you’ve decided, you can follow the steps below:
Direct Sowing
- Wait until the soil temperature is steadily above 65 °F (18 °C).
- Mix a slow-release 10-10-10 fertilizer into the soil one week before planting.
- Sprinkle the seeds into the ground and loosely cover them with soil (¼ inch or 0.6 cm).
- Water the seeds with the gentle mist setting of the garden hose to avoid dislodging the seeds. You can also use a watering can with fine holes.
- Water the soil as soon as the top inch (2.5 cm) is dry. The seeds will germinate within 5-10 days.
- Thin the seedlings when the vigorously growing ones reach 3-4 inches (7.6-10 cm) tall. Space them 1 foot (30 cm) apart if determinate or 2-3 feet (60-90 cm) if indeterminate. This will ensure good air circulation and prevent pests and diseases from taking hold of your plants.
Starting Seeds Indoors
- Check the label on the seed packet for the sowing date. Usually, this is indicated as the number of weeks before the last spring frost date.
- Gather the equipment, including seed-starting trays, seed-starting mix (coco coir mix), and labels. You may also need heat mats to maintain the ideal temperature.
- Moisten the seed-starting mix and fill the trays.
- Make ¼-inch (0.6 cm) deep holes in each cell of the tray and press two seeds in the hole. Cover the seeds with the seed-starting mix.
- Label the setup accordingly if you’re growing multiple varieties.
- Cover the setup with a humidity dome or plastic with holes to keep the moisture in.
- Keep the containers in a warm spot away from direct sunlight. The ideal temperature for germination is 65-85 °F (18-29 °C). You can place the tray over a heat mat to maintain the temperature.
- Check the seed-starting mix every day to ensure it is moist. Use a fine mist sprayer to keep the soil moist without dislodging the seeds.
- Move the containers to a sunny spot (i.e. next to an eastern window) when the seeds germinate. You can remove the heat mat and humidity dome.
- Thin the seedlings when they’re about 2 inches (5 cm) tall to prevent crowding in the limited space.
- Water the plant as soon as the top inch (2.5 cm) of the soil is dry.
- Once the plant is about 4 inches (10 cm) tall or with 2-3 sets of true leaves (whichever comes first), you may repot it into a slightly larger container about 6 inches (15 cm) wide and deep.
Transplanting Seedlings
Cherry tomatoes are typically started indoors 6 weeks before the last frost date. By the time they’re ready for transplant, they’ll be about 6-10 inches (15-25 cm) tall. Store-bought seedlings should also be about this size for better resistance to transplant shock.
- Water the seedlings a day before transplanting.
- Transplant after all danger of frost has passed and the soil has warmed to 65 °F (18 °C). Choose a cloudy day or early morning to prevent the sun from damaging the tender plants.
- Dig a hole in the ground twice the width and depth of the pot or seed starting container.
- Slide the seedling out of the container, keeping the rootball and potting soil intact.
- Cut off the bottom 1-3 branches until only the upper 4 inches (10 cm) of the plant has leaves.
- Place the seedling into the hole and fill the space with soil, burying the roots and leafless stem. Roughly ⅔ of your plant is buried in the soil. Tamp down the soil to remove air pockets.
- Space the seedlings 2-3 feet (60-90 cm) apart for indeterminate or 1 foot (30 cm) for determinate. This will allow the plants to mature without crowding out each other’s leaves or competing for nutrients. Spacing out the seedlings adequately also lets sunlight and air reach all corners of the plant, keeps the leaves dry, and allows the fruits to ripen evenly. Staked or trellised tomatoes can be planted less than 2 feet (<0.6 m) apart.
- Water the seedlings thoroughly.

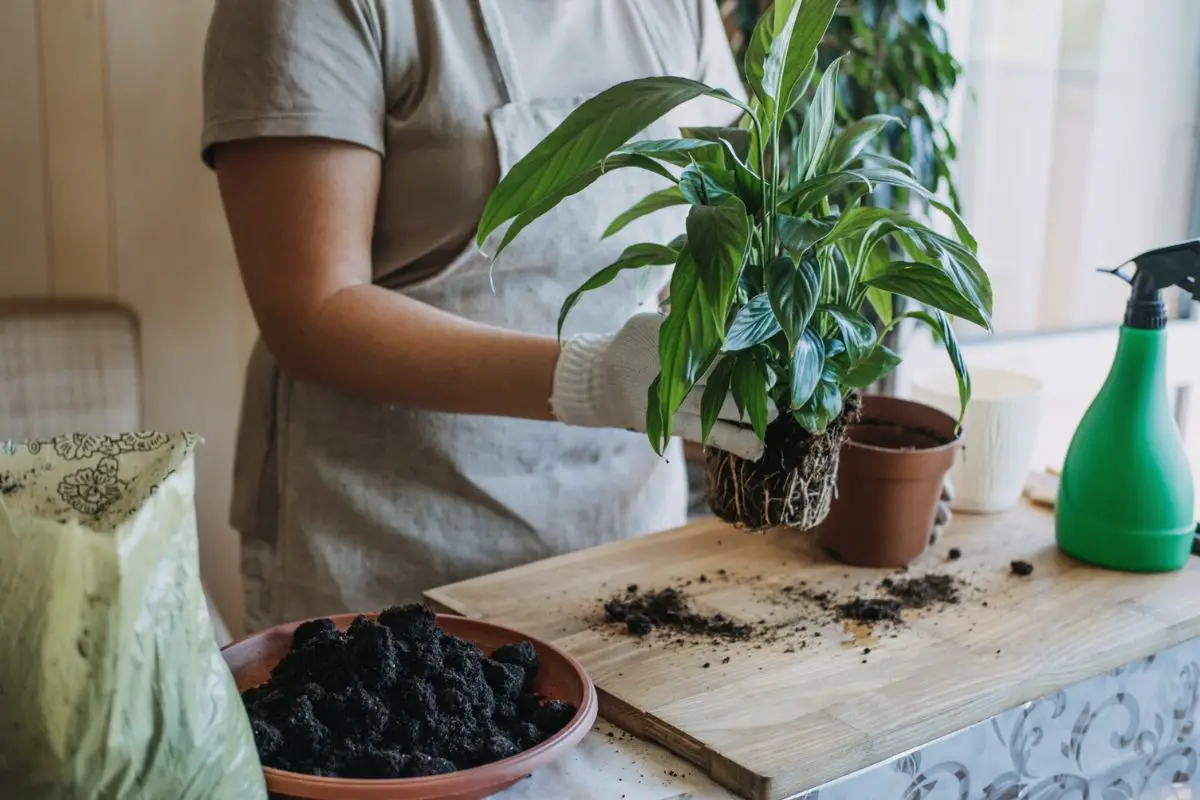
Repotting
Determinate and dwarf tomatoes will do well in pots as long as they are large enough to accommodate the roots and support the weight of the foliage and fruits. You can also grow indeterminate tomatoes in pots, but they likely won’t reach their maximum height and spread.
If you plan to continue growing your cherry tomatoes in containers, you can repot them 2-3 times more after the initial repotting.
They mature within 45-80 days on average with a few exceptions, like the Rosada, which takes 90 days from seed to harvest. This fast-growing habit means they can quickly outgrow their containers.
It’s best not to transplant them directly into their final container from the seedling pots because oversized pots can hold too much moisture. Considering a cherry tomato plant soil’s higher moisture retention, it can increase the risk of root rot if there’s excess soil and water in the pot.
The final pot size depends on the plant size at maturity:
- Dwarf varieties: 12 inches (30 cm)
- Determinate varieties: 18 inches (45 cm)
- Indeterminate varieties: 24 inches (60 cm)
For instance, if the pot size was 6 inches (15 cm) in the initial repotting from the seed tray, you can gradually increase the size to 12 inches (30 cm) and 18 inches (45 cm).
You’ll know that your plant is ready for repotting if it’s 2-3 times taller than the height of the pot.
Here are the steps to minimize the stress on your plant when repotting:
- Water the plant deeply 2 days before repotting.
- Prepare an appropriately sized pot.
- Fill the bottom 3-4 inches (7.6-10 cm) with a standard vegetable potting mix. You can also make a homemade potting mix with 50% coco coir, 25% perlite, and 25% finished compost. Choose a coco coir product with a pH level of 6.2-6.5. Some may be as low as 5.7, which is too acidic for cherry tomatoes.
- Carefully remove the plant by sliding it out of the pot. If the pot is too large to tilt, you can use a trowel to loosen the soil along the edges of the pot. Scoop out the root ball with both hands and transfer it to the new pot.
- Fill in the gaps with more potting mix and firm it down to remove air pockets.
- Place the stake, cage, or trellis only in the final pot. Bury the anchor 8-12 inches (20-30 cm) deep to support the weight of the growing plant.
- Water the soil deeply until the excess drains out of the bottom holes.
Caring for Cherry Tomato Plants
As a fruit-bearing plant, cherry tomatoes have high moisture and fertilizer requirements. They’re also susceptible to many pests and diseases common among members of the Solanaceae family.
It’s crucial to care for them properly to prevent stress that will make them vulnerable to such conditions.
Watering
Here are some tips to water your cherry tomatoes properly:
Water According to Growth Stage
- Seeds need the upper inch (2.5 cm) of the soil to be consistently moist but not soggy.
- Newly transplanted seedlings in the ground outdoors need about a quart (1 liter) of water every day for the first 2 weeks. Those in pots need water as soon as the upper inch (2.5 cm) of the soil is dry.
- Once the seedlings have established roots, provide about an inch (2.5 cm) of water weekly or 0.6 gal (2.3 l) of water per square foot (0.09 sqm).
- When fruit buds appear, increase the watering amount to 2 inches (5 cm) weekly, divided into two watering sessions. Keep the same watering consideration as the fruits ripen if you have indeterminate tomatoes. Just make sure to harvest the fruits as they ripen to avoid cracking.
- Cut down on the amount of water back to an inch weekly when determinate fruits ripen. Too much water can cause the tomatoes to split and attract pests.
Adjust Watering Based on Soil and Weather Conditions
Seedlings and established plants need less water during rainy weather. Conversely, they need to be watered more if it’s sunny or windy, or if you’re growing them in containers or shallow beds.
You also have to water more frequently if your tomato plants are growing in sandy soil and less if the soil is clayey or contains a large amount of organic matter.
Other Good Watering Practices
- Check soil moisture before watering. Poke a finger or wooden chopstick 2 inches (5 cm) into the soil. If it’s dry, it’s time to water your plant.
- Water deeply at the base of the plant to prevent the leaves from getting wet and inviting plant pathogens. I suggest you use a soaker hose or a drip irrigation system to deliver water to the roots of the plant without wetting the leaves.
- Apply organic mulch to keep the soil moist and prevent water from evaporating from the soil surface too quickly, especially in summer. You can use 2-4 inches (5-10 cm) of straw or sawdust.
- Water in the morning to allow the plants to take up water before the soil starts to dry.
Fertilizing
Cherry tomatoes thrive with regular applications of fertilizers at different stages of growth. They need nitrogen, phosphorus, and potassium, as well as some micronutrients to grow healthy stems and leaves, fend off diseases, and produce fruit.
However, your soil likely contains some nutrients, and you may need only to replenish what is missing or is in short supply.
A soil test will give you an idea of the nutrients present or absent in the soil. You can use an at-home test kit to evaluate your soil’s NPK values or send soil samples to a lab for a more thorough analysis.
Here’s a guide to fertilizing cherry tomatoes at different periods through the growing season:
- Before planting: Work well-rotted manure or finished compost at a depth of at least 6 inches (15 cm) into the soil at the planting site 2 weeks before planting your tomatoes. Alternatively, you can use a slow-release 10-10-10 NPK fertilizer.
- Before flowering: Feed your plants a phosphorus-rich fertilizer about 2 weeks before flowering to boost fruiting. You can use a 0-5-5 or 6-24-24 liquid fertilizer and add it to your watering schedule every two weeks. You can also use bone meal as an organic alternative.
- For indeterminate plants: To encourage your plant to continue producing fruits, spread 2-3 tablespoons of bone meal for each mature plant monthly until 4 weeks before the first frost.

Pruning and Training
Because of their vining habit, indeterminate cherry tomatoes will sprawl all over the garden if left on their own. The tangled growth is difficult to maneuver through without stepping on the stems and breaking them. The leaves touching the soil also attract pests and diseases.
The plants have to be trained and pruned to manage their growth. Doing so can boost healthy leaf, stem, and fruit development by creating adequate air circulation, allowing light to reach all corners of the plant, and preventing diseases and pest infestation.
Pruning Schedule
With regular pruning, you can manipulate fruit size and speed up fruiting and ripening to get a bigger harvest. However, if you prune too much in favor of a tidy appearance, you’ll sacrifice stems that would have gone on to produce fruits. Over-pruning will also lead to sparse foliage.
Determinate cherry tomatoes don’t require regular pruning, unlike indeterminate varieties. You only need to remove all the suckers below the first flower cluster.
Pro tip: Always use sterile shears or have a clean cloth and rubbing alcohol on hand to clean the shears between cuts. This will protect your plant from infections.
For indeterminate plants, decide whether you want to have a single- or double-stemmed plant and prune accordingly.
Here’s a pruning schedule to guide you:
At the Start of the Season
The aim at the start of the growing season is to let the plant become healthy and sturdy before it starts to produce fruits.
Here are some tips:
- Remove all suckers and leaves below the first flower cluster for a plant with a single main stem or a leader with no side branches. Suckers eventually grow into shoots with leaves and fruits that compete with each other for nutrients, water, and light. By limiting the number of suckers, the plant can direct its energy into producing a heavy crop.
- If you want a double leader/double-stemmed plant, remove all leaves and suckers except the one right below the first flower cluster. Your plant will have a Y-shape with two main stems.
- Prune all suckers below the first flower cluster on each stem weekly throughout the growing season and during the first 6 weeks of the growing season.
- Remove all flowers until the plant is about 12-18 inches (30-45 cm) tall.

During the Middle of the Season
- Snip off the suckers above every new branch.
- Remove only the leaflets at the tip of the suckers if the summers are hot in your area. The bottom leaflets will shade the fruits.
- Remove the leaves below every fruit cluster so that the plant directs its energy into ripening the fruits.
- Remove all leaves below the lowest fruit cluster to promote ventilation and reduce the instances of diseases.
- Prune dead and dying leaves throughout the growing season.
Toward Late Season
Withhold pruning about 1-2 weeks before harvesting to allow the plant to grow foliage that will shade the fruits.
You can speed up the ripening process by pruning the growing tip/terminal end of the stems about 4 weeks before the first expected fall frost. This prevents further fruiting and signals the plant to redirect its energy into ripening the existing fruits.
General Pruning Guidelines
Remember these aspects when pruning:
- Prune suckers when they are young. You can pinch them at the base or use a hand pruner.
- Use a sharp knife to prune mature and thick suckers.
- Use a sterilized cutting tool and make clean cuts to prevent gaping wounds on the plant.
- Snap leaves by bending them upwards and then downwards. Snapping lets a leaf detach at its natural point of attachment, which is close to the stem where the “snap” heals quickly.
Training Using a Cage, Trellis, or Stake
Dwarf cherry tomatoes don’t need training because they grow upright and are only 1-2 feet (30-60 cm) tall. Some determinate varieties and hybrids (short vines) reaching up to 6 feet (1.8 m) tall may need cages to support the weight of the branches and fruits.
On the other hand, providing vertical support lifts vining indeterminate plants off the ground. You can use a trellis, stakes, or cages to train your tomatoes.

I recommend putting the support in place just after transplanting. This ensures you don’t disturb the roots when you drive in a stake or set up a cage or trellis after the plant has matured and its roots have expanded.
Let’s find out about the pros and cons of the following methods:
| Training Material | Pros | Cons | Steps |
| Trellis | Can support plants with multiple stems using one trellis Even exposure to sunlight Excellent air circulation and easier to work around stems than cages Convenient access for pollinators and harvesting fruits | Needs reinforced bases to prevent from falling over due to the growing plant’s weight Can be expensive Difficult to assemble and dismantle the materials before and after the growing season | 1. Choose a metal trellis if you want a sturdier material. Wood is also sturdy and gives off a more natural look. 2. Bury the base up to 8 inches (20 cm) deep. 3. Use soft twist ties to secure the growing stems and branches against the trellis. Make sure it’s loose enough to allow space for thickening stems. 4. Space the ties 6 inches (15 cm) apart. |
| Cage | Caged tomato plants require less maintenance because you don’t have to prune them often. The dense leaf cover protects the fruits from sunscald and prevents the soil from drying out. You can drape a cover over the cage to protect tender plants from cold temperatures. Caging provides more support than staking and is ideal for indeterminate tomatoes that grow tall and become heavy once fruiting starts. | They are more expensive than stakes. Caged tomato plants require more space to grow, so caging is suitable only if you have a large growing space. Pruning and harvesting from caged tomato plants can be cumbersome if you cannot access the center of the cage easily. It’s difficult to remove pests from parts of the plant at the center of the cage. | 1. Choose a cone-shaped cage that’s narrow at the base and wide at the top. The seedling should be in the middle of the cage. 2. Anchor the cage 6-8 inches (15-20 cm) deep into the soil. 3. Tie the lateral branches along the horizontal bars of the cage using soft twist ties. |
| Stake | Simple, quick, and cheap Ideal for small growing spaces because the plants can grow upright with few lateral stems Convenient to prune and harvest from staked tomato plants because there are few branches and leaves | It takes time and effort to keep on top of training and tying the stems to the stake as the plant grows. Staked tomato plants have to be pruned more often than caged plants to keep them from growing too tall and heavy. Frequent pruning leads to sparse foliage that can cause sunscald or dry out the soil quickly in hot climates. | 1. Choose a stake based on the expected height of your cherry tomato plant. 2. Place a wooden stake 4-6 inches (10-15 cm) away from the base of the plant. 3. Bury each stake 8-12 inches (20-30 cm) deep into the soil. 4. Tie the growing stem against the stake. Position the soft twist ties half an inch (1.3 cm) below each stem 6 inches (15 cm) apart. |
Pests and Disease Management
The key to a bumper crop is growing a healthy plant. You can keep your cherry tomatoes healthy by protecting them from pests.
Common Pests
The following are some common cherry tomato pests:
- Aphids: White, black, green, pink, or brown critters that leave a sticky residue called honeydew. They’re often seen on new stems and young leaves, especially near growing tips and on the underside of leaves
- Whiteflies: Tiny white insects similar to winged aphids. They like the moist soil of tomatoes and lay their eggs in it. They usually attack tomatoes grown indoors, such as in a greenhouse.
- Cutworms: Grub-like caterpillars that live in the soil and attack the stems of young plants. They’re brown or gray insects with yellow or black spots. They burrow large holes in the fruits, cause stems to collapse, and eventually kill the plant
- Spider mites: Their presence is evident from delicate webbing around stems and leaves. Colonies are seen on the underside of leaves. They can cause extensive defoliation if left untreated.
- Hornworms: Presence is evident if you see branches with no leaves in the morning. They can grow to be large caterpillars but are hard to spot when they’re small. You can spot them along stems and on the underside of leaves. They can also cause extensive defoliation in high levels of infestation.
- Slugs: Brown or gray, slimy, and soft-bodied pests (mollusks) with no legs. They leave slime and irregularly-edged holes on young leaves near the bottom of the plant.
- Snails: Hard-shelled mollusks. They leave irregular-shaped holes with smooth edges on leaves and ripening fruits close to the ground. They also leave characteristic silvery mucous trails that other chewing pests don’t.
- Root-knot nematodes: Tiny thread-like worms that can’t be seen with the naked eye. They cause knob-like growth on roots and yellowed leaves, leading to wilting and stunted growth in plants.
- Leaf miners: Small flies with a characteristic bright yellow dot on their back. They leave tell-tale white trails on leaves caused by larval feeding.
Common Diseases
Here are some common cherry tomato diseases:
- Septoria leaf spot: Small, circular gray spots with dark borders around a beige-colored center on the lower leaves, usually after fruiting begins. The spots usually enlarge and merge if the disease is left untreated, leading to yellowed leaves that eventually fall off the plant. It usually occurs with early blight.
- Early blight or Alternaria leaf spot: Tiny, irregularly shaped black or brown lesions—usually surrounded by a yellow halo—which develop first on the lower leaves and resemble a “bull’s eye.” The lesions enlarge and merge if the disease is left untreated. It can lead to sunken black patches with concentric rings on the stem end of fruits and extensive defoliation.
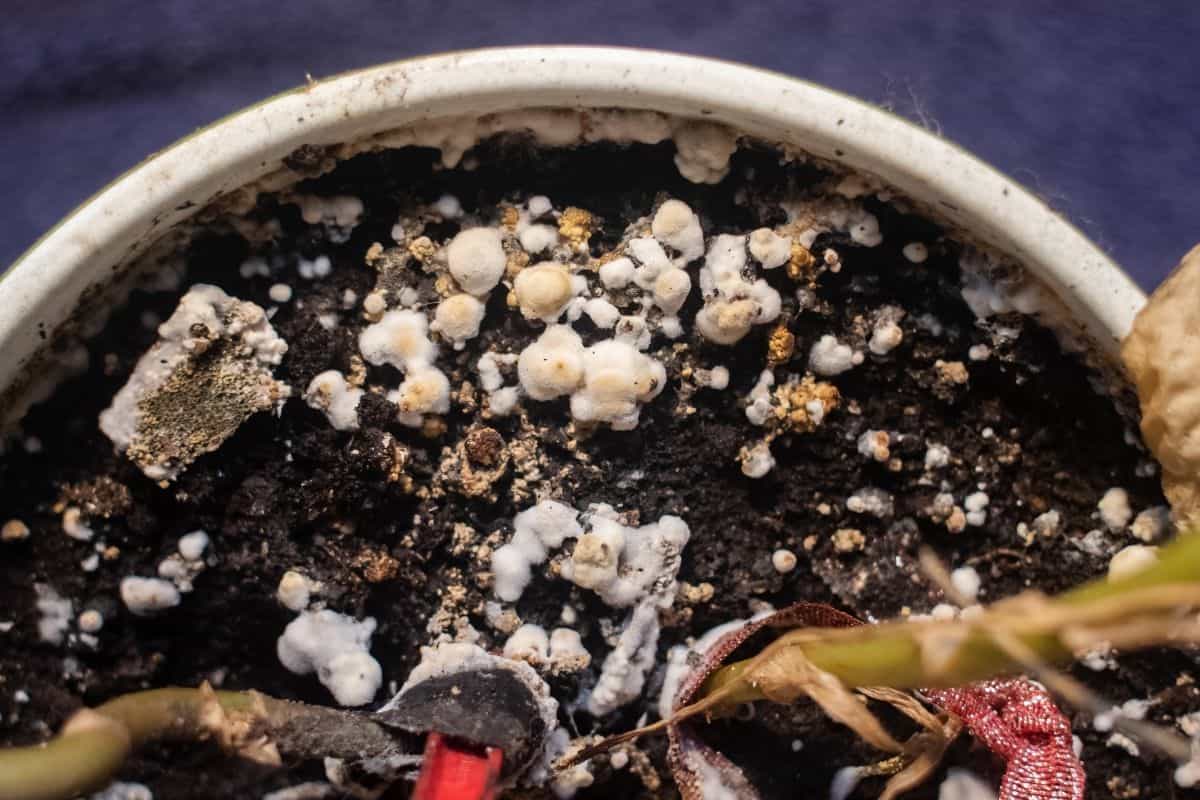
- Mold: Pale green or yellowish spots on older leaves close to the ground. Spots enlarge and merge if the disease is left untreated. You may notice gray, velvety growth of fungal spores on the leaf surface in humid climates and black, leathery rot on fruits and stems.
- Mosaic virus: Older leaves appear mottled. Some leaves may be twisted and curled or smaller than their normal size.
- Fusarium and Verticillium wilt: Plants wilt during sunny days but may recover at night. Leaves turn yellow on one side, dry up, die back from the tips, and fall off. Infected stems don’t show signs of soft decay but reveal dead, brown-colored tissue if you scrape the outer surface.
- Powdery mildew: Pale green or yellow spots on older leaves that turn dusty white. There are also patches of dead tissue on leaves close to the ground, which may be surrounded by a yellow ring.

Organic Control Methods
Organic pest control methods ensure that you are growing food that is healthy for your family and beneficial to Mother Earth.
Here are some effective methods:
Picking by Hand
Handpicking pests works if the infestation is small or only a few plants are involved.
If you are feeling squeamish, you can use tweezers, tongs, or pinchers to pick pests. Don’t drop the pests on the ground. Instead, drown them in soapy water or crush them.
Some pests, like cutworms, are active only in the dark. So you’ll have to go out after dusk and search for them with a light.
Using Insecticidal Soap or Natural Sprays
Look for insecticidal soaps that contain natural ingredients or sprays certified for organic gardening. You can also use horticultural oils like neem oil.
Insecticidal sprays and oils are most effective on soft-bodied pests like aphids, spider mites, and whiteflies. They can also kill the larvae of winged insects hiding in the soil, such as fungus gnats.
Keep the following pointers in mind when using them on infected tomato plants:
- Apply early in the morning or evening so that the solution doesn’t dry out quickly.
- Spray thoroughly to cover the insects and suffocate them.
- Apply once weekly to decimate the entire pest population.
- Do not use dishwashing agents, clothes-washing detergents, or hand soaps. These products are not designed for use on plants.
Placing Physical Barriers
You can repel cutworms, slugs, and snails by placing collars around tomato seedlings and plants.
Make these collars from cardboard, aluminum foil, or an aluminum pie plate, and then bury them about an inch (2.5 cm) into the soil around the plants. Keep about 3 inches (7.6 cm) of the collar sticking above the ground to deter pests that can climb high.
You can also place yellow sticky traps to monitor for and suppress infestation by small insects.
Practicing Crop Rotation
Tomatoes and other plants belonging to the same family tend to be attacked by similar pests and are infected by common pathogens. Many of these pests overwinter and remain in the soil for several growing seasons and infect the tomato plants growing on that plot.
Practicing crop rotation deprives the pests of a host, so they die out.
Here are the rules when growing cherry tomatoes:
- Do not plant cherry tomatoes in the same plot for two successive growing seasons.
- Do not grow tomatoes in the same plot where you had grown plants from the same family, such as potatoes, eggplants, and peppers, in the previous season.
- Grow a non-host plant, such as any legume or small grain, in the same spot where you had grown tomatoes in the previous season. This disrupts the pathogen cycle.
- Practice crop rotation for at least 3 years.
Maintaining Garden Hygiene
The following are some effective cultural practices:
- Remove diseased leaves and branches from the plant.
- Do not dump yard waste on the ground. The pests can spread to nearby plants or overwinter in the soil and infect the next season’s crop.
- Do not compost infected plant debris unless you are certain that the compost pile will reach temperatures high enough to kill the pathogens.
- Sterilize garden tools using a 10% bleach solution.
Companion Planting
Choose companion plants that will keep pests away from your tomato plants.
The best companions are those that:
- Emit an odor that repels pests. Some examples include chives, calendula, French marigolds, and sage.
- Act as lures that attract pests away from tomato plants. They are called trap plants that get “sacrificed” for the sake of your tomatoes. You can plant nasturtiums as a trap crop to lure aphids and whiteflies away from your tomato plants.
- Act as hosts and attract natural predators of tomato pests. Cilantro, parsley, and oregano, when allowed to flower, can attract beneficial insects like hoverflies and parasitic wasps.
Promoting Natural Predators
Natural predators actively hunt down tomato pests, such as aphids, slugs, and hornworms, and keep their numbers under control. For instance, lace-wing larvae and lady beetles feed on aphids. Many birds feed on worms and slugs.
You can promote natural predators by:
- Avoiding chemical pesticides
- Placing bird feeders and bird baths
- Planting native plants
Common Problems and Solutions
Although cherry tomatoes are generally easy to care for in their native habitat, they can be vulnerable when grown outside their preferred climate and soil.
In the U.S., you may come across the following problems when growing cherry tomatoes:
Stunted Growth
Several reasons can cause cherry tomatoes to have slower or stunted growth:
- Insufficient light: These plants need full sun daily for growth. If they’re grown in shady spots or indoors with insufficient light, they will likely grow slower.
- Underwatering: Cherry tomatoes need consistent moisture to support the growing vines or stems, flowers, and fruits. Without enough water, the plant will naturally stop growing.
- Severe pest infestation during the seedling stage: Seedlings that are stressed from environmental issues, such as insufficient light and water, are more vulnerable to pest attacks.
- Lack of nitrogen at planting time: Beginner gardeners might read that excess nitrogen inhibits flowering and fruiting and may shy away from feeding their plant this nutrient at all. However, cherry tomatoes need a healthy dose of nitrogen at planting and significantly less before flowering or fruiting.
To fix or prevent this issue, remember the tips below:
- Give your plant access to unobstructed sunlight for at least 6 hours daily.
- Water the plant based on the growth stage. Cherry tomatoes need more water as they set flowers and fruits.
- Inspect your plant regularly and manually remove pests as soon as you spot them. You can also use some of the organic control methods discussed above.
- Work a slow release balanced fertilizer into the soil at planting. If your soil has low nitrogen at the beginning of the growing season, you can supplement the nutrient by feeding your plant a soluble 6-24-24 fertilizer every 2 weeks when it sets out flower buds.
Blossom Drop
You may notice your plant forming flowers but don’t develop fruits. The flowers just wither and fall off. This condition is called blossom drop.
Dry conditions and high nitrogen levels in the soil can cause blossom drop. You can prevent this by watering your plant adequately and adjusting the fertilizer dosage accordingly. If your soil is high in nitrogen, opt for a soluble 0-5-5 fertilizer during the flowering stage.
Blossom End Rot
Blossom end rot is a condition that manifests as a dark, water-soaked, or rotten bottom on fruits.
It’s mainly caused by low calcium uptake, which happens in the following cases:
- Low calcium levels in the soil: The soil usually has low levels of calcium, which is okay because plants need them only in trace amounts. However, poor or severely nutrient-depleted soil can have too low calcium levels inaccessible to plant roots.
- Underwatering: Water is necessary to deliver calcium from the roots to the other parts of the plants, such as the fruits. Without enough water, the fruits might not receive enough calcium.
- High nitrogen levels: Water sends nutrients throughout the plant indiscriminately. Once the calcium has been sent to the leaves, it will stay there, depriving the flowers and fruits. High nitrogen levels can cause a higher number of leaves and misdirection of the calcium.
To fix the issue, feed your plant a fertilizer that contains calcium. Bone meal is a popular fertilizer for cherry tomatoes because it’s high in phosphorus and also contains good amounts of calcium.
Remove the affected fruits and properly dispose of them to prevent further competition for calcium.

Poor Fruit Set
High nitrogen levels can also cause poor fruit set because the plant will focus more on foliage growth. Testing your soil annually before planting can help monitor soil nutrient levels. It’ll also help you decide which type of fertilizer to use for your plants.
Sunscald
Sun-exposed fruits may have pale, thin skin prone to rotting. Sunscald is caused by intense sunlight, high temperatures, and overpruning.
The fruits need sunlight to have firm skin, but too much can be bad, especially during the peak of summer. The leaves naturally protect the fruits from intense sunlight. Pruning those directly above the fruits can increase the risk of sunscald.
Although tomatoes need full sun, they can suffer damage when temperatures exceed 90 °F (32 °C) for extended periods.
You can fix or prevent this by installing shade covers over your plants, especially those grown in southern or western gardens. Unfurl the shade covers at midday (11 AM to 3 PM) when the sun is at its brightest.
Cracked Fruits
Cherry tomatoes need a lot of water as they develop fruits. However, as the fruits ripen, excess moisture will cause them to crack.
Determinate fruits ripen almost all at once. As the first few fruits ripen, reduce the watering amount back to an inch (2.5 cm) weekly.
On the other hand, indeterminate tomatoes produce new fruits throughout the growing season, requiring high moisture levels. Harvest the fruits as they ripen to prevent them from cracking on the vine.
Hollow Fruit
Tomato fruits can grow big but hollow if the plant is overwatered. This happens if your area receives heavy rainfall and you don’t adjust your watering amount and frequency.
Check the weather forecast and reports on rain volume and adjust your watering routine accordingly. It’s also important to ensure your soil is loose or porous enough to drain away excess moisture.
Catfacing
Cherry tomatoes are also susceptible to catfacing, which is the deformation of fruits. Affected fruits may have dents or scars, resulting in irregular bumps.
This condition is caused by exposure to low temperatures (below 60 °F or 15.6 °C) during flower development, especially when grown indoors or in greenhouses during off-seasons.
Remove the affected fruits and dispose of them. You can prevent the future fruits from having the same issue by maintaining temperatures around 75 °F (24 °C).
Harvesting and Storing
Note the number of days to maturity of the variety of tomatoes you’re growing. Inspect your plants closely for ripening or ripe fruits as this date nears.
You can figure out when it is the right time to harvest indeterminate tomatoes based on the color, flavor, and texture of the fruit.
Here are some clues:
- They have colored fully. Remember that not all tomatoes ripen to a red color. The seed packet or the plant tag should mention the color a mature fruit of the variety you’re growing will take.
- They have reached a “mature green” stage. This is the stage when the fruit has attained its full size but is still green. You can pick green cherry tomatoes when it’s almost time for the first fall frost and you still have plenty of green fruits that might not ripen in time before the freezing temperatures.
- They have attained about half of their actual ripening color. You can pick the fruits when they are just turning red, yellow, orange, or purple but are still half-green. You can pick these tomatoes and ripen them off the vine without them losing their flavor.
- They are firm. Tomatoes are ready for harvesting if the fruits feel firm but not hard.
- Their flavor has developed fully. Do a flavor test on a ripe tomato before picking the whole cluster.
Sometimes, you may have to harvest unripe or underripe cherry tomatoes if growing conditions are unfavorable, for example, in the following instances:
- When there’s a severe pest attack: Sometimes, a severe pest infestation may leave you with no choice but to pull out your tomato plants and destroy them. In such instances, you have to pick the disease-free fruits and ripen them off the vine to salvage the crop.
- When high temperatures are forecast: Temperatures above 95 °F (35 °C) tend to inhibit the production of the red pigments in tomatoes, resulting in orange-red fruits.
- When heavy rains or frost is forecast: Picking the fruits before the rains or frost lets you save some of the crop.
You can ripen the green cherry tomatoes by placing them on the counter, away from direct sunlight. I’ll discuss this further in the following sections.

How to Harvest
Here’s how you can pick cherry tomatoes without damaging the vine:
- Hold the fruit with one hand and the vine with your other hand.
- Twist the tomato gently. If it’s ready to be picked, it’ll snap off easily from the stem.
- Do not tug or pull the fruit if it doesn’t detach from the stem.
- Use sharp and clean pruners to snip the fruit off the vine.
- Cut the stalk just above the flower-shaped leaf on top of the fruit. Snipping too close to the stem might leave an open wound.
Storage and Preservation
If you don’t store harvested cherry tomatoes properly, they’ll rot or attract pests that will soon infect the other fruits you have picked.
Here’s how to store ripe cherry tomatoes:
- Clean and dry your hands before handling the tomatoes.
- Always work with sterilized kitchen tools.
- Wash the tomatoes to clean dirt and debris. Then, dry them.
- Throw away diseased, rotten, or moldy fruits.
- Keep freshly picked tomatoes that have not yet ripened fully on a breathable tray on the countertop.
- Keep tomatoes away from direct sunlight to prevent them from ripening too quickly or their skins from becoming tough.
- Refrigerate the tomatoes if they’re over-ripe or your kitchen is very warm.
- Refrigerate ripe tomatoes by keeping them in the crisper section. Keep the fruits in a paper bag or a plastic bag with holes punched in it.
- Do not refrigerate cherry tomatoes for more than 3 days to prevent them from losing their flavor and juiciness.
Refrigerated tomatoes start to lose their flavor and juiciness after a few weeks. Preserving cherry tomatoes lets you enjoy the fruits of your labor throughout the year.
The following are some ways you can preserve tomatoes:
- Drying: I recommend drying cherry tomatoes naturally instead of using an oven. Just place the tomato halves on baking sheets and put them in the sun to dry. You can use a dehydrator if you live in a humid area.
- Pickling: Besides garlic, you can use bay leaves, dill, parsley, or rosemary to add more zest to your pickled tomatoes. Here’s a tip: poke holes on both sides of the cherry tomatoes to help them soak more of the brine.
- Freezing: Place the tomatoes on a baking sheet and put them in a freezer. After they freeze, you can store them in a freezer bag or an air-tight container.
- Canning: Peel, core, score, and blanch the cherry tomatoes before canning them. I recommend adding lemon juice after you pack the tomatoes in the jar to keep them fresh. Tap the jars on the kitchen counter or run a straw, fork, or chopstick along the inside of the jar to get rid of air bubbles. Ensure that the seals are tight before you store the jars in a cool, dry place.
- Confiting: I’ve found that cooking cherry tomatoes slowly over low heat heightens and preserves their flavors. Ensure that you strain and separate the tomatoes from the olive oil before storing them in the refrigerator. Keep some head space to allow the ingredients in the confit to expand. You can freeze chilled confit and use it for up to a year.
- Fermenting: Fermenting strips away some of the sweetness from the tomatoes and leaves a tangy flavor. I recommend fermenting barely ripe tomatoes. It takes about 6-8 days for tomatoes to ferment at room temperature.

Propagation
You can propagate cherry tomatoes from seeds and cuttings. Learn about these methods to grow more plants for free!
Seed Propagation
Propagating from seeds lets you regrow your favorite tomato without needing to spend money to buy seeds or seedlings. Additionally, you can preserve a variety that thrives in your garden.
When you grow and collect tomato seeds, you’re sure that the seeds are organic. However, if you grow multiple varieties at the same spot, you may end up with hybrids. Although they self-pollinate, bees can sometimes bring pollen from one cherry tomato variety to another.
Here are some tips to help you collect cherry tomato seeds:
- Wait until the end of the growing season to collect seeds from mature and ripe fruits.
- Collect seeds from the fruits of disease-free plants.
- Do not collect seeds from hybrid (F1) varieties, as the following season’s plants may not grow true to the mother plant.
- Cut a ripe tomato and scoop out the pulp. Dry the pulp in a container to separate the seeds. You can also wash the pulp in a colander to separate the seeds.
- Dry the seeds away from direct sunlight.
- Store the seeds in an air-tight container or a paper envelope in a cool, dark place. You can store tomato seeds for up to 5 years.
- Sow the seeds the next spring using the planting tips discussed above.
Propagating from Cuttings
Although it takes less time to grow a tomato plant from a cutting than from seeds, your cutting may not produce fruits if the growing season is nearing its end. You can, however, grow the cutting indoors and move it outdoors the following season to fruit.
Here’s how to propagate tomatoes from cuttings:
- Prepare a pot 3-4 inches wide and 4-6 inches (10-15 cm) deep with drainage holes.
- Fill it with a coco coir-perlite mix.
- Snip off a 6-inch (15 cm) stem or a sucker, preferably one that’s already flowering.
- Remove the lower leaves and the flower bud until the cutting has only two leaves left on top.
- Stick the cutting in a container filled with potting mix.
- Place the cuttings in a warm room (around 75 °F or 24 °C) with bright, indirect sunlight.
- Keep the potting mix moist.
- Transplant the cutting into the garden bed after about 2 weeks. Or, you can transfer it to a larger pot and continue growing it indoors.
Overwintering
Determinate tomatoes are grown as annuals. Once they bear fruits, they will gradually lose vigor and die.
Conversely, indeterminate tomatoes are mostly perennials in their natural habitat. So, if you help them survive the winter, they’ll produce fruits for a few more years.
Keep the following tips in mind to overwinter indeterminate cherry tomato plants:
- Leave plants outdoors if you have frost-free winters and night-time temperatures do not fall below 60 °F (16 °C). Protect outdoor plants when temperatures drop. Use burlap, old sheets, or tarp to wrap the plants at night. You can also use a cold frame to cover them at night.
- Choose smaller and potted cherry tomato vines to bring indoors and overwinter. Potted tomatoes fare better when overwintered than those planted in garden beds. The stress and shock of transplanting can kill a plant when you bring it indoors, even though it was earlier thriving outdoors.
- Only overwinter healthy, sturdy plants. Avoid bringing in pest-infested or diseased plants.
- Move the plants indoors before the first frost. The frost can kill the vine if you leave your plant outside for too long.
- Keep the plants in a warm location and away from cold drafts. A heated greenhouse, an unheated garage, a basement, a conservatory, or a warm corner inside your home will work well.
- Ensure the plant receives adequate light. You can keep the plants near a south- or west-facing window. During winters, the days are short in the northern hemisphere and the sun does not shine intensely. Your cherry tomato plants have a better chance of surviving the winter if you grow them under artificial lights.
- Use grow lights or artificial lights. Specialized plant LED grow lights provide the entire spectrum needed by plants at different stages of growth. Use cool-white fluorescent bulbs, desk lamps, or inexpensive shop light fixtures to provide light.
- Use lights that can be lowered or raised. Place the lights about 3-6 inches (7.6 cm) above the tops of the plants to prevent scorching the leaves.
- Keep the grow lights on for about 12-16 hours a day. They emit less energy than natural sunlight, so your cherry tomatoes need longer exposure.
Depending on the growing conditions inside your house, the tomato plants may or may not produce fruits. Even if they produce flowers, I recommend that you pinch them off. Flowering and fruiting in less-than-ideal growing conditions can stress out the plants.

Final Thoughts
Growing cherry tomatoes at home is a rewarding feeling.
The joy of plucking a fruit from the vine and biting into its juicy freshness can only be had if you grow tomatoes at home. You can enjoy your favorite varieties even if your local grocery store doesn’t stock them.
Most importantly, you feed your family food that is absolutely free of harmful chemicals.
Why don’t you try growing cherry tomatoes at home? There is certainly one (or a couple) that you’ll love to bite into and they’re easy to grow.
And if you’re still scratching your head and wondering if you can pull it off, drop me a line in the comments section below. I would love to answer your questions.