How to Plant, Grow, and Care For Hydrangeas
Hydrangeas are deciduous ornamental shrubs perfect for outdoor gardens. They have beautiful blooms that come back every summer for several decades when grown in suitable environments.
Hydrangeas like 6 hours of direct sunlight with protection from harsh midday sun, especially in hotter climates. They grow actively at temperatures between 60 and 75 °F (15.6 and 24 °C) and shed leaves below 50 °F (10 °C). They require plenty of water and sandy loam soil rich in organic matter.
The care requirements can vary across various species or cultivars. This article will discuss these differences based on the popular varieties grown in the U.S., such as the climbing, smooth, bigleaf, panicled, oakleaf, and mountain hydrangeas.

Quick Guide
| Common Name(s) | Climbing hydrangea Smooth hydrangea Bigleaf hydrangea Panicled hydrangea Oakleaf hydrangea Mountain hydrangea |
| Botanical Name | H. anomala H. arborescens H. macrophylla H. paniculata H. quercifolia H. serrata |
| Family | Hydrangeaceae |
| Plant Type | Deciduous flowering shrub |
| Native Area | Mostly East or Southeast Asia H. arborescens and H. quercifolia from North America |
| USDA Hardiness Zones | 3-9 |
| Height & Spread | 2-50 feet (0.6-15 m) tall 2-6 feet (0.6-1.8 m) wide |
| Bloom Time | Late spring or summer |
| Flower Structure | Corymb |
| Color | White, pink, blue |
| Sun Exposure | Part shade or full sun |
| Soil Type | Sandy loam |
| Soil pH | 5.0-7.0 |
| Watering | Deep watering 2-3 times a week |
| Pests, Diseases, Common Problems | Slugs, snails, aphids, caterpillars, Japanese beetles Rust, powdery mildew, Cercospora leaf spot, anthracnose Overwatering (root rot), leaf scorch, lack of blooms |
| Toxicity | Only the bigleaf hydrangea is toxic (including its leaves, stems, and flowers) Can cause nausea, stomach pain, vomiting, and diarrhea once ingested |
Hydrangeas: An Overview
If you want low-maintenance yet prolific perennial flowers in your outdoor garden, I recommend hydrangeas. They can grow in partly shaded areas and remain undisturbed for several years while producing abundant blooms every summer.
There are roughly 70 species of hydrangeas and hundreds of cultivars. Most species are native to East and Southeast Asia and prefer mild winters and summers. Some originate in North America and will do well in zones 3-9.
It’s worth remembering that even though hydrangeas share some common traits, their growth behaviors and other features can vary widely across different species.
Here are some notable traits among the most popular varieties grown in the U.S.:
Size
On average, hydrangeas grow around 4 feet (1.2 m) tall and 6 feet (1.8 m) wide in home gardens. In the wild, some can grow up to 25 feet (7.5 m) tall. Climbing varieties like the H. anomala can reach over 50 feet (15 m) tall/long.
Shape and Growth Habit
The shrub varieties typically grow compact and can be shaped into rounded bushes or arranged in a hedgerow with regular and thorough pruning.
On the other hand, climbing varieties make excellent garden wall covers because they can sprawl and cling to vertical structures with their aerial roots.
Flowers
There are three types of flower structures in hydrangeas:
- Mophead or hortensia: Most hydrangea flowers grow in a corymb structure where the flowers form on top in a globular form.
- Lacecap: Each lacecap bloom has two layers of flowers: larger outer sepals surrounding a bunch of smaller central florets. The sepals attract pollinators, whereas the central florets contain the nectar.
- Panicled: The flowers form a conical structure. It’s commonly found in H. paniculata and H. quercifolia cultivars.
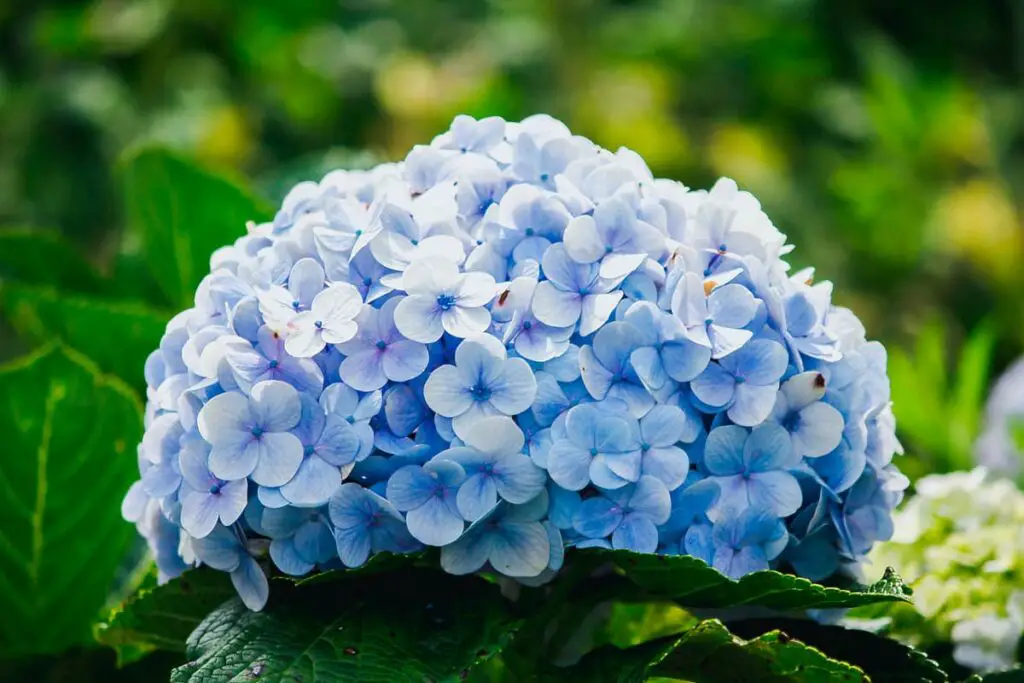
Color
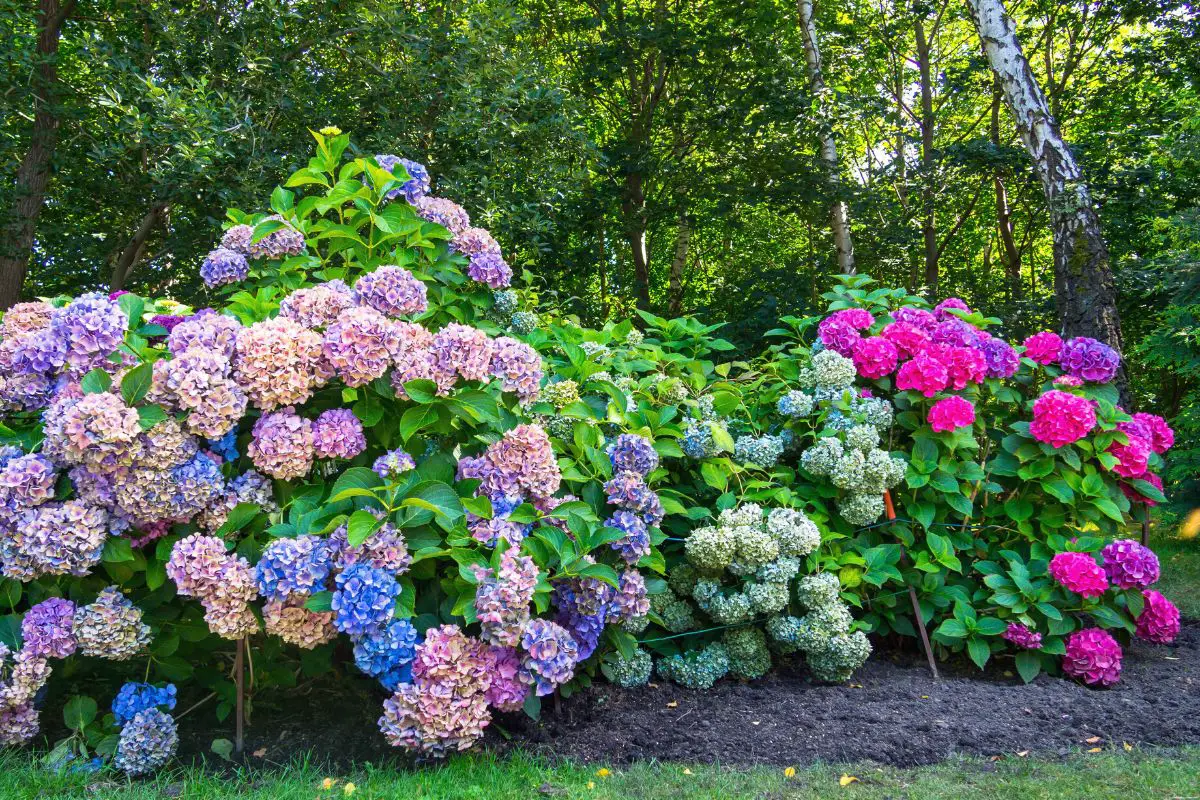
Hydrangeas come in various colors, including cream, yellow, white, purple, pink, and blue. Some flowers may have multiple colors (i.e., pink and white) or may transition from one color to another throughout the blooming period (i.e., white to pink or pink to green).

Choosing the Right Variety for Your Garden
It’s important to understand your climate and the natural conditions in your garden to select the variety that will thrive best.
Here’s an overview of common hydrangea varieties and their distinct features:
| Variety | Size (Height & Spread) | Flower Color(s) | New vs. Old Wood Blooms | Zones & Bloom Time |
| Climbing hydrangea (H. anomala) | Over 50 ft (15 m) long and 6 ft (1.8 m) wide | White, cream, or pale yellow | Old wood | 4-9 Late spring to summer |
| Smooth hydrangea (H. arborescens) | 3-5 ft (0.9-1.5 m) tall and up to 6 ft (1.8 m) wide | Cream or pink | New wood | 4-9 Summer |
| Bigleaf hydrangea (H. macrophylla) | 2-7 ft (0.6-2.1 m) tall and wide | White, purple, pink, or blue | Old wood | 6-9 Late spring to early fall |
| Panicled hydrangea (H. paniculata) | Up to 25 ft (7.5 m) tall and wide | White or pink | New wood | 3-8 Summer to early fall |
| Oakleaf hydrangea (H. quercifolia) | Up to 10 ft (3 m) tall and wide | White or pink | Old wood | 5-9 Summer |
| Mountain hydrangea (H. serrata) | 2-4 ft (0.6-1.2 m) tall and wide | White, pink, or blue | Old wood | 6-9 Summer |
Most gardeners choose hydrangea varieties based on the following considerations:
Plant Size and Garden Space
Some hydrangeas can take up plenty of space, especially the climbing or sprawling varieties.
The dwarf varieties can be grown close to the house, right outside the windows. Regular pruning will keep them from obstructing your view.
The taller shrub varieties can be maintained in a more compact size with annual pruning. Hard pruning (sometimes to the ground) or regular deadheading can help keep hydrangeas more manageable.
If you don’t have enough time to prune your plants, it’s best to grow them in spacious areas where they can freely spread. Note, however, that leaving hydrangeas unpruned can affect the appearance and quality of blooms.
Flower Color
Hydrangeas have diverse flower color patterns. Some hydrangea flowers change colors during the blooming period.
Below are some examples:
- H. macrophylla ‘Double DelightsTM Wedding Gown’: Green to white
- H. paniculata ‘Fire and Ice’: White to red
- H. paniculata ‘Limelight’: Green to white to pink
- H. quercifolia ‘Gatsby Pink’: White to pink
- H. quercifolia ‘Ruby Slippers’: White to pink to red
- H. serrata ‘Grayswood’: White to pink or blue
Here are some recommendations if you want true white hydrangeas:
- H. arborescens ‘Annabelle’
- H. arborescens ‘Invincibelle Wee White’
- H. macrophylla ‘Lanarth White’: The sepals remain white, but the central florets are pH-sensitive and can turn pink or blue
- H. quercifolia ‘Gatsby Moon’
If you like a medley of white, pink, or blue flowers in one bush, go for pH-sensitive varieties. At pH levels below 5.5, these hydrangeas will turn blue if there’s enough aluminum in the soil.
Here are some examples (all under H. macrophylla):
- ‘Nikko Blue’
- ‘Coerulea Lace’
- ‘Tokyo Delight’
- ‘Nantucket Blue’
- ‘Cityline Mars’
- ‘Nigra’
- ‘Endless Summer’
- ‘Double DelightsTM Black Together’
- ‘Blushing Bride’
Hardiness Zone
Hydrangeas generally prefer moderate climates.
Bigleaf and mountain hydrangeas are more heat-tolerant and may survive in warmer climates (zone 10) if they receive partial shade and more water.
On the other hand, panicled hydrangeas are the most cold-tolerant and can endure winters as low as -15 °F (-26 °C).
Vernalization
Hydrangeas are grouped into three categories when it comes to their vernalization:
Old Wood Bloomers
Hydrangeas that bloom on old wood set new buds for next year’s growth in the summer after flowers fade. The buds require a cold period (vernalization) for 6-10 weeks in winter to produce flowers the following year.
New Wood Bloomers
New wood bloomers don’t require the winter chill because the buds grow on new wood set out in spring. Only H. paniculata and H. arborescens bloom entirely on new wood.
Reblooming Hybrids
H. macrophylla and H. serrata reblooming hybrids can produce flowers on both old and new wood. Vernalization will encourage the previous year’s buds to bloom. Deadheading the spent blooms will make way for new wood flowers.
If you live in a warmer climate with insufficient chill time, these hybrids will still produce flowers from new wood but much later in the summer.
Bloom Time
Most hydrangeas bloom in the summer. However, the period and duration can vary depending on the species and climate zone.
- Climbing hydrangeas may bloom as early as late spring when grown in suitable conditions. They’re excellent if you want color in your garden as the other early spring flowers fade.
- Panicled hydrangeas may bloom in mid-summer to early fall because the buds grow on new wood. They can keep your garden colorful for longer even after the summer flowers dry out.
- Bigleaf hydrangeas have the longest blooming period and some cultivars are reblooming (capable of blooming on old and new wood). Famous reblooming varieties are members of the “Let’s Dance” series. They have fascinating color combinations and each flower can last over two months before turning to a dried tan color.
Pre-Planting Considerations
It’s more practical to select a variety that suits your given climate and natural soil conditions. Still, this shouldn’t limit your decision on what hydrangea variety you want to grow.
Setting your mind on one variety will make it easier for you to choose or design suitable locations and tailor the soil conditions for your desired plants.
Here are some things to consider:
Timing
The best time to plant hydrangeas is in mid-to-late spring when all threats of frost have passed and the air and soil temperatures are steadily above 60 °F (15.6 °C). You can also plant hydrangeas at least 6 weeks before the first fall frost.
Location
Although hydrangeas’ sun requirements can vary based on species or cultivar, you can hardly go wrong with this simple reminder: gentle morning sun or dappled afternoon sun. Most hydrangeas thrive in these conditions.
In the northern hemisphere, gentle morning sun is available in east-facing gardens. You can grow dwarf varieties about 2-3 feet (0.6-0.9 m) away from your house wall. The eaves of the roof will give them shade from the midday sun.
If you have a west or south-facing garden, choose a spot where your hydrangeas will receive dappled sun or install shade covers to filter the light.
Avoid north-facing gardens because too much shade can prevent blooming.
Soil Texture and Drainage
All hydrangeas require well-draining soil rich in organic matter. They require frequent watering because they have shallow roots that grow close to the surface. Poor drainage will keep the roots wet and increase the risk of root rot.
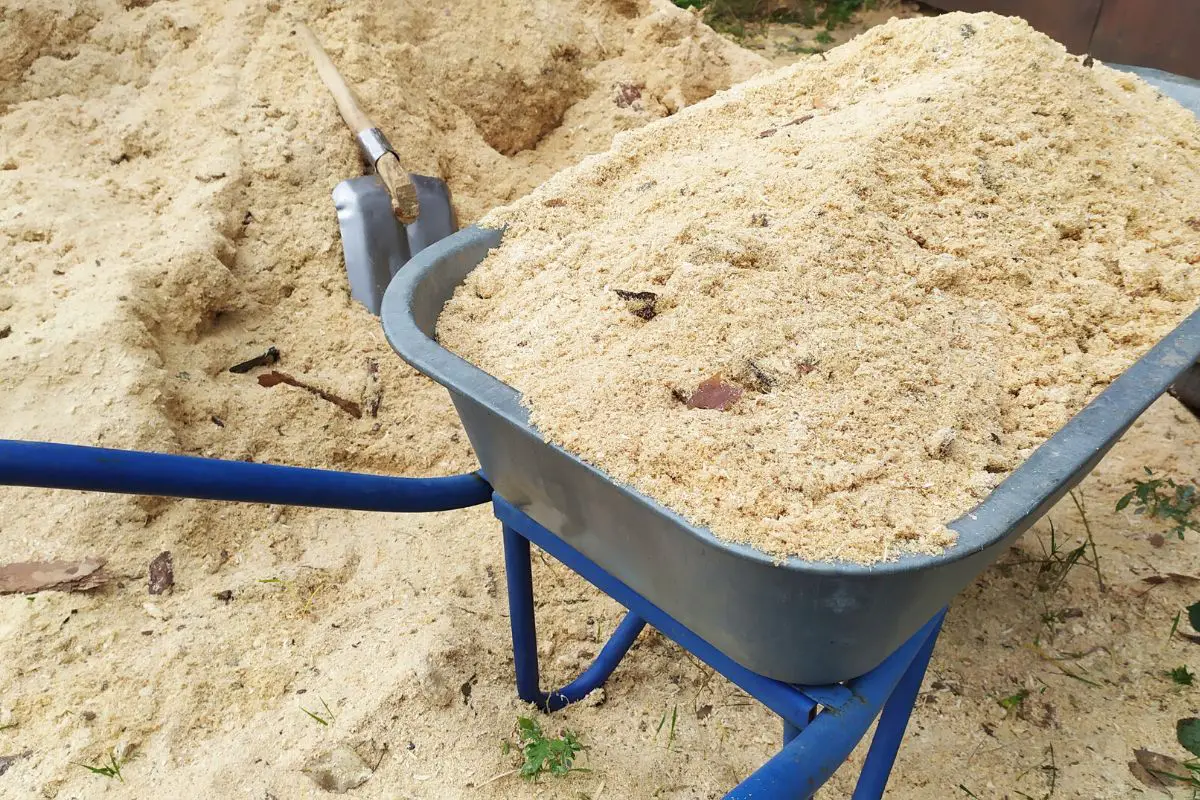
For this reason, sandy loam soil is perfect for hydrangeas. If you have inadequate soil, you can amend it 1-2 weeks before planting.
Refer to the tips below to improve your soil quality:
- Loose soil: Work 3 inches (7.6 cm) of high-quality compost or well-rotted manure in the upper 6-8 inches (15-20 cm) of soil.
- Clayey soil: Dig the soil as deep as the pot height and twice the width of the rootball. Evenly mix equal parts old soil, sand, and compost and place the mixture into the hole.
- Pots: Prepare a mix with equal parts standard potting soil, compost, and perlite. If you want acidic soil for blue flowers, you can use equal parts acidic compost (5.0-5.5), coco coir (5.2-5.5), and horticultural sand.
Soil pH
Most hydrangeas will do great with a soil pH of 6.0-7.0 because this is where most nutrients are accessible to plant roots. Hydrangeas require a good amount of phosphorus to produce flowers but this nutrient becomes inaccessible in acidic or alkaline soils.
Acidity for Blue Flowers
If you want to plant blue hydrangea varieties, you have to aim for a pH slightly lower than 5.5. This acidity will allow your plants to absorb the aluminum in the soil.
Avoid going too much lower because the phosphate ions in the soil will bind with aluminum ions, preventing both nutrients from being absorbed by the plant.
Pro tip: Having aluminum and low soil pH doesn’t guarantee you’ll get blue flowers—but they do increase the odds.
Altering Garden Soil pH
To adjust your soil pH, you must amend it at least three months before planting because it can take time to alter soil acidity successfully. For instance, apply amendments in the fall for spring planting.
To acidify the soil, you can add 4-6 lbs (1.8-2.7 kg) of aluminum sulfate per plant or in a 3×3 feet (0.9×0.9 m) plot. This can reduce the pH by 1.0. Adjust accordingly based on how much you need to change the acidity. This will also introduce the aluminum necessary to have blue hydrangeas.
To raise the soil pH by 1 unit, you can apply 2.2 lbs (1 kg) of lime (calcium carbonate) to a 3×3 feet (0.9×0.9 m) plot. This works well for loose soil but you may need to increase the amount by half if you have clayey soil.

Planting
You can grow hydrangeas from nursery plants. Here are the steps:
- Water your plant deeply 2 days before transplanting. Water the spot in the ground at the same time.
- In the morning of the transplant schedule, dig the ground deep enough so that the top of the potting mix aligns with the ground surface. Ensure the width of the hole is twice the diameter of the pot.
- Place your hand on the surface of the potting mix to secure the plant and tip the pot upside down. Shake the pot to slide the plant out.
- Hold the bottom of the rootball as you lay it into the hole.
- Fill in the space with soil, sprinkling a fistful of bonemeal fertilizer around the roots and covering it with more soil.
- Water the ground deeply without wetting the foliage.
- When transplanting multiple plants, keep them at least 3 feet (0.9 m) apart for good air circulation.
General Care
Due to the large number of species and hybrids, you may come across different care tips for growing hydrangeas.
Here’s a brief outline of the growth requirements of common hydrangea species:
| Species | Sun | Water | Soil pH | Fertilizer |
| H. anomala | Partial shade to full sun | Twice a week | 6.0-7.0 | 10-10-10 slow-release fertilizer in spring |
| H. arborescens | Partial shade | Twice a week | 6.0-7.0 | 10-10-10 slow-release fertilizer in spring |
| H. macrophylla | Partial shade Heat-tolerant | Twice a week (3x for reblooming varieties in summer) | 6.0-7.0 (5.0-5.5 for blue varieties) | 10-10-10 slow-release fertilizer in spring (10-5-5 for blue varieties) 2nd dose in early summer for reblooming 1 lb (0.45 kg) of aluminum sulfate in spring for blue varieties |
| H. paniculata | Partial shade to full sun Cold-tolerant | Twice a week | 6.0-7.0 | 10-10-10 slow-release fertilizer in spring |
| H. quercifolia | Partial shade | Twice a week | 6.0-7.0 | 10-10-10 slow-release fertilizer in spring |
| H. serrata | Partial shade | Twice a week (3x for reblooming varieties in summer) | 6.0-7.0 (5.0-5.5 for blue varieties) | 10-10-10 slow-release fertilizer in spring (10-5-5 for blue varieties) 2nd dose in early summer for reblooming 1 lb (0.45 kg) of aluminum sulfate in spring for blue varieties |
Note: The varieties or hybrids under each species may have unique requirements due to unpredictable genetic traits inherited from the parent plants.
Watering Needs
On average, hydrangeas will do well with 2 inches (5 cm) of water per week divided into two watering sessions. The goal is to saturate the upper 6 inches (15 cm) of soil around each plant every time you water it.
Reblooming bigleaf hydrangeas require more water than other varieties because they need more energy to support the next batch of flowers for the season.
When watering hydrangeas, keep the following in mind:
- Avoid overhead watering to prevent rust and other fungal diseases.
- Water in the morning to give the leaves enough time to dry in case they get wet.
- Water the soil directly using a gentle stream of water to prevent splashing the leaves. Drip irrigation is a practical watering approach for hydrangeas.
- Apply 2 inches (5 cm) of compost or sterile bark mulch in summer to improve moisture retention. The mulch will also protect the roots during freezing winters.
Sunlight and Temperature
In moderate climates where spring and summer temperatures remain between 60 and 75 °F (15.6 and 24 °C), hydrangeas enjoy up to 6 hours of gentle morning sun followed by afternoon shade.
H. paniculata can handle full sun in colder climate zones (3-6).
In warmer zones, hydrangeas need 4 hours of morning sun followed by partial shade or dappled afternoon sun when summer temperatures rise over 80 °F (27 °C). They will also need more water during the summer to maintain the blooms.
Fertilization
Most established hydrangeas do well with a single application of 10-10-10 slow-release fertilizer in spring.
Here are some special considerations for fertilizing hydrangeas:
- For blue flowers, use a 10-5-5 slow-release fertilizer in spring. Too much phosphorus will precipitate with aluminum and prevent flowers from turning blue.
- Reblooming varieties may need a second dose in early summer to encourage the new buds to bloom after the old flowers fade.
- Blue varieties require 1 lb (0.45 kg) of aluminum sulfate after the last frost in spring to maintain the soil acidity. You can topdress the soil with the powder or bury it an inch (2.5 cm) underneath the compost.
Pro tip: Avoid fertilizing in the fall. Although some gardeners may recommend it, I found that doing so can promote green growth and limit the blooms the following year.
You can maintain the soil nutrients and healthy soil microbial activities by replenishing the compost or bark mulch every summer.
Pruning and Maintenance
In addition to vernalization, the old and new wood categories also influence the hydrangeas’ pruning needs.
Old Wood Management
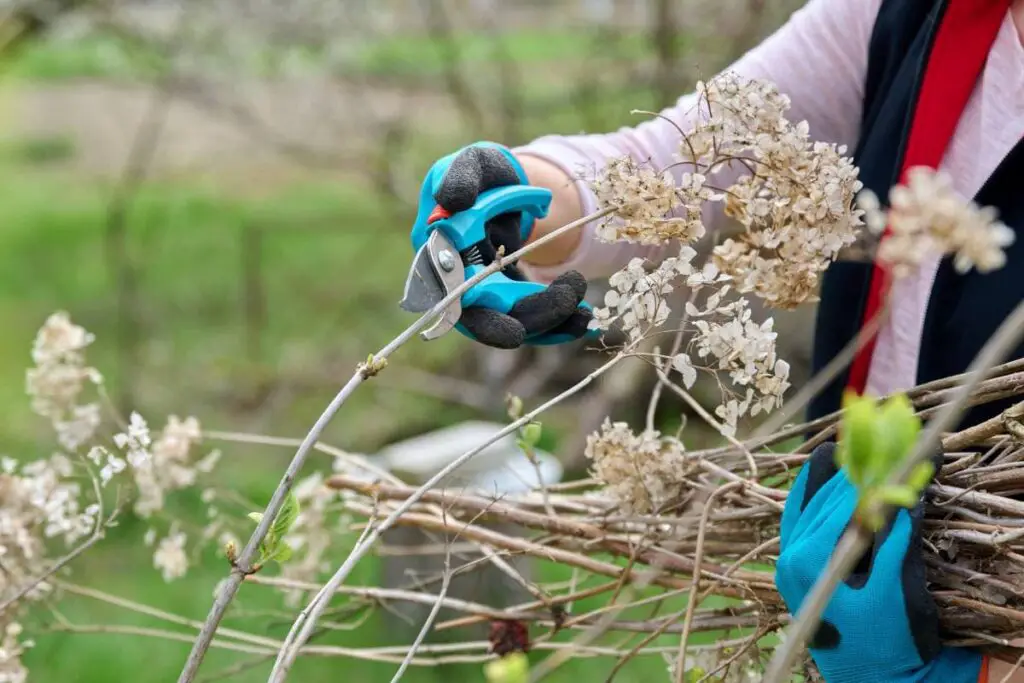
Old wood hydrangeas can go several years without hard pruning but will benefit from after-bloom deadheading. For size management, you can prune them in the summer or early fall after the blooms are spent.
For deadheading, use sterile shears to cut the spent blooms 1/4 inch (0.6 cm) above the new leaf and flower buds to facilitate faster healing. Deadheading can prevent seeding, which can waste the plant’s energy.
For hard pruning, trim up to a third of the plant. You can cut the outermost stems to a few inches (5 cm +) above the ground (regardless if they have buds). You can then thin the central part of the plant by removing spindly sticks. This will give your plant a more bushy or rounded appearance in spring.
New Wood Management
New wood hydrangeas, on the other hand, are best pruned in late winter or early spring to distinguish between dead sticks and living branches. This will encourage the plant to produce larger flowers. They may have smaller flowers if there are too many dead sticks crisscrossing between the living branches.
Here are the steps:
- Wait until the plant shows signs of green growth to locate the spindly and dead sticks.
- Cut the dead sticks down to the ground using sterile shears.
Propagation
There are several simple ways to multiply your hydrangea collection.
Here are some tried and tested tips:
Cutting Propagation
It’s relatively easy to propagate hydrangeas from cuttings. One advantage is that you can get daughter plants that are identical to the mother plant. In addition, some hydrangeas are sterile and can only be propagated through cuttings.
The key is to schedule cutting collection when your plant is actively growing in early or mid-spring. For old wood bloomers, you can collect cuttings in late summer from new growth without flower buds. It’s also important to do it in the morning one day after watering.
Once the timing is right, follow the steps below for successful propagation:
- Choose fresh growth with softer stems and no flower buds. Old wood stems will be too hard and won’t root well.
- Each cutting should have at least two nodes with at least one leaf on the upper node.
- Make a 45° cut below the bottom node using sterile pruning shears.
- Cut off the bottom leaves, ensuring there are 1-2 left on top. If the leaf is too big, you can cut it down to half of its size.
- Soak the bottom half of the cuttings in water as you collect them.
- Prepare 3-inch (7.6 cm) plastic pots with drainage holes. Each cutting should have one pot. If you’re using a tray, space the cuttings 3 inches (7.6 cm) apart.
- Fill ¾ of the container with coco coir, perlite, or vermiculite.
- Use a wooden chopstick to poke holes into the substrate and bury the bottom inch (2.5 cm) of the cutting into the holes.
- Spray the substrate with water.
- Place the setup in an area where they can receive bright, indirect light or dappled sun. Keeping it indoors with controlled light and temperatures will improve the cutting’s chances of forming roots.
- Keep the upper inch (2.5 cm) of the substrate moist.
In about 6 weeks, the cuttings should have enough roots and be ready for transplant into 6-inch (15 cm) terracotta pots using the potting mix recipes discussed above. Watering at this point should be done as soon as the top 2 inches (5 cm) of the soil is dry.
They can then be transplanted into the ground when they reach 12 inches (30 cm) tall. Be sure to time it after the last spring frost or six weeks before the first fall frost.
Alternatively, you can repot them in a 12-inch (30-cm) terracotta pot where they can stay for a year. Dwarf varieties can remain in the same pot for up to 2 years before requiring repotting into a container 2-4 inches (5-10 cm) wider and deeper.
Ground Layering
When left in a spacious area with suitable soil, hydrangea shrubs will spread laterally. The outermost stems may droop too close to the ground and eventually lose their leaves. If the soil is kept moist, roots may form from the nodes and create a new plant.
This process is called ground layering.
This can occur naturally, but I like to force it if there are some empty spaces between my hydrangeas and I want a fuller garden look. The best time to do this is in mid-spring when there’s considerable growth on your plant and it’s more likely to develop roots.
Here are the steps:
- Pick an outer stem that’s already leaning close to the soil.
- Snip off the leaves from the bottom, leaving behind a pair of leaves on the topmost node.
- Dig a trench 2 inches (5 cm) deep into the ground and bury the leafless nodes of the stem.
- Cover the nodes with an inch (2.5 cm) of compost to improve moisture retention and encourage root development.
- Place some rocks or stones over the stem (between the nodes) to keep them within the soil.
- Water the nodes at the same time you water your plant.
The roots should form within 4-6 weeks, and you should see new growth sprouting from the soil by summer.
Division
Hydrangea shrubs can also multiply by producing new clumps of plants or offsets through underground roots, making it possible to divide them. They can do this in the ground or in large enough pots. However, not all hydrangeas do well with division.
You’ll have better chances with the following species:
- H. arborescens
- H. macrophylla
- H. quercifolia
You’ll know that your plant is ready for division when you see clear separation points between clumps and each baby plant has at least three stems. The best time to divide your plants is in early spring while they’re still dormant.
Here are the steps:
- Amend the soil in the new area as needed. Remember the sun and soil requirements of your hydrangea.
- Water the plant 2 days before division.
- Prepare a 5-gallon (19 l) bucket.
- Drive a sharpened spade/shovel at 45° 6-12 inches (15-30 cm) away from the base of the plant. It should go through 8-10 inches (20-25 cm) deep.
- Repeat this all the way around the clump. You should feel the tool cutting through roots.
- Hold the plant firmly by the stem close to the soil and give it a tug. It should come off easily if the roots have been properly cut.
- Place the plant in the bucket.
- Dig a hole into the new spot you want to move the division into. It should be twice the width and the same height as the rootball.
- Place the plant into the hole and fill it back in with the soil.
- Water the plant deeply.
To divide potted hydrangeas, follow these steps:
- Water the plant 1-2 days before repotting.
- Prepare a terracotta pot 2-4 inches (5-10 cm) wider and deeper than the estimated size of the rootball upon division. Ensure it has enough drainage holes.
- Place 2-3 inches (5-7.6 cm) of moist potting mix into the pot (i.e., equal parts compost, perlite, and regular potting soil for non-pH-sensitive varieties).
- In the morning of repotting, lay pieces of newspaper over the working area.
- Loosen the soil along the edges of the pot using a flat knife.
- Hold the soil at the base of the plant and turn the pot upside down to slide the plant out.
- Place the rootball over the newspaper and remove the soil from the roots using your fingers.
- Carefully disentangle the roots to separate the divisions.
- Inspect the roots for signs of damage and prune rotting or dried roots using sterile shears.
- Place the plant inside the pot and backfill with more potting mix.
- Tamp down the potting mix to remove air pockets.
- Water the soil deeply until the excess water comes out of the drainage holes. Let the pot sit over a drip tray until there’s no more water coming out.
- Place the pot in partial shade (similar to the position of the original pot).
- Water again when the top 2 inches (5 cm) is dry.

Seasonal Care and Protection
Hydrangeas are generally low-maintenance plants when kept in suitable environments. In non-native gardens, they require extra care during extreme seasons.
Summer
Hydrangeas have high moisture requirements. If the summer in your area goes above 80 °F (27 °C), you need to make the following adjustments:
- Apply 2 inches (5 cm) of compost or bark mulch around the base of the plant in early summer to improve moisture retention.
- Move potted hydrangeas to a shadier spot, such as next to a wall or tree for relief from intense sunlight.
- Install shade covers over your plant at mid-day (from 11 AM to 3 PM).
- If it’s impractical to install shade covers or move the pot because it’s too large, you must increase the watering frequency. Check the soil moisture using a wooden chopstick and water your plant when the top 2 inches (5 cm) of the soil is dry.
Winter
Hydrangeas shed their leaves in the fall when temperatures go below 50 °F (10 °C). During this time, you may reduce watering to once every 1-2 weeks until late fall.
The leafless plants can survive temperatures as low as 10 °F (-12 °C). H. paniculata varieties can handle as low as 15 °F (-26 °C).
If winter temperatures are expected to drop much lower than these thresholds, you can protect your plant with these tips:
- Increase the bark mulch thickness to 3-4 inches (7.6-10 cm).
- Hang a burlap over your plant. Let the sides dangle to the ground and secure them using rocks.
- Install a chicken wire cage around your plant. Make sure it’s 4-6 inches (10-15 cm) taller than your plant and staked securely into the ground. You can then hang the burlap over this cage and staple or tie it securely.
- Inspect the soil during thawing periods.
- If the ground isn’t frozen, water the plant deeply. This could be done once a month.
Common Pests, Diseases, and Problems
Hydrangeas grown in poor conditions are susceptible to the following issues:
Pests
- Aphids are tiny pests that suck on the sap of leaves and leave behind a sticky residue called honeydew. They can be green, brown, or white and usually hide underneath the leaves.
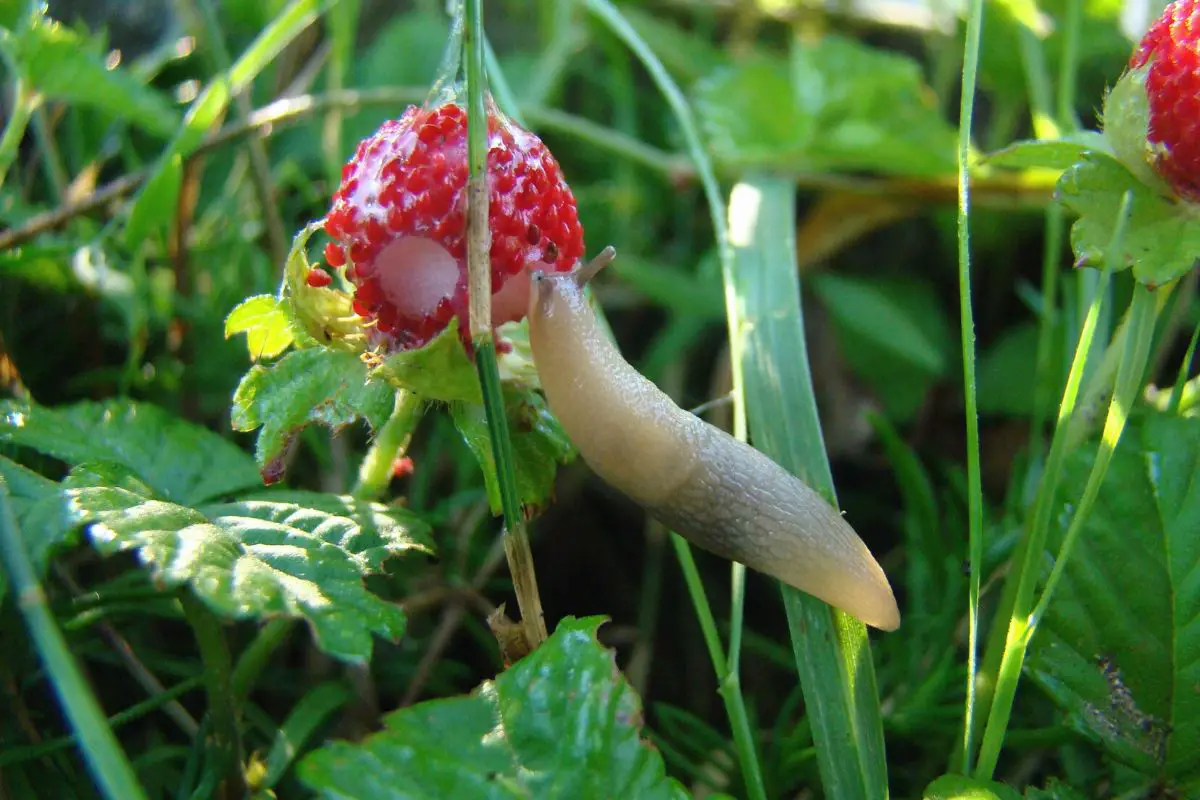
- Slugs are soft-bodied pests without shells (unlike snails) that feed on the leaves using their teeth. They leave behind ragged holes and slimy trails along the leaves.
- Caterpillars are the larvae form of moths and butterflies that like to chew on plant leaves. They come in various colors, depending on the species.
- Japanese beetles have greenish backs and bronze or copper wings. They also chew on leaves and cause ragged holes.
You can fix the issue with the following tips:
- Manually remove these pests by hand or using tweezers and drop them in a bucket of soapy water.
- Spray your plant in the evening with a neem oil solution once a week. This will eliminate aphids and Japanese beetles and keep them from coming back.
- Use a coffee soil drench once every two weeks to eliminate slugs and snails and prevent them from coming back to your plant. Hydrangeas don’t mind a brief rise in acidity.
Diseases
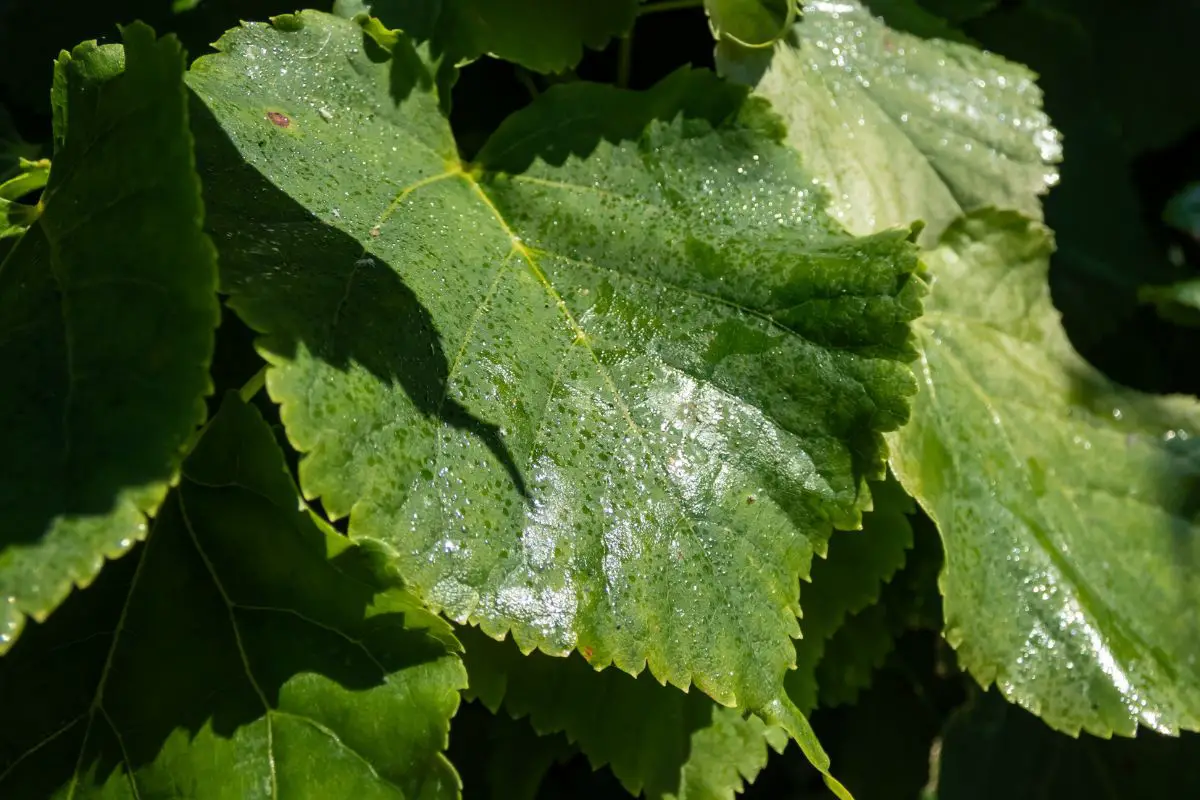
- Rust is caused by the fungus Pucciniastrum hydrangeae and manifests as brown or orange spots on leaf undersides. It spreads on wet foliage exposed to direct sunlight.
- Anthracnose is common among H. macrophylla varieties and caused by Colletotrichum gloeosporoides. Plants grown in hot conditions, overwatered, and overfertilized are more susceptible to this disease. Symptoms include brown spots that become necrotic.
- Powdery mildew is a fungal disease common in plants grown in humid areas with warm days and cool nights. The spores can spread from one plant to another through touching leaves or wind. It manifests as white or gray patches that eventually appear webby as the fungal mycelia grow. Bigleaf hydrangeas are more susceptible, whereas many oakleaf hydrangeas are resistant.
- Cercospora leaf spot: Another problem with bigleaf hydrangeas is their susceptibility to Cercospora hydrangea infection. The leaf spots appear brown with purple margins and necrotic centers.
- Botrytis blight: Botrytis cinerea causes water-soaked spots on hydrangea flowers that are kept wet in humid and cool environments. The spots turn red or brown as the disease progresses.
Prevention and early detection are key against these diseases, but you can manage them using the following methods:
- Space your plants properly at planting to prevent overcrowding and improve air circulation.
- Inspect your plants regularly to spot problems and address them promptly.
- Cut off diseased leaves and properly dispose of them. Don’t add them to the compost pile. Limit leaf removal to 30%.
- Prune your plants annually to remove dead sticks and unruly stems.
- Avoid wetting the foliage when watering.
- Use neem oil spray solution at night once a week for disease and pest prevention. It works against the diseases listed above. They can also halt the spread of the infection when treated promptly. Evening application is necessary to avoid contact with diurnal bees and pollinators.
- Avoid using chemical fungicides, which can kill or repel pollinators.
Problems
Hydrangeas can also encounter a few problems when exposed to poor care practices:
Overwatering and Root Rot
Although hydrangeas love water, they are at risk of root rot if grown in clayey or poorly draining soil. The roots will be deprived of oxygen and weaken the plant.
Once the roots decay, the shoots will not be able to absorb water and nutrients, leading to the following symptoms:
- Yellow leaves
- Wilting
- Brown, water-soaked spots on leaves
- Fading blooms
- Soggy and smelly roots
- Mushy stems
Here are some treatment options:
- You can treat early signs of overwatering by holding off on watering until the top 3 inches (7.6 cm) of the soil is dry.
- If the plant is grown in poor soil and the disease has progressed, it’s impractical to amend the soil without removing the plant. Instead, you can propagate the remaining healthy terminal stems.
- You can transplant potted hydrangeas in fresh soil and a sterile pot after pruning the rotten roots and damaged leaves.
Lack of Blooms
Hydrangeas may lack blooms or fail to bloom in the following situations:
- Too much or too little sunlight
- Excess nitrogen in the soil
- Insufficient phosphorus uptake due to low pH
- Winter injury
- Improper pruning
To ensure your plant blooms profusely in the summer, keep the following care tips in mind:
- Give your plant 4-6 hours of morning sun daily and protect it from harsh afternoon sun using shade covers.
- Feed your plant a balanced fertilizer only once a year in early spring. Avoid overfertilizing your plant.
- If you need to lower the soil pH for blue flowers, keep it at 5.5 as much as possible to still facilitate phosphorus uptake.
- Protect your plant from extreme winter temperatures using burlap.
- Be careful not to remove too many flower and leaf buds from old wood bloomers while pruning in late summer or early fall. On the other hand, prune new wood bloomers in early spring before the new growth sets out new buds.
Companion Planting
Hydrangeas make excellent outdoor garden ornamentals because of their colorful summer blooms. Their lower light requirement makes them suitable companions for the following plants:
Hostas
Hostas are generally low-growing plants and also shade-loving. They bloom around the same time as hydrangeasm but they’re more popular for their colored or textured leaves. Growing them at the base of your hydrangeas can help suppress weeds and add to the appeal of your cottage-style flower garden.
Dogwood Trees
If you prefer a woodland aesthetic, dogwood trees are perfect companions for hydrangeas. They bloom in early to late spring and have green leaves in the summer. That means you’ll have a continuous flush of colors. The canopy will also effectively shade the hydrangeas from intense sunlight.
American Boxwood
In a manicured formal garden, the vibrant green of American boxwood provides a beautiful contrast against the white or colored blooms of taller hydrangea shrubs. These evergreen bushes can also serve as excellent cover for the leafless hydrangeas in winter. You can position the boxwood in front of the hydrangeas for this purpose.
Final Thoughts
Hydrangeas are versatile and low-maintenance plants if you know how to choose varieties that grow well in your climate and soil.
Although they may require careful planning and initial preparations, these steps are crucial in ensuring that your hydrangeas can continue to thrive with fresh blooms year after year.
Explore different varieties to find which ones grow well in your area. You don’t need to purchase expensive varieties. Hydrangeas are so widespread in the U.S. and you may find a friendly neighbor or fellow gardening enthusiast who’ll be glad to share a cutting with you.
Please leave a comment to share about your hydrangea growing journey or ask for more tips.