6 Ways to Make Soil More Acidic for Blue Hydrangeas
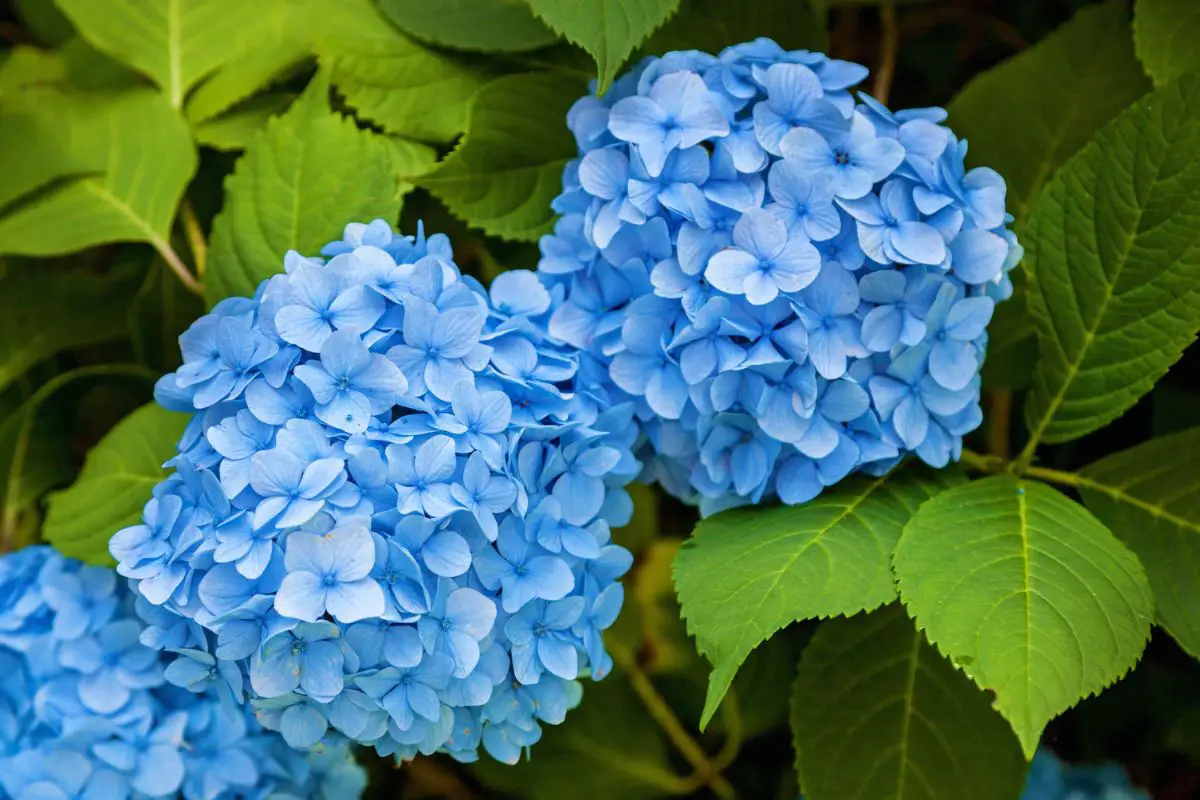
Hydrangeas with blue flowers are gorgeous, and they also happen to have a soft spot for acidic soils. Many soils are naturally acidic, a condition that comes down to several factors. However, if your soil is too alkaline for hydrangeas, you’ll need to take steps to reduce the overall pH.
To make the soil more acidic for hydrangeas, use soil amendments like acidic compost, diluted vinegar, and sphagnum peat moss. Aluminum sulfate, elemental sulfur, and nitrogen-rich fertilizers can also be effective. Take note that some amendments have faster results while others take months to acidify the soil.
In this article, I’ll be going over all the ways you can make your soil more acidic for hydrangeas. I’ll also discuss the science behind soil pH, testing your soil, and some other ways you can ensure your hydrangeas are happy and healthy.
How Soil Acidity Affects Hydrangea Development
The primary characteristics of soil come from its parent material which is the rock formation it used to be. Over time, erosion, weathering, temperature, and other factors can create a specific soil structure that can be alkaline, acidic, or neutral.
In very hot and humid climates, soil pH tends to be more acidic since the mixture of hot weather and heavy rains can affect how nutrients are released from the soil. On the other hand, in cooler climates with low levels of humidity and rainfall, soil pH tends to be more alkaline.
Regions in the US have different soil pH levels, which can greatly determine what kind of plants can grow in each region.
Many hydrangea species can be found in numerous states in the US because they thrive in a wide range of soil pH. Still, these flowers prefer acidic soils. Although they won’t die immediately in alkaline soils, the quality of growth will be affected.
Soil pH can affect hydrangeas in a number of ways, including the following:
Nutrient Availability
Hydrangeas need a healthy amount of nutrients during the growing season to promote lush growth and blooming. Most essential plant nutrients are available at a range of 6.2-6.8, with 6.5 being the optimum level for most plants.
For many researchers, two nutrients of interest in hydrangeas are phosphorus and aluminum.
Phosphorus
As flowering plants, hydrangeas need adequate levels of phosphorus in the soil. However, low soil pH can limit the accessibility of phosphorus to the plants’ roots. Even if the soil has enough phosphorus, your plants’ access to the nutrient declines as pH levels fall below 6.0.
Aluminum
Aluminum is present in most soils but is usually inaccessible to plants at pH levels over 5.5.
In general, it is ideal to keep pH levels above 6.0 because too much aluminum is considered toxic to plant life. The nutrient can build up in the plant roots and inhibit root growth, resulting in poor water and nutrient absorption that can eventually kill the plant.
However, hydrangeas can tolerate high levels of aluminum in the soil. They can absorb more aluminum ions if the soil has adequate amounts of potassium, another essential plant nutrient.
Interaction Between Phosphorus and Aluminum
Although many resources will recommend using high-phosphorus fertilizers for flowering plants, gardeners who aim for blue hydrangeas must limit the amount of phosphorus in the soil.
At low pH levels (below 5.5), excess phosphate ions will bind with aluminum ions, making the latter inaccessible to your hydrangeas. As a result, your plant will produce bountiful blooms, but few or none of them will be blue.
Influence on the Color of Blooms
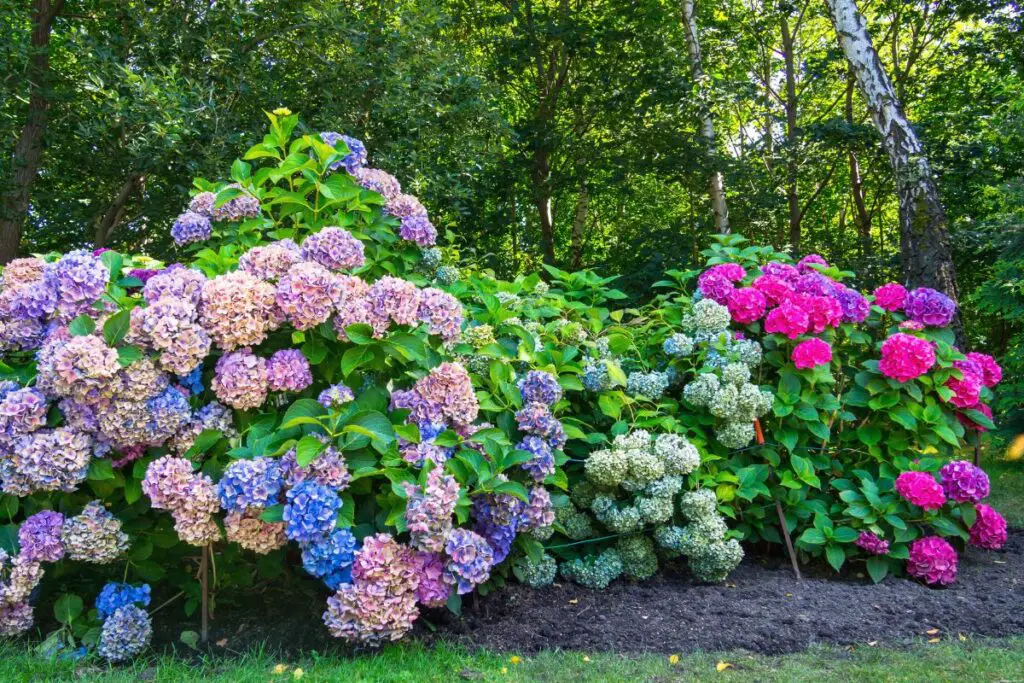
One of the primary reasons many avid hydrangea growers aim for more acidic soils is the rare occurrence of blue flowers. Pink and purple flowers are equally beautiful, but the blue ones are more special due to the unique soil requirements that need to be met to get them.
The most crucial requirement is aluminum accessibility. Hydrangeas have a unique response to excess aluminum ions in the soil. The plant collects and delivers the ions to the sepals, where they interact with and chemically alter the red pigments, giving the bloom the characteristic blue hue.
A low pH will not automatically give you blue hydrangeas because if the soil has excess phosphate ions, your plant might not absorb enough aluminum. Also, for potted hydrangeas, if the soil is depleted of aluminum ions, the plant won’t produce blue flowers even at low pH.
Nevertheless, you’ll have better chances of getting blue flowers at pH levels below 5.5 with adequate amendments like aluminum sulfate.
The Science Behind the Rarity of Blue Hydrangeas
Not all hydrangeas can turn blue even under the right soil conditions. Some species have white blooms because they lack delphinidin, the anthocyanin pigment that responds to soil pH and aluminum ions and is responsible for the color changes in hydrangea blooms.
Regardless of soil pH and aluminum ion availability, pure white hydrangea cultivars will remain white. A popular example is the Hydrangea arborescens ‘Annabelle’, which has cream or white blooms.
They shouldn’t be confused with hydrangea bushes with wide arrays of colors. Although some pink or blue hydrangeas can turn pale and almost white, it can be due to uneven nutrient interactions with the pigments among separate blooms.
Hybrids produced from a cross between pure white species and pink species might not produce distinct blue blooms even when grown in aluminum-rich, acidic soils.
The possibility of blue flowers largely depends on how much of the genes that carry proteins or enzymes that code for anthocyanin are acquired by the hybrid and how they respond to the gene activators or inhibitors present in the other parent plant’s genes.
Methods to Lower Your Soil pH
One of the fundamental aspects of soil health and chemistry is the pH level. The pH determines how efficiently your plant roots can access essential nutrients through the soil, so measuring the acidity of your soil is one of the best ways to ensure your plants can thrive.
Testing your soil acidity every few months is an excellent way to maintain the correct levels for the plants you’re growing.
A good time to test your soil for its pH level is around September or October. This is because it gives you enough time before winter frosts to alter the pH levels if needed, bringing you around to a productive spring.
A good pH level for your hydrangeas lies around 5.0 to 6.0. This is relatively acidic but not so much so that the nutrients are too soluble and can be easily eroded by heavy rainfall.
To test your soil, I recommend using a 2-in-1 soil pH tester tool that tests soil moisture levels and acidity. This also makes your life easier by letting you know how often you need to water your plants. These are straightforward to use and don’t need a battery.

How to Test pH Without a pH Meter
It may seem surprising, but you can actually test your soil’s pH levels without a meter. This is a relatively easy way to check for soil pH, but it is rather time-consuming.
It’s much easier to do if you have a tester, but if you’d rather spend the time to do it yourself without spending the money, then follow the steps below:
- Let the soil dry on a flat surface. Grab a few handfuls of soil and place them on a flat surface. Spread out the soil to form a very thin layer and leave it for about 24 hours to dry.
- Put the soil in water. After it has dried out, take some of the soil and place it in a small bowl of water. Mix it up so that the soil turns into a thick sludge.
- Add a few tablespoons of vinegar to the sludge. If it begins to froth, you may need to add an amendment to the soil to make it more acidic for your hydrangeas.
One thing to note is that you need to be careful when altering soil pH. While acidic soil can be healthy for your hydrangeas and give you that beautiful blue color, dropping the pH too low can cause problems for your soil and your other plants.
As a result, it’s important to always be aware of your soil pH before adding anything to it. This is why knowing how to measure your pH levels is vital.
More importantly, it’s best to amend the soil before planting your hydrangeas. That way, you can avoid damaging an already established plant.
Once you have determined that your soil needs amendments to lower the pH to your desired value, you can choose from the methods below:
1. Use Aluminum Sulfate
Aluminum sulfate in the soil acts quickly to neutralize very alkaline soils and, over time, will make them more acidic. Your hydrangeas will benefit from this, and the natural acidity, as a result, will make the flowers more blue and beautiful than ever.
Note that a concentrated aluminum sulfate solution has a pH of 3.0-4.0. Adding 4-6 pounds (1.8-2.7 kg) of aluminum sulfate to the root zone of one plant and watering it in can reduce the pH by 1 unit.
The best way to use aluminum sulfate is to dilute it with water. This creates a chemical reaction resulting in sulfuric acid forming, which will naturally acidify your soil. Additionally, since hydrangeas love aluminum-rich soil, the solution will act as the perfect catalyst for growth.
Be mindful when handling aluminum sulfate. Always use gloves when handling the mixture, and if it touches your skin, wash it off immediately.
Monitor the changes in soil pH every 4-6 weeks so that you can make adjustments when necessary before the growing season.
You can then maintain the soil pH for grown plants every three months by adding one cup (340 g) of aluminum sulfate to the soil around your plant, raking it in lightly, and watering it in.
2. Add Acidic Compost to the Soil
Well-decomposed compost can have a pH level ranging from 5.0 to 8.5. If you want to organically change your soil’s pH to match your hydrangea’s requirements, opt for an acidic compost. However, depending on how high your soil’s pH is, it can take some time to lower it using only compost.
Acidifying the soil to get blue hydrangea blooms from already established plants can prove troublesome and even detrimental to them.
It’s always best to amend the soil before planting your hydrangeas. It’s also more manageable when you’re dealing with potting soil than garden soil with inherent alkaline qualities. That way, you can monitor the change in soil pH and work on maintaining it as you go along.
When adding compost to your soil, follow the steps below:
Prepare Enough Compost
Whether you’re planning to amend the soil in your garden or in your pot, you’ll need adequate amounts of compost to make a significant change. Ideally, you should have 2 inches (5 cm) of compost for every 5 inches (12.7 cm) of topsoil or potting soil.
Work the Compost Into the Soil
You’ll also want to work the compost into the soil in the fall. This will give your compost enough time to lower the pH by the growing season in spring. However, if you intend to plant hydrangeas in the fall, you can apply the compost to the soil in late spring.
Check the soil pH regularly to confirm if the amendment is effective.
3. Use Diluted Vinegar
Vinegar is a naturally acidic substance with a pH level of 2.0-3.0, so it makes sense that it will alter the acidity of your hydrangeas’ soil. If you use too much of it, you could kill the roots—so only use a little bit at a time if you choose to try this method.
When using household or kitchen vinegar, dilute one cup (250 ml) of vinegar in one gallon (3.8 l) of water. More concentrated horticultural vinegar that contains around 20% acetic acid will need to be diluted more at one tablespoon (15 ml) per gallon (3.8 l) of water.
Vinegar has properties that naturally lower the pH of the soil, but it doesn’t last as long as other methods. It’s a good method to try if you don’t have any other option. This can also work when you’re trying to maintain the soil’s acidity.
Remember to use this solution only once a month.
You’ll likely find that vinegar has the magical ability to destroy weeds and other pathogens in the soil (in small doses), which is an excellent way to ensure your soil stays free and clear of unwanted plants.
4. Use Elemental Sulfur
Using sulfur to alter soil pH is one of the most popular ways to maintain soil acidity. Elemental sulfur is cost-effective and environmentally friendly. It works by using microorganisms in the soil to initiate chemical changes that lead to the creation of sulfuric acid, which acidifies the soil.
Although it has a similar mechanism to aluminum sulfate, the acidifying effect of elemental sulfur is more intense. Approximately 0.5-1 pound (0.2-0.4 kg) of elemental sulfur per plant can reduce the soil pH by 1 unit.
You can purchase elemental sulfur at any local nursery or online. Make sure to read and follow the instructions on how to use the product and wear protective gear, such as gloves and a face mask.
5. Acidify Your Soil With Sphagnum Peat Moss
Sphagnum peat moss is popular among many gardeners, and there’s a good reason for it. Peat moss comprises decayed organic matter such as animal and plant material. It is naturally very light, so it makes for an excellent addition to heavy clay-based soils.
It also acts as a soil conditioner and will lower the pH naturally. It lasts for a very long time and creates an environment with better aeration and drainage channels.
The idea behind adding peat moss to your soil is simple: the more you put in the soil, the more acidic it will become. Just ensure you’re getting sphagnum peat moss with a pH of 3.0-4.0 because most regular store-bought peat moss has only slightly acidic to neutral pH.
Also, before adding peat moss, ensure it has absorbed enough water. You’ll need to drench it slowly in a few cups of water and squeeze out the excess before distributing it among the top few inches of soil.
Downsides of Peat Moss
If you’re planning on using peat moss for your hydrangeas’ soil, you must be mindful of the downsides. Peat moss doesn’t have any nutrients by itself, so it can’t be used as a natural fertilizer. You’ll need to add some organic matter, like compost or well-rotted manure.
Additionally, the process of harvesting peat moss is not considered environmentally friendly. Peat bogs worldwide have undergone extensive cultivation to the point that they’re no longer viable habitats for the wildlife who call them their home.
As a result of these processes, peat bogs are now releasing carbon dioxide into the atmosphere, irreversibly damaging the earth. Therefore, if you’re planning to use peat moss in your garden, it’s best to be mindful of how much you use and how it is sourced.
6. Apply Nitrogen-Rich Fertilizer
Fertilizers rich in nitrogen and ammonium are perfect for affecting the pH of soils. Ammonium in the fertilizer goes through a process called nitrification, which unleashes hydrogen molecules into the soil. This process is what changes the acid levels in the soil.
This is all because nitrogen is one of the primary foundations of pH changes in the soil. If you can find a good fertilizer with these properties, your hydrangeas will thank you.
However, limit your use of nitrogen-rich fertilizers only during the growing season. Also, be mindful not to use such fertilizers on already rich soil. Doing so can cause more harm than good because your plants will suffer from fertilizer burn.

Other Growth Requirements of Hydrangeas
Your hydrangeas need more than just a good soil pH and structure to thrive.
Below are the other requirements you need to address to ensure your hydrangeas grow healthily:
Magnesium and Epsom Salt
Hydrangeas need magnesium sulfate, a compound that allows your plant to become bigger and more green through photosynthesis. It also gives your hydrangeas a better survival rate and higher resilience to insects.
One of the best ways to ensure your hydrangeas are getting enough magnesium is to provide them with Epsom salts. It is a natural and cost-effective way to help your hydrangeas grow big and strong and create a mineral-dense soil texture that helps spur growth.
Partial Shade
Hydrangeas are generally not fond of direct sunlight for extended periods, so placing them in a shaded spot that gets a little bit of sunlight is your best bet.
Since hydrangeas love a moisture-rich environment, too much direct sunlight will dry out the soil, and the roots will have more difficulty accessing those all-important nutrients.
If your hydrangeas are indoors, it’s a good idea to place them in a window spot that gets bright sunlight for up to six hours a day. This way, you’re not depriving them of the moisture they need, and they’ll still get adequate sunlight for photosynthesis to take place.
Regular Pruning
You’ll need to prune your hydrangeas once a year to ensure they don’t grow too big.
If you leave your hydrangeas without pruning them, you’ll find they’ll have all their beautiful flowers right at the top of the shrub and hardly any flowers below. This can also make your shrub fall to the side in extreme cases due to top-heavy flowering buds.
The best time to prune the hydrangeas is between late winter and early spring. You just need a good pair of small garden scissors to trim off any dead buds, leaving the healthy ones intact and ready to bloom in the summer months.
Remove any stems that are growing too wild outside of the shrub, and you’re good to go.
Common Related Questions
How Can I Acidify My Soil Naturally?
You can acidify your soil naturally by using acidic compost or Sphagnum peat moss. However, note that the acidifying effect is directly proportional to the amount of amendment you add to your soil. For instance, the more compost or peat moss you add to your soil, the faster and higher the acidifying effect is.
Aim for compost that has a pH of 5.0 or peat moss with 3.0-4.0 to see significant changes in soil pH. Just be mindful of your hydrangea’s soil requirements because they might not appreciate the high water-holding quality of these amendments, especially if they’re already in clayey soil.
What is the Best Acid for Hydrangeas?
Aluminum sulfate is the best acid for hydrangeas because it effectively reduces the soil pH and provides your plants with enough aluminum for better chances of getting blue blooms.
Be sure to use the product sparingly on established plants by applying it as a top dressing. Alternatively, you can amend the soil two seasons ahead before planting your hydrangeas in the spring or the fall.
Final Thoughts
To make the soil more acidic for hydrangeas, you can use organic soil amendments, such as compost and peat moss. You can also use aluminum sulfate, elemental sulfur, vinegar, and nitrogen fertilizers.
Looking after your hydrangeas requires more than a regular watering schedule. You also need to maintain a good pH level in the soil and ensure you prune your shrub every year.
Keep your hydrangeas away from too much direct sunlight, and use Epsom salts for an extra helping of magnesium sulfate. Hydrangeas are beautiful when looked after properly, so test your soil often.