How to Plant, Grow, and Harvest Pumpkins (Ultimate Guide)
Pumpkins are fantastic plants because they’re easy to grow and can be used for a lot of healthy recipes and fall decorations. Vining varieties make excellent cover crops in your vegetable garden and choke out weeds. So, if you want to try growing pumpkins, you’ve come to the right place!
Start pumpkins in late spring or early summer for a fall harvest. You can choose from vining, bushy, or dwarf varieties that will match your garden. Pumpkins require plenty of moisture, space, and sunlight to produce strong and healthy fruits.
In this article, I will share everything you need to know about growing pumpkins. I’ll share tips on how to choose the best pumpkin variety and provide a comprehensive guide on their growth requirements.

Quick Guide
| Common Name(s) | Pumpkin, squash |
| Botanical Name | Cucurbita pepo, C. maxima, C. moschata |
| Family | Cucurbitaceae |
| Plant Type | Annual bush or vine, fruit |
| Native Area | America |
| USDA Hardiness Zones | 3-12 |
| Height & Spread | Vine: 9-18 inches (23-45 cm) tall, 20-30 feet (6-9 m) long, 15 feet (4.5 m) wide Bush: 1-3 feet (0.3-0.9 m) tall and 4-15 feet (1.2-4.5 m) wide |
| Plant Spacing | Vine: 5-6 feet (1.5-1.8 m) between hills and 10-15 feet (3-4.5 m) between rows Bush or dwarf: 2-3 feet (0.6-0.9 m) between seedlings and 4-6 feet (1.2-1.8 m) between rows |
| Planting Depth | 1 inch (2.5 cm) deep |
| Planting Season | Late spring or early summer |
| Days to Maturity | 90-120 days |
| Sun Exposure | Full sun |
| Soil Type | Sandy loam |
| Soil pH | 6.0-6.8 |
| Watering | 1.5-2 inches (3.8-5 cm) of water every 7-10 days |
| Pollinators | Honey bees, bumble bees, squash bees |
| Pests | Cucumber beetles, squash bugs, aphids, root-knot nematodes |
| Diseases | Bacterial wilt, powdery mildew, mosaic viruses |
| Plant With | Marigolds, nasturtiums, Hubbard squash, sunflowers |
| Don’t Plant With | Fennel, potatoes, sweet potatoes, cabbage, broccoli, kale |
Selecting Pumpkin Varieties
Different pumpkin species and cultivars are native to various parts of America. No matter where you live in USDA zones 3-12, there’s a pumpkin variety that will grow well in your area.
Choosing the right variety will ensure that your crop grows throughout summer and produces a bountiful fall harvest.
Here are some tips on how to choose the right pumpkin variety:
Based on the Available Space
Pumpkins generally require plenty of outdoor space, so they’re not for indoor gardeners. One large vining pumpkin variety will need at least 50 square feet (4.6 sq m) of space. If you have a smaller garden, opt for dwarf, semi-bush, or bush varieties.
Large, Vining Cultivars
- ‘Jack O’Lantern’: This pumpkin is a favorite among many gardeners who grow pumpkins for decoration. It can spread up to 15 feet (4.5 m) long and wide at maturity. It has many hybrids that are about the same size or even larger, so if your pumpkin seeds say they’re a ‘Jack O’Lantern’ hybrid, you’ll need a large garden to grow them.
- ‘Big Max’: This is a giant pumpkin variety grown mainly for competitions. Limiting the yield to one fruit per vine can produce a pumpkin weighing up to 100 pounds (45 kg). For maximum fruit size, the vines need a large growing space.
- ‘Atlantic Giant’: Another giant variety, its vine can grow 12 feet (3.6 m) long. It needs at least 50 square feet (4.6 sq m) of space without obstructions from taller plants, fences, or walls that can block sunlight.
Compact Cultivars
- ‘Funny Face’: This variety has large fruits weighing 8-15 pounds (3.6-6.8 kg) in a compact semi-bush body.
- ‘Baby Boo’: This is one of the most compact pumpkin varieties, growing only up to 2 feet (0.6 m) tall. It produces white, apple-sized pumpkins suitable for decorations.
- ‘Jack Be Little’: This is a miniature version of the larger ‘Jack O’Lantern’. It is a semi-bush variety that produces multiple fruits per plant and can be grown in containers with trellises.
Based on Purpose
You can also choose a pumpkin variety based on purpose. Some gardeners grow pumpkins mainly for their decorative function, while others grow them for fall-season special recipes or Halloween carving.
Decorative
- ‘Baby Bear’: Small and smooth, perfect for kids to paint on
- ‘Casper’: Bright white and medium-sized, also edible
- ‘Blue Doll’: Has a bluish color and makes for an exciting contrast with traditional orange pumpkins
- ‘Toad’: Tiny and warty
Carving
- ‘Connecticut Field’: Large and was the original Halloween pumpkin
- ‘Jack O’Lantern’: Has a large and hard shell with little flesh
- ‘Howden Field’: Large and hollow and lasts long once carved
- ‘Magician’: Large and disease-resistant
- ‘New Moon’: White pumpkin for carving, typically weighing 45 pounds (20 kg)
Cooking
- ‘Winter Luxury’: Excellent for soups and pies
- ‘Orange Smoothie’: As the name implies, it’s best pureed and made into a smoothie
- ‘Jarrahdale’: A cross between ‘Cinderella’ and ‘Hubbard squash’, great for pies and soups

Based on Climate and Region
Pumpkins grow in regions in the US where there are at least 120 frost-free days. They’re warm-season annuals that can tolerate temperatures up to 95 °F (35 °C).
If you have short summers, you can opt for fast-maturing varieties, including the following:
- ‘Jack Be Little’ (85 days): Small and good for decoration
- ‘Aspen’ (90 days): Good for carving and cooking
- ‘Baby Boo’ (95 days): Good for decoration
- ‘Lumina’ (95 days): Good for carving and decoration (white and smooth)
On the other hand, ‘Jap’ and ‘Seminole’ are among the most heat-tolerant pumpkin varieties. They have long maturing times (around 130 days) and, therefore, are best grown in warmer regions (USDA zones 10-12).
To make the most of your growing seasons, you can start the seeds in pots indoors 2-4 weeks before the last frost in spring.
Preparing the Soil
Pumpkins are flower- and fruit-bearing plants that require rich, well-draining soil for high-quality yields. Lack of soil preparation can lead to poor nutrition, overcrowding, and water-logging, resulting in crop failure.
To prepare the soil for pumpkin seeding, keep the following soil parameters in mind:
pH (6.0-6.8)
Apply lime to acidic soil (below 6.0) or acidify alkaline soil (over 7.0) by adding elemental sulfur. Do this in the fall before planting pumpkins the following year because these amendments take several months to change the soil pH as desired.
Temperature
Wait until the threat of the last frost is over before sowing your pumpkin seeds. Soil temperatures should be at least 60 °F (15.6 °C). Temperatures below 50 °F (10 °C) can delay germination rates.
If you live in colder regions or want to direct-sow pumpkin seeds sooner, you must dig into the soil and create small hills.
I’ll describe how to create hills in more detail in the following section.
Soil Type and Drainage
Sandy soils must be amended by adding coco peat or peat moss to improve moisture retention. On the other hand, add sand or pumice to dense, clayey soil for better drainage and to warm the soil more quickly. Alternatively, you can add compost to either soil type because it improves both moisture retention and drainage.
There are two ways to prepare the soil for pumpkin seeding: direct sowing or creating hills.
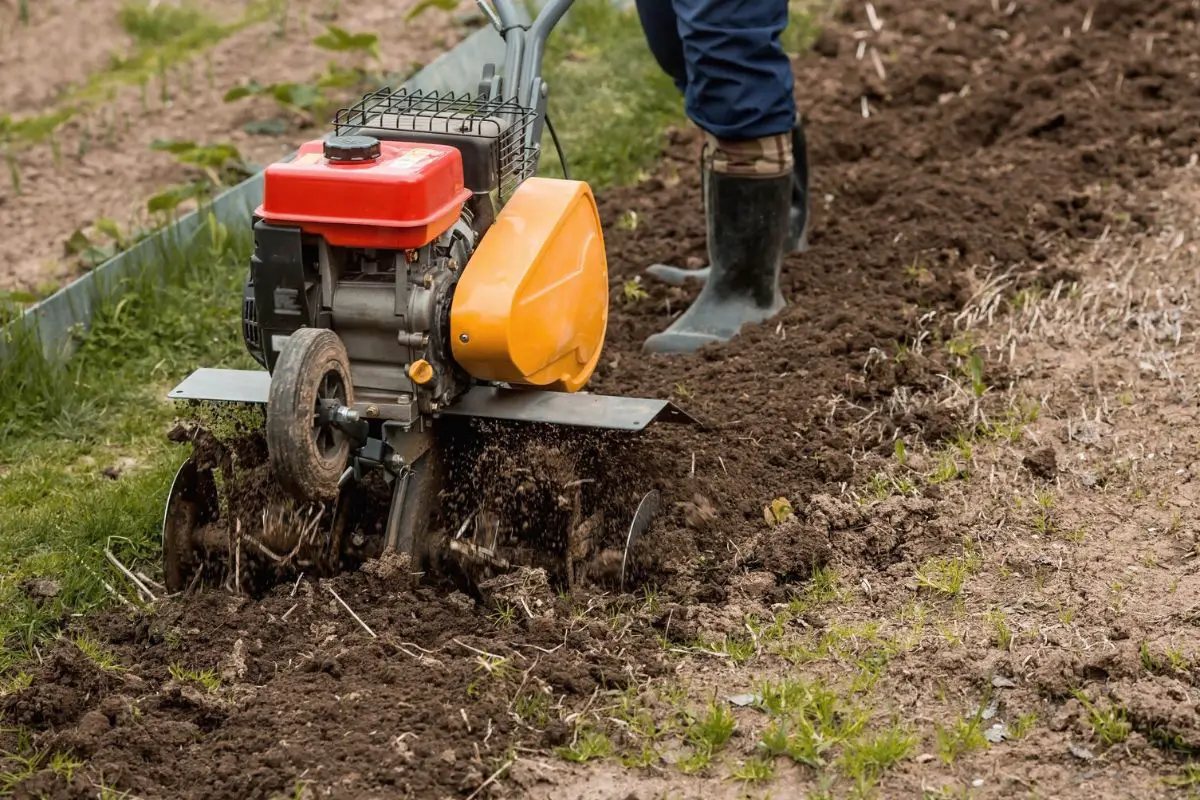
Soil Preparation for Direct Sowing
Direct sowing is commonly practiced in warmer regions. The process is relatively simple. Till the soil up to 10 inches (25 cm) deep and work about 3-4 inches (7.6-10 cm) of organic materials, such as green manure or compost, into the tilled soil layer.
I tried growing peas and broccoli in my garden in early spring before growing pumpkins to serve as green manure. By the time they dried out in late spring or early summer, I tilled them into the soil and had the soil tested 3-4 weeks later.
Lab results showed that the pea and broccoli residues post-harvest contributed to a healthy nitrogen amount in the soil. Because of that, I use a low-nitrogen, high-phosphorus fertilizer (5-10-5 NPK) for my pumpkins throughout the growing season.
Nitrogen is helpful for the early stages of the plant but will inhibit flower and fruit development when constantly high. Testing your soil for NPK values will help you determine what kind of fertilizer to use on your pumpkins.
You can test the NPK values by purchasing an at-home test kit available online or in garden supplies stores. You may also send some soil samples to your local garden extension centers or laboratories for a more thorough analysis of soil nutrients and microbial populations.
How to Create Hills or Mounds
If you live in colder regions or the soil is too loose or too dense, it’s best to create hills. This will warm your soil more quickly and improve drainage or moisture retention.
- Dig a hole 6-12 inches (15-30 cm) deep and 2 feet (60 cm) wide.
- Space the holes 5-6 feet (1.5-1.8 m) apart for vine and semi-bush varieties. Keep a 10-15-feet (3-4.5 m) distance between rows. Bush or dwarf varieties need 2-3 feet (0.6-0.9 m) between holes and 4-6 feet (1.2-1.8 m) between rows.
- Mix two parts soil and one part compost or green manure.
- Add any amendments as needed (i.e., sand for clayey soil or coco peat for sandy soil).
- Pour the soil mix into the holes and shape the top into a volcano. The resulting hill or mound should be 6-12 inches (15-30 cm) high and 2 feet (60 cm) wide at the base.
Planting Pumpkin Seeds
You can start your pumpkin seeds indoors or sow them directly into your garden bed. Note that vining pumpkin varieties don’t transplant well. That’s why many gardeners just wait for the soil to warm up enough before sowing seeds.
The timing for planting pumpkin seeds can vary per region. A good rule of thumb is always to wait until the soil temperatures are steadily above 60 °F (15.6 °C) before directly sowing your pumpkin seeds.
Here’s a general guide on when to best plant pumpkins based on USDA Hardiness Zones:
- Zones 3-5: Between late May and early July. In colder regions, you have a smaller planting window to ensure the fruits mature before the first fall frost. Therefore, I recommend starting the seeds in pots indoors. I’ll discuss this in more detail below.
- Zones 6-10: Between late April and early July.
- Zone 11 (frost-free areas of Florida): Between August and March. It’s best to avoid growing pumpkins during the hottest parts of the summer because heat stress can negatively affect the plants’ health and yield.

Once the environmental conditions are suitable, you can sow your seeds directly into the soil or hills, following the steps below:
- Bury 4-5 seeds 1 inch (2.5 cm) deep into the soil or every hill. Keep the seeds about an inch (2.5 cm) apart.
- Water daily until the seedlings are about 3 inches (7.6 cm) tall.
- Thin the seedlings by pulling out the weakly growing ones. When growing them in hills, keep one seedling per hill. On flat soil, keep in mind the distance recommendations depending on the pumpkin variety.
If you have short summers, here’s how to start pumpkin seeds indoors:
- Prepare seed-starting pots about 4 inches (10 cm) wide and deep. Choose pots that are easy to slide off or tear apart so that you won’t disturb the roots when transplanting the seedlings later.
- Fill it in with a mix of coco peat and perlite.
- Poke two holes an inch (2.5 cm) deep and an inch (2.5 cm) apart in the middle of the substrate and pop in one pumpkin seed each. Lightly cover them with the substrate.
- Place the pots near a bright eastern window.
- Water the substrate deeply. Water it again as soon as the top inch (2.5 cm) is dry.
- Thin the seedlings when they reach 3 inches (7.6 cm) tall by leaving behind the more aggressively growing ones. There should be one seedling per pot.
After 20-40 days (depending on the cultivar), your seedlings should be ready for transplant into your garden bed.
Transplant the seedlings through the following steps:
- Acclimatize your seedlings by moving them outdoors for a few hours each day for a week. Increase the number of hours gradually.
- Carefully remove the seedlings from the pot while keeping the potting soil intact.
- Dig a hole into the hill or soil to fit the seedling and cover it with soil.
- Water the transplant deeply.
- Follow the same spacing recommendations above.
Weed Your Garden Regularly to Remove Competition
Hoe your garden a few days to a week before planting your pumpkin seeds or seedlings to eliminate the weeds. It’s crucial to continue removing weeds as they sprout to give your pumpkin seedlings a fighting chance.
Seedlings are vulnerable to weeds because of their shallow roots. In addition, pumpkins are heavy feeders and will show signs of nutrient deficiency when there are plenty of weeds growing around them.
You can also place 2 inches (5 cm) of straw around established seedlings to conserve moisture and keep the soil moist during hot and dry weather. As the vines grow, the large foliage should be able to shade out the weeds, allowing the plants to thrive.
Watering and Fertilizing
Water and fertilizers are crucial to ensuring optimal yields from your pumpkin plants.
Watering Tips
Established pumpkin plants need about 1.5 inches (3.8 cm) every 10 days. This volume includes the moisture from rain and any supplemental irrigation in case of dry climate.
In hotter regions or during the flowering or fruiting season, you need to increase the volume to 2 inches (5 cm) of water every 7-10 days. Pumpkin fruits and flowers require plenty of water for fruit development.
Good watering practices are important to prevent moisture-related issues in pumpkin plants.
Keep the following tips in mind:
- Use drip irrigation or water the soil directly using a narrow-nozzled garden hose to keep the moisture off the leaves and fruits.
- Water the plant in the morning to give the leaves enough time to dry.
- Reduce watering as the fruits near harvest to prevent them from trying to grow within the hardened shell.
- The cooler autumn season will also keep the soil moist for longer, so wait until the top 2-3 inches (5-7.6 cm) of the soil is dry before watering again. Excess water can cause the fruits to split on the vine.

Fertilizer Guidelines
Pumpkins need a balanced fertilizer in the early growing stages. You can apply a half-strength 10-10-10 NPK liquid fertilizer every 2-3 weeks by adding it to your watering routine. The vines are fast-growing, making them heavy feeders.
After around 40-60 days, the flower buds will appear, and you must switch to a half-strength 5-10-5 NPK liquid fertilizer. The high phosphorus level is essential for flower and fruit development. Apply it once every 2 weeks until about 2-4 weeks before harvest.
Although pumpkins love regular fertilizer feedings, it’s important to pay attention to signs of over-fertilization in your plant, including yellowing or wilting foliage.
To fix the issue, you can increase the gap between feedings by a week or dilute the fertilizer further down to a quarter-strength.
Sunlight and Space Requirements
As a rule of thumb, giant pumpkin varieties with fruits weighing 15-25 pounds (6.8-11.3 kg) require full sun or at least 6 hours of sunlight every day. These varieties also take up much space, often requiring 50-100 sq ft (4.6-9.3 sq m).
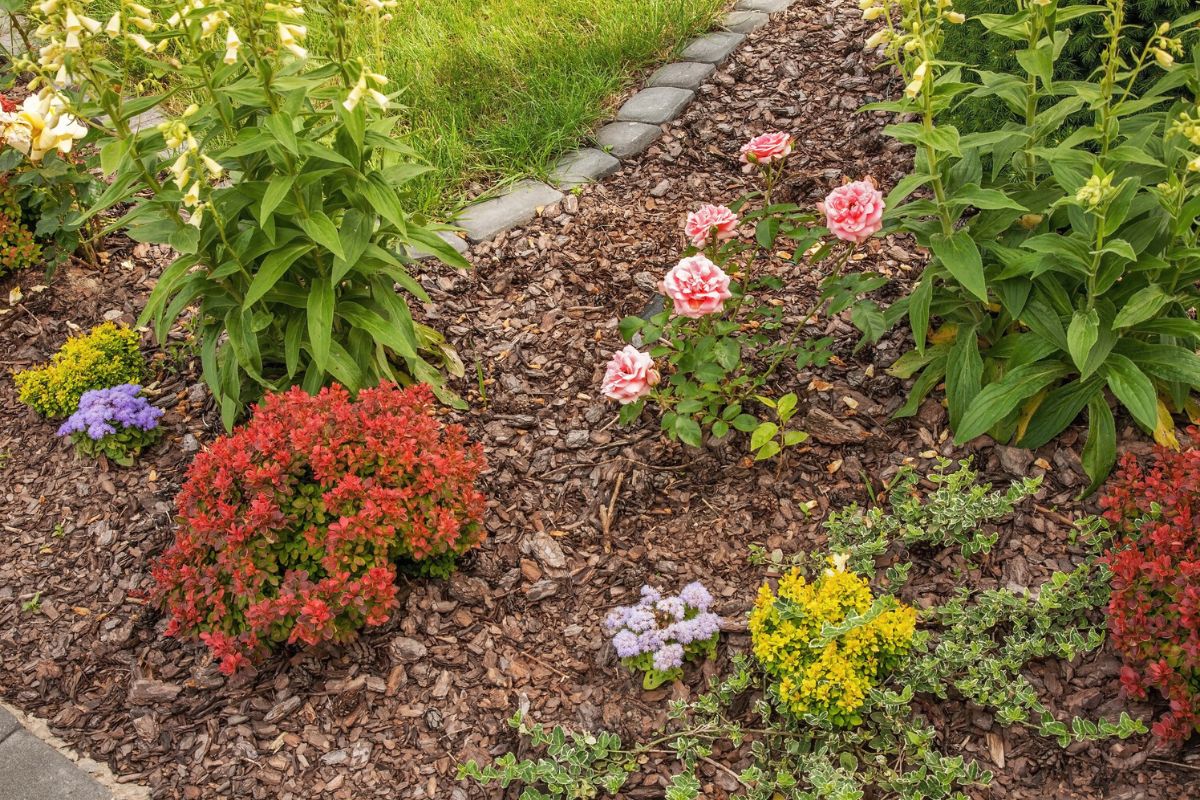
Pumpkins require plenty of space to prevent moisture-related diseases, such as bacterial wilt, powdery mildew, and mosaic viruses. Adequate space will also ensure the fruits and foliage receive enough sunlight.
Avoid growing taller plants like sunflowers near your intermediate and giant pumpkins. Although sunflowers can attract pollinators, they will shade out your pumpkins. Lack of sunlight will result in poor-quality fruits, which may be deformed or smaller in size.
On the other hand, smaller and compact pumpkin varieties require less space and will benefit from the partial shade provided by taller plants during the hottest part of the day. They are less heat-tolerant than their larger relatives, and the fruits may dry up more quickly from intense sun exposure.
Maintain a good balance between water and sun exposure for your pumpkin plants. Although larger varieties love direct sunlight, they also require more moisture.
Drought stress can cause heat stress even to the most sun-loving pumpkins. Both conditions can lead to stunted fruit development or lower yield.
Adjust your watering frequency accordingly to ensure that your pumpkin plants remain well-hydrated. Check the soil and water as soon as the top 2-3 inches (5-7.6 cm) are dry.

Pollination
Your pumpkin may be growing healthily with plenty of flowers but isn’t bearing fruits. This could be due to a lack of pollination.
The common pollinators of pumpkins include:
- Honey bees
- Bumble bees
- Squash bees
You can invite them to your garden by growing beneficial companion plants around your pumpkin patch, such as sunflowers, marigolds, and nasturtiums. You can also grow Hubbard squash to attract squash bees.
A pumpkin plant has male and female flowers.
You’ll recognize the male flower through its long stem and knob-like protrusion in the middle of the petals.
On the other hand, the female flower has a globular section between the stem and the flower. This section will eventually become the fruit once the flower is pollinated. Each female flower will bloom for only a few hours (typically in the morning) and will close up by the afternoon, giving bees a short window to pollinate them.
You can also hand-pollinate the flowers through the following steps:
- Cut the male flowers by the stem.
- Remove the petals, leaving the knob behind. The knob contains the pollen.
- Gently rub the knob all over the brain-like center of the female flower.
You’ll know that the flower has been pollinated if the petals fall off after a few days and the globular section below it increases in size.

Pest and Disease Management
Pumpkins are not immune to pests and diseases. In fact, they’re susceptible to health issues common to their cucumber relatives.
Here are some common pumpkin pests and diseases to look out for:
Pests
Aphids
Aphids feed on the sap of plant leaves. They are usually green or brown and leave behind honeydew on the leaves. Aphids also serve as vectors that transmit common mosaic viruses in the Cucurbit family.
You can treat an aphid infestation using insecticidal soap or diluted neem oil solution. Be sure to spray the treatment at night to prevent leaf damage from intense sunlight during the day.
Squash Bugs
Squash bugs are common pests of the Cucurbit family of plants. The adults have a gray body and hide on the underside of leaves. They also lay eggs in that area, which are identifiable due to their red coloration and V-like pattern.

The seedling and flowering stages are more susceptible to severe damage or wilting from squash bug attacks. These pests suck moisture and nutrients from the plant, leaving the plant starving.
You can control squash bug infestations by removing the eggs using sticky tape. Pat the tape lightly on the underside of the leaves where the eggs are attached. The eggs should stick to the tape.
You can catch the nymphs or adults by laying newspaper traps on the ground at night. Remove the newspaper in the morning and collect the bugs that collect underneath it. Drop the bugs in soapy water.

Root-Knot Nematodes
Root-knot nematodes grow within the soil and attack the roots, where they create lesions or galls. Severely damaged roots can lead to crop failure, and you must treat the soil or practice crop rotation for 2-3 years before you can safely grow pumpkins in the area.
You can rotate among zinnias, salvias, and marigolds during this time because these flowers are resistant to root-knot nematodes.
They also make excellent companion plants to grow around your pumpkin plants to block root-knot nematodes. In addition, their colorful blooms will invite pollinators to help with your pumpkin fruit production.
Slugs and Snails
Slugs and snails typically cannot pierce through the hard shell of mature pumpkin fruits. They might also be repulsed by the hairy pumpkin leaves. They will, however, feed on the pumpkin seedlings and young fruits that haven’t developed a hard outer shell yet.
You can prevent slugs and snails from attacking your pumpkin seedlings by placing beer traps between hills or rows. You can also train your young plant to grow on a trellis or cattle panel to prevent ground pests from reaching the fruits.

Stink Bugs
Stink bugs are aggressive pests that aren’t picky regarding food choices. They can easily pierce through the hard shell of pumpkins using their salivary enzyme and feed on the flesh within.
This attack can get worse because the wounds left behind by the stink bugs can invite pathogens to infect your plant.
You can control stink bug populations or effectively eliminate them from your garden using commercial insecticidal soap. This is better than homemade insecticidal soaps because it’s safe for edible plants and doesn’t leave behind harmful residues.
Apply the treatment once weekly after sunset to protect the foliage from potential sunburn.

Squash Vine Borer
Squash vine borers are active during the early stages of growth of pumpkin plants (around June and July).
The maggot-like larvae enter the pumpkin vine and feed within it. This activity blocks the water and nutrient transport from the roots to the upper parts of the plant. As a result, the leaves will turn yellow or wilt and the plant eventually dies.
To prevent damage caused by squash vine borers, look for adults flying around your garden before planting your pumpkins. They have grey fuzzy wings and an orange body with orange dots along the middle.
Install floating row covers after planting or transplanting your pumpkin seeds or seedlings. Row covers will also block out other flying pests.
If your plants have already been damaged by these pests, destroy them immediately to prevent the larvae from escaping into the soil and growing into an adult by next summer.
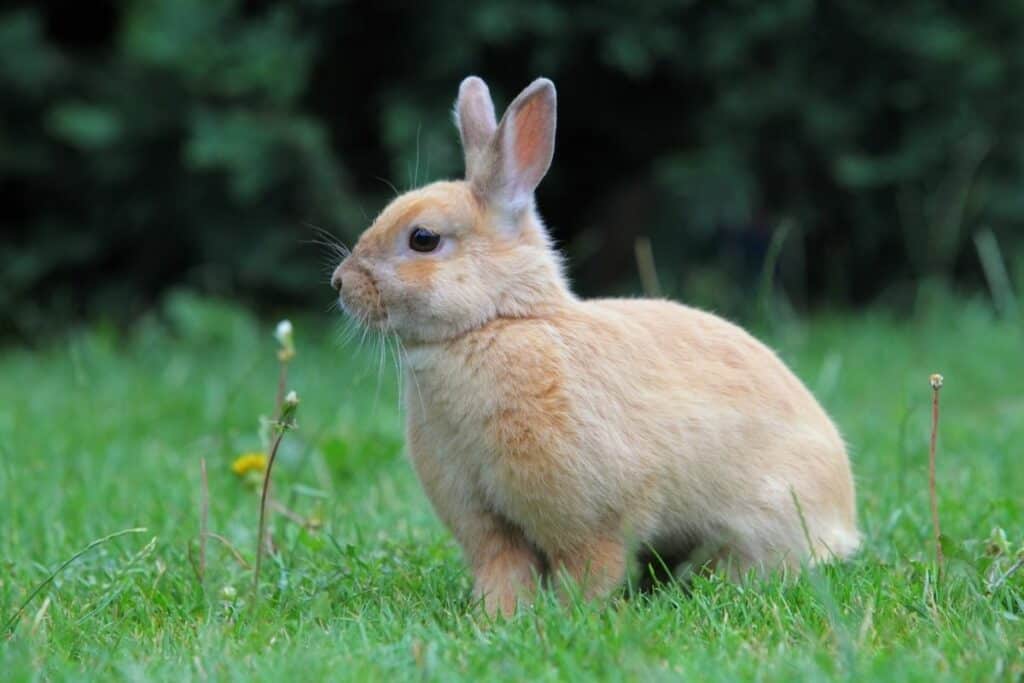
Rodents, Rabbits, and Deer
Rabbits and rodents like mice and squirrels can gnaw through the shells of pumpkin fruits to enjoy the flesh within. If you live in colder regions, you can grow peppermint around your pumpkin patch to keep these pests away.
In warmer regions, you can soak cotton balls in peppermint oil and place them inside mason jars covered with a mesh net. Spread them around your garden and moisten the cotton balls with peppermint oil as needed.
Deer will also feed on the pumpkin fruits and leaves. You can place a fence around your garden to keep deer away.
Cucumber Beetles
Cucumber beetles are yellow-and-black striped or spotted beetles that become active around the same time you plant your pumpkins. The larvae feed on the roots and stems, whereas the adults feed on the leaves, flowers, and fruits.
The damage caused by cucumber beetles can easily be overcome by a healthy plant. The main issue arises from the beetles’ propensity to carry bacterial wilt disease.
Start your seeds indoors and plant trap crops (other cucurbit plants) in your garden before transplanting the pumpkin. The Hubbard squash or other summer squash varieties will work.
You can then eliminate the beetles as they gather using a neem oil spray. Spray the solution generously throughout the foliage of the trap crops and the soil. Do this weekly for 3-4 weeks before transplanting your pumpkin seedlings.
Diseases
Bacterial Wilt
As discussed, bacterial wilt (Xanthomonas cucurbitae) is a disease carried by cucumber beetles from one plant in the Cucurbit family to another.
The symptoms are small tan spots that may be surrounded by a yellow halo. The disease will damage the plant’s vascular system, inhibiting moisture and nutrient transport. The plant will then eventually wilt and die.
There’s no cure for bacterial wilt. You must uproot affected plants, collect fallen debris, and dispose of them. If your locality allows burning plants, you can do so to eliminate the disease. Avoid adding infected plants to your compost pile.
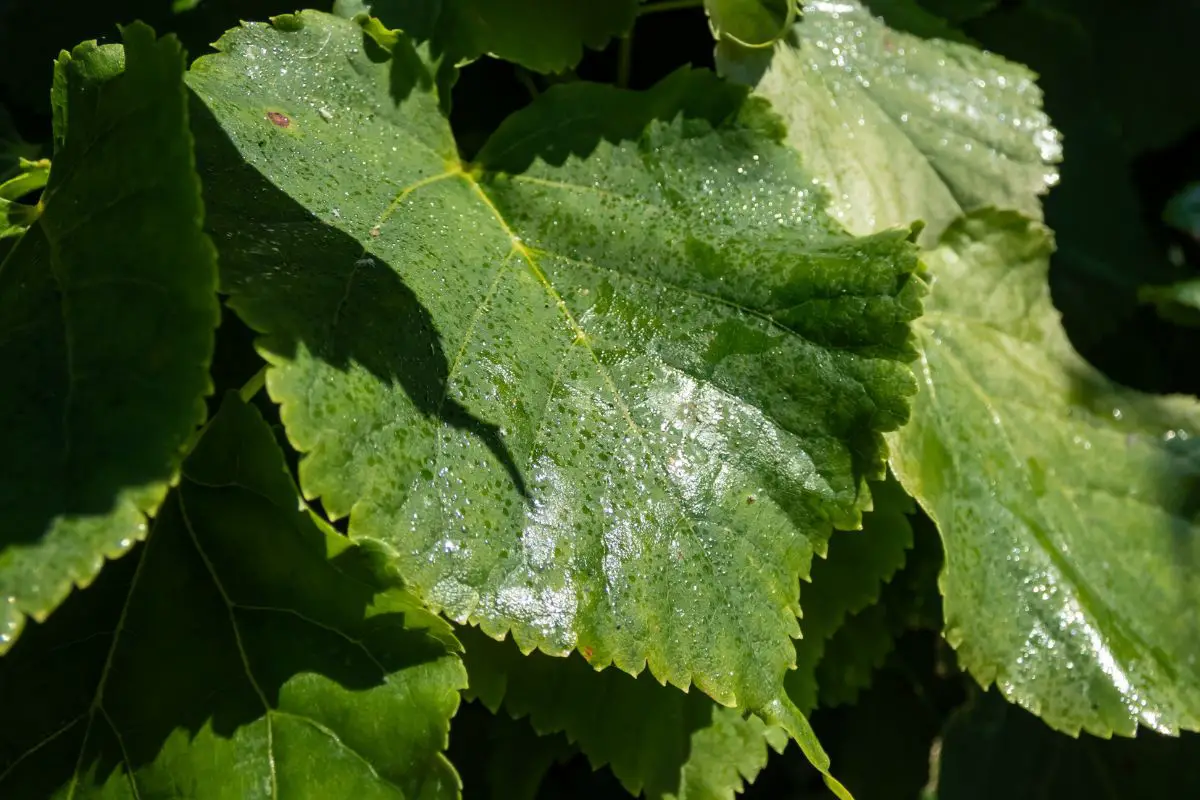
Powdery Mildew
Powdery mildew (Podosphaera xanthii) is a common plant disease that occurs primarily in humid areas or when the foliage remains wet for extended periods. You can easily identify the disease through the white, powdery growth over the leaves.
In severe cases, the plant won’t be able to photosynthesize enough to generate food and your pumpkin fruits will become deformed.
Proper spacing and watering practices are crucial to preventing this disease. You can also grow resistant varieties, including ‘Mustang’, ‘Charisma’, and ‘Magician’.

Mosaic Viruses
Several mosaic viruses that infect cucumbers, watermelons, and zucchinis can also affect pumpkins. Symptoms in young plants include distorted leaves. The plant will continue to have stunted growth and even if it does produce fruits, they will be distorted too.
Unfortunately, there are few mosaic-virus-resistant pumpkin varieties, such as ‘Magician’ and ‘Rascal’. You must dispose of the infected plants to prevent the spread of the disease. You may also reduce the risk by addressing aphid infestations in your garden.
Anthracnose
Anthracnose is a common disease among all members of the Cucurbit family. It is caused by the fungus Colletotrichum orbiculare, which is active during warm and wet summers.
The disease manifests as brown or black circular spots that cut through the leaves and black spots on the fruits about ¼ inch (0.63 cm) wide and deep.
Infected plants cannot be treated, and all parts and debris must be destroyed. Avoid growing Cucurbit plants in the same soil for at least 3 years to prevent the same issue from happening.

Blossom End Rot
In addition to the usual NPK fertilizer, pumpkins also need trace amounts of calcium. Lack of calcium can cause blossom end rot in developing fruits. The ends of the affected fruits will turn brown or black, and the rinds and the flesh will feel mushy and sticky.
To prevent the issue, ensure that the soil pH doesn’t go below 6.0, which can reduce calcium availability. Moreover, choose a liquid NPK fertilizer with micronutrients like calcium and magnesium.
Excess nitrogen during the fruiting period will also contribute to this problem so it’s crucial to switch to a low-nitrogen fertilizer as the flowers appear.
Downy Mildew
Downy mildew affecting members of the Cucurbit family is mainly caused by the fungus Pseudoperonospora cubensis. It’s common during the warm and wet summers, especially if the pumpkin leaves lack proper ventilation.
Early signs of the disease include yellow angular spots on the leaves that gradually merge and become brown. After a rain, you may notice brown fuzzy growths on the undersides of the leaves. These are the fungal spores that may spread to nearby plants.
For large pumpkin farms, trained farmers with appropriate protective equipment apply fungicides containing chlorothalonil to address early detection of downy mildew.

You can also use the same in your vegetable garden as long as you wear skin and eye protection during use and follow the product instructions carefully. Note that fungicides containing chlorothalonil can leach into the groundwater and affect aquatic life.
If half the plant’s foliage shows yellow spots, it’s best to destroy your plant entirely to prevent the spread of the disease. Wait 3 years before growing another Cucurbit plant in your garden.
Pro tip: You can avoid all of the health issues above by pruning and training your pumpkins. I’ll go into more detail in the section below.
Pruning and Training
Many pumpkin varieties grow on long vines. Even bush types grow low, and you’ll soon find the foliage and fruits sitting on moist soil. You can protect the foliage and fruits from excess soil moisture by applying up to 2 inches (5 cm) of organic mulch.
Straw is the best mulch for pumpkins because it can keep the soil cool and moist during hot days. In addition, straw doesn’t hold moisture, so the foliage and fruits remain dry above the mulch layer.
You can also avoid excess moisture-related issues by pruning and training your pumpkins to grow on a trellis.
These practices present the following benefits:
- Better air circulation
- Maximized space
- Reduced risk of diseases
- Protection from ground pests
- Ease of harvest
- Larger fruits
- Protection from excess moisture
Follow the steps below on how to prune and train your pumpkins:
Pruning
You can start pruning your pumpkin vines in the middle of summer or as soon as you see fruits forming.
- Locate the main vine. You will recognize it if you trace it from the base of the plant, which is where you sowed the seed.
- Measure 10-12 feet (3-3.6 m) along the main vine. Check if there are any fruits beyond that point and decide if they’re worth keeping. Fruits less than the size of your fist are unlikely to grow big enough by fall harvest so you can discard them.
- Cut the growing end of the main vine at the 10th-12th mark. The cut portion will no longer grow back.
- Locate the secondary vines sprouting along the length of your main vine and cut off the flowers or small fruits on them. This will help the plant focus on the development of the larger fruits along the main vine.
- Find the tertiary vines growing out of the secondary vines. Feel free to cut them off because they don’t serve any special functions.
Training
You can train both vining or semi-bush-type pumpkins to grow upright along a trellis or cattle panel because they have tendrils, which they use to wrap around supporting structures.
Here’s how:
- As your plant grows a foot (30 cm) tall, place a trellis or cattle panel around 4-6 inches (10-15 cm) away from the base.
- Locate the main vine and tie it loosely against the support using a soft tie.
- If you see tendrils, try to wrap them around the structure. They will naturally hold on to the structure as they grow longer.
- Add more soft ties as the plant grows longer if the tendrils are not automatically wrapping around the structure. Be patient because your pumpkins will naturally grab onto any vertical support.
- As the plant bears fruits, create makeshift hammocks underneath the fruits to keep them from falling off. Use breathable materials like stockings or mesh bags. Tie the ends of the hammock on the cattle panel or trellis.

Harvesting Pumpkins
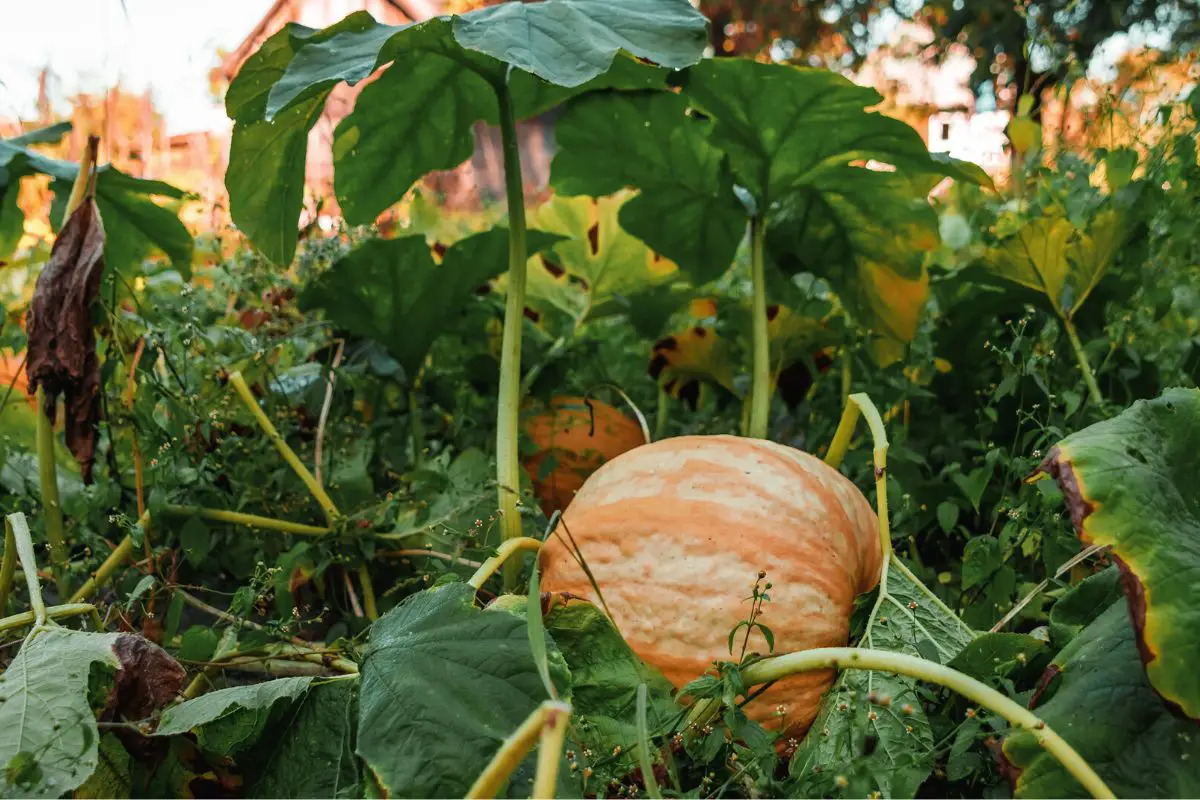
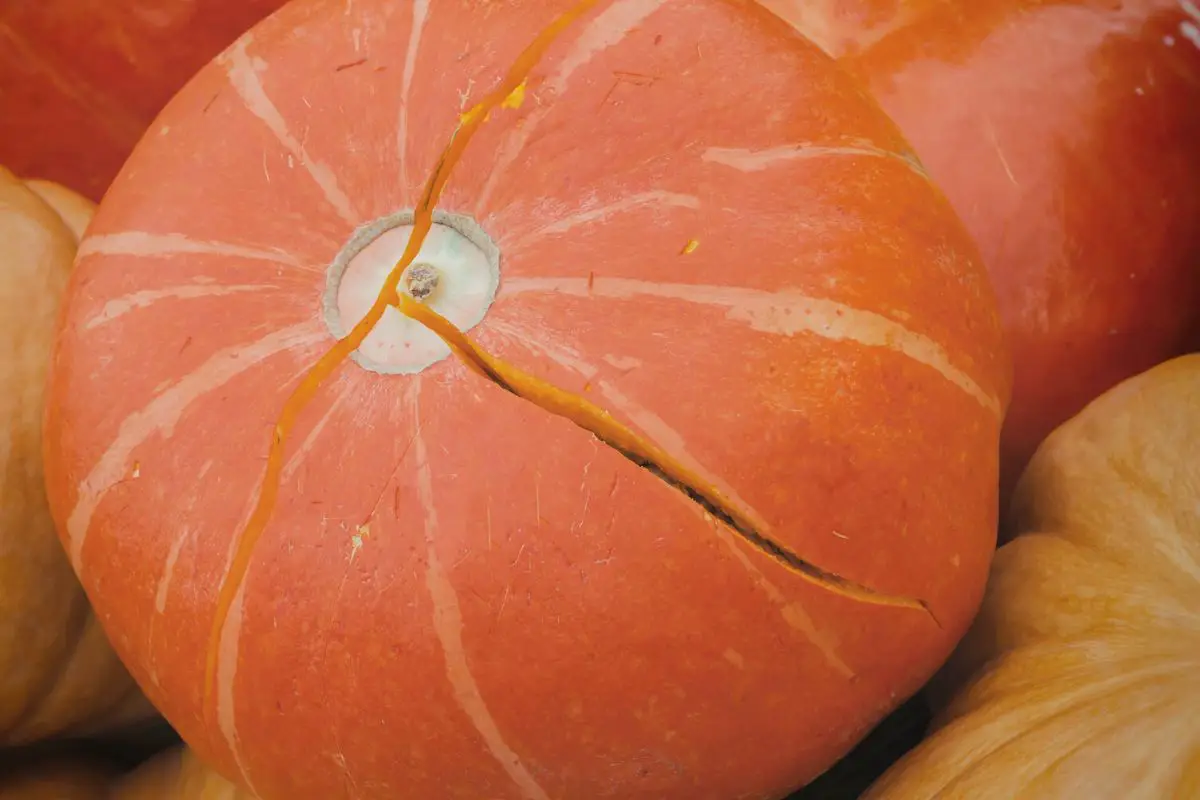
You will know your pumpkins are ready for harvest when you see the following signs:
- The fruit has a uniform coloration based on the variety. For instance, ‘New Moon’ is entirely white, and ‘Jack O’Lantern’ is completely orange.
- Your fingernail cannot form a dent through the hard outer shell.
- The vines and foliage are drying up.
If your pumpkin shows the above signs, wait until 2-3 days after the rain or watering session before harvesting your pumpkins. Avoid harvesting the fruits when they’re still wet to avoid rotting while in storage.
I sometimes wait until the first light frost kills off the plant before harvesting my pumpkins. This should be fine as long as you keep your plant safe from pests and excessive moisture.
Here’s how to harvest and store your pumpkins:
- Use a sharp knife or pruning shears to cut off the stem. Leave 2-4 inches (5-10 cm) of stub on top of the fruit.
- Leave the pumpkin in a warm room (80 °F or 27 °C) with high humidity (60%) for 10 days to cure.
- Move the pumpkin to a cooler room (50-55 °F or 10-13 °C) with moderate humidity (50%). Your pumpkin should last 2-3 months under these conditions.
Harvesting and Storing Pumpkin Seeds
Collecting pumpkin seeds from a healthy, disease-free fruit is an excellent way to ensure that your next batch of pumpkins will be as healthy. You can also share these seeds with your family or friends.
To harvest and store the seeds, follow the steps below:
- Collect the seeds from the fruit using a spoon.
- Remove the flesh from the seeds by rubbing them between your fingers under cool, running water. Depending on the variety, the seeds should be white or green.
- Spread the seeds over a mesh pad or thin cloth and leave them in a room with good ventilation for 3-5 days or until they’re completely dry.
- Place the dry seeds in an airtight container and store them inside your refrigerator’s crisper drawer.
Pumpkin seeds stored this way will last up to 4 years but the viability will decrease with each passing year.
Test the viability of the seeds by doing the float test. Simply drop a few seeds in a cup of clean water and wait for 15 minutes. Seeds that sink to the bottom are viable, while those that float aren’t.

Common Mistakes to Avoid
Although pumpkins are relatively easy to grow, there are plenty of errors new and experienced gardeners might encounter.
Here are some common mistakes to avoid when growing pumpkins:
- Inadequate Lighting: Avoid growing pumpkins near tall trees or structures that can cast unwanted shade. As sun-loving, warm-season plants, pumpkins need full sun to grow healthily and bear flowers and fruits.
- Discouraging Pollinators: Avoid using pesticides that will discourage beneficial insects and pollinators from visiting your garden.
- Planting too Close to Other Plants: Pumpkins need plenty of space to grow. Planting them too close to other plants will increase the risk of moisture-related pests and diseases.
- Overplanting Seeds: Pumpkin seeds need an inch (2.5 cm) of space between them. It’s important to thin the seedlings before their roots entangle with each other. Crowded seedlings will compete for moisture and nutrients, resulting in stunted growth.
- Ignoring Pests and Diseases: Early detection of pests or diseases is crucial to saving your entire batch of pumpkins. Ignoring them will lead to crop failure and will render your garden patch unavailable for growing pumpkins and related crops for the next 3 years.
- Underwatering: Pumpkins grow during the peak of summer and need plenty of moisture to support the developing flowers and fruits. Lack of water will result in premature fruit and leaf drops.
- Harvesting Too Early or Too Late: Premature harvests usually have a soft shell, causing them to rot within a few weeks. On the other hand, leaving your pumpkins in the ground for too long also increases the risk of rot due to prolonged exposure to moisture from the rain or morning dews.
Final Thoughts
Pumpkins are easy to grow in a home garden as long as you have enough space to accommodate their aggressively growing vines. They require plenty of space, sunlight, and moisture for the best yield.
They’re susceptible to many pests and diseases common among their Cucurbit family, such as cucumber beetles and powdery mildew. You can grow trap crops or resistant cultivars to protect your precious pumpkins.
Try planting a pumpkin in your garden next summer, and you might be surprised how easy and fun they are to grow!