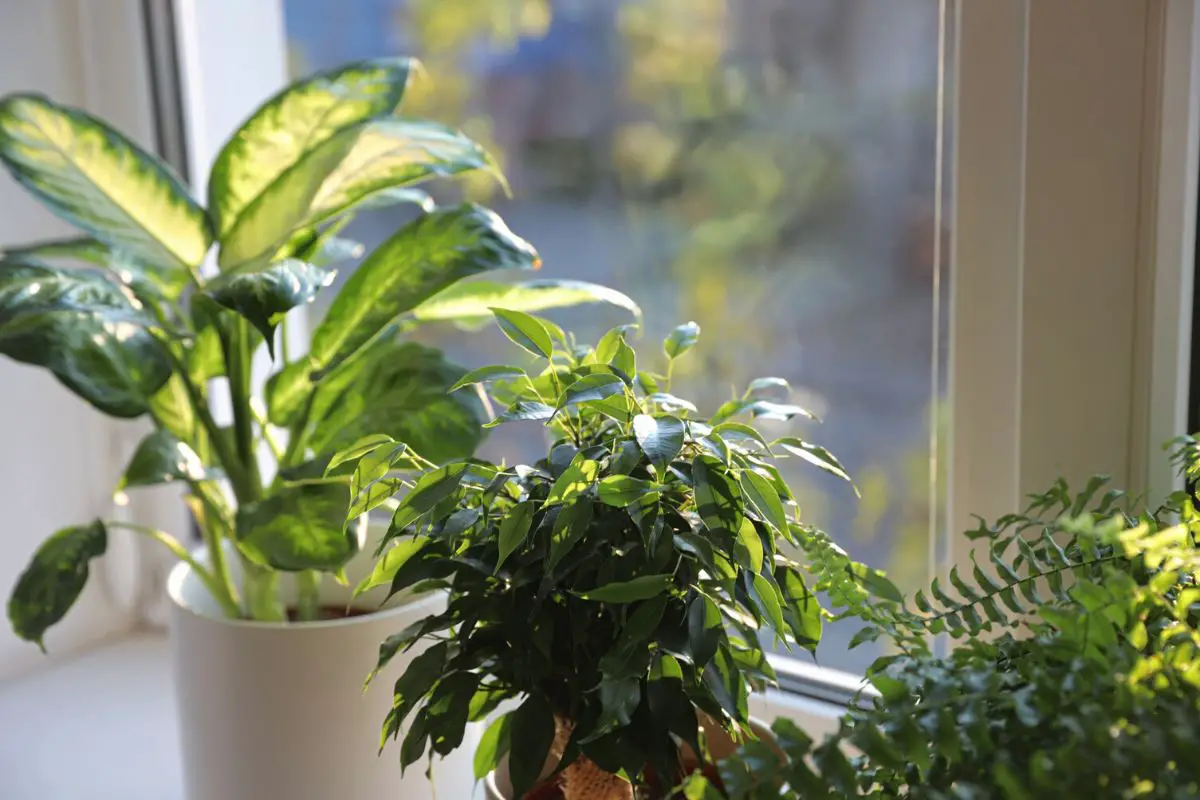
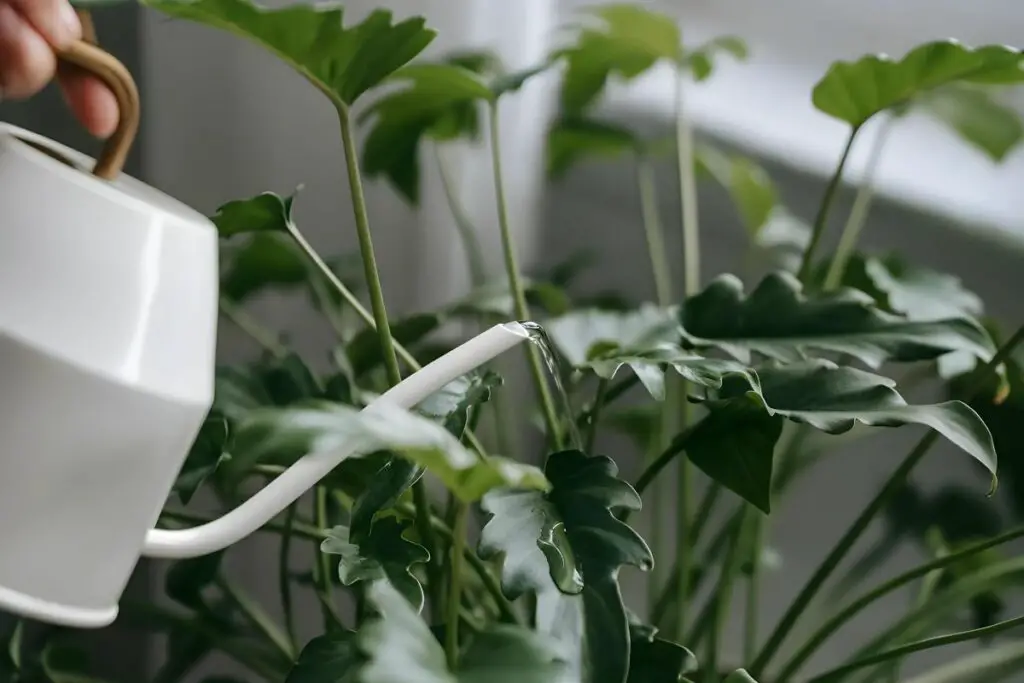
Water is vital for plant life, but each plant has a different moisture requirement. Overwatering is a common problem among beginner and enthusiastic gardeners, especially in indoor gardens with a mix of drought-tolerant and moisture-loving plants.
Overwatering can lead to yellowing, browning, or dropping leaves. Overwatered plants also become stressed and more susceptible to damage from pests and diseases. In severe cases, plants may succumb to root or stem rot and die.
The early signs of overwatering are similar to dehydration or sunburn, so it’s common to make mistakes in the treatment method. It’s important to distinguish the signs correctly to prevent long-term damage to plants. This article will explore the symptoms and causes in detail and provide you with practical solutions to save your plant.
Overwatering in Houseplants: An Overview
Overwatering is a gardening mistake where there’s much more water than the plant roots can absorb.
If overwatering occurs only once and your houseplant is kept in well-draining soil, the extra water will be lost through any of the following ways:
- Exit through the drainage holes
- Evaporation from the soil surface
- Wicked away from the sides of a breathable pot
- Released as vapor from plant transpiration or in liquid form through guttation
However, if done frequently or if the excess moisture has no way out and stays in the soil for extended periods, it can cause the following issues in progression:
- Water will block soil pores, preventing oxygen from reaching the plant’s roots.
- The suffocated roots can’t send enough moisture or nutrients to the shoots aboveground, causing the leaves to turn yellow or wilt.
- Wet conditions will encourage the growth of rot-causing fungi.
- These fungi will feed on the suffocated and weakened roots, causing decay.
- The rot or decay will gradually move up to the plant’s crown and stem.
- The plant eventually dies.
Symptoms
It’s crucial to diagnose overwatering quickly for better chances of saving your plant.
Wet Soil
The surface of the potting mix should feel damp or dry about 3 days after watering your plant. In most cases, the top inch (2.5 cm) should be completely dry within 5-7 days.
If the soil surface or the top inch (2.5 cm) remains wet 3-7 days after watering, then there’s a problem with water infiltration and drainage. The roots will be sitting in waterlogged soil for too long.
Water-Soaked Spots
When there’s too much water in the soil, the pressure in plant cells increases, causing them to swell. You may notice water-soaked spots along the stems or the leaves. Eventually, these spots can burst and leave blisters.
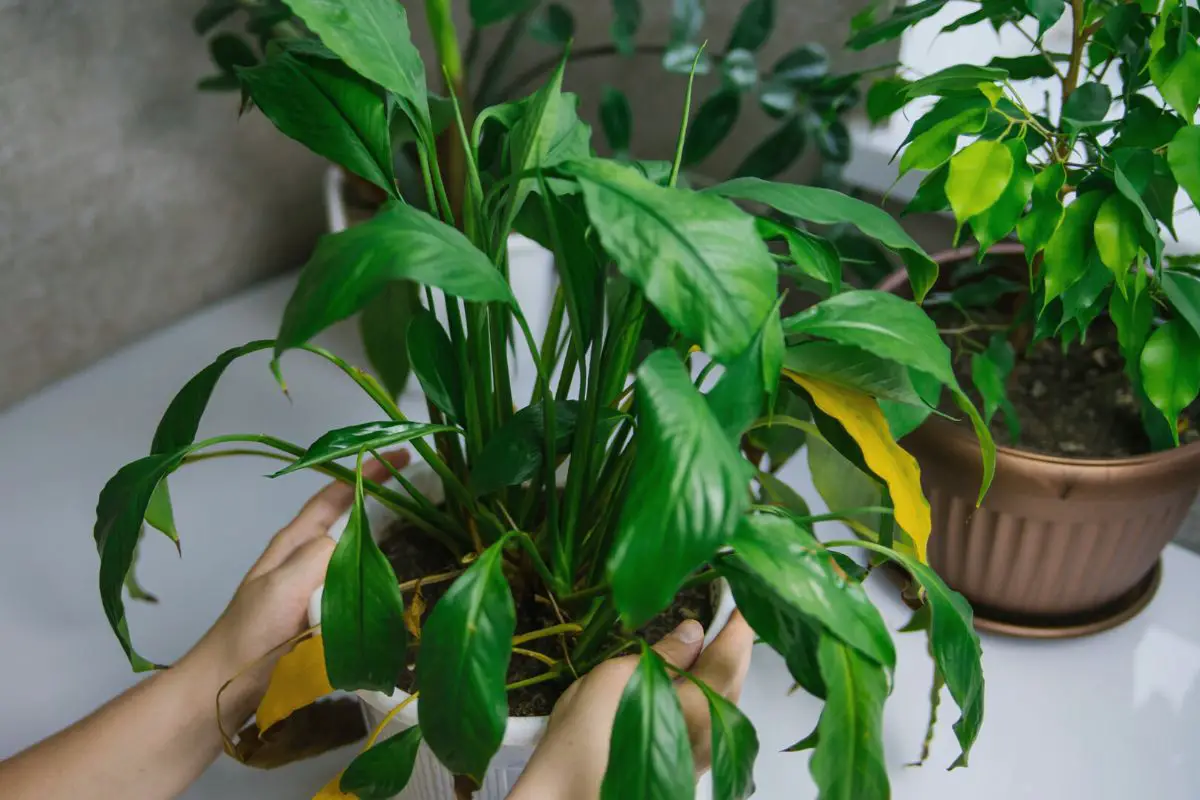
Yellowing Leaves
As the overwatering problems progress, the weakened roots can’t deliver moisture or nutrients to the leaves. The lack of magnesium, nitrogen, or iron will cause the leaves to turn yellow.
Browning Leaves
In many cases, the water-soaked leaves burst and turn brown and mushy. This is a good way to distinguish overwatering from underwatering.
However, in case of severe root damage, the plant will show signs of dehydration. Eventually, the yellowed leaves will turn brown and crisp.
Wilting
The leaves eventually lose the remaining moisture in their cells and start wilting. Succulents may resist this for a little longer and may only show stress through wrinkled leaves.
As the problem progresses without timely fixes, the plant stem will also appear weaker and start wilting or drooping.
Dropping Leaves
Overwatering can cause houseplants to feel stressed. Some plants, such as the jade plant, are prone to shedding leaves when stressed. They may drop any yellow, brown, or even healthy green leaves.
This is a defense mechanism that helps them limit the amount of foliage to heal or maintain.
Soft, Mushy Stems or Roots
Chronic overwatering will eventually lead to root rot and a mushy, unstable plant base.
You may observe the following signs when the issue progresses to this stage:
- The stem will feel soft and mushy.
- The plant may lean due to a weaker structure.
- The roots will appear slimy, brown, gray, or black.
- The roots feel mushy and fall apart with a simple tug.
- The decaying parts may also give off a foul, rotten smell.
Mold or Algae Growth
Occasionally, you may see mold or algae growing on the soil surface. They serve as a clear indicator of excessive moisture in the soil.
Algal spores can contaminate your water supply and lay dormant in your potting soil when you water your plant. On the other hand, airborne fungal spores can spread within your household and land on your houseplants but remain undetected.
When they receive consistent moisture, the spores mature and proliferate.
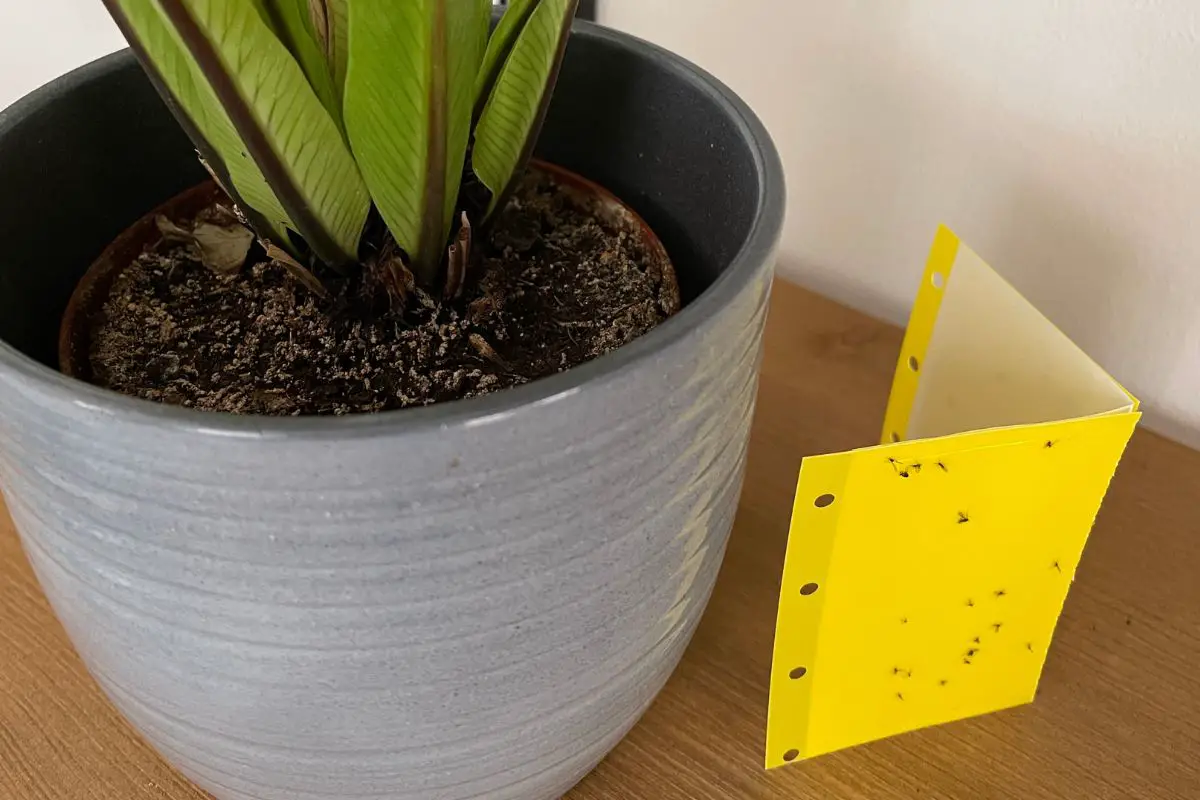
Presence of Pests
Overwatered plants are weak and prone to pests. Pests like fungus gnats fly over houseplants looking for constantly moist soil to lay their eggs in. The eggs require moisture to hatch and release larvae. The larvae will then feed on the decaying plant roots, further weakening the plant.
Plant sap feeders may also be attracted to the water-soaked leaves and stems.
These pests include:
- Aphids
- Mealybugs
- Spider mites
- Scale mites
- Whiteflies
Stunted Growth
The damaged roots can’t provide nourishment to the shoots aboveground, so the plant’s metabolic activities are severely impaired. As a result, the plant grows very slowly or even stops growing entirely.
Plant Death
If the damage is too severe, the plant will eventually die. There are two ways to confirm if your plant is dead:
The Snap Test
Plants that are alive with enough moisture in their stems or branches should be pliable. The snap test will help quickly determine how much the plant has dried out.
- Hold a branch between your thumb and forefinger and pinch it. If the branch breaks between your fingers, it means the plant has dried out thoroughly from that point.
- Hold the stem with two hands and try to bend it. If it snaps from little pressure, it means the plant can no longer be revived.
If your plant is still pliable, you can pluck out the dried or damaged leaves and repot the plant. I’ll discuss this treatment in more detail later.
The Scratch Test
You can also check the moisture within the stems using the scratch test. Use your fingernail to scratch a paper-thin layer off the stem or bark on multiple spots from top to bottom. You can use a coin or a sterile knife when checking plants with toxic sap, such as the ZZ plant.
If the inner layer appears green and still juicy, the plant is still alive. On the other hand, a brown, crisp inner layer means the plant has dried out.
Causes
Here are the causes of overwatering:
Frequent Watering
Many online sources recommend watering certain houseplants once a week or once every two weeks. Remember that there’s no one-size-fits-all approach when it comes to watering.
Some houseplants grow in soil with more moisture-retaining materials, while others are in fast-draining substrates. It’s important to make separate watering schedules when caring for different types of plants to avoid overwatering those that prefer a bit of dry soil.
Poor Drainage
Poor drainage in the potting mix and container can keep the plant roots unnecessarily wet for too long.
Here are some indoor gardening mistakes that can lead to overwatering:
- Using poor-draining soil: Garden soil is too compacted and holds too much moisture for potted houseplants. It may also harbor some pathogens that can hurt your plants. Potting mixes containing large portions of peat moss or vermiculite can also hold too much water and drown the roots.
- Planting in containers without proper drainage holes: Some beginner gardeners may focus on aesthetics and go for decorative pots without drainage holes. Unfortunately, the excess moisture will remain in the container and increase the risk of root rot.
- Using an oversized pot: Repotting every 1-3 years is an essential part of indoor gardening. Some people may try to use larger pots to delay repotting by a few more years. However, it also means there’s too much soil that can hold excess moisture and keep the roots moist for too long.
- Choosing improper pot materials: Decorative pots like plastic and ceramic come in various designs, making them attractive for indoor gardeners. Remember that these materials aren’t breathable and excess moisture can remain in the pot longer. It’s important to choose ones with drainage holes and be extra careful with how you water your plants.
Lack of Understanding Plant Needs
Sticking too strictly to a watering schedule without sufficient understanding of your plant’s moisture needs can lead to overwatering problems.
Note that different plants require different watering frequencies:
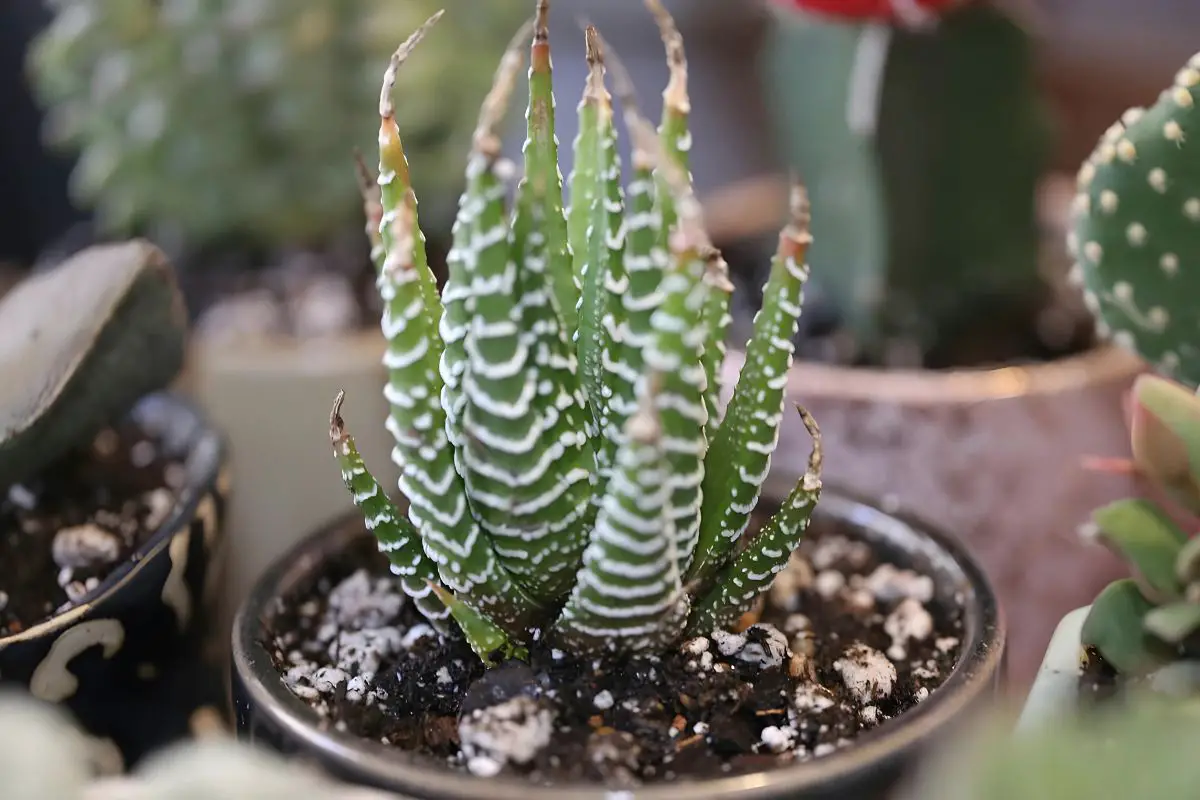
- Drought-tolerant plants like cacti and succulents have fragile roots, making them more susceptible to root rot when kept in wet conditions. On average, they can go 2-3 weeks between watering sessions. They need the soil to be almost completely dry before watering.
- Plants with average watering needs prefer a bit of dry soil between watering. Ideally, you should wait until the top 2-3 inches (5-7.6 cm) of the potting mix is dry. When planted in an appropriate potting mix, they can benefit from weekly deep watering.
- Moisture-loving plants like indoor ferns and prayer plants like more frequent watering. They need water as soon as the top 1-2 inches (2.5-5 cm) of the soil is dry. However, their roots will rot if you keep them in soggy soil at all times.
A plant may also have varying water needs depending on the growth stages.
- Seeds and seedlings need constantly moist soil to establish roots.
- Mature plants need less frequent watering because they have more extensive roots and sturdy shoots.
- Flowering or fruiting plants need more water if you want them to bloom or bear fruits indoors. Conversely, they will need less water as the fruits ripen.
- Many houseplants enter dormancy or a period of slower growth in the fall or winter. Some spring-flowering perennials go dormant in summer. During dormancy, plants typically need less frequent watering.
Improper Environmental Conditions
Numerous environmental factors outdoors can dry out the soil more quickly, such as intense sunlight, wind, and the roots of neighboring plants.
Indoors, the soil of potted houseplants can remain wet if kept in suboptimal conditions, including:
- Higher humidity
- Lower temperatures
- Lower light intensity
- Poor air circulation
The above conditions may also prompt your plants to slow down metabolic activities, further delaying moisture loss.
Fixes and Solutions
You can fix overwatered houseplants depending on the severity of the damage to the roots and foliage.
Placing the Pot Over Dry Paper Towels
Placing the pot over dry paper towels can quickly dry out the soil of a lightly overwatered plant. Make sure the paper towels are in contact with the potting mix so they can absorb the excess moisture from the drainage holes. Replace the towels once they’re soaked.
Adjusting Watering Schedules
Once you confirm that you’ve been overwatering your plant, wait for the potting soil to dry out enough before watering it again.
Make it a habit to check the soil moisture before watering your plant, record how long it takes to dry out enough and make a rough schedule based on that.
Here’s a simple guide I go by that works on my houseplants:
- Seeds and seedlings: Keep the top inch (2.5 cm) of the soil moist until they’re ready for transplant.
- Plants with average moisture needs: Water when the top 2-3 inches (5-7.6 cm) is dry.
- Moisture-loving plants: Water as soon as the top 1-2 inches (2.5-5 cm) is dry.
- Cacti and succulents: Wait until the top half of the potting mix is dry.
The changing seasons may also affect indoor temperatures, lighting, and humidity. Therefore, it’s important to adjust your watering schedule accordingly.
Adjusting Light Conditions
Here’s a guide to the different levels of light requirements of plants:
- Full sun: At least 6 hours of direct sunlight daily
- Partial sun: 4-6 hours of direct sunlight
- Dappled sun: 4-6 hours of filtered sunlight (gaps between tree canopies)
- Partial shade: 2-4 hours of direct sunlight or filtered light throughout the day
- Deep shade: Less than 2 hours of sunlight
Most houseplants thrive in conditions similar to dappled sun or partial shade, where they receive bright, indirect light throughout the day.
This lighting is available 4-8 feet (1.2-2.4 m) away from a bright window. Since every house and window design and location is different, you can move the pot closer or farther or hang sheer curtains until you find your plant’s comfort zone.
On the other hand, flowering and fruiting plants need direct sunlight to bloom or produce fruits and prefer sitting close to an eastern or southern window all day.
You must adjust your plant’s light exposure based on the extent of damage or the treatment used.
- For minor and occasional overwatering problems that were detected before the plant showed signs of stress, you can raise the plant’s light intensity requirement by one level. You can do this by moving your plant around 2 feet (60 cm) closer to the bright window, as it will help dry out the soil faster. Move the plant back to its initial spot once the top inch (2.5 cm) has dried out.
- If the damage is severe and requires repotting, place the newly repotted plant in a spot where the light intensity is one level lower. For instance, choose a spot 2 feet (60 cm) farther from its initial position or hang a sheer curtain against the window. You don’t want to cause sun stress to a plant that’s still recovering from overwatering or root rot.
Move your plant back to its initial spot when you see signs of recovery or improvement.
Improving Airflow
If the soil takes a long time to dry out due to high humidity, you can open the windows during mild weather to enhance the air circulation around your plants.
Alternatively, you can improve the airflow by using electric fans. Just make sure the fan isn’t blowing directly toward your plant to prevent your plant from getting damaged because of the draft.
Maintaining Optimal Temperatures
Each houseplant has an optimal temperature requirement to keep it thriving. Keeping your plant in stable condition will help it recover. For instance, if your plant prefers a range of 65-85 °F (18-29 °C), keep the temperature at around 75 °F (24 °C).
Avoid exposing your plant to extreme temperatures because it can delay recovery.
Keep your plant away from areas where temperatures tend to fluctuate significantly throughout the day, such as:
- Vents
- Drafty windows and doors
- Frequently used appliances that can heat up
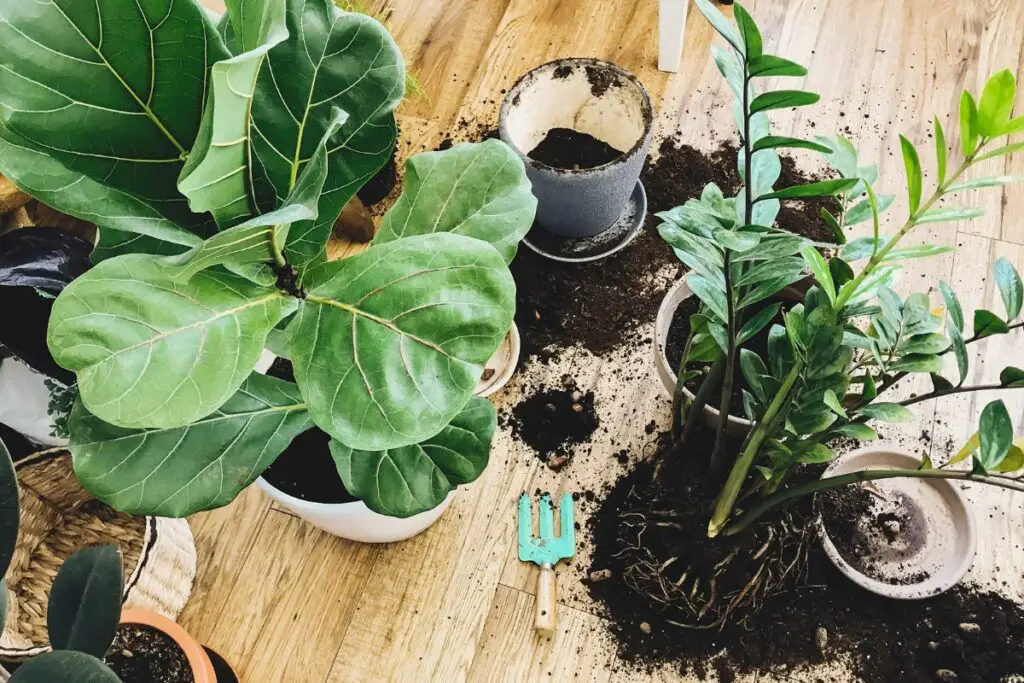
Repotting
If the soil has poor drainage, adjusting the watering schedule might not be enough to fix the issue. In this case, it’s best to repot your plant in fresh soil mix with better drainage. I also recommend choosing a suitable pot.
Improving Soil Drainage
The most effective way to improve soil drainage is to add porous materials, including the following:
- Perlite
- Pumice
- Coarse sand
Moisture-loving plants can benefit from a soil mix that contains 25-50% porous material. Cacti and succulents, on the other hand, prefer 60-70% of their soil mix to be porous.
I also recommend adding at least 10% high-quality compost to the potting mix to introduce organic matter and beneficial microbes. It will also provide your plant with a gentle dose of nutrients as it recovers.
Choosing the Right Pot
Here are some tips for choosing the right pot to prevent waterlogging:
- Use pots with adequate drainage holes.
- Go for unglazed terracotta or clay pots because they are breathable.
- Choose a pot that’s only 1-2 inches (2.5-5 cm) wider and 2-3 inches (5-7.6 cm) deeper than the rootball.
Step-by-Step Guide
Once you’ve prepared the suitable pot and soil mix, follow these steps to repot your plant:
- Moisten the soil mix and fill the bottom 2 inches (5 cm) of the new pot with it.
- Check the soil moisture around the overwatered plant. If it’s still too wet and you’re worried about root rot, carefully unpot the plant by sliding it out. Alternatively, scoop out the rootball with one hand while tilting the pot with the other.
- Rinse the old soil away with gentle running water.
- Inspect the roots for signs of damage.
- Use sterile shears to trim away any soft, black, or mushy roots.
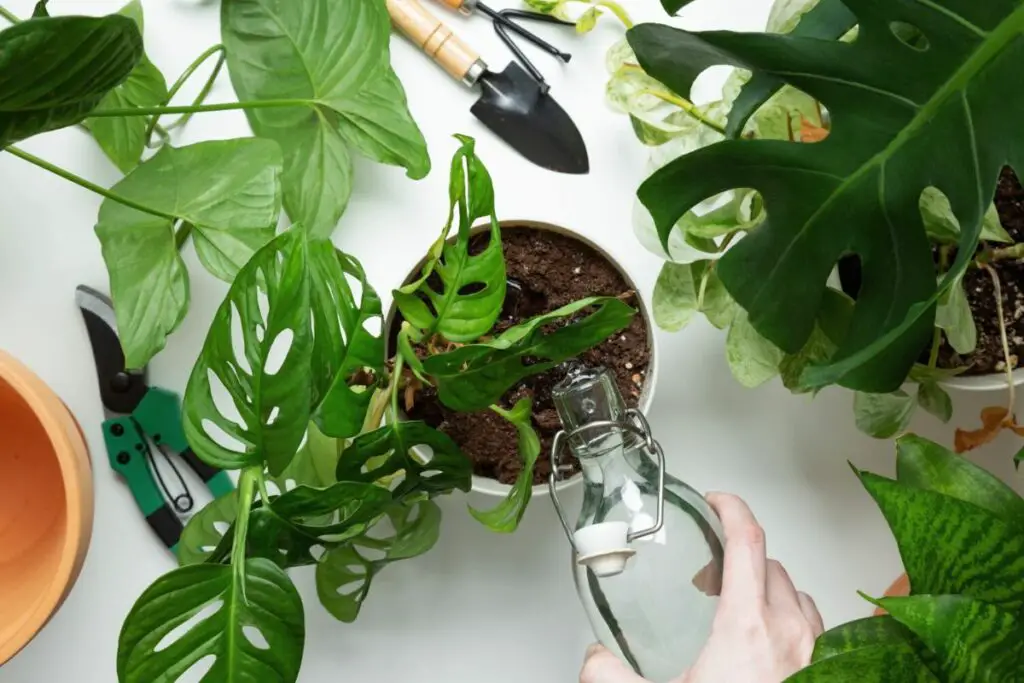
- Soak the roots in 1% hydrogen peroxide solution for 10 minutes to eliminate remaining pathogens and oxidize the suffocated roots.
- Gently wipe the roots dry with a clean towel and air dry over paper towels for up to 30 minutes.
- Place the plant over the fresh soil in the new pot and fill in the gaps with moist soil.
- Gently tamp down the soil to keep the plant firmly in place.
- Place the pot in a slightly dimmer location than before. You can move it 2 feet (60 cm) farther from the window.
- Wait until the top 1-2 inches (2.5-5 cm) of the soil is dry before watering the plant deeply. Don’t allow the soil to dry out completely because it can lead to transplant shock.
- Let the excess moisture drain out of the holes before placing your plant back on its spot or saucer.
- Refrain from fertilizing the plant until the next growing season to prevent fertilizer burn. Allow the fragile roots to recover. The nutrients in the fresh potting mix with compost should be enough until your plant establishes new and healthier roots.
Monitoring Plant Recovery
You must keep your plant in its preferred indoor environment during recovery. Be mindful of its light, temperature, and humidity requirements, which can vary depending on the species.
Depending on the severity and the fixes applied, it usually takes overwatered plants between 1-3 weeks to show signs of recovery. The plant’s recovery rate will depend on its overall health before the remedy and the season. Plants repotted outside of the growing season can take longer to recover from transplant shock.
While waiting for your plant to bounce back, remember the following tips:
- Remove dead leaves from the soil surface as they fall.
- Avoid over- or underwatering your plant. Check the soil 5 days after watering (10 days for cacti and succulents) to see if it’s dry enough and water your plant as needed.
- Water the plant deeply and ensure there’s no water pooling in the saucer.
- Avoid stressing your plant by relocating it too abruptly. Keep your plant in the same spot, ideally away from drafty windows and vents.
- Rotate the pot by 90-180° degrees every time you water it to ensure even light exposure throughout the plant.
- Manually remove pests using tweezers or cotton swabs as soon as you spot them and drop them in soapy water.
Preventative Measures and Best Practices
Overwatering problems are avoidable with good and consistent gardening practices; here are some things to remember:
Understanding Plant Water Needs
Each plant has unique soil and moisture requirements. It’s important to research your plant’s moisture needs before acquiring it.
The table below shows a brief guide about common houseplants:
| Plant | Soil Drainage | Watering Frequency |
| African Violet (Saintpaulia ionantha) | Slow | Weekly Top inch (2.5 cm) is dry |
| Air plant (Tillandsia spp.) | Soilless | Every 1-2 weeks Soak the plant in water for an hour |
| Aloe vera (Aloe vera) | Fast-draining | Every 2-3 weeks Top half of the pot is dry |
| Anthurium (Anthurium andraeanum) | Moderate | Weekly Top 2 inches (5 cm) are dry |
| Cast Iron Plant (Aspidistra elatior) | Moderate | Weekly Top 2 inches (5 cm) are dry |
| Chinese Evergreen (Aglaonema modestum) | Moderate | Weekly Top 2 inches (5 cm) are dry |
| Cornstalk Dracaena (Dracaena fragrans) | Slow | Weekly Top inch (2.5 cm) is dry |
| Croton (Codiaeum variegatum) | Moderate | Weekly Top 2 inches (5 cm) are dry |
| Dieffenbachia (Dieffenbachia seguine) | Moderate | Weekly Top 2 inches (5 cm) are dry |
| English Ivy (Hedera helix) | Moderate | Weekly Top 2 inches (5 cm) are dry |
| Fiddle Leaf Fig (Ficus lyrata) | Slow | Weekly Top 2 inches (5 cm) are dry |
| Gardenia (Gardenia spp.) | Fast-draining | Every 10-14 days Top 2 inches (5 cm) or top half is dry |
| Jade Plant (Crassula ovata) | Fast-draining | Every 10-14 days Top 2 inches (5 cm) or top half is dry |
| Haworthia (Haworthia or Haworthiopsis spp.) | Fast-draining | Every 2-3 weeks Top half of the pot is dry |
| Heartleaf Philodendron (Philodendron hederaceum) | Moderate | Every 10-14 days Top 2 inches (5 cm) are dry |
| Lipstick Echeveria (Echeveria agavoides) | Fast-draining | Every 2-3 weeks Top half of the pot is dry |
| Lucky Bamboo (Dracaena sanderiana) | Slow | Weekly Top inch (2.5 cm) is dry |
| Majesty Palm (Ravenea rivularis) | Slow | 1-2 times a week Top inch (2.5 cm) is dry |
| Money tree (Pachira aquatica) | Moderate | Weekly Top 2 inches (5 cm) are dry |
| Monstera (Monstera deliciosa) | Slow | Weekly Top inch (2.5 cm) is dry |
| Nerve Plant (Fittonia albivenis) | Moderate | Weekly Top inch (2.5 cm) is dry |
| Pancake Plant (Pilea peperomioides) | Slow | Weekly Top 2 inches (5 cm) are dry |
| Parlor Palm (Chamaedorea elegans) | Moderate | Weekly Top 2 inches (5 cm) are dry |
| Peace Lily (Spathiphyllum spp.) | Moderate | Weekly Top 2 inches (5 cm) are dry |
| Pearl Echeveria (Echeveria elegans) | Fast-draining | Every 10-14 days Top 2 inches (5 cm) or top half is dry |
| Ponytail Palm (Beaucarnea recurvata) | Fast-draining | Every 2-3 weeks Top half of the pot is dry |
| Pothos (Epipremnum spp.) | Slow | Weekly Top 2 inches (5 cm) are dry |
| Prayer Plant (Calathea spp.) | Slow | Weekly Top inch (2.5 cm) is dry |
| Rubber Plant (Ficus elastica) | Moderate | Weekly Top 2 inches (5 cm) are dry |
| Snake Plant (Dracaena trifasciata) | Fast-draining | Every 2-3 weeks Top half of the pot is dry |
| Spider Plant (Chlorophytum comosum) | Moderate | Weekly Top inch (2.5 cm) is dry |
| String of Pearls (Senecio rowleyanus) | Fast-draining | Every 10-14 days Top 2 inches (5 cm) or top half is dry |
| Sword Fern (N. exaltata) | Slow | Every 2-3 days (hanging baskets) or twice a week in pots Top inch (2.5 cm) is dry |
| Tradescantia zebrina (Tradescantia zebrina) | Moderate | Weekly Top 2 inches (5 cm) are dry |
| Tree Philodendron (Philodendron selloum) | Moderate | Weekly Top inch (2.5 cm) is dry |
| Wax Plant (Hoya spp.) | Fast-draining | Every 10-14 days Top half of the pot is dry |
| ZZ Plant (Zamioculcas zamiifolia) | Fast-draining | Every 10-14 days Top half of the pot is dry |
Note: The watering frequency and measurements in the table are based on experience when using the appropriate, plant-specific soil mix.
Here are some examples of soil mix recipes based on drainage requirements:
- Slow-draining or moist: Contains 50% (or more) peat moss and/or vermiculite
- Moderate: Equal mix of compost, vermiculite/peat, and perlite/pumice/sand
- Fast-draining: Equal parts compost and perlite/pumice
Creating a Watering Schedule
It can be challenging to keep track of your plants’ watering schedules, especially if they have widely different watering needs.
You can create a flexible watering schedule by following these steps:
- In spring, water your plant gradually using cups.
- Count and record the number of cups it takes before the excess drains out of the holes.
- After 5 days, check the soil moisture. Keep checking and record how long it takes to dry out enough to warrant another watering.
- After about 3-4 watering sessions, you’ll have a more reliable watering schedule for the next 2-3 months.
- Set an alarm or phone reminder 2 days before the estimated watering schedule so you don’t forget to water your plant and ensure it doesn’t dry out too soon.
- Repeat the process as temperatures rise in the summer or drop in the fall and winter. This will help you adjust your schedule accordingly.
Soil Moisture Checks
Different soil mix formulations can also influence how quickly the soil dries out or how much moisture it can hold. Manually checking the soil moisture is a highly recommended gardening practice to prevent watering issues. Check the soil around 2 days before your estimated watering schedule.
You can use different methods to confirm the soil moisture:
Finger Test
The finger test is a straightforward approach. You can stick your forefinger into the soil to see how deep it has dried out. Each knuckle is estimated to be equal to an inch (2.5 cm).
The downsides of this method are that it can be messy and brings a risk of damaging shallow roots or bulbs.
Squeeze Test
The squeeze test is more invasive but can help you measure soil moisture more accurately. To do this, you must scoop out a handful of soil from the surface and squeeze it in your palm.
You can then gauge the soil moisture based on the following:
- Dry: The soil feels crumbly and looks lighter.
- Adequately moist: The soil has the consistency of a squeezed sponge. Some particles clump together, while others fall apart and appear fluffy.
- Wet: The soil is dark and holds its shape.
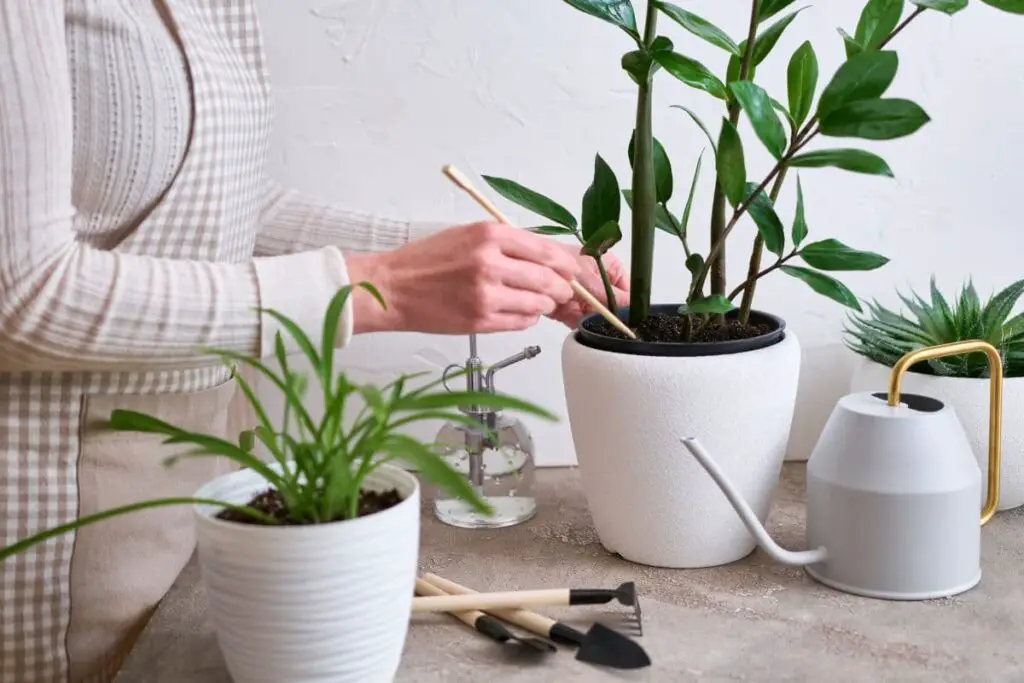
Chopstick Test
You can also use a wooden chopstick for minimal soil disturbance. Simply calibrate the chopstick by inches to check if it has dried out to your expected depth. You can poke the stick into 3-4 spots to ensure that the upper layer of the soil has dried out evenly.
Moisture Meter
Moisture meters can measure soil moisture more accurately. It works by sticking a metal probe into the soil, and the reader will point to a scale of 1-10 (from dry to wet). Each product usually comes with a guide on common houseplants and the reading at which you must water them.
Weight Check
Another simple method to check if the soil is dry enough is by checking the weight of the container. You can lift the container right after a deep watering session to have an idea of how heavy it is when well-watered.
Two days before the estimated watering schedule, lift the pot again. Dry soil is significantly lighter than wet soil.
Final Thoughts
Most plants are sensitive to overwatering and are at high risk of root rot or plant death if chronically overwatered. It’s crucial to correctly diagnose the problem and promptly fix it to improve your houseplant’s chances of recovery.
I strongly suggest keeping an eye on your watering schedule and considering it as a vital part of your plant care routine. Adjust the schedule accordingly based on your plant’s growth stage, the season, and any changes in your indoor environment conditions.
Review and remember the fixes and preventative measures recommended in the article to ensure your houseplants thrive and remain healthy.
Feel free to reach out for more practical gardening tips!