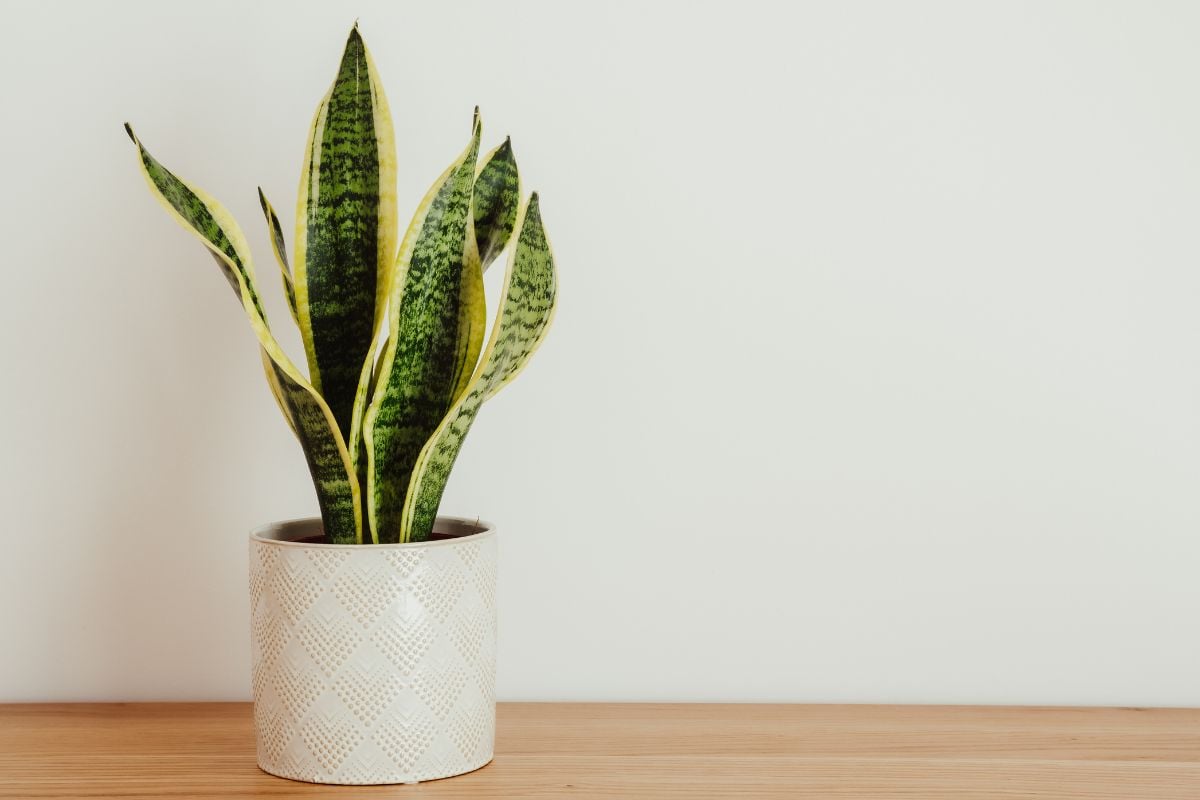
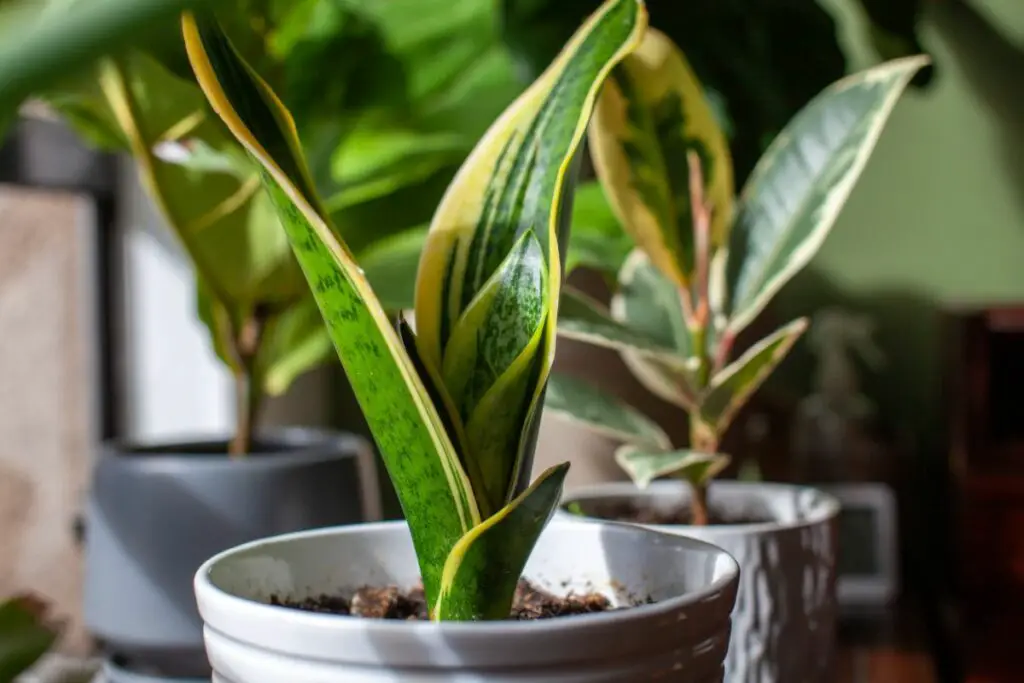
How To Make the Best Snake Plant Soil Mix (DIY Recipe)
Snake plants are versatile and can adapt to various environmental conditions, including growing in soil or water. However, you’ll need to provide the ideal conditions this eye-catching plant prefers to achieve stellar growth. Creating a soil mixture for your snake plants can be time-consuming, but I assure you that the results will be worth it.
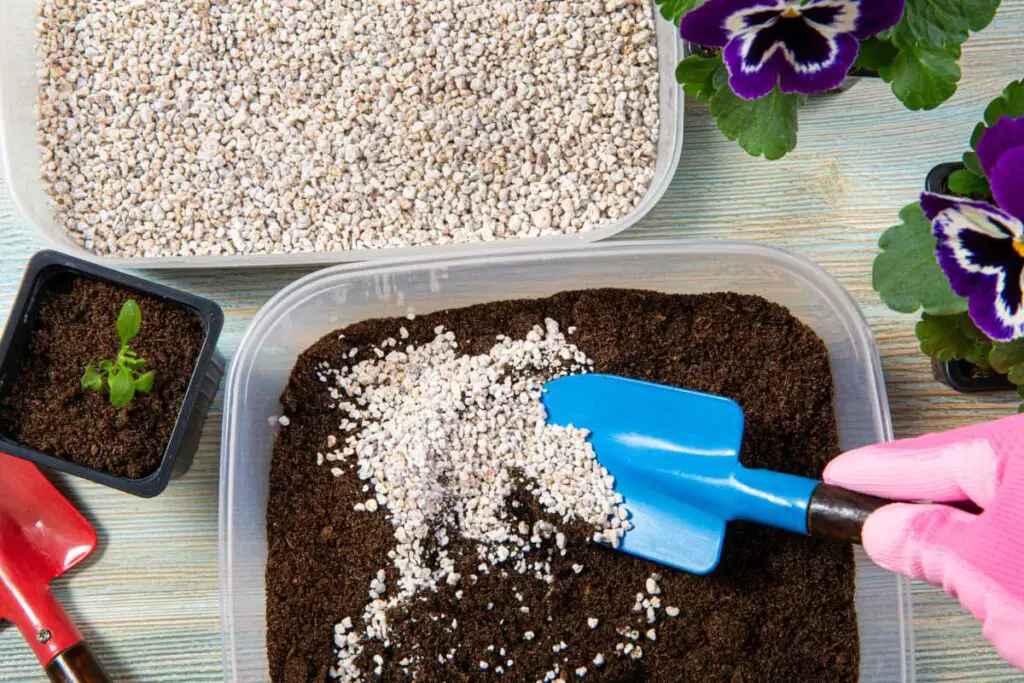
To make the best snake plant soil mix, choose a lightweight soil base that has well-draining properties and is rich in nutrients. Add amendments to the soil that aid in drainage, nutrients, and water retention. Mix equal parts of soil, perlite, coir, and sand.
Creating your own snake plant soil mix will ensure your plant has everything it needs to grow big and healthy. This article will take you through all the steps to make the best snake plant soil mix. Let’s begin!
1. Start With a Suitable Soil Base
Snake plants are part of the succulent family, so they’re susceptible to root rot, just like other succulents. The soil base must aid in drainage to keep your snake plant’s root system healthy. The soil base you choose should also contain the nutrients and pH balance needed to help improve health and growth.
It’s best to use an all-purpose soil mix as a general soil if you’re unsure of your plant’s preferences or if you’re growing several species together. However, snake plants thrive on well-drained soil equipped with all the essential nutrients.
Knowing the soil conditions your snake plant prefers will help you understand what soil and amendments to choose to have a healthy and happy plant.
It’s better to choose a commercial mix instead of using the dirt in your yard. Outdoor dirt can bring in contaminants like bacteria and bugs. Outdoor soil can also be too dense or hard when it dries out. Alternatively, it can have an unbalanced pH level.
The base soil should be lightweight with a neutral pH of 5.5 and 6 to create excellent growing conditions.
Organic indoor potting soil is a great base to start with because it’s pH-neutral and is already formulated to be lightweight with perlite added in the mix. It also contains organic matter and nutrients. Unless otherwise stated, indoor potting soil is typically a well-draining soil mixture.
Organic Indoor Potting Soil
If you’re using indoor potting soil, ensure it has adequate drainage to keep the roots from staying too moist. Not all indoor potting soil is the same. Depending on the brand, the ingredients can be different, so pay attention to what they add to the soil mixture.
As already mentioned, commercial indoor potting soils typically come with a neutral pH level. However, if you already have the potting mix on hand and need to balance the pH level, you can add lime to increase it or sulfur to reduce it.
Because unbalanced pH levels can affect health and growth, it’s essential to utilize these two components to balance the pH in the soil mixture:
- Lime: Lime increases the pH by making the soil less acidic and more alkaline. It also adds calcium and/or magnesium to your soil, depending on the lime used. Garden or agricultural lime is typically used to balance pH levels, but dolomite lime can also be used.
- Sulfur: When sulfur is added to the soil mixture to lower the pH levels, the soil bacteria will change the sulfur to sulfuric acid. This process lowers the pH within the neutral range or close to it, making it a healthier soil for snake plants to grow in.
The following are the structural characteristics of your typical indoor potting soil:
- Organic compost for nutrients
- Perlite for drainage
- Balanced pH levels
- Lightweight for drainage
- Some contain bark for aeration
Omit the Potting Soil Containing Bark
Indoor potting mix is usually a great all-around choice for a soil base when hand-blending your own mix. However, potting mix with bark may not be a great choice to use. When bark is mixed in with the soil, the rapid decomposition of the bark causes the depletion of nitrogen.
This means less nitrogen for your plants, and that’s not a good thing. Nitrogen is one of the primary nutrients your plants need to go through photosynthetic cycles. And snake plants love their NPK (nitrogen, phosphorus, and potassium).
Skip Potting Soil Containing Too Much Organic Matter
Snake plants don’t need excessive nutrients in their soil, so make sure it’s not too dense with organic matter. Potting soil with a higher ratio of compost included wouldn’t be ideal for snake plants. While they do enjoy nutrients from compost matter, these shouldn’t be found in excess.
2. Add Some Amendments
Soil amendments are materials added to the soil to change the structure. There are different amendments that aid in drainage, water retention, and nutrients.
The following amendments are excellent to use for adding aeration, moisture retention, and nutrients to home-blended soil mixtures:
- Perlite
- Vermiculite
- Peat moss
- Coconut coir
- Builder’s or coarse sand
- Organic compost
Perlite Over Vermiculite
Perlite and vermiculite are common amendments used to aerate the soil mixture to keep root systems from retaining too much moisture for extended periods.
Perlite is made of volcanic rock, and when heated, it expands into tiny styrofoam-looking balls. Vermiculite is also made to expand by heating, but it is a hydrous phyllosilicate mineral.
Drainage is essential for plant health, so choosing one of these amendments to add to your soil will help create an ideal mixture for your snake plants to thrive in. Perlite and vermiculite aerate, retain moisture, and add nutrients to the soil structure. The difference between the two is that perlite is better at aeration, and vermiculite is better at water retention.
This is why perlite would be a better choice than vermiculite for snake plants. Perlite is also commonly used in commercial premixed succulent soil to aid drainage. However, if you have vermiculite on hand, it will also work.
Peat Moss or Coconut Coir
Some are fighting to ban the sale of peat moss (known as sphagnum moss) to use for gardening. There’s controversy on whether it’s safe for the environment. It’s said that when peat moss breaks down, it releases gasses that create weakness and holes in the ozone layer.
For years, peat moss has been the go-to amendment to add to DIY soil mixtures to aid in aeration and water retention. The downside is that it doesn’t provide nutrients for the plant to use, unlike coconut coir. This is why people began switching.
Coconut coir (also called coir) does the same job as peat moss and also contributes nutrients to the soil. Coir is made from the fiber between the husk and outer shell of coconuts. It’s a bit more expensive and typically comes in a bricked form.
Unlike peat moss, coconut coir takes a long time to break down in the soil. So, this may come down to your preference. Both are acceptable, and some gardeners have used them together, but this isn’t necessary for your snake plants.
Sand Is Good for Aeration and Top-Heavy Plants
Snake plants are known to grow tall and sometimes fan outward. And with them preferring well-draining soil, sand is an excellent amendment to add to your soil mixture.
Most succulent and cacti-premixed soils have sand already added to them, so adding sand to the mix if you’re using indoor potting soil as your base will increase the drainage rate to keep the roots healthy.
The best sand to use for your soil mixture will be coarse sand.
Organic Compost to Add Nutrients
Organic compost is rich in nutrients and can be used in small amounts in your mix, depending on the base soil you choose.
Indoor potting soil already contains the amount of nutrients needed because there is more soil matter in the mix. So, if you’re using specified succulent or cactus-premixed soils for your base, you can add a small part of organic compost to give your snake plant a boost of nutrients to thrive.
Organic compost is an amazing amendment for all plants—indoors and outdoors.
Making your own compost will not only benefit your wallet and help your plants thrive, but it will greatly cut down food waste from your kitchen.
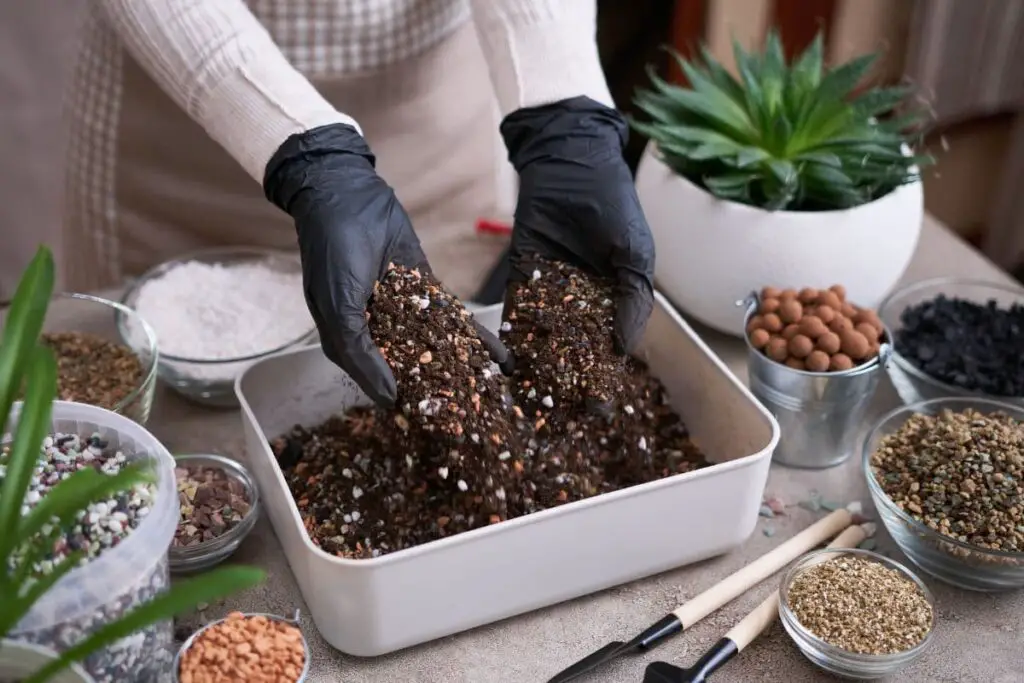
3. Mix the Soil and Amendments
Now comes the fun and dirty part—mixing everything!
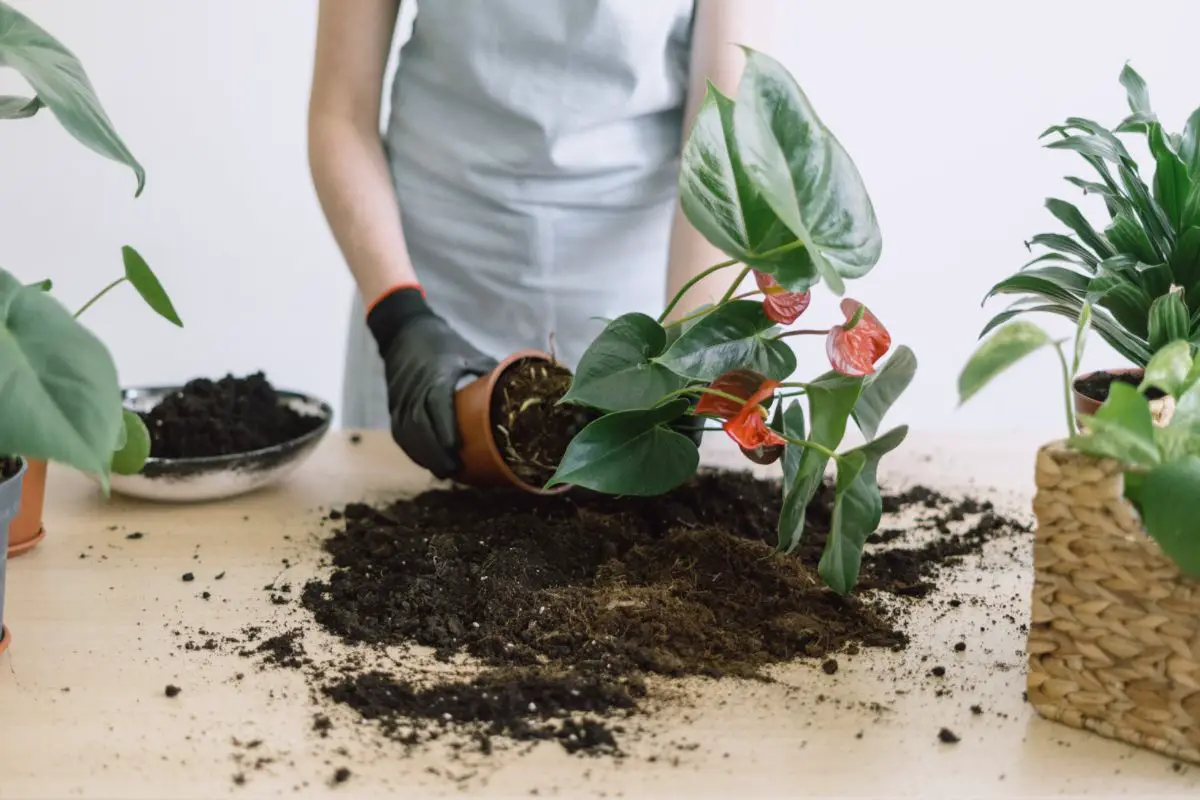
You’ll want to mix everything together in equal parts. You can use a large bowl or bucket to mix everything in. Once you have completed the mixing, you’ll need to pot your snake plant in a pot that is ⅓ bigger than the root system to allow for healthy growth.
If you’re up-sizing your pot, the rule of thumb is to go up one size. Unless your snake plant is rootbound, that will allow enough room to grow without an excessive amount of soil to retain moisture. If your snake plant is rootbound, use a pot that is ⅓ bigger than the root system, as mentioned above.
When using indoor potting soil and amendments, you’ll use the following ratio as your recipe:
- 1 part soil
- 1 part perlite or vermiculite
- 1 part peat moss or coconut coir
- 1 part sand
Recipe Using Indoor Potting Mix
Snake plants love the balance of NPK (nitrogen, phosphorus, and potassium). So, this recipe catered to using indoor potting mix for your hand-blended soil.
Follow these steps for mixing your soil and amendments together:
- Gather your materials. You’ll need indoor potting soil, amendments, a suitable sized pot, your snake plant, a bucket or something to mix it in, and a small garden shovel.
- The recipe ratio of mixing you’ll use with indoor potting soil will be equal parts of soil and amendments. As mentioned above, the ratio broken down includes the following: 1 part each of soil, perlite or vermiculite, peat moss or coconut coir, and sand.
- Using the bucket (or your choice of container used for mixing), mix the soil and amendments together with either your hands or a small garden shovel.
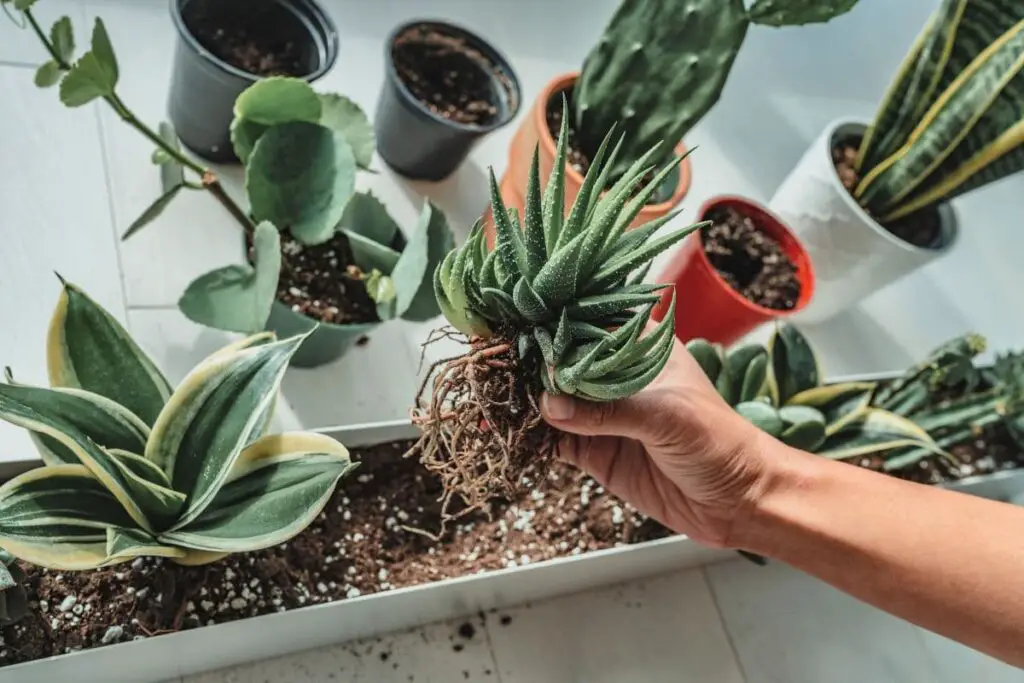
- Once the soil is well-blended, grab the pot you’re going to use for your snake plant and fill the pot ⅓ with the soil blend you’ve mixed.
- Remove your snake plant from its current pot and assess the root system. If it’s rootbound, you’ll need to carefully loosen the outer roots a bit to stimulate a healthy spread when repotted. Be careful not to damage the roots while trying to loosen them.
- Place your snake plant on top of the soil and hold in place if needed.
- Use the rest of the soil mixture to fill the remaining area around the snake plant.
4. Other Soils You May Have on Hand
If you’re an avid indoor gardener, you may also have other soils on hand that are acceptable to use with a little tweaking to cater to the preferences of your snake plant. Succulent and cactus premixed soils are good to use for a base soil if you already have them on hand. They already contain sand, perlite, and potting mix.
So, all you’ll have to do is mix in a little more soil and amendments to achieve the best potting soil mix for your snake plant to thrive.
Succulent Soil Mix
These soils are formulated for drainage to keep the root system of succulents healthy and free of rot. The mixture includes equal parts of sand, perlite, and potting soil. Ideal for your snake plant and other succulents to grow healthy. However, to help your snake plant flourish, you can add a few extra amendments to the mixture.
The ratio for the best snake plant soil mix includes following five parts:
- 2 parts succulent soil
- 1 part perlite or vermiculite
- 1 part peat moss or coconut coir
- 1 part organic compost
Here’s what you’ll need to do:
- Gather your materials. You’ll need succulent soil mixture, amendments, a suitable sized pot, your snake plant, a bucket or something to mix it in, and a small garden shovel.
- The ratio you’ll want to aim for is equal parts soil and amendments. Use the following ratio, as mentioned above. You’ll use 2 parts succulent soil, 1 part perlite or vermiculite, 1 part peat moss or coconut coir, and 1 part organic compost.
- Mix the soil and amendments together with either your hands or a small garden shovel in the bucket or container.
- Once the soil is well-blended, grab the pot you’re going to use for your snake plant and fill the pot about ⅓ with the soil blend you’ve mixed.
- Remove your snake plant from its current pot and assess the root system. If it’s rootbound, carefully loosen the outer roots a bit to stimulate a healthy spread when repotted. Be careful not to damage the roots while trying to loosen them.
- Place your snake plant on top of the soil, holding it in place if needed.
- Use the rest of the soil mixture to fill the remaining area around the snake plant.
Cactus, Palm, and Citrus Mix
This type of mix is slightly different from the succulent mix. It contains half sand, and the other half is equal parts perlite and potting soil.
When using this premixed as a base soil, use the following recipe with a five-part ratio:
- 1 part cactus soil mixture
- 2 part perlite or vermiculite
- 1 part peat moss or coconut coir
- 1 part organic compost
So, to balance drainage, nutrients, and water retention, you can use the same steps with the revised ratio:
- Gather your materials. You’ll need your soil mixture (cactus, palm, and citrus), amendments, a suitable-sized pot, your snake plant, a bucket or something to mix it in, and a small garden shovel.
- As mentioned above, the ratio you’ll want to aim for includes: 1 part cactus soil mixture, 2 part perlite or vermiculite, 1 part peat moss or coconut coir, and 1 part organic compost.
- Mix the soil and amendments together with either your hands or a small garden shovel in the bucket or container.
- Once the soil is well-blended, grab the pot you’re going to use for your snake plant and fill the pot about ⅓ with the soil blend you’ve mixed.
- Remove your snake plant from its current pot and assess the root system. If it’s rootbound, carefully loosen the outer roots a bit to stimulate a healthy spread when repotted. Be careful not to damage the roots while trying to loosen them.
- Place your snake plant on top of the soil, holding it in place if needed.
- Use the rest of the blended soil mixture to fill the remaining area around the snake plant.
Final Thoughts
While it’s easier to go to your local hardware store to grab the first bag of potting soil to use for your snake plant, this probably won’t provide your plant with the nutrients it needs to thrive.
Following these steps to create the best snake plant soil mix will allow you to make sure that your greenery is receiving everything it needs. You may get dirty, and it may take a little time, but you’ll be rewarded with a healthy growing snake plant to enjoy.