Cardamom (Elettaria cardamomum) is a popular Indian herb with various culinary and medicinal uses. Although it is a tropical plant, it can be grown successfully in the US, ideally in zones 10-12. However, you can still grow it regardless of the zone as long as you provide it with proper care during the cold weather.
Planting a cardamom plant requires proper humidity and temperature management. Cardamom is a tropical plant, so maintaining similar conditions to their natural habitat goes a long way. It’s also important to choose between growing from seeds or cuttings as the growth time for each differs slightly.
I’ll go through each item in more detail to help you understand cardamom’s growth requirements and the necessity to provide them. If you want to grow a cardamom plant successfully at home, read on!
1. Decide Whether to Grow the Cardamom From Seeds or Suckers
There are two ways to grow a cardamom plant. One is from its abundant seeds from the pods, and the other involves separating the suckers from a mature plant.
Either way, they need to be grown in pots to make it easier to move them and protect them from sudden changes or dips in temperature. Alternatively, you can grow them on a flower bed in a greenhouse where the temperature and humidity are controlled.
Both ways are simple, but they can have a few differences early in the growing process. That’s why it’s essential to decide early on whether you plan to grow the cardamom from seeds or suckers.
Cardamoms have the same growth requirements after the seedlings or suckers germinate.
I’ll discuss the differences below:
Growing From Seeds
If you plan to grow a cardamom plant from seeds, it can take three years before the plant is ready for harvest. It usually takes longer to reach maturity with seeds than if you use rhizome cuttings with suckers.
You can buy cardamom seeds from a local gardening store or harvest seeds from a mature cardamom plant at least 6 feet (1.8 m) tall.
You can pinch off ripe pods from the mature plant, but you must dry the pods under direct sunlight until they become crisp enough to squeeze the seeds out with your fingers easily.
Each cardamom pod contains approximately ten seeds, so you can usually harvest as many as you want, provided you have a precious healthy spread.
However, you should ideally collect seeds from at least five pods from different plants for planting to increase your chances that some of them will sprout because some environmental factors may prohibit their growth.
Planting this way also introduces enough variety in genetics to give the plants the best chance of reaching maturity.
Remember to soak the seeds in distilled water overnight or approximately 8 hours, then drain the water with a clean piece of cloth and remove the excess moisture from the seeds by rubbing them in the cloth.
Your seeds are ready for planting.
Growing From Suckers
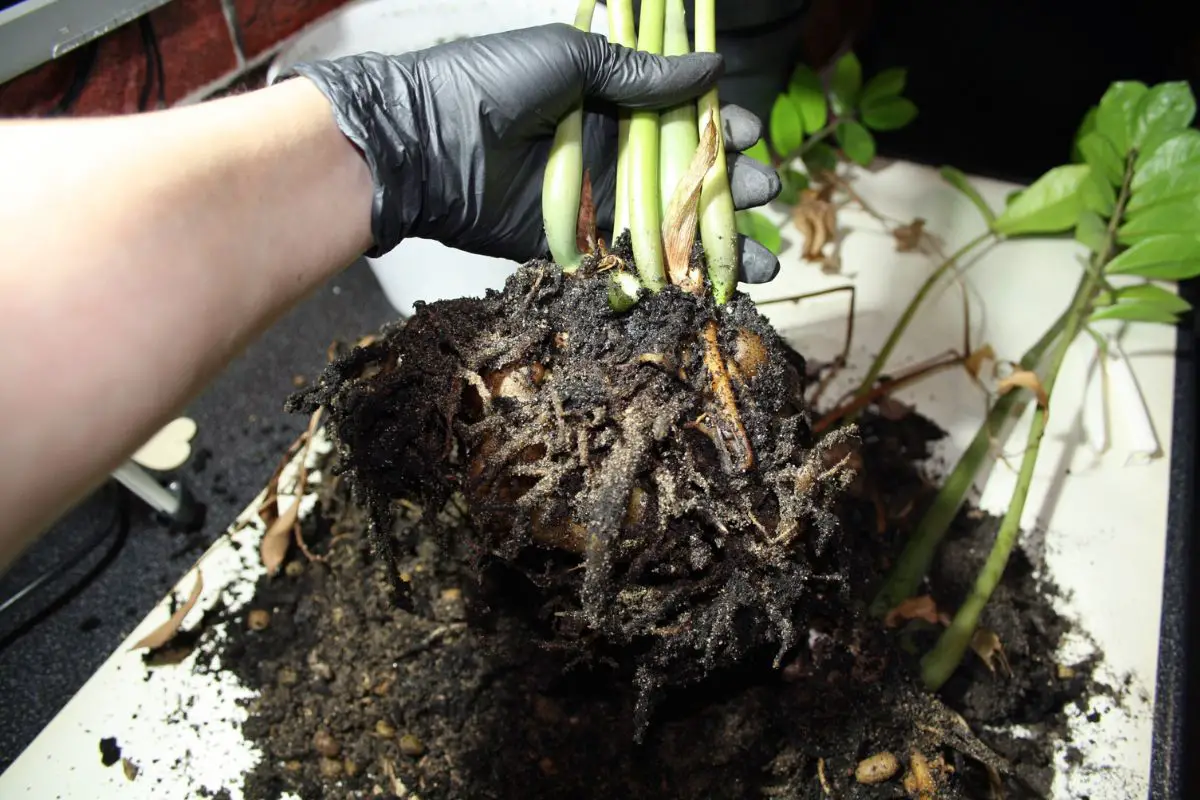
As the cardamom plant matures, it typically spreads laterally underground through rhizomes. These lateral roots produce suckers that will later grow into another cardamom plant.
Many gardeners prefer this method of growing a cardamom plant because it takes only roughly 18-24 months for the suckers to mature and start producing pods. It is also relatively easy to propagate cardamoms from suckers.
Using sterile garden shears or a knife, you can cut a mature rhizome with at least one sucker and transplant it into a pot or on a flower bed in a greenhouse. The sucker should be growing upwards instead of laterally for a better chance of success after transplantation.
Moreover, a sucker at least 2 inches (5 cm) tall will grow more successfully than shorter ones.
2. Prepare a Substrate With Two Parts Loam and One Part Sand
Cardamoms can grow in a loamy or sandy substrate in their natural habitat, which is mainly in the tropical rainforests of South and Southeast Asia. Growing cardamoms outside their natural environment requires gardeners or farmers to replicate their optimal environmental conditions.
These prized herbs thrive best in loamy soil rich in organic matter or humus. They also prefer consistently moist soil and can be pretty sensitive to drying. However, waterlogged conditions can be counterproductive for their growth.
Cardamoms call for a substrate with good moisture retention and drainage. Adding one part sand to two parts loam can often address these plants’ soil requirements. It also helps to add organic matter or compost to provide cardamoms with their nutritional requirements.
Another important thing to remember is that cardamoms prefer a slightly acidic substrate with pH levels ranging from 5.0–6.5.
Moisten the soil enough before planting the seeds or suckers. Test the drainage capacity of the soil in advance to ensure that the seeds or young shoots do not sit in excess moisture. Observe how well the water drains out of the pot’s drainage holes.
Planting Seeds Into the Soil
Lay the seeds on top of the moist soil and keep them 1-2 inches (2.5-5 cm) apart. Doing so will provide them with enough space to grow and prevent them from competing for moisture and nutrients early in their development. You don’t need to give them too much space because you will have to transplant them later.
After laying the seeds on the soil’s surface, cover them with 1/8 inch (3.2 mm) of soil. Avoid covering them with a thick layer of soil, as it will prevent them from germinating successfully.
Planting Suckers Into the Soil
Suckers grow much faster than seeds, so you will need to give them more space for growth. If you want to start them indoors, you can plant two rhizome divisions with at least one sucker each in a pot 10 inches (25 cm) in diameter. Keep the rhizome cuttings at least 5 inches (12.7 cm) apart.
Avoid burying the rhizomes too deep into the soil because it might suffocate them and reduce their access to sunlight. Instead, cover the roots with only enough soil to keep at least an inch (2.5 cm) of the tiny suckers above ground.

3. Grow Your Seedlings in Pots Indoors or in a Greenhouse
Seeds can take a month or two to germinate. They typically take another month before they are ready to be transplanted. On the other hand, you can plant suckers directly into the soil where you plan to keep them until maturity.
However, the climate in the US is not exactly suitable for cardamoms, making it necessary to grow your seedlings in indoor pots or a greenhouse. It can also help you regulate the other environmental conditions cardamoms need for optimum growth.
Growing cardamoms in pots makes it easy to move them indoors as the temperatures drop in the fall and take them out as the temperatures rise in spring.
Meanwhile, growing them in greenhouses can rid you of the chore of moving them. However, a greenhouse can be costly and impossible for home gardeners who only wish to keep a few pots of cardamoms.
4. Select a Spot That Can Accommodate the Plant’s Full Size
When growing cardamoms in pots, it is essential to remember that these plants can reach up to 10 feet (3 m) in height. They also produce rhizomes that spread laterally. The pot’s walls can block the cardamom’s roots and compromise the plant’s growth.
Larger shoots require more extensive roots to support the plant’s growth. Therefore, if the cardamom’s roots are confined in a limited space, the plant may not grow as tall as it should and may even fail to produce pods.
To address this issue, home gardeners must divide the mature plant’s rhizomes every two to three years after they have started producing lateral roots with suckers. You may also transplant your overgrown cardamom plants into larger pots. However, they can be too heavy and inconvenient to move around.
So when transplanting cardamom seedlings or rhizome cuttings into their final space, be sure to select a spot that can accommodate their full size at maturity.
Planting them into the ground seems ideal to deal with the issues regarding space. However, maintaining the moisture requirement of ground-planted cardamoms can be challenging. This is where sufficient knowledge about a cardamom plant’s growth requirements becomes invaluable.

5. Place the Cardamom in an Area With Partial Shade
Cardamoms naturally grow in rainforests and benefit from the shade cast by tall tree canopies. When growing them in the home garden, choose an area where your cardamoms can receive dappled sunlight or partial shade.
Although it may seem like a good idea to grow them next to an evergreen tree for shade in all seasons, it can be counterproductive for cardamoms to compete for moisture with bigger plants. They need plenty of water and will immediately show signs of distress when left to sit in dry soil for a while, especially in hot and dry weather.
Cardamoms are one of the few plants which can grow in a north-facing garden as long as they can receive at least 2 hours of sunlight per day.
6. Water Your Cardamoms Daily
Potted cardamoms appreciate shallow but frequent watering. For shallow applications, you can water your plants twice daily. However, if you don’t have plenty of time, you can deep-water your cardamoms once a day.
Those grown in the ground may prefer deep watering daily. A good rule of thumb is to water your cardamoms twice a day during summer and once a day in spring and fall. In winter, you can reduce the watering frequency to once every two days.
Soil moisture is vital for a cardamom plant’s optimal health. This is mainly because they get plenty of rain more than half of the year in their natural habitat.
As a result, dry soil can negatively affect the roots, and the plant will quickly show signs of distress and stunted growth.
Potted cardamoms can benefit from wick-watering, where you install a moisture-absorbent wick into the soil through a drainage hole while its other end draws water from a larger container below.
This method allows your plant to draw out as much water as it needs, but it usually takes a while to moisten the soil enough to meet the cardamom plant’s moisture requirement. Moreover, you will need to refill the container frequently to ensure it doesn’t run out of water.
Additionally, the wick’s moisture absorption capacity deteriorates over time, making this method only suitable as a temporary feeding method. It is still best to water your cardamoms from the top as often as the environmental conditions dictate.
7. Keep the Humidity Above 70%
Cardamoms thrive best in tropical forests with large amounts of rainfall every year. Such conditions provide these plants with high levels of humidity essential for their growth. So when growing them in the US, where there can be very dry winters, farmers must take some measures to increase the humidity.
Again, the best way to regulate the humidity is to grow your cardamoms indoors or in a greenhouse. Ideally, the humidity levels shouldn’t go below 70%. Otherwise, the plants will fail to produce fruits or flowers.
Cardamoms seldom produce enough fruits and flowers at home if the humidity levels frequently dip below 70%. They tend to bear fruits only during years when home gardeners can keep the moisture levels stable.
Using a humidifier during dry seasons can help improve your chances of harvesting cardamom fruits during the growing season in the following year.
8. Keep the Temperature Between 65–90 °F (18–32 °C)
In addition to soil moisture and humidity, cardamom plants can also be fussy when it comes to temperature. Extended periods of low temperatures below 64 °F (18 °C) or fluctuating temperatures with frequent dips below 62.5 °F (17 °C) can be detrimental to your cardamoms.
Freezing temperatures can also be dangerous for cardamom plants. That’s why they are better grown in pots for easier movement during harsh weather conditions. However, growing them in pots also has the downsides mentioned above.
In greenhouses, you may regulate the temperature and keep it within a range of 65-90 °F (18-32 °C). You can also use an air conditioner at home to keep the temperature within the ideal range. However, air conditioners tend to dry up the air, making a humidifier a necessity if you don’t already have one.
It is best to monitor both the temperature and the humidity at the same time if you want to create a suitable indoor environment for your cardamom plant.

9. Fertilize Your Cardamom During the Growing Season
A balanced fertilizer with equal amounts of nitrogen, phosphorus, and potassium is helpful for the growth of young cardamom plants. However, as they grow bigger, they will need varying amounts of these macronutrients.
Cardamoms need a potassium-rich fertilizer to help with their growth.
As mentioned, cardamoms thrive in a consistently moist environment. Potassium aids in the plant’s ability to transport water and nutrients from the roots to the shoots. An adequate supply of potassium can also ensure that your cardamoms will produce plenty of pods.
Most soils rich in organic matter have sufficient amounts of nitrogen, phosphorus, and potassium, so you typically don’t have to apply fertilizer when planting cardamoms. However, you can send soil samples to the laboratory to see if you need to supplement your soil with fertilizers.
Nutrients are quickly depleted from the soil during the growing season as the plants need to use more of them. If your cardamom plants or other mature plants have been staying in the same space for several years, chances are the essential macronutrients are already depleted.
If necessary, apply an NPK fertilizer with a 1:1:2 ratio at the beginning of the growing season or after transplanting your seedlings, typically in late May or June. You can reapply the fertilizer after two to three months for better yield.
10. Harvest Cardamom Pods After Three Years
If you plan to propagate your cardamom plants from seeds, it is best to do so after the plants have successfully produced fruits and flowers for at least two consecutive years.
It takes approximately two to three years for cardamom plants to produce fruits or pods, depending on whether they were grown from suckers or seeds. If the mature plants can continuously produce fruits for the next two years, they will make a good source of seeds for propagation.
In contrast, propagation from rhizomes may require more mature plants. If you notice new shoots sprouting beside your mature cardamom plant, it is most likely because the roots have grown healthily and spread wide enough to develop suckers.
It also shows that the environmental conditions are suitable for the plant to establish itself and proliferate through suckers.

Final Thoughts
Growing any plant outside its natural habitat can be challenging as you have to replicate its suitable environmental conditions. The process can be tedious and costly. However, cardamoms are popular spices, and many farmers consider them highly profitable.
Whether you are a hobbyist growing your own spices or a dedicated farmer looking for a new business venture, you will find all the efforts that go into planting cardamoms a bit troublesome but totally worth it!