How to Plant, Grow, and Care for Peace Lilies
Peace lilies (Spathiphyllum spp.) are one of the few flowering plants that readily bloom even with suboptimal indoor lighting conditions. They’re also famous for their low maintenance needs, making them perfect for new and experienced gardeners.
Peace lilies are excellent indoor plants because they:
- Thrive in low to medium indoor lighting
- Are drought-tolerant due to underground rhizomes that store moisture
- Adapt to usual indoor humidity of around 40-60%
- Thrive in warm indoor temperatures of around 65-85 °F (18-29 °C) but can tolerate occasional drops to as low as 54 °F (12 °C) in winter, which can promote earlier flowering in spring
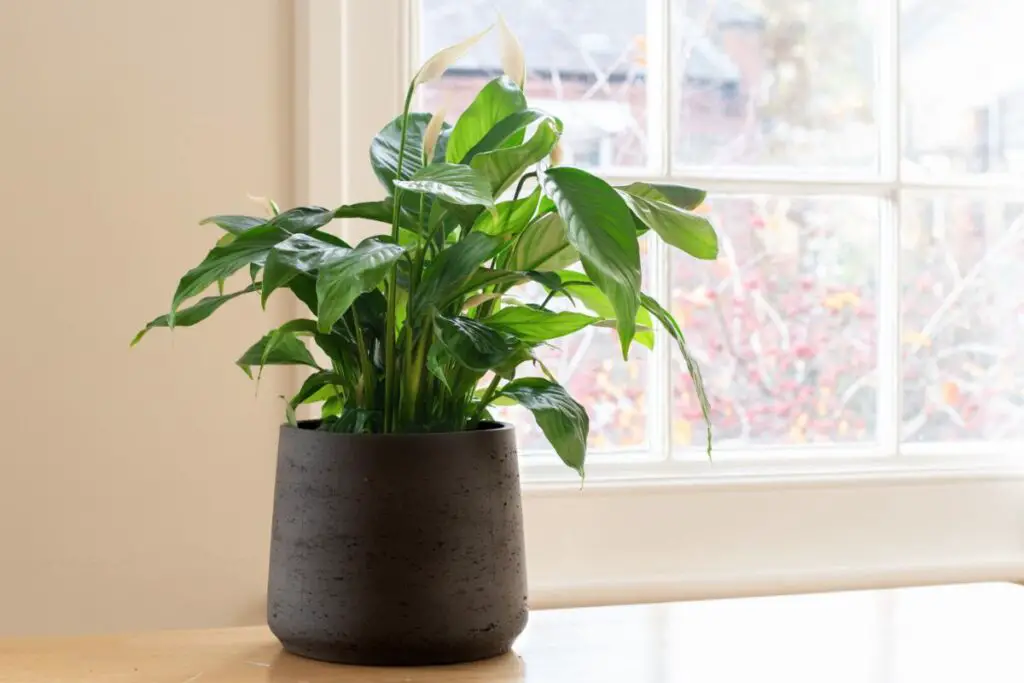
- Are eye-catching with their long-lasting, elegant white flowers and dark green foliage
- Have been scientifically proven to purify the air by removing indoor pollutants like formaldehyde, toluene, and xylene
- Are easy to propagate because they produce suckers or baby plants through rhizomes
This article will explore all the care requirements of peace lilies and the benefits of growing them. I’ll also share planting tips and practical solutions to common problems for a stress-free gardening experience and a thriving plant.

Quick Guide
| Common Name(s) | Peace lily, spathe flower |
| Botanical Name | Spathiphyllum spp. |
| Family | Araceae |
| Plant Type | Herbaceous perennial, tropical flower |
| Native Area | Tropical South America (Venezuela, Colombia) |
| Height & Spread | 1-4 feet (0.3-1.2 m) tall and wide |
| Bloom Time | Spring (sporadically in summer) |
| Flower Structure | Spadix |
| Color | White |
| Sun Exposure | Partial to deep shade |
| Soil Type | Moist, well-draining, rich in organic matter |
| Soil pH | 5.5-6.5 |
| Watering | Moderate, once weekly |
| Pests, Diseases, Common Problems | Scale insects, aphids, mealybugs, fungus gnats, spider mites Cylindrocladium root rot, leaf blight Brown leaf tips, lack of flowers |
| Toxicity | Mildly toxic due to calcium oxalate crystals in the sap |
| Required Maintenance | Low Repot or divide every 2-3 years |
Peace Lilies: An Overview
The plant genus Spathiphyllum, widely known as peace lilies, consists of over 40 cultivars of herbaceous perennials commonly grown as houseplants. They belong to the arum family (Araceae) and are closely related to anthuriums and caladiums.
Origin and Natural Habitat
Peace lilies are tropical flowering plants native to Central and South American rainforests, particularly in Colombia and Venezuela.
As tropical natives, peace lilies thrive in the following natural conditions:
- Moist, well-draining soil rich in organic matter
- Dappled or filtered sunlight through tree canopies
- High precipitation rate of around 100 inches (254 cm) annually
- Warm, frost-free temperatures of around 75 °F (24 °C)
- Humidity levels over 70% all year round
Spathiphyllum plants entered Europe in the 19th century, and numerous cultivars have been introduced to Florida by German horticulturists. The newer cultivars that have been bred in colder climates are well-adapted to indoor conditions and have better tolerance to colder seasons, making them perfect as houseplants in the U.S.
Anatomy
Peace lilies are magnificent houseplants with the following physical traits:
- Leaves: Glossy, solid dark green leaves that grow in a clumping habit. Each leaf (including the petiole) can range from 4-25 inches (10-63.5 cm) long. The foliage makes the plant look aesthetically pleasing, even without the flowers.
- Rhizomes: Fleshy underground stems that store extra moisture, giving peace lilies tolerance to brief periods of drought. New clumps of leaves (suckers) readily grow out of the rhizomes, making it easier to divide or propagate the plant.
- Roots: Shallow fibrous roots well-adapted to moist conditions due to rapid moisture uptake.
Flowers
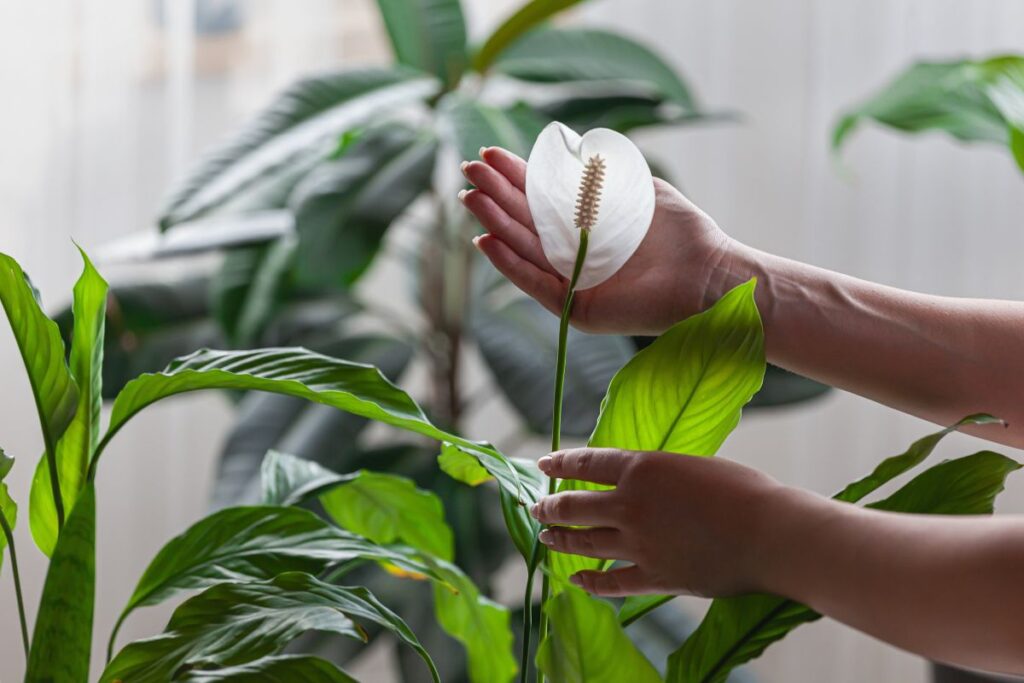
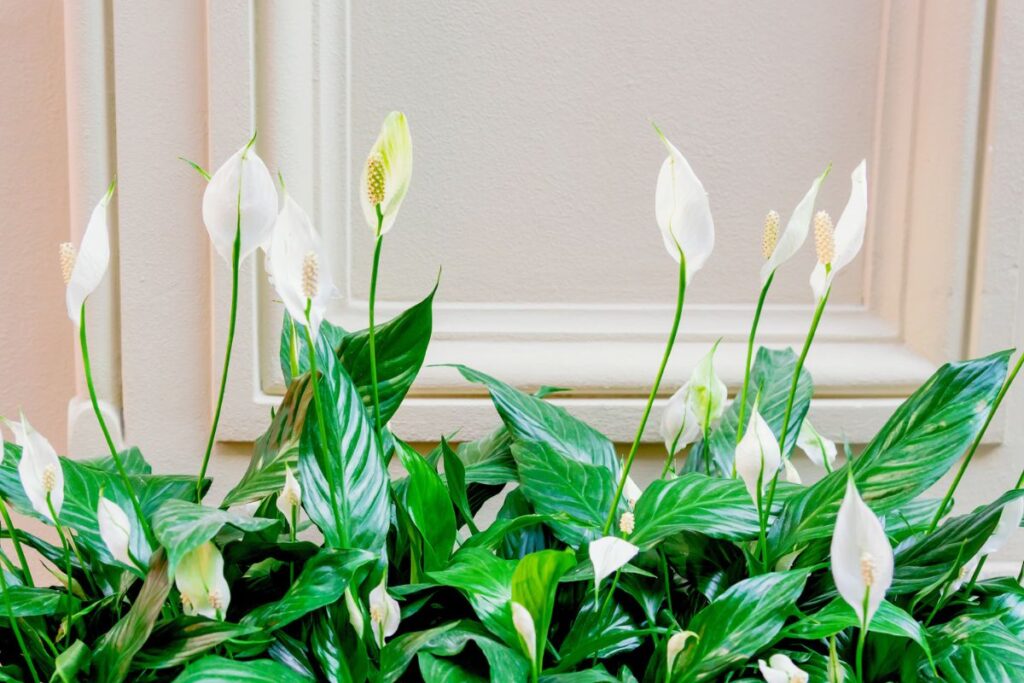
Peace lilies are famous for their showy flowers that possess the following traits:
- Spathe: Large, white, and spoon-shaped. It gradually reverts to green within 1-2 months to aid the plant with photosynthesis. After 2 months or so, the spathe turns brown and the stalk droops.
- Spadix: Yellowish-white and finger-like, ranging from 2-9 inches (5-23 cm) long. It has multiple protruding structures or spikes, which contain the female flower part (stigma). After a week or so, tiny, rough dots form between the spikes. The dots contain pollen or the male flower part.
- Stalk: Occasionally grows up to 6 inches (15 cm) taller than the leaves for better visibility and access to insect pollinators.
- Odor: Mild and sweet, barely noticeable
Note: Peace lily flowers are protogynous, wherein the female parts are produced first, making the younger flowers female. Once the pollens start to develop, the same flower turns male. The female parts become unreceptive to pollen, inhibiting self-pollination. Thus, your plant needs at least two flowers at different levels of development for pollination to occur.
Blooming Time
Peace lilies bloom sporadically throughout the year in their native habitat.
On the other hand, newer cultivars typically mature in 1-3 years and bloom indoors in spring until early summer in colder regions with freezing winters. The lower light intensity and temperatures in the fall and winter can prompt peace lilies to become less metabolically active.
Prolific varieties or cultivars are more likely to produce flowers all year round when grown with the following care routine and stable indoor conditions:
- Around 12 hours of bright indirect light daily
- Consistently warm daytime temperatures of around 75 °F (24 °C) and no more than a 10 °F (5-6 °C) drop at night (i.e., 65 °F or 18 °C)
- Regular watering (as soon as the soil is dry 2 inches/5 cm deep)
- Light feeding of a 10-10-10 granular fertilizer every 2 months from spring to summer
Popular multi-seasonal peace lilies include:
- ‘Domino’
- ‘Little Angel’
- ‘Mauna Loa’
- ‘Piccolino’
- ‘Sensation’
- ‘Wallisii’
Note: Peace lilies may bloom about a month earlier than usual in spring when exposed to cooler air in winter, with daytime temperatures around 72 °F (22 °C) and 54 °F (12 °C) at night.
Reproduction
Peace lilies naturally self-propagate in two ways:
- Through seeds: The flowers contain both male and female parts in the spadix. When foraging, bees accidentally carry the pollen from one old flower to a newly opened flower, resulting in pollination. Rounded seed pods with pointed tips then develop on the spadix, each containing tiny tan seeds about 2-3 mm (~0.08 in) in diameter. The seeds may be dispersed by wind or deposited into the soil when the spathes dry out and fall to the ground.
- Through offshoots or suckers: The fleshy underground stems (rhizomes) grow laterally and produce new clumps of leaves (offshoots or suckers), which can be separated from the mother plant and grown into a separate plant.
Note: I know some fellow gardeners who purchase peace lilies, keep them for 3-5 years, and discard them when they stop flowering. Interestingly, peace lilies can live almost forever by producing new offshoots to replace the aging clumps.
With proper care and regular division/repotting, you can keep peace lilies for generations and share the offshoots with families and friends.
Dormancy and Growth Rate
In nature, peace lilies don’t enter dormancy. Instead, they may grow slowly for a month or so after flowers fade to generate enough energy for another flush of flowers. They also have a moderate growth rate, growing up to 6 inches (15 cm) annually.
In colder climates and indoor settings, potted indoor peace lilies tend to show a different growth pattern, including the following:
- More active growth in spring and summer due to warmer air temperatures and brighter light conditions.
- Lack of blooms in the fall and winter because cooler temperatures and lower light conditions slow down the plant’s metabolic activities
Slower growth and a delay in reproductive maturity or flower development may occur in indoor peace lilies due to suboptimal conditions, including the following:
- Lower light levels
- Irregular watering
- Low humidity
- Unstable temperature
- Pot-bound conditions
- Nutrient deficiency
Toxicity
One downside of growing peace lilies indoors is that all plant parts are mildly toxic to humans, cats, and dogs.
The leaves, stems, flowers, and roots all contain calcium oxalate crystals, which can cause the following symptoms when ingested:
- Oral irritation or burning sensation
- Drooling
- Vomiting
Keep the plant out of reach of young children by placing the pot on wall shelves. If you have cats and dogs, ensure that they don’t have access to your indoor garden.
Cats can easily climb wall shelves and nibble on the peace lily leaves. My cat once did, and it took one session of induced vomiting and activated charcoal pill administration at the vet clinic before my cat recovered. It was a pretty unfortunate and costly mistake.
Benefits as Houseplants
Peace lilies are beneficial indoor plants because of their:
- Elegant flowers: The showy white flowers provide an interesting contrast against the greenery in your indoor garden.
- Striking foliage: Even outside of the blooming season, the lush, dark green leaves add a touch of nature to your space.
- Drought tolerance: Although peace lilies like moist soil conditions, they can be pretty forgiving of occasional misses in the watering schedule.
- Tolerance to low light conditions: They can grow comfortably next to a north-facing window—a spot most other houseplants cannot tolerate.
- Low-maintenance needs: Peace lilies have low nutrient requirements. They can also stay in the same pot for 2-3 years before needing division or transplant.
- Ease of propagation: You can readily divide suckers from the mother plant during repotting to increase your peace lily collection.
- Air purification capacity: Peace lilies are one of the few houseplants in the famous NASA study that have been proven by Harvard researchers to extract air pollutants like formaldehyde, toluene, and xylene, even in real-life settings.
Popular Varieties
Depending on your indoor space and flowering preferences, there are over 40 peace lily varieties and cultivars to choose from, including the following:
| Variety or Cultivar | Physical Traits | Distinct Features or Advantages |
| Domino | Height: Up to 30 inches (76 cm) tall Leaf: Up to 12 inches (30 cm) long and 5 inches (13 cm) wide; Variegated leaves with random white streaks/specks Spathe: Up to 8 inches (20 cm) long and 4 inches (10 cm) wide (pointy tip) | Typically produces numerous flowers at once (3 or more) Have unique variegated leaves (compared to the more common solid-green varieties) |
| Little Angel | Height: Up to 15 inches (38 cm) tall Leaf: Glossy deep green; around 5 inches (13 cm) long and 3 inches (7.6 cm) wide Spathe: Narrower at up to 3 inches (7.6 cm) wide | Compact Readily blooms indoors in spring at low to moderate light and more prolifically in brighter (indirect) light |
| Mauna Loa Supreme | Height: Up to 3 feet (0.9 m) tall Leaf: Glossy deep green; up to 9 inches (23 cm) long and 5 inches (13 cm) wide Spathe: Up to 4 inches (10 cm) wide | Medium-sized Slow-growing and typically matures at over 3 years old Tolerant of direct morning sun Likely to bloom multiple times indoors in bright, indirect light |
| Sensation | Height: Up to 6 feet (1.8 m) tall Leaf: Deeply ribbed, thick, dark green; Up to 20 inches (50 cm) long and 15 inches (38 cm) wide Spathe: Up to 15 inches (38 cm) long and 10 inches (25 cm) wide | Largest peace lily variety Perfect as an eye-catching statement plant |
| Wallisii | Height: Up to 15 inches (38 cm) tall Leaf: Deeply ribbed, emerald; Up to 10 inches (25 cm) long and 4 inches (10 cm) wide Spathe: Tiny, around 3 inches (7.6 cm) long and 2 inches (5 cm) wide | Compact Tolerant to low (north-facing window) and high (direct morning sun) light intensities Likely to bloom multiple times indoors in bright, indirect light |
Selecting Your Plant
My local nursery typically doesn’t sell peace lilies outside of the blooming season because, according to the owner, there’s not much interest in peace lilies without the flowers. The flowers also indicate excellent plant health, and you can count on continuous blooms in the following years.
That said, here are practical tips when choosing a peace lily:
- Select a plant whose mature size and flowering potential match your indoor space. For instance, ‘Little Angel’ is compact and typically blooms even in low light conditions (i.e., north-facing window). On the other hand, ‘Mauna Loa Supreme’ is medium-sized and requires bright indirect light to flower. You can consult the garden store staff or check the label that comes with the plant.
- Ensure the nursery pot has adequate drainage holes. Choose a pot with about an inch (2.5 cm) of lateral space for new growth and no roots poking out of the drainage holes or soil surface.
- Choose a plant with visible new clumps (suckers) at the base, which indicates that the plant is growing healthily and ready for division.
- Check the soil moisture with your finger. Avoid pots with crusty or soggy soil. Pro Tip: You may also sniff the pot for signs of root rot, such as foul-smelling soil. Healthy soil will feel crumbly on your fingers and smell earthy.
- Choose a plant with perky central leaves and gracefully arching outer leaves. The leaves should also feel firm, not wrinkly.
- Inspect the leaves for signs of pests and diseases. Avoid plants with webbing, fluffy white clusters, or brown bumps along the veins or on leaf undersides, and crawling insects. In addition, avoid those with black, brown, or yellow leaf spots, which may indicate leaf blight.
After purchasing a peace lily, I recommend leaving it in the same pot for about a year before repotting the following spring to minimize the risk of transplant shock.
Here are important reminders after bringing home your peace lily:
- Isolation: Quarantine the plant for 6-8 weeks and observe for any signs of pests or diseases.
- Optimal Environment: Keep it in a warm room (around 75 °F or 24 °C) with bright indirect light and moderate humidity (40-60%).
- Watering: Water the plant only when the top 2-3 inches (5-7.6 cm) of the potting mix is dry.
Initial Planting
Once your peace lily has adapted to your indoor space and is ready for repotting, follow the tips below:
Choosing the Right Pot
Peace lilies look great in any type of pot. However, it’s important to strike a balance between function and aesthetics to keep your plant healthy.
Here are some important reminders when choosing the perfect pot for peace lilies:
- Material and Design: You can use glazed ceramic or unglazed terracotta—just ensure the pot has adequate drainage holes to remove excess moisture and prevent waterlogging. In addition, use a pot with a wide mouth for easier repotting in the future.
- Size: Choose a pot that’s only a size larger than the old pot. When dividing the plant, be sure the new pot is 2 inches (5 cm) wider and deeper than the root ball.
Pro Tip: My personal favorite for peace lilies is an unglazed terracotta that’s no more than ⅓ of the total height of the plant. The porous walls wick the excess moisture away. In addition, the pot size supports the plant’s vertical growth without drawing attention away from the lush foliage.
Soil Selection
Peace lilies like moist soil with adequate drainage. Here are some potting recipes that work great on peace lilies:
- 1 part standard houseplant potting mix, 1 part perlite, 1 part compost
- 1 part coco peat, 1 part pine/orchid bark, 1 part perlite/pumice
Pro Tip: I like to amend a standard houseplant potting mix with perlite and compost to improve drainage and add extra nutrients to the mix to promote healthy growth and boost the chances of flowering.
Step-by-Step Planting Guide
Follow these steps to transplant your peace lily into the new pot properly:
- Water the plant two days before transplanting.
- Carefully slide the plant out of the old pot. Use a sterile spatula to loosen the edges of the root ball from the pot.
- If the old potting soil looks degraded, hydrophobic, or too soggy, gently but firmly disentangle the roots from the old soil and rinse them in gentle running water.
- Inspect the roots and trim any desiccated (brown, dry, brittle) or rotten (black, mushy, crumbly) parts using sharp, sterile scissors.
- Fill the bottom 2 inches (5 cm) of the new pot with fresh and moist soil mix.
- Spread the roots naturally over the soil and fill the spaces with more soil.
- Firmly tamp the soil down to remove air spaces.
- Be sure that the rhizomes are buried about ½-1 inch (1.3-2.5 cm) below the soil and that the surface is about an inch (2.5 cm) below the rim of the pot.
- Place the pot in bright indirect light, moderate temperature, and moderate humidity.
- Check the soil regularly and water the plant deeply when the top 2-3 inches (5-7.6 cm) of the soil is completely dry.
Optimal Growing Conditions
To keep your peace lily in top shape, follow the guidelines for finding the optimal growing conditions below:
Light Requirements
Peace lilies have flexible light needs. The guide below details practical placement recommendations:
| Light Intensity | Location | Implication |
| Low | Next to a north-facing window 10-14 hours under full-spectrum grow lights or fluorescent lamps | Slower growth rate Dwarf varieties like ‘Little Angel’ and ‘Wallisii’ readily bloom even at low light |
| Moderate(Bright indirect) | Up to 4 feet (1.2 m) from an east-facing window for gentle, indirect morning sun 4-8 feet (1.2-2.4 m) from a south- or southeast-facing window | Normal growth rate (moderate) Higher chances of flowering throughout the year |
| High(Bright direct) | Next to an east-facing window 2-4 hours of direct morning sun | Suitable for sun-tolerant varieties like ‘Wallisii’ and ‘Mauna Loa Supreme’ |
Here are additional reminders about a peace lily’s light requirements:
- Avoid direct sunlight from south or west-facing windows because intense light can scorch the leaves and cause brown or yellow leaf tips.
- Rotate the pot every time you water the plant to avoid leggy growth.
- For plants in moderate or high light intensity, draw the curtains at midday in summer to prevent sunburn.
- Clear the windows of dust, dirt, and snow for optimal natural light access that can promote continuous flowering even in the fall and winter.
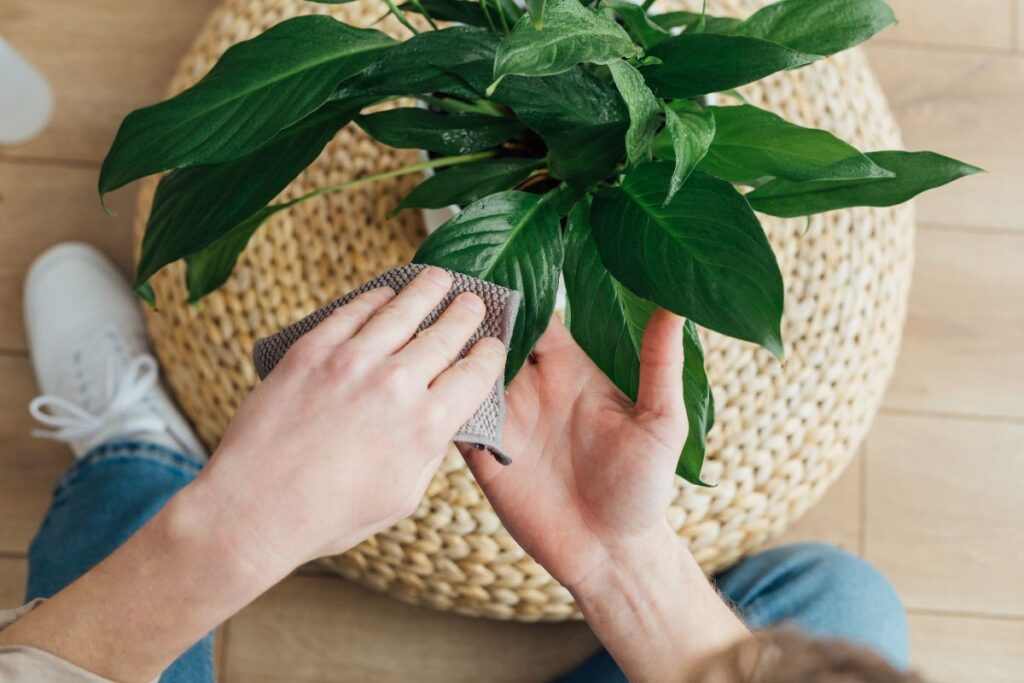
- Clean the leaves regularly with a clean, damp cloth to remove dust and optimize their photosynthetic capacity.
Watering
Here are a few important things to remember about a peace lily’s watering needs:
- Soil quality: Use a well-draining potting mix in a pot with drainage holes to prevent waterlogging. Adding compost or coco peat to the mix will make it easy to re-wet, whereas the perlite can help drain excess moisture.
- Water quality: Use room-temperature (around 68 °F or 20 °C) filtered water or pre-collected rainwater stored in sterile conditions. Avoid hard or tap water with fluoride, as buildup in the soil can cause leaf tip burn (brown leaf tips).
- Method: Pour the water evenly over the soil surface without wetting the foliage. Water the plant deeply to rehydrate the roots and rhizomes fully.
- Frequency: Wait until the top 2-3 inches (5-7.6 cm) of the potting mix dries out completely before watering again. This can be as often as every 5-7 days in spring and summer or every 10-14 days in the fall and winter. Plants growing in low light typically need less frequent watering due to lower metabolic and transpiration rates.
Pro Tip: You may also use a soil moisture meter to check when it’s time to water your plant. Insert the probe ⅔ deep into the potting mix. Repeat multiple times and water your plant when the average reading shows 4.
Underwatering Vs. Overwatering
Peace lilies can tolerate occasional underwatering but may require stringent intervention and take some time to recover when overwatered.
In my experience, peace lilies can go up to 2 weeks without water in spring but only up to 10 days in summer before the leaves start to show thirst.
Here are the symptoms of underwatered peace lilies:
- Wrinkly leaves
- Drooping or wilting leaves
- Yellow or brown leaf tips
Watering the plant deeply should reinvigorate the leaves and perk them back up.
On the other hand, peace lilies may show the following symptoms when overwatered:
- Yellowing leaf surface
- Mushy petioles and leaves
- Brown, water-soaked spots on the leaves
- Soggy, foul-smelling soil
- Mushy rhizomes
Minor overwatering issues can be fixed by letting the soil dry out a bit between watering sessions.
On the other hand, a problem with soil drainage can lead to root rot, so it may be best to repot the plant in fresh soil and a new, sterile pot. Mushy rhizomes and foul-smelling roots are common signs of root rot, which can be fatal to peace lilies.
I’ll discuss how to address this issue further below.
Temperature & Humidity
Maintain the following parameters for a happy peace lily:
- Optimal temperature range: 65-85 °F (18-29 °C). Ensure that there’s only a 10 °F (5-6 °C) drop between daytime and nighttime temperatures because drastic changes can cause droopy leaves and inhibit flowering. Keep the plant away from heating or cooling vents that can cause temperature fluctuations.
- Ideal humidity: 40-60%. Group peace lilies with other tropical plants like monsteras for a humid microclimate. You may also switch on a humidifier for around 4 hours at midday or during dry winter nights. You can also place dwarf peace lilies over a pebbled tray with water for a slight humidity boost. Otherwise, dry air conditions can cause droopy leaves and brown leaf tips.
On the other hand, here are some common peace lily care tips from other sources that you can do without:
- Regular misting: Spraying water on your peace lily leaves can only temporarily and negligibly raise the local humidity around the plant. Due to the upright growth and clump formation of the leaves, the water can also pool at the base of the leaves and increase the risk of root or crown rot and fungal or bacterial infections.
- Bathroom or kitchen placement: Temperature and humidity levels in bathrooms and kitchens can vary significantly throughout the day, depending on the frequency of use. For instance, hot showers and cooking at different times of day can cause fluctuations that can be confusing for flowering plants, which require distinct warm-day and cool-night conditions for flower development.
Fertilizing and Nutrient Requirements
Peace lilies have low nutrient needs, especially when grown in a high-quality potting mix. I usually don’t feed newly divided and transplanted suckers for the first 2 years, and they grow just fine. However, when the plants mature and start to flower, they require regular feeding to support the flowers.
Peace lilies can benefit from regular 10-10-10 houseplant fertilizers (liquid or granular). Avoid high-nitrogen fertilizers, as they can promote robust leaf growth and inhibit flowering.
Here are some tips on how to feed your peace lilies:
- Granular (slow-release) fertilizer: In early spring, rake about ½ inches (1.3 cm) deep into the soil surface, and sprinkle a thin layer of granular fertilizer over the depressions on the soil. Gently cover the granules with soil and water the plant deeply. Repeat every 2 months until mid-summer. Note: Choose low-to-zero fluoride fertilizers.
- Liquid fertilizer: Dilute the solution to half the recommended strength in distilled or filtered water. Pour directly into the soil and repeat every other time you water your plant from spring to mid-summer.
- Compost (optional): Rake the soil surface in early fall and work about an inch (2.5 cm) of compost into the top layer of the soil to gently replenish the nutrients consumed during flowering and lightly feed your peace lily throughout the cold season.
Signs of Nutrient Imbalance
Peace lilies are sensitive to nutrient imbalances and may show the following symptoms:
| Issue | Symptoms | Solutions |
| Nutrient Deficiency | Yellowing of leaf surface between the veins (magnesium, iron) Premature yellowing of entire leaf surface (nitrogen) | Feed the plant using a half-strength 10-10-10 liquid fertilizer for faster recovery Apply every time you water your plant and gradually increase the interval until late summer |
| Over-Fertilization | Brown leaf tips Crusty soil surface (from fertilizer salt or granules) | Scrape the salt crust over the soil surface and flush the soil with distilled water equal to the volume of the pot Alternatively, unpot the plant, remove the old soil, rinse the roots with distilled water, and repot the plant in fresh, well-draining soil mix. |
Pruning and Maintenance
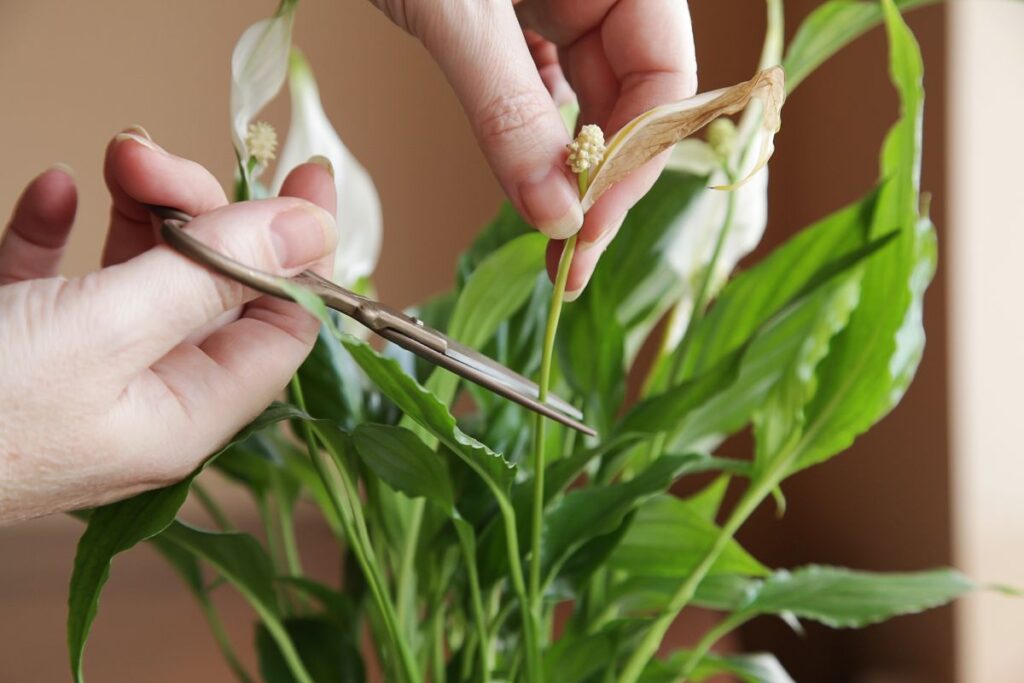
Regular pruning is crucial to maintaining the health of peace lilies. The best time to hard prune peace lilies is in spring or summer while they’re actively growing, but you can perform light pruning as needed during the cold season.
Here are the possible reasons and methods for pruning a peace lily:
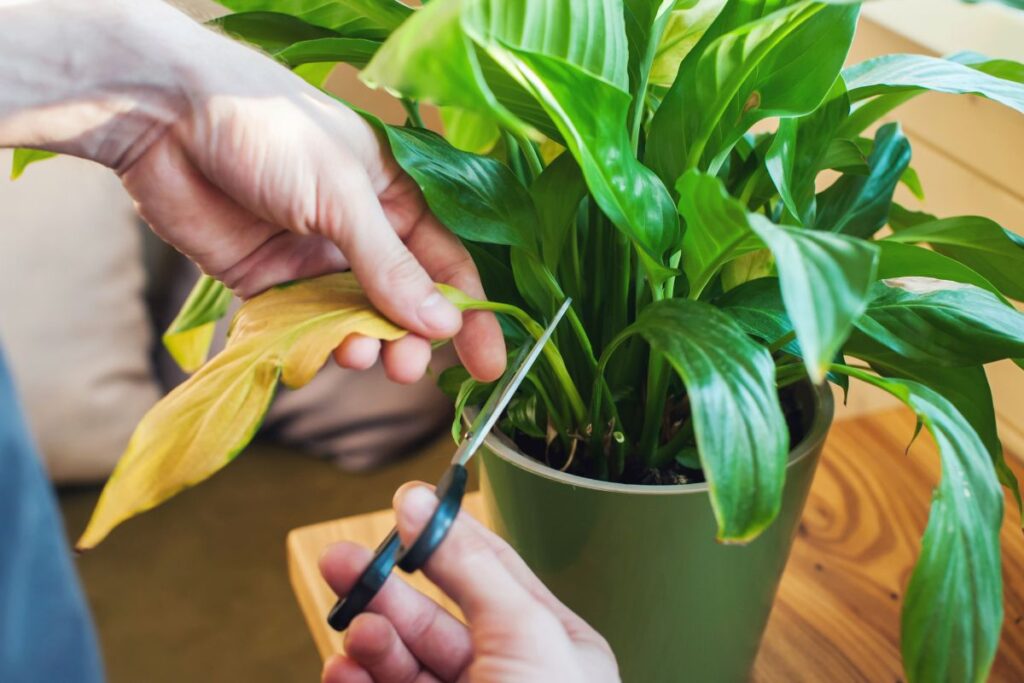
- Removing brown leaf tips: Peace lilies usually develop brown leaf tips for various reasons, such as over- or underwatering, fertilizer burn, or low humidity. Using sharp scissors, trim the brown tips at an angle on either side to mimic the lance shape of the leaves. This gives the plant a healthy appearance instead of having an unnatural, truncated tip.
- Pruning spent flowers or damaged leaves: As flowers fade and leaves age, you can cut the stalks/petioles close to the base of the clump. This helps the plant allocate energy resources to the remaining healthy leaves and potential new growth.
Note: Remember to use sharp, sterile tools like scissors or shears whenever you prune your peace lily to prevent the spread of pests or diseases. Sterilize the blades with rubbing alcohol and cotton balls or a clean cloth between cuts.
Routine Cleaning
Peace lilies have large, clumping foliage that can harbor dust over time. Moisten a clean piece of cloth with distilled or filtered water and wipe the dust off the leaves.
Avoid using leaf shine products, as they can:
- Get stuck between the ridges or depressions on the leaves
- Block the pores on the leaves and inhibit transpiration
- Leave behind residues that can damage plant tissue by increasing the risk of leaf scorch
Propagation Techniques
You can propagate indoor peace lilies through division or seeds. I’ll explain the steps below.
Division
Plant division is a straightforward propagation method you can use when repotting your peace lilies, typically every 2-3 years.
Spring or early summer is the best time to divide peace lilies because they’re in active growth and more likely to survive transplant shock.
Follow the steps below:
- Water the plant deeply 2 days before division.
- Carefully unpot the plant and disentangle the roots.
- Look for natural separation points between clumps of leaves along the rhizomes, and carefully separate them with your fingers.
- Use a sharp, sterile knife to slice the leaf clumps (suckers) that don’t readily separate from the mother plant. Ensure that each sucker has healthy fibrous roots.
- Prepare a pot 2 inches (5 cm) wider and deeper than the root ball of the sucker and fill in the bottom with your standard peace lily soil mix.
- Plant the division in the new pot, and tamp the soil down to remove air spaces and anchor the plant.
- Water the soil deeply to help the young plant adapt to the new pot.
- Place in a warm room with bright, indirect light and moderate humidity.
- Water again deeply as soon as the top 1-2 inches (2.5-5 cm) is dry. The young plant needs regular watering to help the roots establish in the new environment.
To set expectations, it can take 1-3 years of adequate care before the young plant matures and starts producing flowers.
Seed Propagation
If your peace lily is a prolific bloomer, you can hand-pollinate the flowers and collect the seeds.
Here’s how:
- Wait until the tiny dots containing the pollen develop between the female flower parts.
- Using your gloved fingers or a brush with soft bristles, collect the pollens and brush them against the female parts of a young flower (without its own pollen yet) to pollinate it. Note: Peace lily flowers cannot self-pollinate because the female parts are no longer receptive after the pollen is produced.
- Wait until the spadix and spathe dry out completely before collecting the seeds. You’ll know that the hand-pollination was successful when round seed pods develop in the gaps between the spikes.
- Rub the dried pods between your fingers to release the seeds.
You may then plant the seeds with the following steps:
- Fill a 6-inch (15-cm) pot with coco peat or your standard peace lily potting mix.
- Poke 2-3 holes about an inch (2.5 cm) apart and ¼ inch (0.6 cm) deep.
- Place 2-3 seeds in each hole and cover them lightly with soil.
- Spray the soil with water to moisten the top inch (2.5 cm).
- Place the pot in a warm room with bright, indirect light.
- Moisten the top inch (2.5 cm) of the soil daily.
The seedlings typically germinate after about 1-2 weeks, and the plant can stay in the same pot for about a year.
Repotting

Peace lilies have slow-to-moderate growth rates indoors and don’t mind staying in the same pot for 2-3 years, sometimes longer.
However, prolonged potbound conditions can lead to the following issues or symptoms:
- Roots spilling out of the pot: Fibrous roots may grow out of the drainage holes or over the soil surface due to a lack of space in the pot.
- Yellowing, drooping leaves: Over time, the soil degrades and loses nutrients. Root growth can also displace some soil, reducing the substrate’s ability to hold sufficient moisture for the plant.
- Stunted growth due to limited soil space: The rhizomes need lateral space to put out offshoots.
- Lack of flowers: Although peace lilies lose vigor and flower less often over time, soil quality and nutrients also play an important role in the plants’ ability to flower.
The above symptoms indicate that it’s time to repot your peace lily. The best time to do so is in spring until early summer during active growth.
Follow the steps below to repot your overgrown peace lily carefully:
- Water the soil deeply two days before repotting. If there isn’t much soil left to hold water, soak the pot in filtered water for about 10 minutes one day before repotting to rehydrate the plant.
- Using sterile scissors, cut the roots poking out of the drainage holes to remove resistance when you unpot the plant.
- Carefully slide the plant out of the pot to minimize root damage and reduce transplant shock risks.
- Examine the root ball and gently disentangle the roots. Prune the dried or mushy sections, but limit pruning to about 30% of the root volume to reduce transplant shock. Sterilize the tools with rubbing alcohol between cuts.
- Prepare a new pot with fresh, well-draining soil. Ensure the pot has drainage holes and is about 2 inches (5 cm) wider and deeper than the old one. Avoid using oversized pots in an attempt to further reduce the repotting frequency because the extra soil space can hold excess moisture and increase the risk of root rot.
- Spread the roots over the fresh soil and bury the crown up to an inch (2.5 cm) below the surface.
- Water the soil deeply to help the plant settle in. Potbound or overgrown peace lilies can use the moisture after repotting because the old soil is often dry and void of nutrients.
- Place the plant in bright indirect light, moderate temperature, and moderate humidity.
Note: Peace lilies may take about 2 weeks to recover from transplant shock and start growing new shoots. Just to set expectations: Newly repotted plants might not bloom in the same year, especially after extensive root pruning.
Be consistent in your care routine after repotting to maintain plant health and encourage blooms in the following year.
Hydroponic Planting
You can also grow the peace lily divisions in water (hydroponics) for an elegant plant decoration. This is perfect for mature peace lilies with an established root system for minimal repotting needs and less disturbance.
With appropriate care and environment, peace lilies can stay in the same water container for several years. I’ve had two setups, which I haven’t repotted for a little over 3 years, and they’re still thriving—even flowering in the past two springs.
You’ll need the following materials:
- Clear vase with a narrow neck or a bowl with a narrow mouth to support the foliage and keep minimal contact with the water. I recommend a container whose mouth is about a third of the span of the bottom leaves.
- Rocks about 1-2 inches (2.5-5 cm) in diameter (any color you like—I prefer black or white for a neutral but elegant feel)
- Filtered or distilled water to clean/rinse the roots and the regular substrate
- Water hose with a mild shower setting
- Thin wooden skewers about 2-3 mm (~0.08 in) in diameter (optional)
Follow the steps below to grow your peace lily in water:
- Clean the rocks under running water to remove dirt. Pro Tip: Place the rocks in a strainer and run freshly boiled water over them to kill any pathogens.
- Water the plant deeply two days before transplanting so the soil is easier to work with or detach from the roots with minimal damage.
- Carefully unpot the plant and remove as much soil from the roots as possible using your fingers.
- Use a hose (mild shower setting) to wash off the remaining soil until all that’s left are the white, fleshy roots. Note: It’s okay if the hose has tap water when flushing. Just rinse the roots with filtered or distilled water after removing all the soil.
- Fill the bottom of the bowl with enough rocks to keep the plant’s base well above the water line.
- Position the roots over the rocks and spread them out freely. Optional: Gently cover the roots with more rocks if you want to keep the plant stable. Alternatively, if the base of the leaves keeps sinking in water, pierce two wooden skewers through the rhizome and hang the tips over the rim of the container to keep the plant steady.
- Fill the bowl with enough filtered or distilled water just below the base of the leaves.
- Place the plant in an area with moderate temperature and bright indirect light. Avoid direct sunlight and temperatures over 80 °F (27 °C) because they can promote algal growth.
For maintenance, remember the following tips:
- Refill the water whenever it drops below the crown of the roots.
- Routinely remove any dried or dying leaves before or as soon as they fall into the water.
- Fertilize only once every two months in spring until early summer using a water-soluble 10-10-10 fertilizer. Read the product label for the appropriate dosage and dilute the fertilizer to half the recommended strength.
Pest and Disease Management
Several houseplant pests and diseases may be drawn to peace lilies due to their moisture requirements (i.e., high humidity and moist soil.
Watch out for the following pests and diseases:
Common Pests
Existing plant pests indoors can spread from one houseplant to another. In such cases, the following pests may be drawn to peace lilies:
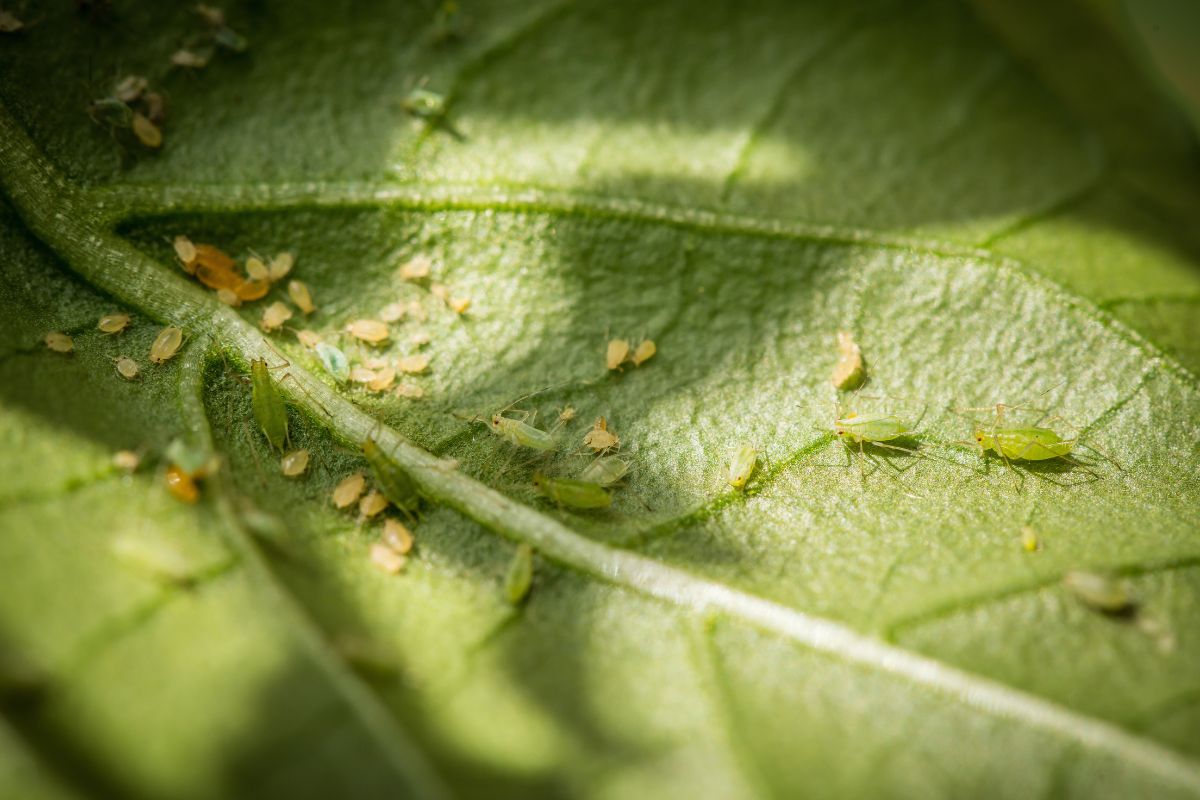
- Aphids: translucent white, green, black, or orange insects about 1/16-⅛ inches (1.6-3.2 mm) long. They feed along the veins on leaf undersides and excrete honeydew.
- Scale insects: tiny brown, immobile bumps around 1/16-⅛ inches (1.6-3.2 mm) in diameter. Those that feed on phloem sap from the leaf veins excrete honeydew.
- Mealybugs: fluffy white clusters of insects with segmented bodies around 1/16-⅛ inches (1.6-3.2 mm) long. They also feed on plant sap and release honeydew.
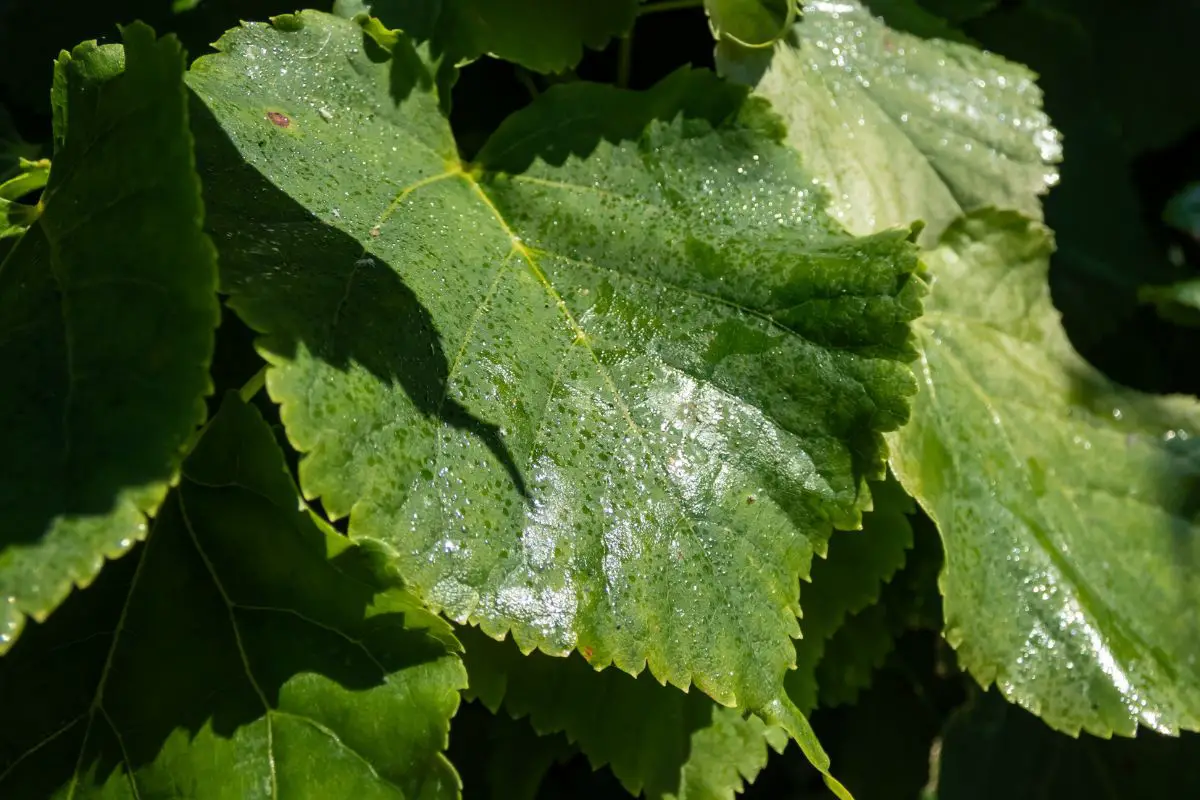
- Spider mites: tiny spider-like insects about 1/20 inch (1 mm) long. They produce fine webs and cause speckled yellow or white damage on the leaf surface.
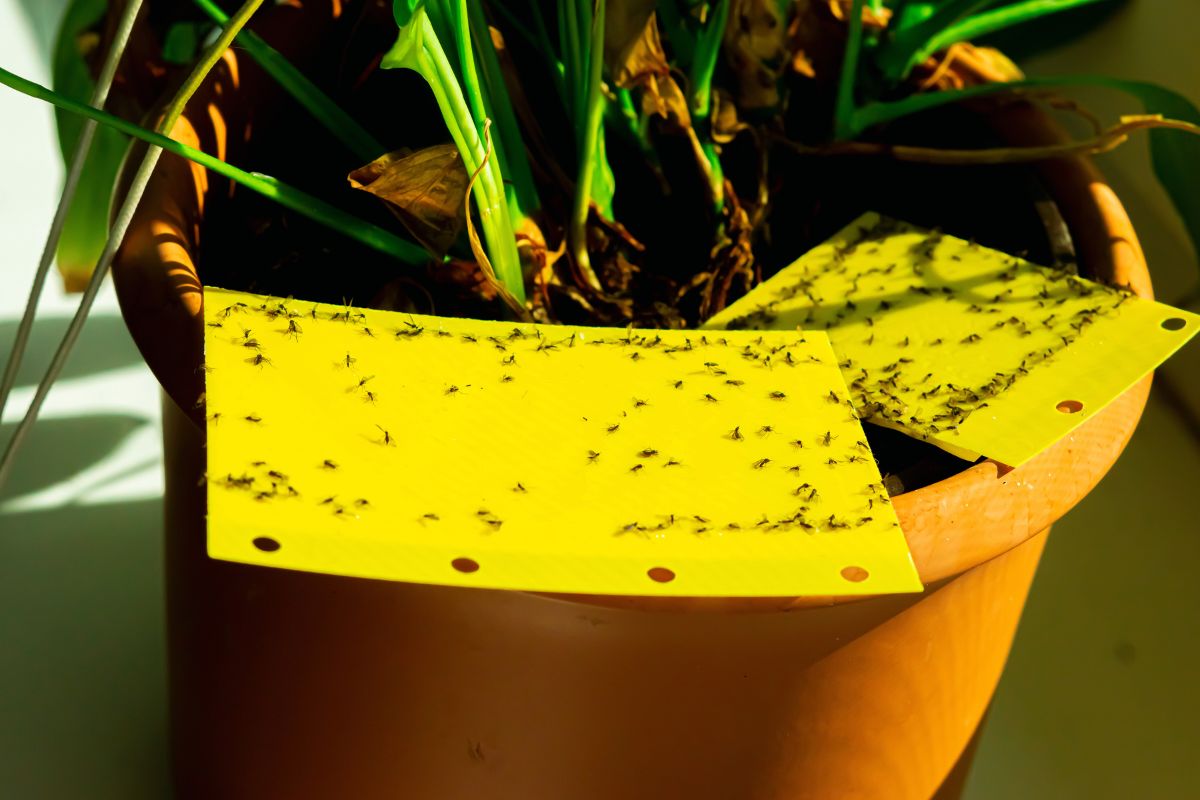
- Fungus gnats: black or gray mosquito-like insects about 1/16-⅛ inches (1.6-3.2 mm) long. They lay eggs in moist potting soil, and the larvae feed on organic matter or plant roots after hatching.
You can deal with a pest infestation with the following tips:
- Isolation: Isolate severely infested plants in a room with similar environmental conditions to avoid worsening the stress symptoms with relocation shock.
- Manual removal: Use alcohol-dipped cotton swabs to scrape aphids, mealybugs, and scale insects off the leaves and drop them in soapy water. To remove spider mites, you can dunk the peace lily leaves in a tub of filtered water and wipe the webs off with a clean, damp cloth. On the other hand, you can catch adult fungus gnats by placing a yellow sticky trap near your pots.
- Organic treatment: Spray the foliage with neem oil at night to eliminate the remaining crawlers. Repeat once a week for up to 8 weeks for treatment and every 2 weeks to prevent a re-infestation.
- Chemical treatment: You may use spinosad-based sprays to deal with spider mites. Be sure that the room is well-ventilated for at least 24 hours after treatment, and repeat the process every 10-14 days. Read and follow the product-specific safety precautions.
- Soil drench: For fungus gnat infestations, you can drench the soil in 1% hydrogen peroxide in lieu of regular watering to eliminate the eggs and larvae in the soil. Avoid wetting the leaves with the solution. Hydrogen peroxide may also eliminate rot-causing pathogens.
- Watering adjustment: Allow the top 2-3 inches (5-7.6 cm) of the soil to dry out between waterings. Alternatively, add a fine layer of pumice over the soil to prevent fungus gnats from laying eggs in your peace lily pots.
Common Diseases
Watering problems are the primary causes of disease transmission in peace lilies.
Here are common issues to look out for:
Bacterial or Fungal Leaf Spots
I’ve once had a peace lily suffer from bacterial leaf spots acquired from neighboring plants.
For instance, my tall dieffenbachia (4 feet or 1.2 m) had a mushy brown-black spot with a yellow halo, which was transmitted to my short peace lilies (18 inches or 45 cm).
I usually keep the humidifier on in the tropical plants area during the day. The moisture that landed on the dieffenbachia leaves may have trickled down to my peace lilies, carrying the pathogens with it.
Common bacterial and fungal leaf spot diseases that can infect peace lilies include:
- Xanthomonas campestris var. dieffenbachiae: Bacterial pathogen that causes brown, mushy spots (occasionally with a yellow halo) along leaf edges.
- Phytophthora parasitica: Root rot pathogen that can spread to the leaves by splashing contaminated soil during watering and cause black, necrotic leaf spots.
- Myrothecium roridum: Fungal leaf spot pathogen that can enter plant wounds and cause necrotic tissue damage (on leaves and stems)
Prompt diagnosis and treatment are crucial to help your plant recover.
Here’s how I fix leaf spot problems:
- Prune all symptomatic leaves down to the base using sterile pruning shears. Sanitize the blades between cuts to prevent the spread of infection.
- Brush a small amount of cinnamon powder over the cuts to prevent pathogens from entering the wounds.
- Isolate the infected plants or keep them far enough to prevent pathogen-contaminated water from dripping from one plant to another—this is common when placing plants on shelves.
If symptoms persist, discard the infected plants to avoid the spread of disease to neighboring plants.
Root Rot
Peace lilies like evenly moist soil to keep the petioles plump and the foliage upright.
On the other hand, standing water or soggy conditions can cause rot-causing pathogens to multiply rapidly and damage the roots.
Common root rot-causing pathogens that affect peace lilies include:
- Cylindrocladium spathiphylli
- Phytophthora parasitica
- Rhizoctonia solani
- Sclerotium rolfsii
Peace lily roots may be contaminated by rot-causing pathogens from nurseries, which can remain undetected so long as the plant remains healthy and the soil is allowed to dry out between waterings.
However, prolonged soggy conditions can activate the pathogens and cause a rapid decline in plant health with the following symptoms:
- Wet, soggy soil (sometimes with mold)
- Adult fungus gnats hovering over the soil, indicating that it’s too wet and suitable for laying eggs in
- Yellowing leaf base that spreads upward
- Brown, water-soaked spots on the leaves
- Mushy and limp petioles
- Foul odor coming from the soil
- Black, mushy roots and rhizomes
Although you can fix mildly overwatered peace lilies, it’s rather impossible to save a plant with root rot symptoms because the shallow roots and underground stems likely carry the pathogens. It’s only a matter of time before the plant dies.
You must discard the infected plant and contaminated soil mix properly. Wash the pot with 10% bleach to kill the remaining pathogens and rinse thoroughly with clean water.
Troubleshooting Common Problems
Despite being low-maintenance houseplants, peace lilies may come across aesthetic and health problems when poorly handled or neglected.
Here are the common problems of peace lilies and their corresponding fixes:
Brown Leaf Tips

The pointy leaf tips of peace lilies turn brown due to the following issues:
- Overwatering (brown and mushy)
- Underwatering (crisp and dry)
- Salt stress from fluoride or fertilizer salts (crisp and dry)
- Low humidity and/or high temperature (crisp, dry, and curling inward)
- Sun stress (brown, dry spots on sun-exposed leaf surfaces and tips)
You can fix the problem by pruning the leaf tips at an angle on either side, mimicking the pointy shape of the leaves. Use sterile scissors to avoid infecting the stressed plant.
Improve your care routine and the environment, and the leaf tips won’t brown again.
Drooping or Wilting Leaves
Older leaves naturally droop or wilt over time. On average, the leaves on my peace lilies stay perky for around 3-6 months before gradually arching outward and downward and turning yellow.
The thicker leaves of larger varieties like ‘Sensation’ can sometimes stay green for up to a year if you keep the plant in moist soil and humid air.
Premature or unnatural drooping and wilting of leaves may be caused by the following issues:
- Prolonged underwatering: Water the plant deeply to rehydrate the roots. Alternatively, soak the pot in filtered water for 10-30 minutes to relieve any hydrophobic clumps in the soil. The leaves should perk up after a few hours when properly rehydrated.
- Waterlogged soil: If the symptom is accompanied by mushy brown leaves, allow the soil to dry out a bit. You can poke a few holes in the soil using a wooden chopstick to aerate it and encourage faster drying. You may also poke the soil at the drainage hole to remove any plugs that inhibit proper drainage.
- Dry air: If the humidity is too low indoors (less than 30%) for several days and the soil is also dry, peace lily leaves are likely to droop or wilt. Place dwarf peace lilies over a pebbled tray with water and group them with other tropical houseplants for a slight boost in humidity. You can also switch on the humidifier for several hours to improve the overall humidity indoors to around 50%.
- Cold shock: Sudden or prolonged exposure to temperatures below 50 °F (10 °C) can shock peace lilies and cause the leaves to turn brown, mushy, and limp. Unfortunately, there’s a low chance of the plant bouncing back. You can prune all the mushy stems and leaves and keep the roots and rhizomes in a warm room with bright indirect light. With patience and proper care, new leaf clumps may sprout.
Note: Peace lilies don’t require staking to fix droopiness. The natural arching of the leaves due to aging adds a graceful touch to the plant’s appearance.
On the other hand, drooping or wilting due to stress is often irreversible (except for slight dehydration). Addressing the underlying issues will prompt the plant to produce new and upright leaves.
Yellowing Leaves
Peace lily leaves may turn yellow prematurely due to the following:
- Pest damage can lead to localized yellowing at the feeding site or a speckled white or yellow appearance. Prune the severely discolored leaves and treat the pest infestation with neem oil or spinosad-based spray. Monitor the plant and manually remove new pests as soon as you spot them.
- Nutrient imbalances can also cause yellowing. A lack of magnesium and iron can cause interveinal chlorosis, and nitrogen deficiency can lead to the yellowing of entire leaf surfaces. Feed the plant with a half-strength 10-10-10 liquid fertilizer every time you water from spring to summer or until the symptoms go away. Gradually increase the interval in summer and stop feeding in the fall.
- Overwatering occasionally turns the leaves yellow from the base, especially when root rot occurs. Allow the top half of the soil to dry out completely before watering again. If it takes too long for the soil to dry out, consider repotting the plant in a loose, well-draining potting mix.
- Underwatering can cause yellowing of the leaf tips that gradually turn brown if left unattended. Water your plant deeply and regularly to prevent dehydration symptoms, ideally as soon as the top 2-3 inches (5-7.6 cm) of the soil is dry.
Lack of Blooms
Peace lilies may fail to bloom due to the following reasons:
- Age and potbound issues: Peace lilies naturally lose vigor over time, especially when potbound. Dividing the plant and repotting it in a fresh soil mix with compost can reinvigorate it and encourage future flowering.
- Nutrient deficiency: Peace lilies can use mild nutrient boosts from balanced organic fertilizers (10-10-10) during the growing season to support the blooms while maintaining green growth. Avoid using nitrogen-rich fertilizers because they can inhibit flowering. I also don’t recommend high-phosphorus, low-nitrogen fertilizers, as they can promote flowers but lead to dull-looking leaves.
- Water stress: Over- and underwatering can stress the plant and inhibit flower development. Be consistent with your watering routine and address watering problems promptly.
- Insufficient light: Although peace lilies can tolerate low light conditions, the lack of natural light can inhibit flower development. Flowering plants require sufficient red light from the sun to promote blooms.
Seasonal Care
If you live in a frost-free region, you can maintain your care routine all year round, and your peace lily will reward you with sporadic blooms.
On the other hand, if light intensity and temperature vary drastically between seasons in your area, you may adjust your care routine in the fall and winter with the following tips:
- Light: Ensure your plant receives at least 8 hours of filtered or indirect light up to 8 feet (2.4 m) from a south-facing window to keep the leaves green and vibrant. If your plant is next to a north-facing window, clean the window regularly for optimal access to natural light. You can also amend the lighting needs during cloudy days by placing the pot a foot (30 cm) below a 15-watt grow light for about 8-10 hours daily.
- Water: Routinely check the soil moisture about 7 days after watering. When the top 2-3 inches (5-7.6 cm) or the upper half of the soil is dry, it’s time to water your plant deeply. Otherwise, give your plant a couple more days.
- Temperature: Keep the plant away from drafty doors and windows. If the plant sits next to a north-facing window, seal the windows to prevent drafts and keep the leaves away from the cold panes. Nighttime temperatures of around 60-65 °F (15.6-18 °C) should be safe and may even promote flower bud development.
- Humidity: Maintain the humidity at 40-60% all year round.
- Fertilizer: Stop feeding your plant granular fertilizers in mid-summer. When using liquid fertilizers, stop feeding in late summer. However, if your peace lily has a history of flowering sporadically even through winter, work a handful of compost into the top inch (2.5 cm) of the potting mix in the fall.
Display and Companion Plants
There are several varieties of peace lilies to choose from, depending on your aesthetic preferences and indoor space limitations.
Here are some design recommendations to optimize your plant’s appeal:
- A touch of green on a tall wall shelf: This placement is perfect because it doesn’t take much space, and the plant is safely out of reach from young children or curious dogs. Peace lilies are also versatile light-wise, so they can tolerate low-to-moderate lighting along the walls. Use compact varieties like ‘Wallisii’ or ‘Little Angel’ for this purpose.
- Welcome plant along corridors: The white spathes of peace lilies usually mean peace and purity, making them perfect for welcoming guests into your home.
- Table centerpiece: Dwarf varieties look amazing over tables or countertops. They’re also easy to keep clean and relocate as needed.
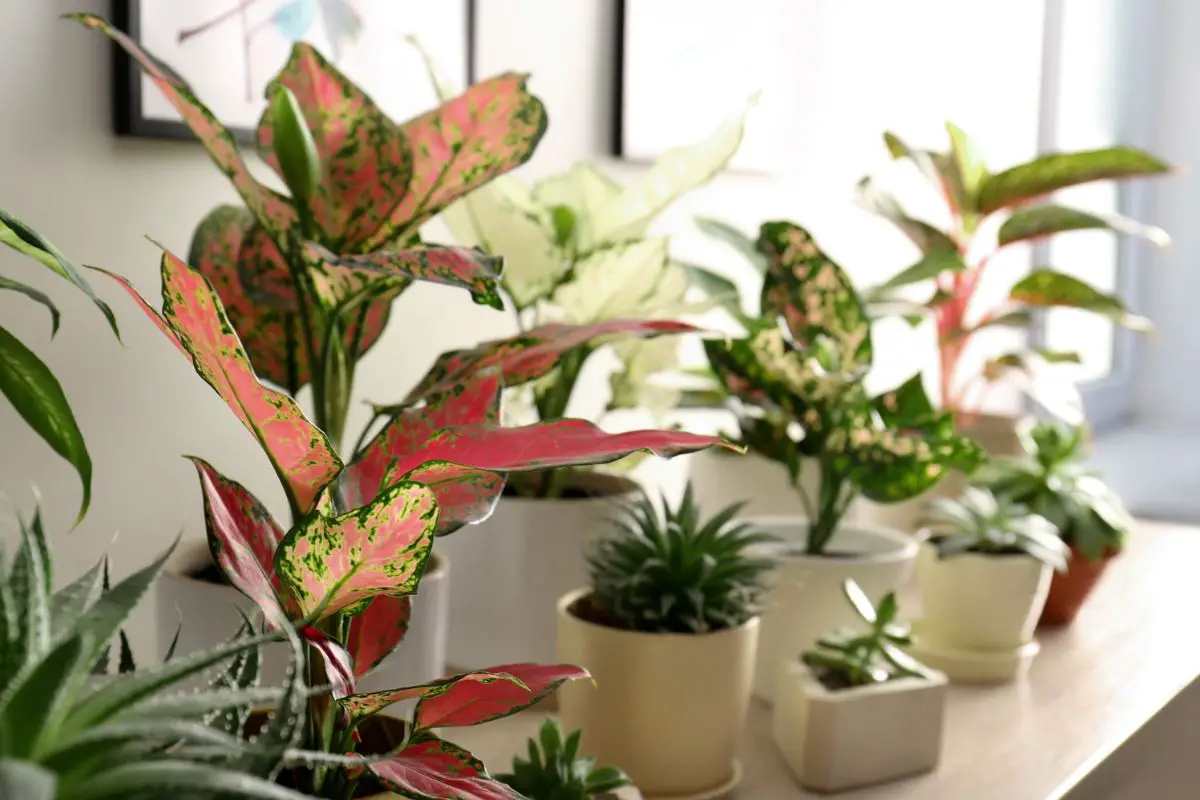
- Tropical plant collection: You can also place peace lilies along with your tropical plants for practical and aesthetic reasons. It’s easier to keep track of and maintain your plants’ environmental needs (i.e., light, temperature, and humidity), and you’ll also have a relaxing green corner in your home.
For a fantastic tropical vibe in your home, you can group peace lilies with the following houseplants:
- African violets (Saintpaulia ionantha): If you like flowering plants, African violets are an excellent companion to peace lilies. Both plants can be trusted to flower even with low to moderate indoor lighting. The bluish-purple flowers of African violets add an exciting contrast against the white spathes of peace lilies.
- Dieffenbachia (Dieffenbachia seguine): This low-light tolerant plant is a perfect companion for peace lilies. Also known as dumb cane, dieffenbachia has brush-stroked creamy white leaves with green margins, which are a festive contrast to the classic peace lilies’ solid-green leaves.
- Monstera (Monstera deliciosa): Monsteras and peace lilies share the same affinity to high humidity, moderate lighting, and moderate temperatures. Grouping them in the same area will make it practical to maintain greenhouse-like conditions in the indoor garden.
Final Thoughts
Peace lilies are attractive and resilient houseplants that can bring joy and beauty to any home. They have low maintenance needs and are easy to propagate, making them suitable for sharing with family and friends.
Go ahead and purchase that peace lily you’ve been eyeing for years and be part of a growing community of plant enthusiasts. Follow the practical tips discussed in the article until you develop a routine that works perfectly in your indoor gardening adventure.
Feel free to leave a comment to ask questions or share expert advice on peace lily plant care.