How to Plant, Grow, and Care for Spider Plants
Spider plants are known for their distinctive arching leaves, spider-like plantlets, and compact size. They’re also one of the easiest houseplants to care for.
Spider plants are an excellent recommendation for beginner indoor gardeners because they:
- Thrive in moderate to bright light conditions. You can place them next to a sunny window or a corner that receives bright indirect light.
- Are mildly drought tolerant. Their fleshy rhizomes store moisture, allowing the plant to withstand infrequent watering.
- Do great at moderate indoor humidity and temperature. However, they’ll need protection from drafty doors or windows because they can’t tolerate temperatures below 45 °F (7 °C).
- Don’t require frequent fertilization because the rhizomes also store food and nutrients for continuous plant growth.
- Are easy to propagate. When potbound, spider plants produce tiny plantlets that can be planted directly into the soil. You may also divide the overgrown mother plant or harvest seeds after flowering.
- Have few pest and disease problems. Proper placement, such as on high shelves or hanging baskets, will keep them safe from common indoor pests and pathogens.
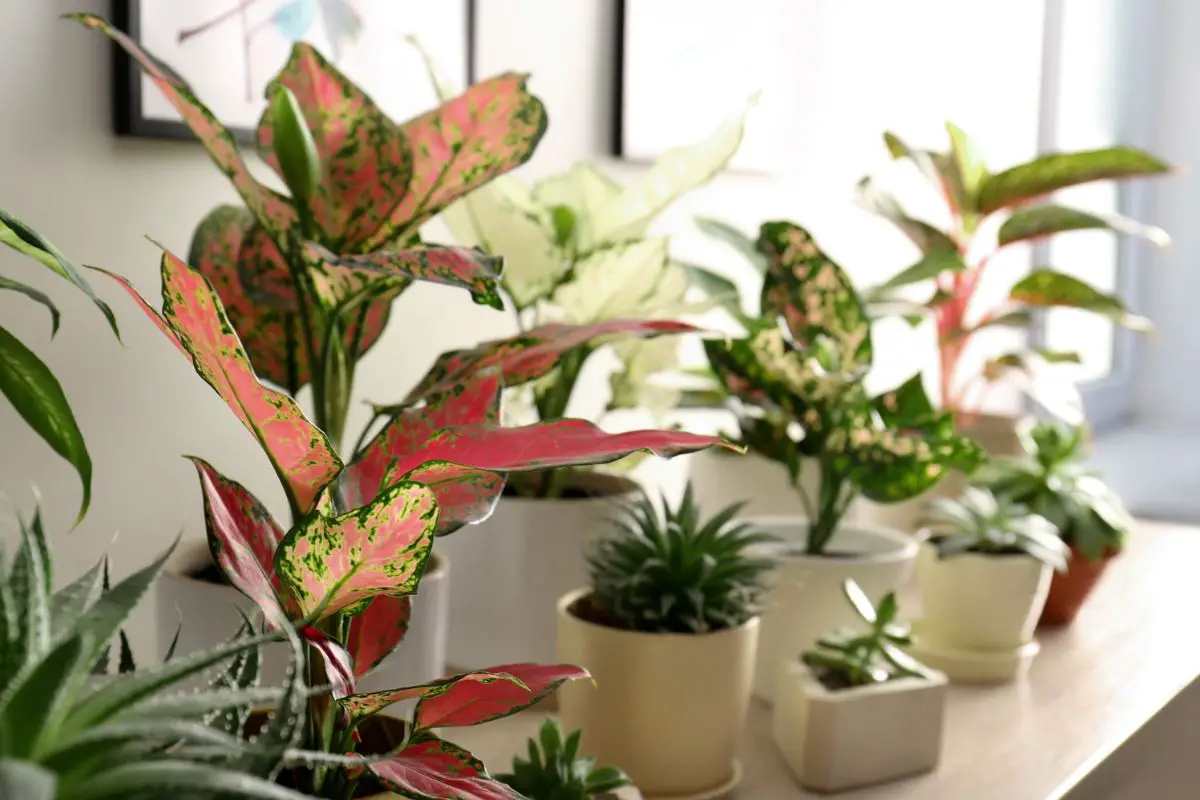
- Have versatile decorative appeal. Spider plants look amazing on tabletops, shelves, or hanging baskets.
- Can live indefinitely with adequate and consistent care. Plant division every 2-3 years and regular collection of plantlets can produce new plants that can last generations.
The rest of the article will discuss a spider plant’s care and environmental requirements to thrive in any indoor space.

Quick Guide
| Common Name(s) | Spider plant, ribbon plant, green shamrock |
| Botanical Name | Chlorophytum comosum |
| Family | Asparagaceae |
| Plant Type | Herbaceous perennial |
| Native Area | Tropical regions of coastal South Africa |
| Height & Spread | Each leaf is 12-18 inches (30-45 cm) long The plant cluster can spread around 20 inches (50 cm) wide |
| Bloom Time | Late summer or early fall |
| Flower Structure | Raceme |
| Color | White |
| Sun Exposure | Partial sun; up to 4 hours of direct morning sun or at least 12 hours of bright indirect light |
| Soil Type | Moist, well-draining |
| Soil pH | 6.0-7.0 |
| Watering | Once every 5-7 days or when the soil is dry halfway down |
| Pests, Diseases, Common Problems | Scale insects, mealybugs, aphids, spider mites, whiteflies Root rot, fungal or bacterial leaf spot diseases (rare) Leaf tip burn, loss of variegation, leaf bleaching |
| Toxicity | Non-toxic |
| Required Maintenance | Low to moderate Mildly drought tolerant Tolerant to moderate to bright light conditions |
Spider Plants: An Overview
Spider plants (Chlorophytum comosum) are compact, clump-forming, herbaceous perennials that belong to the Asparagaceae or asparagus family.
They’re occasionally called ribbon plants because of the shape of the foliage (long and thin) or hen-and-chicks because of the baby plants or plantlets produced by the mother plant.
Below are essential facts about spider plants:
Origin and Natural Habitat
Spider plants are native to the tropical regions of coastal West and South Africa with the following environmental conditions:
- Dappled sunlight: The intense tropical sun is often filtered by taller plant canopies
- Season-dependent rainfall: As low as 4 inches (100 mm) during the dry winter and up to 50 inches (1300 mm) during the wet or summer season
- Sandy loam soil: Loose and well-draining
- Warm, frost-free temperatures: Average of 65-75 °F (18-24 °C) and seldom drops below 45 °F (7 °C) in winter
- Humid conditions: Around 70% on average, but can be as low as 50% in winter
Anatomy
A spider plant’s anatomy is a testament to its adaptations and evolution induced by its native environment.
Here are the noteworthy physical traits of a spider plant:
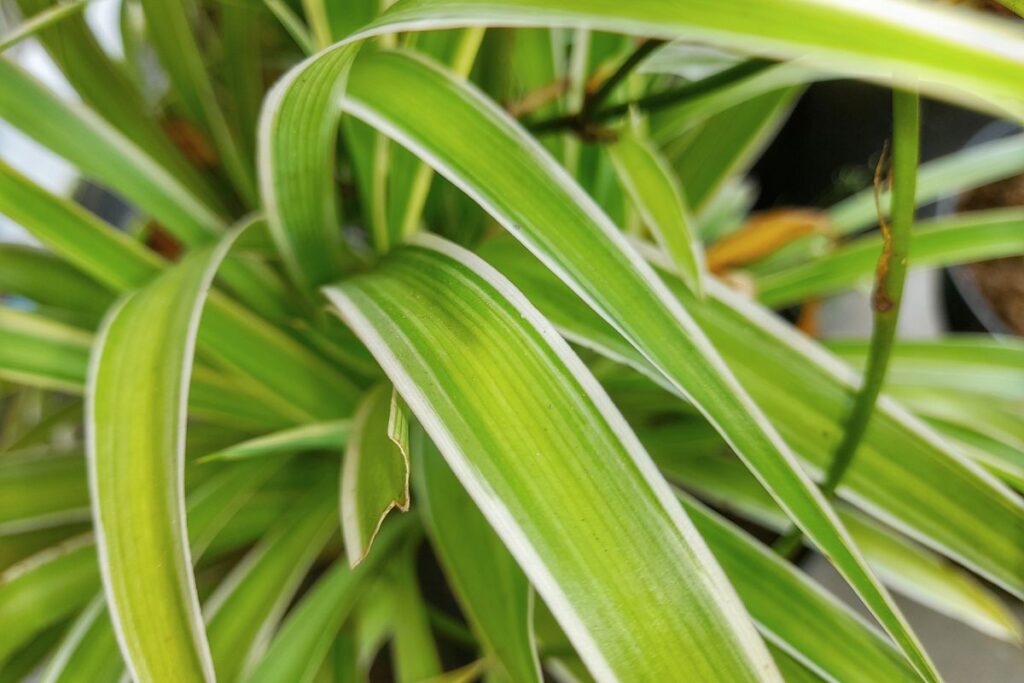
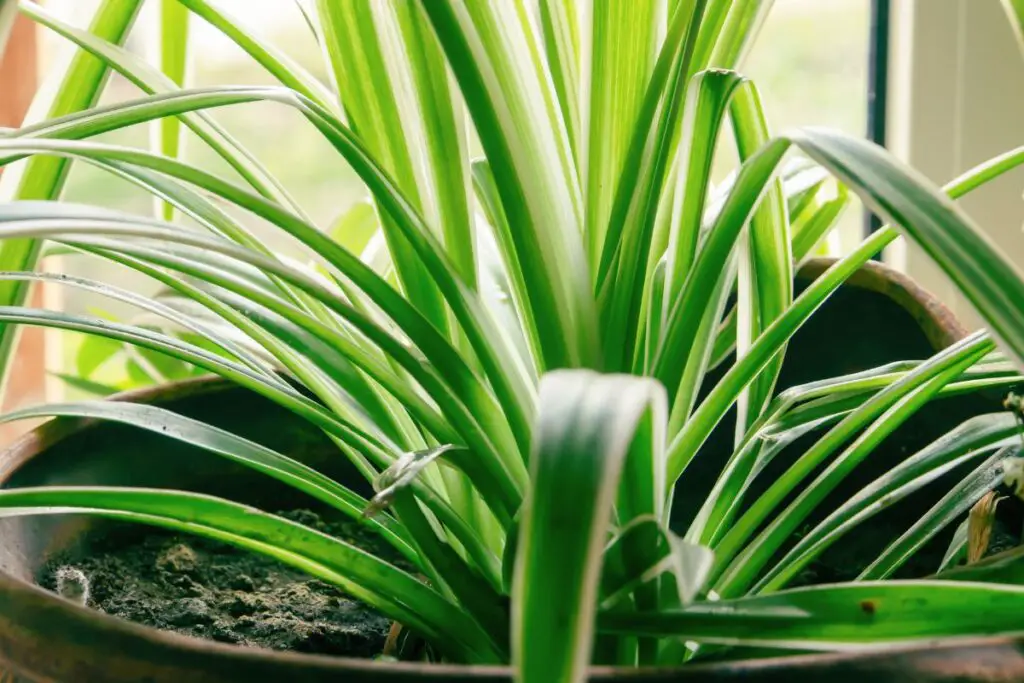
- Leaves: Long, arching, grass-like leaves. The classic Chlorophytum comosum has bright green leaves. The more popular variegated species with white stripes are ‘Vittatum’ (white center) and ‘Variegatum’ (white edges), which resulted from variations in chlorophyll production due to exposure to more intense sunlight.
- Roots: Thick, tuberous roots that help store water and nutrients to survive the season-dependent rainfall and nutrient-scarce soil in coastal African regions.
Reproduction
In nature, spider plants reproduce in two ways:
- Seed production: Toward the end of the wet season, as day length gets shorter, mature spider plants put out long flower stalks (often incorrectly called stolons or runners) and produce tiny white flowers, which produce flat black seeds after pollination. The seeds then fall on the ground or are dispersed by the wind.
- Plantlets or offshoots: The nodes of the flower stalks produce new leaves, forming a baby spider plant or spiderette, which is a miniature version of the mother plant. Eventually, the plantlets develop aerial roots and their weight pulls the stalk down to the ground. The stalk dries out over time after the plantlets develop more underground roots.
Note: Strictly speaking, spider plants don’t reproduce through stolons, which are underground stems. Instead, they put out long flower stalks about 2 feet (0.6 m) tall that gradually arch and send the plantlets to the ground, where they can complete their root development.
Flowers
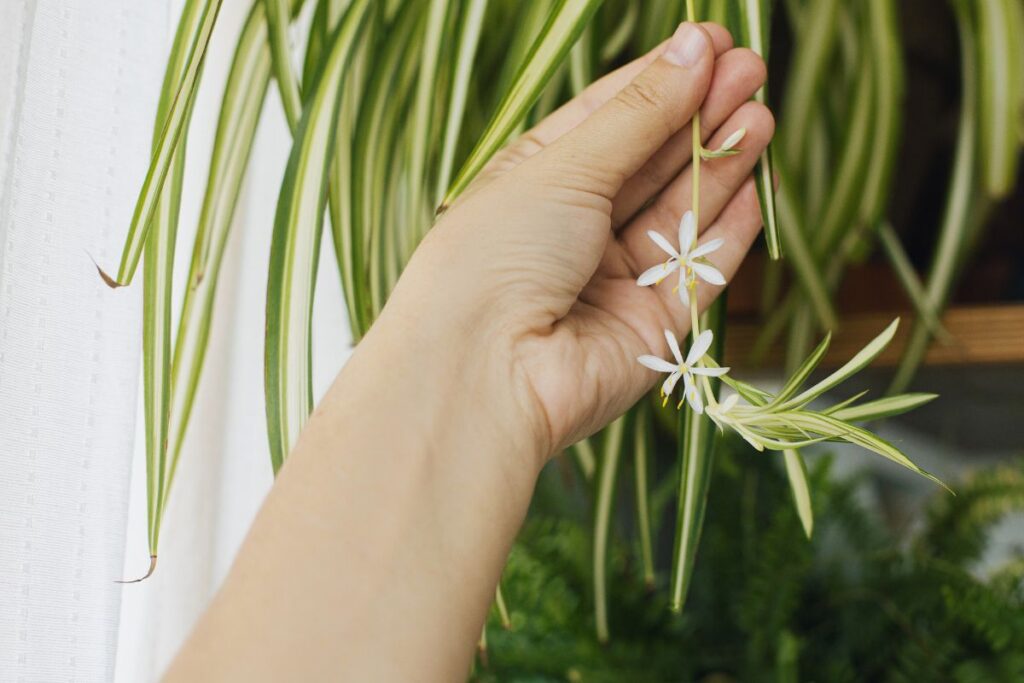
Mature spider plants (typically over one year old) naturally bear odorless flowers in the wild with the following traits:
- Blooming season: A spider plant stores enough energy in the rhizomes during the growing season and puts out long stems/stalks, usually in late summer as day length gets shorter.
- Appearance: Tiny, white, odorless flowers around 1-1.5 inches (2.5-3.8 cm) in diameter with six white petals grow along the stalk in a raceme formation.
- Pollination: Spider plant flowers are monoecious, which means they can self-pollinate with the help of birds, butterflies, bees, or moths.
- Fruit: After pollination, the flowers fade and give way to a tiny leathery fruit (around 0.5 in or 1.3 cm) that looks like three ear flaps (seed pods) that contain one black seed each.
Note: It is less likely for spider plants to bear fruits naturally indoors due to the absence of insect pollinators. However, you can hand-pollinate the flowers by cutting off a stamen and rubbing the pollen against the pistil. I’ll discuss this further below.
Dormancy and Growth Rate
Spider plants are fast-growing plants that can reach maturity within 1-2 years under optimal conditions. A distinct sign of maturity is when they start producing long stalks that bear flowers or plantlets.
Spider plants don’t normally enter dormancy in the wild. However, they may grow relatively slower during the cooler and drier winter months as they put their energy toward growing plantlets or baby spider plants.
Toxicity
Spider plants are non-toxic to humans and pets, making them a safe choice for households.
However, be mindful about where you place spider plants in your home because their grass-like foliage is attractive to cats or dogs who like to nibble on leaves when they feel unwell.
Although it won’t harm your pets, a spider plant can sustain severe aesthetic damage, especially if leaf chewing is accompanied by soil digging, which is a common behavior for dogs.
Benefits as Houseplants
Spider plants are excellent houseplants for new or experienced indoor gardeners because they are:
- Low maintenance: They have fleshy roots that allow them to survive despite infrequent watering and fertilization. They can also tolerate lower light conditions (under artificial lighting) but will lose their variegations.
- Easy to propagate: Spider plants grow pretty fast and will readily produce plantlets after 1-2 years of adequate and consistent care.
- Resilient: As long as the fleshy rhizomes remain healthy, the plant can bounce back after treating stress, pest damage, or diseases.
- Versatile: Their compact size and tolerance to various light conditions allow for multiple decorative ideas, as you can put them on shelves or hanging baskets. They can also sit comfortably on bedside or center tables.
Note: Other sources claim that spider plants have air-purifying qualities based on a NASA study on an enclosed chamber with formaldehyde.
However, several experts argue that the spider plant’s ability to draw toxins from the air is likely not as efficient in homes or other environments where toxins are continually replenished.
In addition, formaldehyde isn’t the only toxin in home gardens and experts argue that you may need to use several different plants with affinity for various toxins for noticeable improvement. There’s also no clear information as to how many pots can effectively clean indoor air as reports range from 60 to 700.
Popular Varieties
The classic Chlorophytum comosum, also known as ‘green shamrock’, with bright green, grass-like foliage, is not as famous as its variegated cultivars.
Here are the different spider plant varieties that may help elevate your indoor aesthetics:
| Variety | Physical Traits | Advantages and Disadvantages |
| Chlorophytum comosum Green shamrock | Bright green leaves 12-18 inches (30-45 cm) long and 0.5-1 inch (1.3-2.5 cm) wide Green stem/flower stalk | Tolerant to low light Fast-growing |
| Chlorophytum comosum ‘Vittatum’ | Bright green leaves with creamy white center 10-16 inches (20-40 cm) long and half an inch (1.3 cm) wide White or pale green stem/flower stalk | Requires brighter (direct morning) light to retain variegations Light and heat-tolerant Slower growth in moderate lighting |
| Chlorophytum comosum ‘Variegatum’ | Bright green center and white edges 10-16 inches (20-40 cm) long and around 1 inch (2.5 cm) wide Green stem/flower stalk | Requires brighter (direct morning) light to retain variegations Light and heat-tolerant Puts out fewer plantlets than other varieties |
| Chlorophytum comosum ‘Bonnie’ | Curly leaves with thin, white center and bright green edges 8-12 inches (20-30 cm) long and half an inch (1.3 cm) wide White or pale green stem/flower stalk | Requires brighter (direct morning) light to retain variegations Light and heat-tolerant Fast-growing and readily produces numerous plantlets |
| Chlorophytum comosum ‘Ocean’ | Thin white edges and variegated deep and light green center 8-10 inches (20-25 cm) long and around an inch (2.5 cm) wide White or pale green stem/flower stalk | Shorter and spiky blades Light and heat-tolerant Suitable for compact spaces with no room for cascading spider plant varieties |
Selecting Your Plant
Spider plants reached Europe in the late 1700s and the U.S. much later through plant trade. That said, spider plants have been popular in Western homes even before social media.
You can find spider plants in reputable nurseries and gardening stores. You may also ask a friend or fellow gardener for a plantlet or two for free.
I got my first spider plant (a ‘Vittatum’) from a friend who had a surplus of plantlets. Before I knew it, I also had so many plantlets that I could share with friends and family. To this day, over a decade later, my younger spider plants are either a division or a plantlet collected from the same mother plant.
Here are some tips for choosing a healthy and viable spider plant:
- Ensure that the nursery pot has drainage holes. Also, check that there’s about an inch (2.5 cm) of lateral space around the plant for growth.
- Choose a plant with firm, gracefully arching leaves, indicating that the plant has a robust root system.
- Avoid plants with unnaturally drooping leaves and brown leaf tips, which indicate stress from various factors, such as over- or underwatering, light stress, and over-fertilization. An unhealthy plant is more likely to suffer relocation shock when you bring it home.
- Inspect the leaves for signs of pests or diseases, such as fluffy white masses, webbing, crawlers, or brown or yellow spots. Avoid plants with any sign of pest infestation or an infection.
Spider plants are resilient and don’t mind repotting right after purchase. However, if the plant I choose possesses the traits listed above, I usually keep it in the same pot for about a year and only repot it in the following spring.
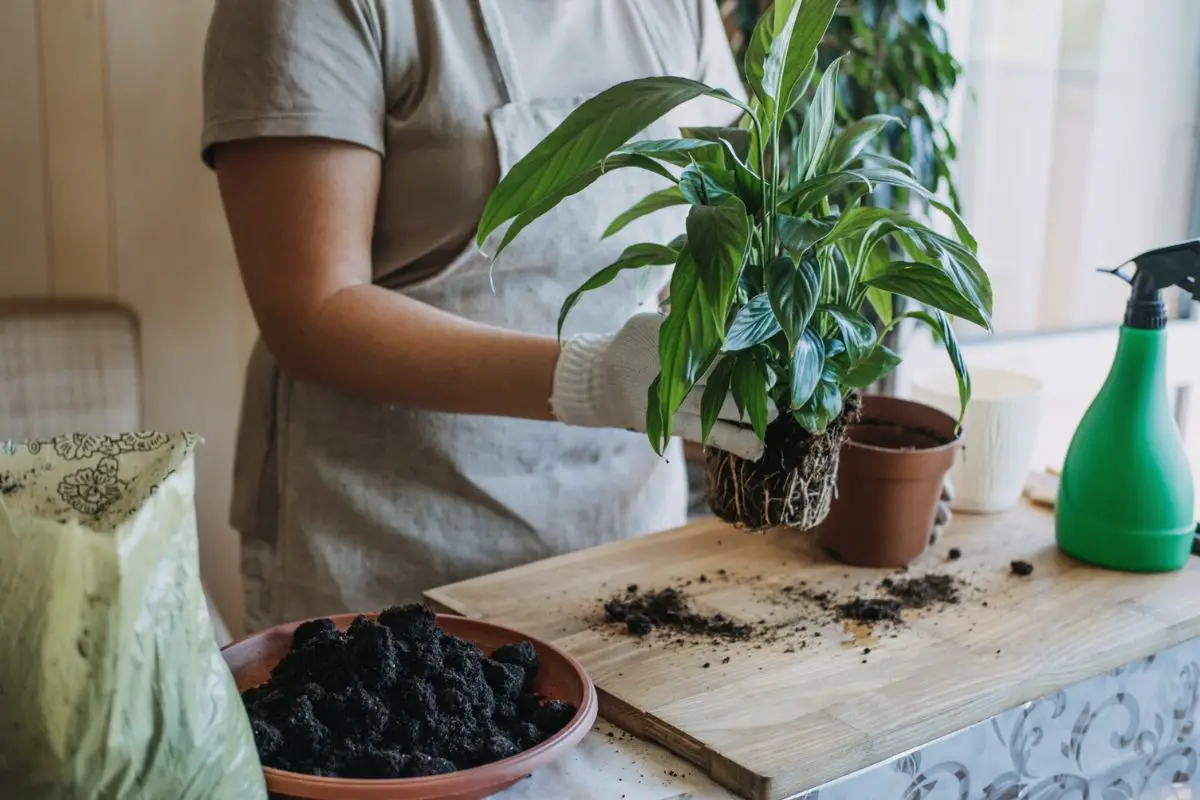
Initial Planting

After taking your new spider plant home, you must inspect it carefully to decide whether it’s necessary to repot.
Here are some factors to consider before transplanting your new spider plant:
- The plant has outgrown its pot with fleshy roots poking out of the soil or there’s no visible soil space for new leaves to grow on.
- The soil is bone-dry (hydrophobic) from prolonged underwatering. It’ll be harder to re-wet hydrophobic soil, and the plant will likely remain thirsty, even after watering.
- The soil is too soggy. If the pot has no drainage holes or the soil holds too much water, it’s best to move the plant to a suitable pot with a high-quality potting mix.
Follow the tips below to transplant your spider plant properly:
Choosing the Right Pot
Spider plants like to be snug in their pots and will likely put out new plantlets when slightly potbound. However, the roots can become too fleshy and thick, risking pot damage and plant stress.
Here are practical tips for choosing a suitable pot for spider plants:
- Choose a pot that’s around 2 inches (5 cm) wider and deeper than the old pot. I recommend using a pot with a wider mouth to unpot the plant as needed in the future easily.
- Ensure the pot has drainage holes to prevent waterlogging that may lead to root rot.
- Regular pots: Use an unglazed terracotta pot for tabletops or shelves.
- Hanging baskets: Use a lightweight plastic pot with drainage holes for hanging baskets. Alternatively coco coir basket for better drainage and aeration (no need for drainage holes).
Pro Tip: I avoid pots deeper than 10 inches (25 cm) for spider plants because they prefer wide, shallow pots. The maximum size I use is 12 inches (30 cm) wide and 10 inches (20 cm) deep.
Once the oldest spider plants outgrow their largest pot, I divide and repot them in 4-inch (10 cm) pots.
Soil Selection
The key to keeping a spider plant healthy is optimal soil, which has the following traits:
- Well-draining to prevent waterlogging
- Loose for proper aeration
- Has organic matter with adequate moisture retention and a light dose of nutrients
Here are some of my go-to recipes for spider plant soil:
- Equal parts high-quality potting mix and perlite: Soil-based potting mixes typically contain garden soil and peat moss and/or vermiculite, which retain extra moisture. Adding perlite to the mix improves drainage.
- Equal parts orchid mix and compost: Orchid mix typically contains fast-draining materials like bark, which help prevent waterlogging and root rot. Adding compost can boost moisture retention to allow spider plant roots to draw moisture before the water drains or evaporates.
Pro Tip: Check the product label or ask your supplier to confirm that the potting mix materials contain low to zero boron (<35 ppm) or fluoride (<25 ppm) because higher concentrations can cause toxicity, leading to necrotic spots on the spider plant leaves.
Step-by-Step Planting Guide
Spider plants are quite tricky to handle because of the lack of visible stems to hold on to.
Follow the steps below to properly transplant your spider plants without damaging the foliage:
- Water the soil deeply 1-2 days before transplanting. Pro Tip: I also pre-moisten the new substrate at the same time so it isn’t soggy on transplanting day.
- Use sharp, sterile scissors to cut the roots poking out of the drainage holes to remove resistance.
- Run a blunt spatula around the edges of the pot, carefully lifting the trailing leaves as you circle the pot.
- Lift the leaves and firmly hold the base without crushing the plant.
- Slide the root ball out of the pot and let the foliage rest on one side of the plant.
- Inspect the soil and the roots. If the soil looks well-hydrated (moist but not soggy) and the roots appear white and plump, you don’t have to break apart the root ball. Note: If the soil seems water-repellent or soggy or the roots have mushy brown spots, you must remove the soil and prune the roots. I’ll discuss this later in the article.
- Loosen the soil and the root ball a bit using a wooden chopstick or your fingers to avoid puncturing the tuberous roots. This will help the roots naturally spread on the new substrate.
- Fill the new pot with 2 inches (5 cm) of fresh soil and position the root ball in the center. Be sure that the base of the leaves and the soil surface are only up to an inch (2.5 cm) below the rim of the pot to avoid spilling every time you water your plant.
- Fill the sides of the root ball with more soil. Tamp the new soil firmly to remove air pockets and encourage the roots to grow into it.
- Place the plant in a warm room (around 70 °F or 20 °C) with bright indirect light and moderate humidity (40-60%).
- Wait 5-7 days before watering your plant deeply. Check the soil moisture with your fingers or a wooden chopstick and water the plant only when the soil is dry halfway down.
Optimal Growing Conditions
A spider plant may look frail because of its thin, trailing foliage. However, they’re surprisingly one of the sturdiest plants in my collection.
Follow the care tips below for a thriving spider plant:
Light Requirements

Spider plants have moderate to high light requirements but can tolerate lower light conditions. Although they’ll continue growing at low light (around 200 foot candles), they prefer brighter light (500-1000 foot candles) to retain their variegation.
Here are light intensity and placement recommendations:
| Light Intensity | Placement | Implication |
| High | Next to a southeast or east-facing window Up to 4 hours of direct sunlight and 8 hours of bright indirect light | Best for variegated types to retain striations and produce plantlets Hang sheer curtains to filter the light at the peak of summer because too much direct sunlight can bleach the leaves of variegated spider plants |
| Moderate | 4-8 feet (1.2-2.4 m) from a south-facing window At least 12 hours of bright indirect sunlight | Suitable for the retention of striations and production of flowers and plantlets |
| Low | 4-8 feet from a west-facing window or next to a north-facing window Less than 12 hours of bright indirect light | Suitable for the solid-green Chlorophytum comosum Variegated types may tolerate low light but will likely lose their striations and gradually turn solid green from prolonged exposure Plants receiving less than 12 hours of natural light during the growing season can’t distinguish the shorter days in the fall and winter and are less likely to flower or produce plantlets. |
| Artificial | 12-16 hours of exposure from a 15-watt grow lamp 1 foot (30 cm) above. | Spider plants will grow under this condition but will be less likely to flower or produce plantlets. |
Here are additional tips for the light requirements of indoor spider plants:
- Ensure the plant receives at least 12 hours of daylight during the growing season for food and energy generation and flower or offshoot production. Shorter daylight (about 12 hours of darkness) in late summer or fall for at least 3 consecutive weeks will encourage flowering and plantlet formation.
- Rotate the pot weekly or every time you water to ensure balanced light exposure to all sides of the plant.
- Observe the coloration of the leaves and adjust lighting as needed. If the leaves appear paler or bleached, move the pot about 2 feet (0.6 m) away from the windows or draw sheer curtains. In contrast, variegated types growing greener leaves with visible loss of striations require brighter light.
- Clear the windows of dirt and snow regularly for optimal light penetration into your home, especially north-facing windows that receive the least amount of natural light in the northern hemisphere.
Watering
Spider plants have fleshy, tuberous roots that store extra moisture and nutrients, allowing them to survive drought.
In my experience, mature spider plants can tolerate up to 3 weeks without water at moderate light during the growing season before showing signs of stress, such as:
- Limp leaves (unnatural droopiness instead of graceful arching)
- The green streaks on the leaves may appear dull or gray (early sign)
- Brown, crisp leaf tips (prolonged underwatering)
- Crusty soil
In contrast, frequent watering or constantly wet or soggy soil can lead to the following symptoms:
- Yellowing leaves
- Brown, mushy roots and rhizomes
Here are important factors to consider when watering spider plants:
- Soil Quality: Use loose, well-draining soil that’s easy to re-wet. A standard houseplant potting soil mixed with perlite provides the perfect balance for the moisture needs of a spider plant.
- Water Quality: Use filtered or pre-collected rainwater because spider plants are sensitive to minerals like fluoride and boron, which can cause necrotic tips or spots on the leaves. Note: Letting tap water sit overnight doesn’t help reduce boron or fluoride concentration. In fact, since these minerals don’t dissipate, water loss from evaporation can increase their concentration.
- Soil Moisture Check: You can check the soil moisture using your finger or a wooden chopstick 5-7 days after watering. Allow the top half of the soil to dry before watering. For accurate reading, you may also use a moisture meter and water the plant when the reading shows 4 about ⅔ deep into the soil.
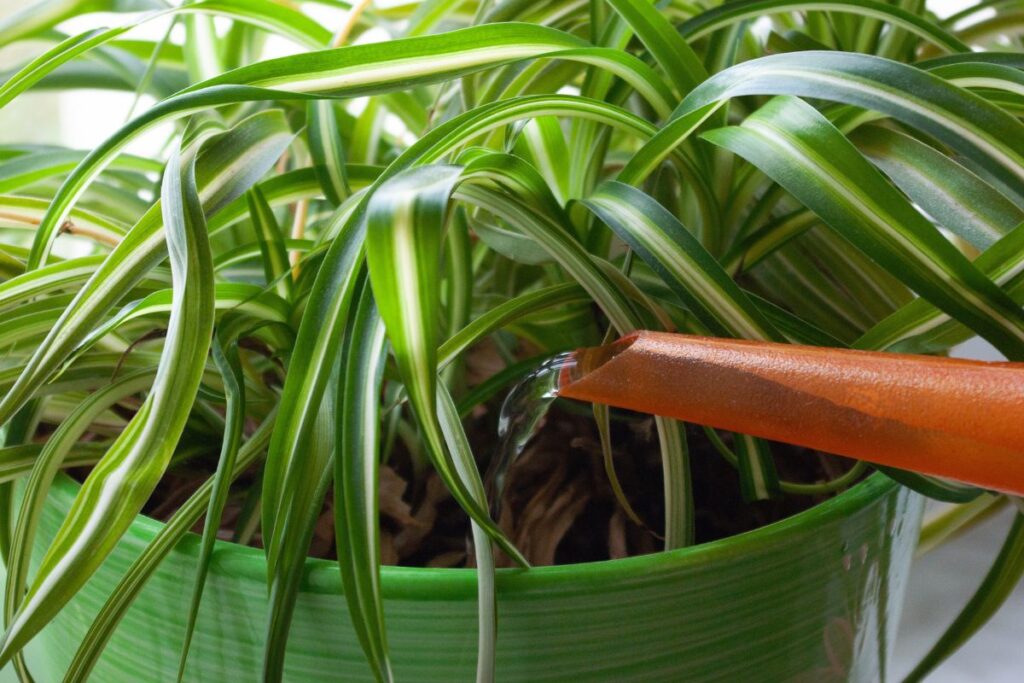
- Method and Equipment: Water your plant deeply and evenly. I prefer to use a watering can with a narrow spout to water my spider plants. Move the leaves to one side and pour the water directly into the soil, move the spout to another spot, and stop when the excess water exits the drainage holes. Let the excess water drain completely before placing the pot on the saucer or hanging basket to prevent root rot.
- Seasonal Adjustment: Reduce the watering frequency in late fall or winter after flowering or collecting the plantlets. Spider plants noticeably grow more slowly and consume less water after the flowers fade. Allow the upper ⅔ of the soil to dry out between watering sessions to keep the rhizomes from sitting too long in moist soil.
Watering Frequency Based on Potting Conditions
Regular pots tend to hold more moisture for longer than hanging baskets, which drain water quickly due to better aeration and gravity.
Here’s a brief guide to the watering requirements of different potting conditions in different seasons:
| Pot Type | Spring and Summer | Late Fall and Winter |
| Regular Pot | Once every 5-7 days or When the soil is dry halfway down | Once every 10-14 days or When the soil is dry ⅔ deep |
| Hanging Basket | When the soil is dry halfway down Once every 1-2 days at high light (with direct sun) Once every 2-4 days at low to moderate light | When the soil is dry ⅔ deep Once every 3-4 days at high light Once every 5-7 days at low to moderate light |
Temperature & Humidity
Spider plants enjoy moderate indoor temperature and humidity conditions with the following parameters:
- Ideal temperature range: 65-75 °F (18-24 °C). Spider plants can tolerate temperatures as high as 90 °F (32 °C) if well-hydrated and the humidity is over 50%. However, be sure to keep your spider plants away from drafty doors and windows in winter because they’re not frost-tolerant. Spider plants may grow slowly at temperatures below 65 °F (18 °C) and even lower temperatures (around 45 °F or 7 °C) can cause chill injury, leading to yellow or brown, mushy leaves.
- Humidity level: 40-60%. Spider plants prefer higher humidity levels (over 70%) but can tolerate drier conditions (around 30%) if well-watered. Prolonged dry conditions (underwatering and low humidity) can lead to brown leaf tips and limp leaves. Grouping spider plants with other houseplants or placing the pot over a pebbled tray can boost the local humidity around them.
Note: Other sources recommend misting spider plants regularly to increase the humidity. However, I don’t recommend it as misting has a temporary and negligible effect on the local humidity around plants unless done every 5 minutes—which isn’t feasible.
Frequent misting can also keep the soil and foliage unnecessarily wet for longer periods, providing a suitable environment for rot-causing pathogens.
Fertilizing and Nutrient Requirements
One common mistake people make when caring for spider plants is over-fertilization. Truth be told, I hardly fertilize my spider plants, and they’re thriving. I usually repot or divide them every 2-3 years.
High-quality potting mixes infused with nutrients usually have enough to feed spider plants between repotting sessions. Adding compost to the mix can also supply just enough nutrients for spider plants to keep thriving.
On the other hand, spider plants may show the following signs of nutrient deficiency if planted in nutrient-poor soil:
- Slow or stunted growth
- Yellowing leaves (lack of nitrogen and/or magnesium)
You can boost growth and relieve the yellowing with the following feeding options:
- Add a half-strength 3-1-2 liquid fertilizer to your watering can and feed the plant once a month from spring to summer.
- Apply around 4 grams of a 19-6-12 granular fertilizer into the top inch (2.5 cm) of the soil in early spring and early summer and water your plant regularly.
- Work a handful of compost into the top inch (2.5 cm) of the soil in early spring and early summer.
Be mindful when feeding your spider plants because over-fertilization can lead to the following symptoms:
- Visible salt crust on the soil surface
- Leaf tip burn
- Wilting
In case of over-fertilization, it’s best to repot your plant in fresh soil with the following steps:
- Carefully unpot your spider plant.
- Remove as much old soil as possible from the roots using a wooden chopstick or your fingers.
- Rinse the roots with filtered water to remove the remaining soil and dilute the fertilizer salts.
- Repot the plant in fresh soil containing a high-quality potting mix and perlite (or orchid mix and compost).
- Avoid fertilizing the plant for at least 6 months after repotting. When fertilizing, remember the feeding options recommended above to avoid over-fertilization.
Pruning and Maintenance
Spider plants require minimal pruning and maintenance. You can do minimal pruning at any time to remove old or damaged leaves. On the other hand, you can perform hard pruning from mid-spring to early summer when the plant is actively growing.
Follow these tips to prune your spider plants properly:
- Aging Leaves: Individual spider plant leaves start fading after 6-12 months, depending on indoor lighting, temperature, and/or humidity. As the leaves age, they turn yellow and limp. Use sterile scissors and trim individual leaves close to the base.
- Brown Leaf Tips: Cut the brown tips using sharp, sterile scissors for a clean cut and to prevent infections.
- Overgrown Leaves: You can control the size of overgrown plants and promote a fuller appearance by pruning the longer or leggy leaves at the center and the overflowing leaves along the edges of the pot. Note: If the rhizomes are poking out of the soil, it’s best just to unpot the plant and prune the roots.
- Plantlets or Spiderettes: Removing and propagating the spiderettes can also help the plant redirect its energy to maintaining the existing mature leaves of the mother plant. I’ll discuss how to collect and propagate the plantlets below.
Pro Tip: After pruning the leggy or unevenly long leaves, improve the lighting conditions around your spider plant. Provide at least 12 hours of bright indirect light daily during the growing season (at least 8 during fall and winter) and rotate the pot regularly for even light distribution.
Root Pruning
Occasionally pruning the roots, ideally during repotting, will help keep your plant compact and manageable.
Here are practical tips on pruning the roots of an overgrown spider plant:
- Carefully unpot the plant and disentangle the roots using your fingers or a wooden chopstick.
- Comb through the roots using your fingers. Roots damaged by rot or desiccation should readily fall off.
- Feel free to cut off up to a third of the root ball. Spider plants are pretty sturdy and should bounce back. I cut off up to half the root mass on my plant, and although it took 2 months before new leaves started growing back, the existing leaves remained vibrant and healthy.
- Spray the blades with rubbing alcohol and wipe dry with a clean cloth between cuts.
Propagation Techniques
You can propagate spider plants in three ways:
- By plantlets
- By division
- By seed propagation
Let’s explore them further below:
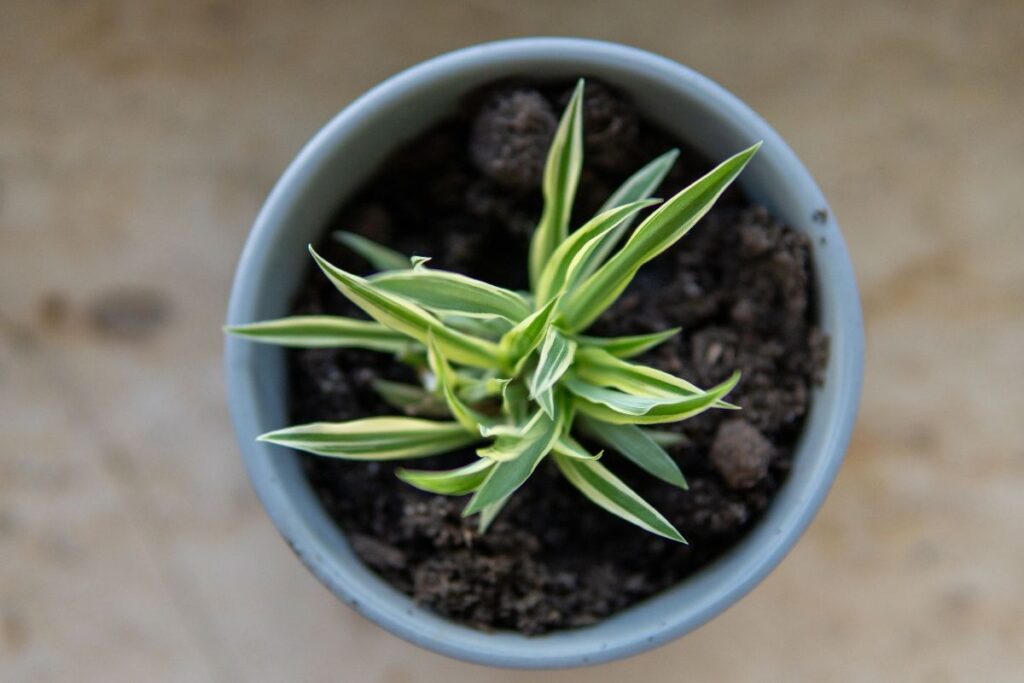
Plantlet Collection and Planting
Spider plants are fast-growing and typically start producing plantlets after about a year in optimal conditions.
Each plantlet looks like a clump of leaves or a miniature spider plant that sprouts from nodes on the flower stem and produces plump aerial roots.
Here’s a brief guide on how to collect and propagate the plantlets:
Collection
It’s crucial to give the plantlets enough time to develop sturdy aerial roots before planting them in soil or water for better chances of success.
- Check if the plantlets have plump stubs of aerial roots at least 0.5 inches (1.3 cm) long.
- Cut off the plantlet of the stem using sharp, sterile scissors. Be sure to keep the roots intact.
Water Propagation
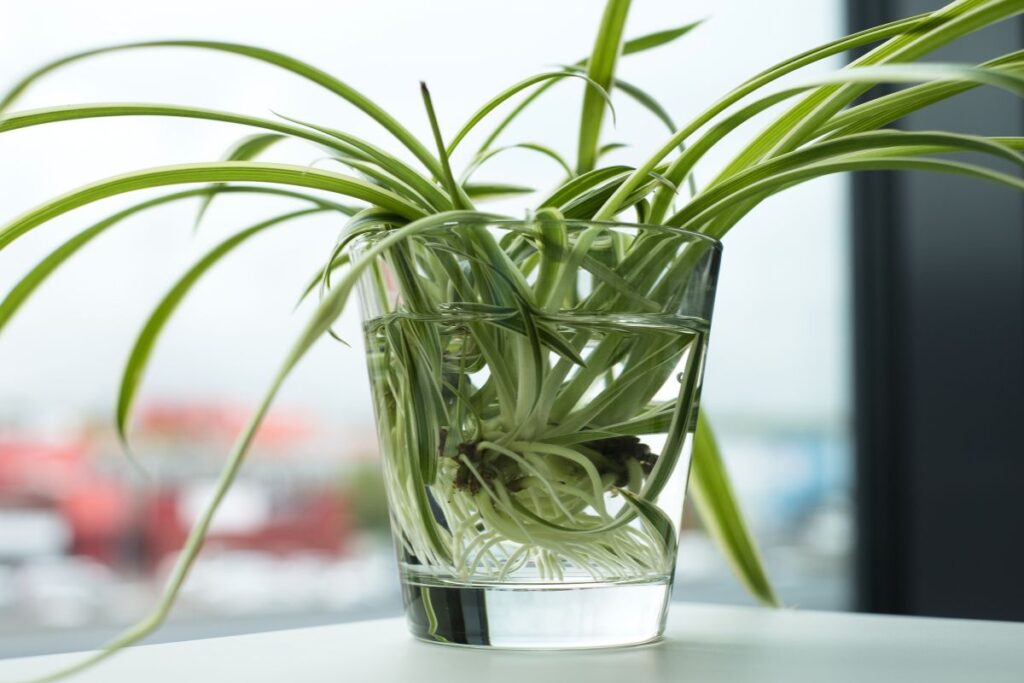
Propagating the plantlets in water will yield the fastest results, often within 1-2 weeks. However, the plant may exhibit a bit of shock or slowed growth once moved to soil.
- Soak the roots in filtered water. It’s okay to let the bottom half inch (1.3 cm) of the leaves touch the water.
- Keep the plant in bright, indirect light and moderate temperature and humidity.
- Replace or refill the water every 5-7 days.
- Once the roots are about 2 inches (5 cm) long, you can transplant the baby spider plant into a 4-inch (10 cm) pot with your regular potting mix.
Soil Propagation
Soil-propagated plantlets grow more slowly during the first 1-2 months, typically putting on noticeable leaf growth after a month or so because the roots will establish in the soil first.
The advantage of soil propagation is that you can keep the young plant in the same pot for about a year before repotting it into a larger pot, reducing the risk of transplant shock.
- Plant the plantlet in a 3-inch (7.6 cm) pot with drainage holes. Use coco coir or your standard spider plant potting mix.
- Spray the substrate with sufficient filtered water to keep it moist but not soggy.
- Keep the plant in bright, indirect light and moderate temperature and humidity.
- Moisten the soil again as soon as the top inch (2.5 cm) is dry.
Pro Tip: Plantlets typically come out in the fall after the spider flowers fade. If you live in a cold climate, which can prompt slower plant growth in the fall and winter, an excellent alternative is to root the plantlets while still attached to the mother plant.
Here’s how:
- Scoop out some soil about a half inch (1.3 cm) deep and an inch (2.5 cm) wide to accommodate the young plantlets. This works if there’s enough pot space.
- Pull the stem downward to the soil to bury the plantlet’s aerial roots in the hole.
- Use plastic bobby pins to secure the stem in the soil.
- Water and care for the parent plant as usual.
The flower stem may dry out naturally. Even if it doesn’t, I usually cut the stem off the mother plant and the plantlet using sterile shears after 1-2 months when I see noticeable leaf growth on the plantlet. As the plantlet grows, it’ll give your plant a fuller look.
Plant Division
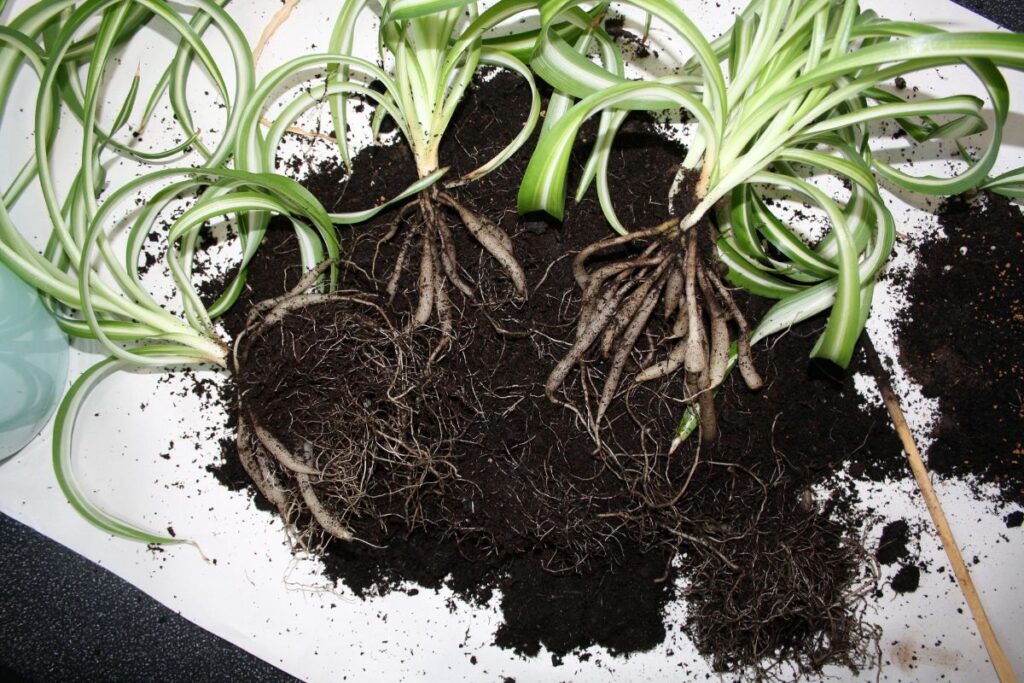
Dividing a fast-growing spider plant every 2-3 years will help reinvigorate the mother plant by giving its roots more room to grow. It can also increase your spider plant collection by providing well-rooted, average-sized plants.
Follow these steps to divide a spider plant:
- Water the plant deeply 1-2 days before repotting to make the soil and roots easier to work with.
- Carefully unpot the plant and examine the roots for natural division spots. Spider plant leaves typically grow in clumps, making it easier to divide them.
- Carefully disentangle the roots and separate the clumps.
- You may plant 2-3 small clumps together in the same pot, ensuring it’s about 2 inches (5 cm) wider and deeper than the collective size of the roots of the plants.
- Use moist spider plant potting mix and give the plant 5-7 days before the first deep watering.
- Keep the plant in bright, indirect light and moderate temperature and humidity.
Seed Propagation
Seed propagation typically has a lower success rate, especially if hand-pollination fails. The seeds can take up to 8 weeks to germinate and another 2-4 months before the young plant is ready for transplant.
The resulting plant will likely have solid green leaves without the characteristic variegations of the mother plant.
If you have a flowering spider plant, you can explore the hand-pollination and seed-planting methods below:
Hand-Pollination
- Use sterile scissors to cut off a stamen (white stalk with yellow pollen-filled tip).
- Rub the pollen against the tip of the pistil (central white stalk taller than the stamen).
- Use a magnifying glass or smartphone camera to zoom in on the pistil and ensure there are yellow pollen grains attached.
- Wait for around 2-4 weeks for the fruits to dry out and turn brown.
- Collect the dry black seeds.
Seed Planting
- Prepare a seed starter tray with coco coir.
- Poke a hole about 0.5 inches (1.3 cm) deep at the center and place one seed.
- Spray the substrate with filtered water until it feels damp but not soggy. Repeat every 2 days or whenever the top half inch (1.3 cm) of the substrate dries out.
- Keep the setup next to an eastern window or up to 8 feet (2.4 m) from a south-facing window.
- Maintain an indoor temperature of around 75-85 °F (24-29 °C) or place the tray over a heating pad to keep the soil temperature above 65 °F (18 °C) for faster germination.
Repotting

The best time to repot spider plants is in spring or early summer to promote faster recovery from transplant shock or root pruning. They can tolerate repotting during the colder months if indoor conditions remain within optimal range.
Spider plants are generally fast-growing plants that require regular repotting (typically every 1-2 years) to maintain health and promote continuous growth.
A few factors may influence the repotting frequency and timing of spider plants, including the following:
- Light Conditions: Brighter light conditions can promote rapid growth, requiring more frequent repotting (1-2 years).
- Root Pruning: In my observation, pruning up to a third of the roots during repotting can reduce the repotting frequency to every 2-3 years, especially when growing the plant in a pot at least 2 inches (5 cm) wider and deeper than the root ball.
- Pot Size: Repotting your spider plants in containers around 4 inches (10 cm) bigger than the old one can delay repotting needs but increase the risks of root rot because of higher moisture retention.
- Root Health: In case of root rot, it’s crucial to repot the spider plant right away (regardless of the season) to increase its chances of recovery. Left unattended, root rot can kill spider plants in about 2 weeks due to the small pot size and proximity of the roots and the leaves.
You’ll know that your spider plant needs repotting when you see the following signs:
- Roots poking out the drainage holes
- Rhizomes emerging on the soil surface
- Soil spilling over the rim of the pot
- Cracks on the pot’s walls (terracotta or brittle plastic)
Below is a step-by-step guide to safely repotting spider plants:
- Water the plant deeply 1-2 days before repotting to rehydrate the roots and soil, making them easy to work with. Pre-moisten the fresh soil mix at around the same time.
- Cut off the roots growing through the drainage holes to remove resistance when you pull out the plant from the pot.
- Loosen the root ball from the pot. For terracotta or ceramic pots, run a spatula around the edges. For plastic pots, you may use large scissors to cut through the plastic and release the root ball.
- Firmly hold the base of the leaves as you slide the plant out of the pot.
- If you’re dividing the plant, locate natural separation points between plant clusters and disentangle the roots to release them. Otherwise, just loosen the bottom of the root ball to release some roots and encourage them to spread in the new soil.
- Fill the bottom 2 inches (5 cm) of the pot with fresh, moist soil mix and position the spider plant at the center. Ensure the base of the leaves is just an inch (2.5 cm) below the pot’s rim.
- Fill the gaps around the root ball with more soil and tamp it down firmly until the soil surface is also about an inch (2.5 cm) below the rim to prevent spillage when watering.
- Place the newly repotted plant in a warm spot with moderate humidity and bright indirect light.
- Wait 5-7 days or until the soil is dry halfway down before the initial deep watering.
Pest and Disease Management
Spider plants have few pest and disease problems. Here are some issues to watch out for:
Common Pests
The following pests may attack spider plants:
- Mealybugs: Fluffy white masses at the base of the leaves. Individual cottony white adults about 1/16-⅛ inches (1.6-3.2 mm) in diameter may feed along the central leaf vein.
- Scale Insects: Tiny brown bumps about 1/16-⅛ inches (1.6-3.2 mm) along the leaf veins.
- Aphids: Tiny, actively moving translucent insects up to ⅛ inches (3.2 mm) long. They can camouflage against the leaves with their translucent body, but some species may be pink, black, or orange.
- Spider Mites: Microscopic spider-like crawlers that weave fine webs between leaves and cause speckled yellow or white damage on the leaf surface. They can appear black, white with two distinct dots, or red upon closer inspection with a 30x magnifying glass.
- Whiteflies: Tiny insects about ⅛ inches (3.2 mm) long with white, waxy wings that flutter when you move the leaves.
Phloem-feeding pests like mealybugs, aphids, scale insects, and whiteflies typically excrete honeydew—a colorless, sugary liquid. As such, secondary signs of pest infestations include black sooty mold on the leaf surface and ants in the potting soil or on the leaves.
You can treat pest infestations on spider plants with the following tips:
- Quarantine visibly infested spider plants in a room with similar temperature and humidity conditions as the original spot to prevent relocation stress. Ensure the area only has bright indirect light to prevent sun damage from organic treatments.
- Prune severely infested leaf blades down to the base and properly discard to prevent the spread of invisible eggs and crawlers on floors or tabletops.
- Remove individual pests from leaves using a cotton swab with alcohol. For hard-shelled scale insects, use tweezers or the blunt end of a knife. Repeat every 2-3 days until there are no more visible pests.
- Drop the pests in soapy water to immobilize and kill them.
- Install yellow sticky traps around your plant to draw whiteflies away from the leaves.
- Wipe the honeydew, sooty mold, or webs off the leaves using a clean, damp cloth.
- Spray the plant generously with neem oil solution or commercial insecticidal soap after sunset to prevent leaf scorch. Repeat once a week for up to 8 weeks until there are no more signs of infestations.
- Use a spinosad-based spray every 10-14 days to effectively treat a spider mite infestation. Ensure the room is well-ventilated at least 24 hours after treatment. Follow the safety instructions on the product label.
Pro Tip: You may also use a non-conventional treatment method for minor infestations. Here’s a trick that works for my spider plants:
- Before watering your plant, firmly hold the pot (and soil) upside down and soak the leaves in a bowl of filtered water.
- Carefully swirl the leaves around for ten seconds to remove the pests.
- Let the water drip back into the bowl for 15-30 seconds.
- Add a scoop of liquid soap to the water bowl to kill the pests.
- Water your plant as usual.
- After sunset, spray the leaves with neem oil to eliminate the remaining pests. Repeat neem oil applications every 2 weeks to prevent a re-infestation.
Root Rot
Spider plants are susceptible to root rot when watered too often or kept in poorly draining soil. Wet soil can promote the rapid growth of fungal or bacterial pathogens, which can feed on the fleshy roots and cause them to decay.
Root rot can lead to the following symptoms in spider plants:
- Yellowing leaves
- Brown, water-soaked leaves
- Limp leaves
- Soggy soil
- Brown, mushy, and foul-smelling roots and rhizomes
Spider plants can survive root rot when diagnosed and treated promptly. However, you may lose a large part of the plant as you treat the roots.
Follow these steps to improve your spider plant’s chances of surviving root rot:
- Carefully unpot the plant. Soggy soil is easier to slide out of the pot.
- Wear some latex gloves and remove as much soil as possible from the roots.
- Comb through the roots with your gloved fingers. Rotten roots should slough off readily.
- Rinse the remaining roots with filtered water and inspect for remaining signs of rot. Healthy spider plant roots are white and plump, especially the rhizomes.
- Prune all the brown and mushy roots using sterile scissors. Note: Some leaf clumps may break away from the mother plant as you thin the roots. You can just replant them together with the mother plant later if they have remaining healthy roots or root them in a separate pot as you would the plantlets.
- Optional: Soak the roots in 1% hydrogen peroxide for 5 minutes or pour the solution over the roots to eliminate the remaining pathogens.
- Transplant the spider plant in a sterile pot 2 inches (5 cm) wider and deeper than the remaining root ball. Use fresh, damp, well-draining soil mix (i.e. equal parts standard potting soil and perlite) to prevent future problems with root rot.
- Place the plant in bright indirect light and moderate temperature (around 70 °F or 21 °C) and humidity (around 50%) as it recovers.
- Give the plant 5-7 days to recover from the cuts before deep watering.
Once your plant recovers and grows new roots, you should see new leaves emerging from the soil.
Troubleshooting Common Problems
Although sturdy, spider plants may occasionally come across some issues that require special care and attention, including the following:
Lack of Plantlets
Spider plants might not produce plantlets (or flowers) for the following reasons:
- Transplant shock: I’ve observed that repotting spider plants too often (i.e., every year) can inhibit plantlet production. For instance, if you repot the plant in spring, it won’t produce plantlets in the fall. Spider plants tend to produce more plantlets when there’s little or no room for root growth in the pot, which is possible if you keep the plant in the same pot for at least two years.
- Insufficient light and water during the growing season: Flower and plantlet production requires much energy to generate enough food in the rhizomes. Give your plant at least 12 hours of bright light and moist conditions during the growing season.
- Too much daylight after flowering: After flowering, spider plants require longer nights (less than 12 hours of sunlight) for at least 3 consecutive weeks in the fall to produce plantlets along the flower stalks.
- Over-fertilization: Salt stress and boron or fluoride toxicity can cause plant damage (necrosis or leaf tip burn) that can inhibit plantlet formation. Give your plant a half-strength liquid fertilizer once a month during the growing season or a granular fertilizer only once in early spring and early summer (3 months apart).
Brown Leaf Tips
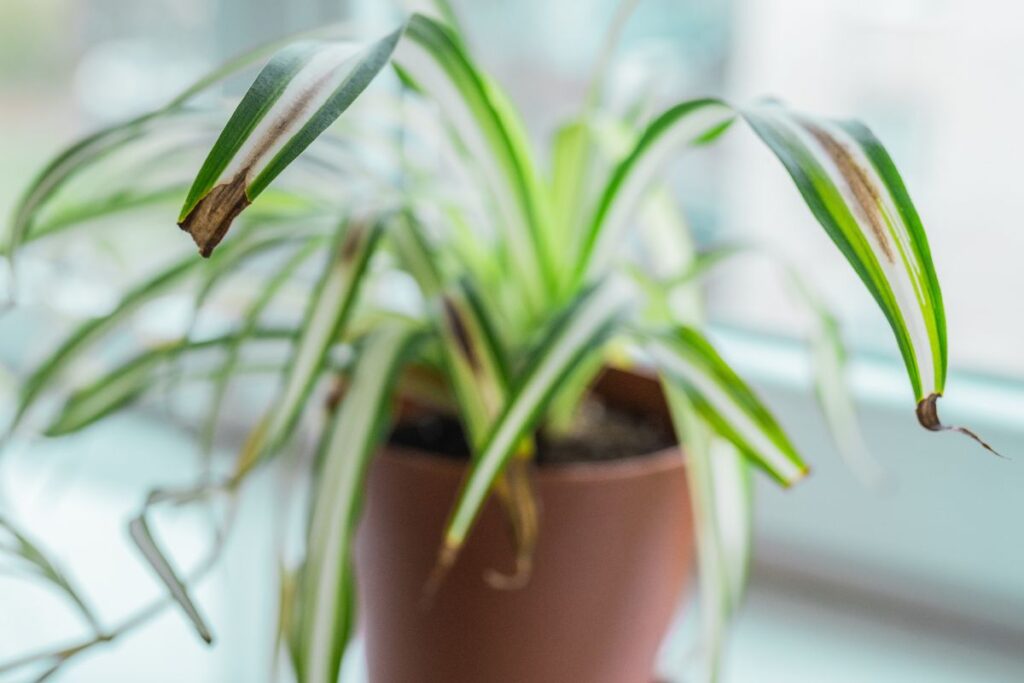
Browning leaf tips are a common issue in spider plants caused by the following:
- Too much direct sunlight: Prolonged exposure to direct sunlight, especially during hot and dry days (peak of summer), can cause sunburn or leaf scorch and brown leaf tips. Prune the damaged leaf tips or leaves with brown, dry spots and move your plant away from the windows into a spot that receives filtered light.
- Underwatering: Although drought tolerant, spider plants may exhibit dehydration through browning leaf tips or limp leaves when left unwatered for too long, especially during the warm growing season. Water the soil deeply and evenly to properly rehydrate the plant and allow the top half of the soil mix to dry out before watering again.
- Regular use of hard water with boron and fluoride: Occasional use of tap water won’t immediately lead to boron or fluoride toxicity. Conversely, prolonged use can lead to mineral buildup in the soil or plant tissue, causing necrotic (brown) leaf spots or tips. Prune the damaged foliage and switch to filtered or rainwater to dilute the unwanted minerals and promote healthy new growth.
- Hot and dry conditions: Although they don’t directly cause browning leaf tips, high temperatures and low humidity can exacerbate plant stress caused by intense lighting and underwatering. Keeping your spider plants at moderate temperatures (65-75 °F or 18-24 °C) and humidity (40-60%) can help mitigate the damage and boost recovery.
Bleached Leaves
Prolonged exposure to direct sunlight can bleach spider plant leaves. At first, it may look like the white stripes are expanding or the green areas are getting lighter. Eventually, the entire leaf surface will appear pale green to almost white.
You can fix the problem with the following tips:
- Prune the leaves that have turned dry or crisp because they’re beyond saving.
- Move the plant away from a sunny window into a spot that receives only bright indirect light. Hang sheer curtains as needed to filter the light.
- Water your plant regularly to rehydrate the leaves and improve recovery.
- Rotate the plant weekly to give the leaves equal exposure to (and break from) sunlight.
Over time, the partially bleached leaves will produce new chlorophyll and appear greener. You may prune the leaves that remain bleached, as they may be too far gone.
Lack of Variegation
Variegations in plants are typically caused by genetic mutations induced by environmental factors like sunlight or herbivory.
In spider plants, the variegated types require brighter light conditions to compensate for the lack of chlorophyll, which is necessary to trap light energy. Prolonged exposure to low light conditions will prompt the leaves to produce more chlorophyll to capture as much light as possible, resulting in a solid-green appearance.
To help your plant grow new leaves with attractive variegations, ensure it receives 8-12 hours of bright, indirect, natural light per day.
Note: Artificial lighting using grow lamps may help supplement your plant’s light requirements, but it can be a costly fix. For instance, variegated spider plants require 12-16 hours of exposure to a 40-watt lamp about a foot (30 cm) away to retain their coloration.
Seasonal Care
Spider plants will flourish if indoor conditions remain stable all year round. However, they can use some seasonal tweaks that replicate their native environment to achieve their full potential, such as flowering or producing plantlets.
Here are essential care adjustment tips for spider plants in the fall and winter:
Light
Spider plants are short-day plants, which means they require long, uninterrupted nights to initiate flower or plantlet formation.
In the late summer or fall, avoid exposing spider plants to bright indoor lights at night.
Here’s how:
- Choose a location in your home that receives bright natural light during the day and minimal or dim light at night. In my case, that’s the hanging basket on the balcony or the wall shelf in the living room, which I hardly stay in at night.
- Cover the spider plant with a box at night. You may need to do this for 3-4 weeks in late summer or early fall. Once the flowers appear, you can just leave your plant as is.
Note: A stark contrast between less than 12 hours of bright natural daylight and over 12 hours of dim artificial night light (or no light) can provide spider plants a similar vibe as in their native habitat, promoting flowering and the consequent plantlet formation.
Water
Spider plants require regular watering during the growing season (spring and summer) to support their rapid growth. A good rule of thumb is to water your plant every 5-7 days or as soon as the soil dries out halfway down.
Spider plants also require sufficient moisture during flowering or plantlet formation to support the new growth.
After collecting the plantlets, reduce watering in late fall and winter to once every 10-14 days or when the soil is dry ⅔ down because spider plants may consume less water during the cooler months.
You may also reduce watering sooner (early or mid-fall) if the plant doesn’t produce flowers.
Temperature and Humidity
Indoor spider plants thrive when the temperature and humidity remain stable all year round.
If you live in a colder climate with freezing and dry winters, you may follow the tips below to optimize indoor conditions for spider plants:
- Move spider plants in hanging baskets indoors when outdoor air temperatures are expected to drop below 50 °F (10 °C). Although they can tolerate temperatures as low as 45 °F (7 °C), a sudden temperature drop can stress the plant.
- Keep the plants away from drafty doors or windows and heating vents to prevent chill injury or heat stress.
- Group your spider plant with other tropical houseplants to create a humid microclimate. You can place small pots over a pebbled tray with water to boost the local humidity but be sure to keep the arching foliage off the water.
Note: Although indoor air may feel drier due to space heaters, I still don’t recommend misting your spider plant. Water mists in the air dissipate quickly and have little to no effect on your plant’s humidity needs.
On the other hand, water droplets on the leaves and soil can remain longer due to low temperatures or light intensity during the cold season and potentially cause fungal infections.
Fertilizer
Avoid feeding spider plants with liquid or granular fertilizer during fall and winter because the lower light intensity and temperatures can slow down the plant’s growth. Feeding your plant during this period of slow growth can lead to fertilizer salt buildup that can cause leaf tip burn.
I usually keep my indoor space warm (over 65 °F or 18 °C) during winter for comfort and my east-facing spider plant keeps putting out a few new leaves.
Pro Tip: To maintain your plant’s health without encouraging a growth spurt during the cold season, add a handful of compost to the soil in late summer for a gentle dose of nutrients throughout winter.
Display and Companion Plants
Spider plants are versatile plants that can adapt to various indoor light conditions and can tolerate a wide range of temperatures and humidity levels, making them an excellent addition to any indoor garden.
Design Ideas
Here are fantastic design ideas to maximize your spider plant’s attractive foliage:
- Hanging baskets: A spider plant’s gracefully arching leaves and trailing flowers and plantlets look amazing on hanging baskets, which you can place next to a bright window.
- Wall shelves: Their compact size and adaptability to different environmental conditions allow spider plants to add life and color to virtually any corner of the home.
- Tabletops: The lush ray of leaves sprawling from a shallow pot can make a beautiful centerpiece on tables.
Companion Plants
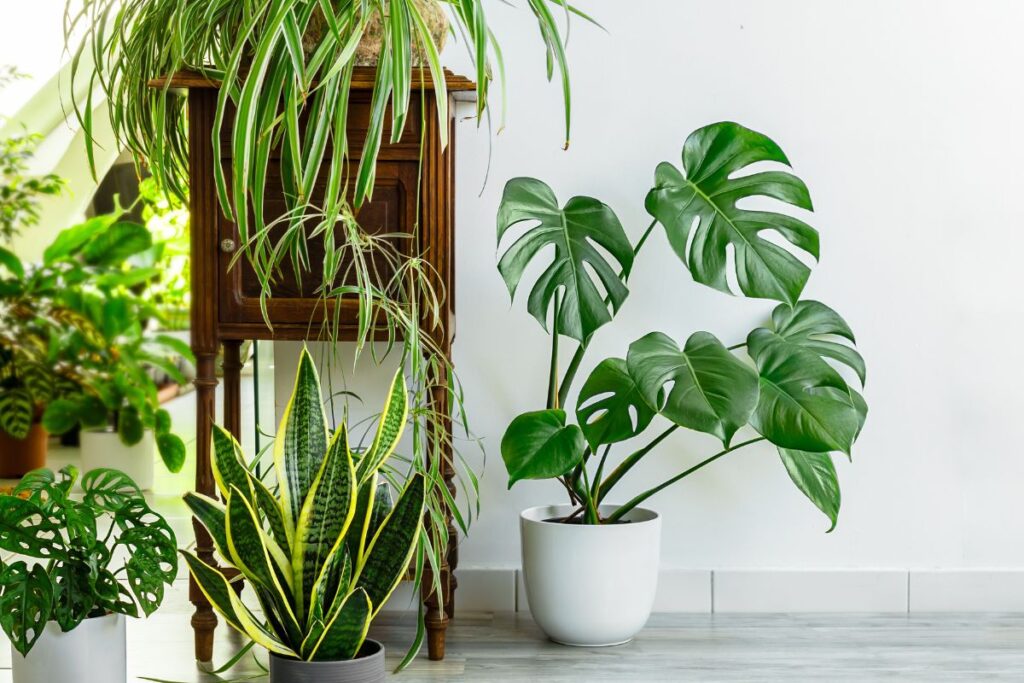
Spider plants, especially the variegated ones, can amplify your indoor garden filled with solid-green tropical houseplants, such as the following:
- Jade Plant (Crassula ovata): Spider plants can sit beautifully on top of a miniature jade plant (‘Minima’) on your plant shelf. They’re both highly adaptable to varying light, temperature, and humidity conditions.
- Monstera (Monstera deliciosa): Monsteras have large, showy, solid-green leaves, which are an interesting contrast to the compact, variegated leaves of spider plants. They can both thrive in moderate light and high humidity.
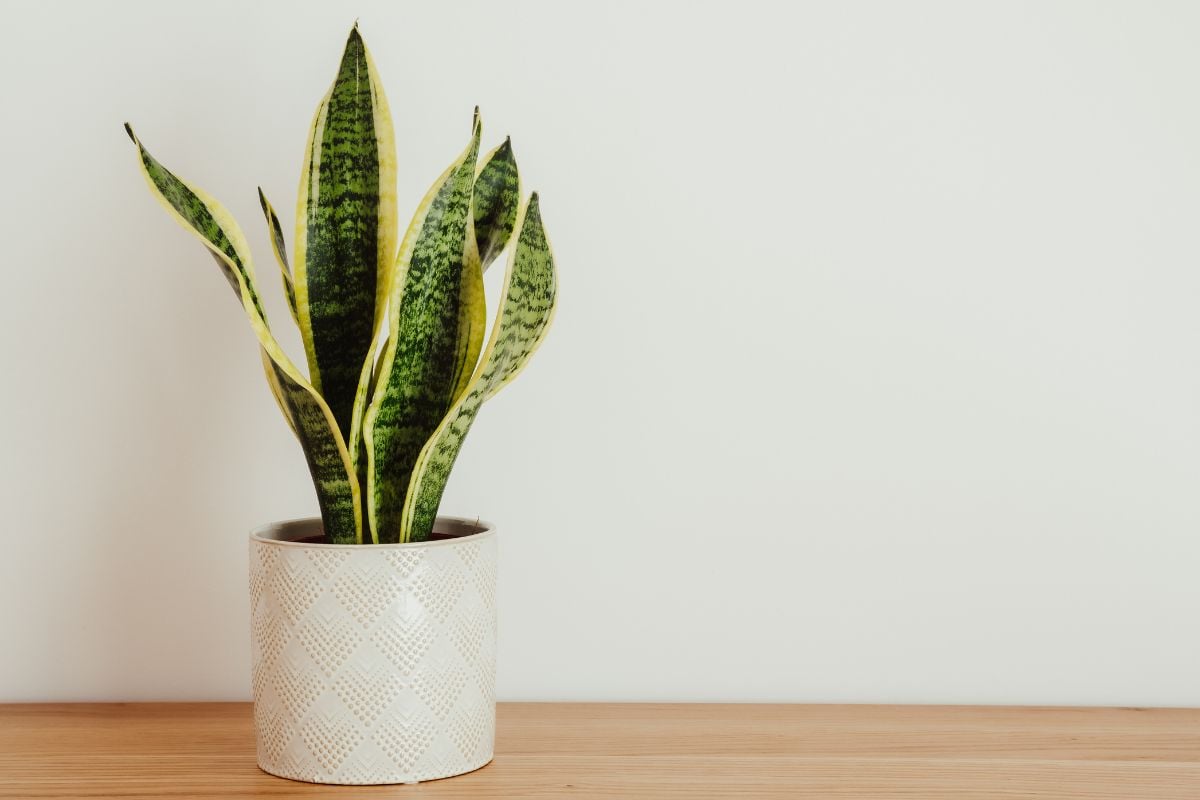
- Snake Plant (Dracaena trifasciata): Snake plants have long, stiff, variegated blades that also thrive in moderate to bright light conditions. Placing snake plants and spider plants together will add to the fascinating diversity of your indoor garden.
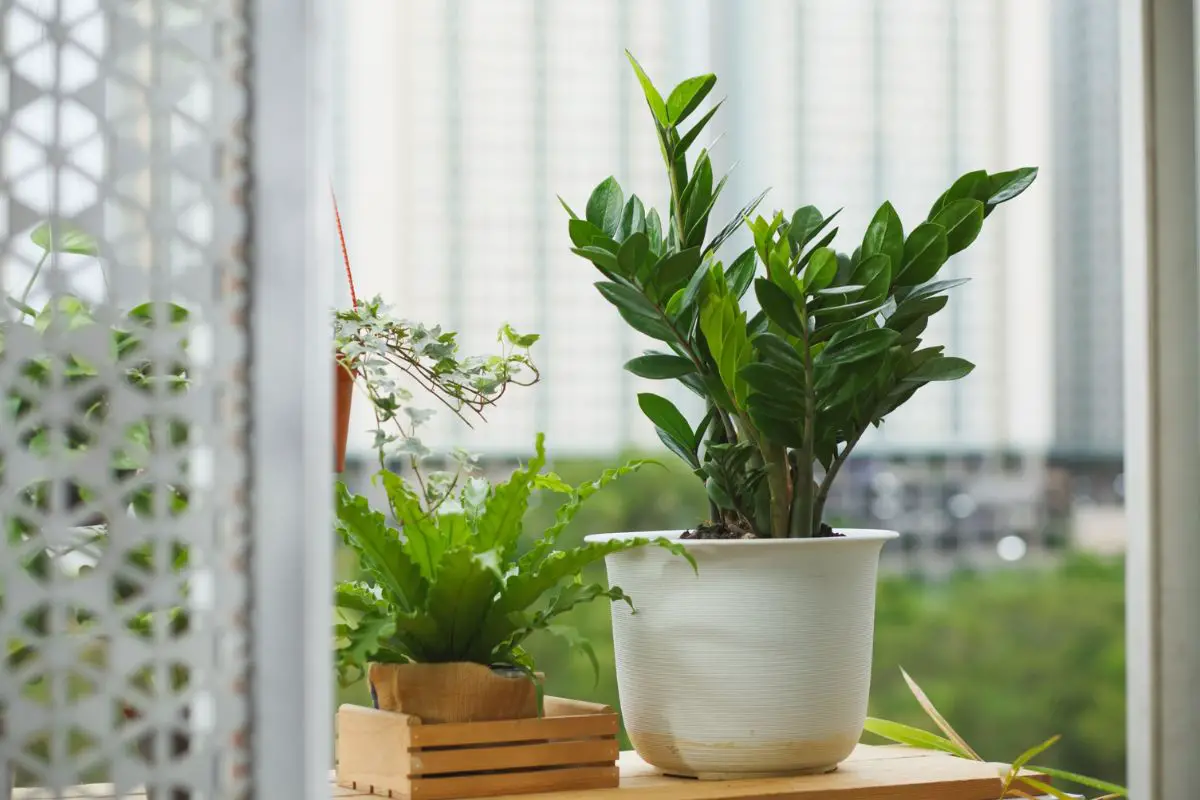
- ZZ Plant (Zamioculcas zamiifolia): ZZ plants are modest houseplants that can sit in a low-light corner of the home. Variegated spider plants can accompany ZZ plants and add some texture to the greenery.
Final Thoughts
Spider plants are sturdy and forgiving houseplants that thrive with a simple care routine:
- Give them at least 12 hours of bright indirect light in spring and summer, less in the fall and winter.
- Water regular pots using filtered water every 5-7 days during the growing season and every 10-14 days in late fall and winter. Hanging baskets require more frequent watering, ideally as soon as the top half of the soil is dry.
- Maintain moderate indoor temperature and humidity all year round.
- Feed once a month with a half-strength 3-1-2 liquid fertilizer only during the growing season, typically a year after repotting.
- Repot or divide when the plant fills to the edges of the pot or the rhizomes emerge from the soil.
- Remove aging leaves as needed to improve the plant’s appearance.
Even if you miss a few points while caring for spider plants, don’t worry as they can grow fast and replace sick leaves with healthy ones after receiving improved care.
Leave a comment to share your spider plant care journey or ask questions to fuel your interest in this fascinating plant.