Identifying Spider Mites on Houseplants, & How to Treat Them
Spider mites are common pests in outdoor gardens during summer. They can affect numerous plants indiscriminately and cause aesthetic damage and defoliation. Unfortunately, they can unnoticeably enter your home through infested new plants and damage the rest of your houseplants.
Below are essential facts to help you understand spider mites better:
- Spider mites prefer warm and dry conditions. In a controlled indoor environment, they can produce more than 10 generations annually, with each adult living and feeding off plant sap for around 30 days.
- Spider mite larvae, nymphs, and adults have piercing mouth parts (stylets) that allow them to draw moisture from the stomata on leaf undersides.
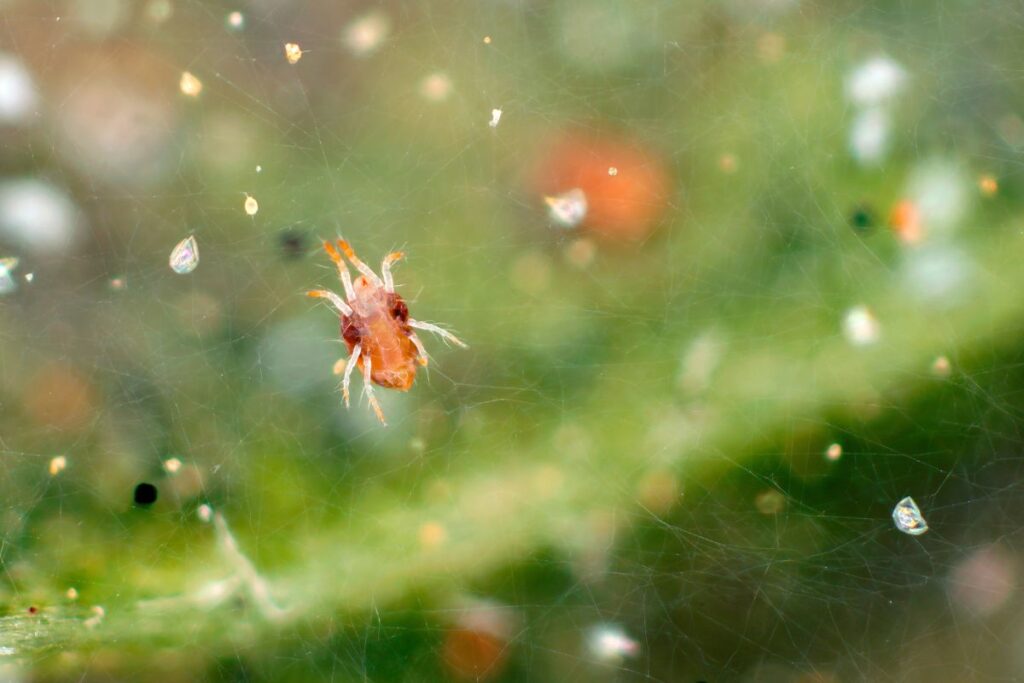
- An adult spider mite is about 0.5-1 mm (0.02-0.04 inches) in diameter and appears like a tiny moving dot. They’re generally hard to spot without a magnifying glass.
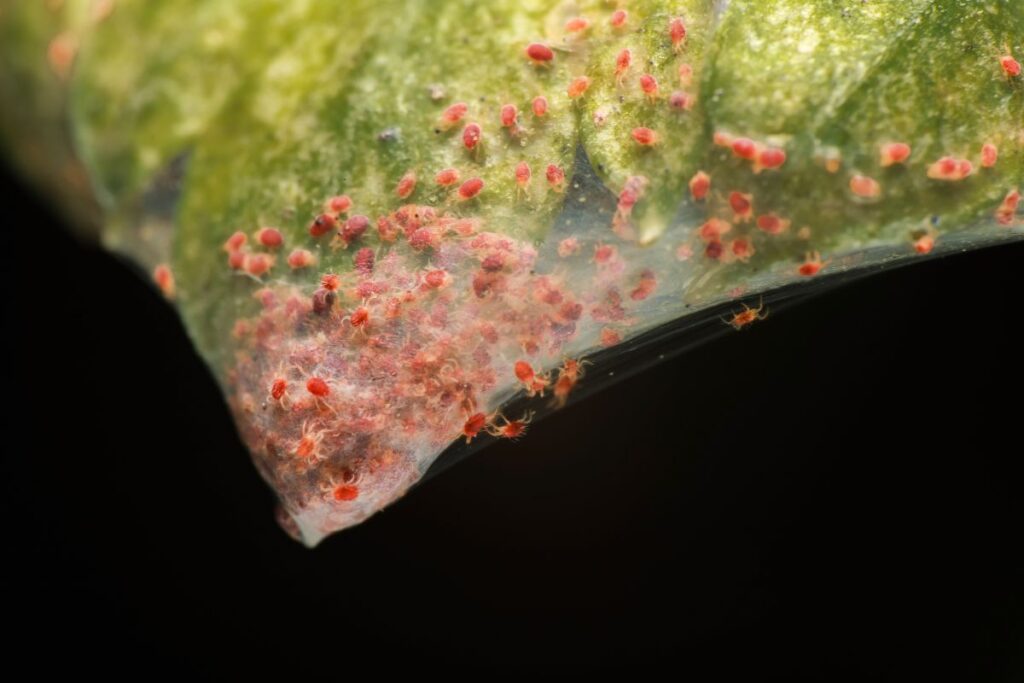
- Signs of spider mite infestation include fine webs on leaves or between stems and speckled white or yellow discoloration on leaf surfaces. The speckles gradually turn reddish brown, and the affected leaves may curl or fall off.
- Spider mites are vulnerable to neem oil, insecticidal soap, and spinosad-based sprays.
This guide will help you understand a spider mite’s feeding mechanisms and symptoms and explore their environmental preferences that promote growth and reproductive development. I’ll also share practical tips on how to manage, treat, and prevent future infestations.

Quick Guide
| Common Name(s) | Spider mite Two-spotted spider mite Southern red mite Honeylocust spider mite European red mite Boxwood spider mite |
| Scientific Name | Tetranychus spp. Oligonychus spp. Platytetranychus spp. Panonychus spp. Eutetranychus spp. |
| Pest Type | Arachnids (Family Tetranychidae) |
| Commonly Affects | Succulents (from arid regions), fruit-bearing plants, flowering plants, foliage plants |
| Size | Eggs and larvae: Less than 1/50 in (0.5 mm) Nymphs and adults: Less than 1/20 in (1 mm) |
| Color | Black, red, brown, dotted, or translucent (turning green or yellow after feeding on sap) |
| Signs of Infestation | Webbing, stippled or speckled leaves, yellow or brown spots, leaf drop |
| Preferred Conditions | Warm, dry environments |
| Damage Level | Moderate to severe |
| Prevention Methods | Regular plant inspections, neem oil spray |
| Treatment Options | Neem oil spray, spinosad-based miticides, routine removal of webs |
Life Cycle, Behavior, and Environmental Triggers
Spider mites are arachnids that belong to the same class (Arachnida) as mites, scorpions, spiders, and ticks. The spider mite family (Tetranychidae) consists of several genera that may affect trees, shrubs, and herbaceous plants.
The most common mites found in U.S. crops include the following:
- Tetranychus spp. (two-spotted spider mite)
- Oligonychus spp. (southern red mite, spruce, maple, and oak)
- Platytetranychus spp. (honeylocust spider mite)
- Panonychus spp. (European red mite)
- Eutetranychus spp. (boxwood spider mite)
The most notorious species affecting houseplants in the U.S. is the two-spotted spider mite (Tetranychus urticae). They’re easily identifiable through the two dark spots on either side of their translucent body. Their bodies may take on a reddish hue during cooler seasons, making them hard to distinguish from other mite species.
Regardless of the species, spider mites share similar physical and developmental traits, including the following:
- Eggs: Each adult female spider mite lays about 70 eggs throughout its lifespan. The eggs are clear microscopic dots less than 1/50 in (0.5 mm) in diameter and often found on leaf undersides. Fertilized eggs are noticeably larger and result in female spider mites. Unfertilized eggs, on the other hand, are smaller and produce male mites.
- Larvae: The egg hatches within 3-7 days and produces a larva, which is almost the same size as the egg but has six legs. During summer, the eggs hatch sooner, and the larvae only take a few days to evolve to the next stage.
- Nymphs: Within the next 3-7 days, the larvae morph into yellow or green nymphs (protonymphs and deutonymphs), slightly increasing in size (less than 1 mm) and developing two additional legs.
- Adult females: Female spider mites appear rounded and can reach up to 1 mm (0.04 inches) in diameter and get a darker orange, red, brown, or black color. They typically live for 15-30 days. They weave webs to protect the eggs from natural predators or windy conditions.
- Adult males: Male spider mites remain almost the same size and color as the nymphs with a pointed belly. They also live longer than females (20 to over 30 days).
Environmental Factors Favoring Mite Reproduction and Growth
Depending on the environment, spider mites can morph from eggs to adults within 1-4 weeks.
Here are the primary factors influencing a spider mite’s activity and reproduction:
High Temperatures
Spider mites like warm to hot conditions (55-110 °F or 13-43 °C) but can’t tolerate the cold.
When air temperatures are steadily over 80 °F (27 °C) for at least 3 days, the fertility of female spider mites significantly increases—2-3 times more than moderate temperatures of around 65 °F (18 °C). In addition, new generations of spider mites can develop from an egg to a reproductive adult in fewer than 2 weeks.
On the other hand, as nighttime air temperatures drop below 59 °F (15 °C), adult females enter diapause.
During this time, spider mites undergo the following changes:
- Adult males gradually die as they max out their lifespan of 30 days or so.
- Adult females turn orange-red because of higher fat deposits.
- The females become less active and overwinter beneath tree barks or in the soil.
- The eggs remain dormant underneath the leaves.
Underwatering
Underwatering can alter the sap chemistry, particularly with lower moisture and more concentrated sugars in the leaves, making the plant attractive to spider mites.
Prolonged underwatering, on the other hand, can lead to drought stress, pushing plants to retain water in their leaves, lowering vapor or humidity around them, and allowing the mites to draw in as much moisture as needed for energy and reproduction.
Only a few plants, such as the thale cress (Arabidopsis spp.), have developed chemical and genetic responses to drought stress to inhibit further spider mite damage. For instance, mite feeding following drought stress prompts the plants to close their stomata completely within 24-30 hours to deter spider mites.
Low Humidity
Lower humidity benefits spider mites by allowing them to readily excrete unwanted moisture after feeding excessively on plant sap. The leaf surface also remains dry, making it easier for the mites to weave their webs as needed.
Feeding Behavior
Spider mites are often found underneath leaves because their larval, nymphal, and adult stages have stylets or piercing mouthparts that allow them to draw moisture directly from the stomata on the leaf undersides.
While being all-day feeders, spider mites notably cause more severe damage at night.
Where Do They Come From?
Spider mites (i.e., two-spotted and European red) are primarily from temperate regions in Europe and Asia and have been introduced to the US through plant trade.
Currently, spider mites are widespread globally and can affect over 1,000 species of trees, shrubs, succulents, and herbaceous plants, especially during the growing season from spring to summer.
Spider mites naturally spread from one plant to another in the following ways:
- Crawling between plants
- Being blown by the wind
- Weaving webs between neighboring plants
- Hitching a ride on gardening tools
Note: Spider mites may occasionally be found in soil as adults diapause to survive the cold. However, they don’t reproduce or breed in soil. They require warm air temperatures and plant sap for more active reproduction and development.
Indoor gardeners can bring spider mites to their homes in several ways, including the following:
- Introducing an infested plant without proper isolation
- Bringing in a houseplant after an outdoor exposure in spring or summer
- Adding garden soil with spider mite eggs or adults to a homemade potting mix
- Unknowingly bringing in spider mites through clothes, pet fur, or garden tools
Without intervention, spider mites can pose a serious threat to houseplants because of their rapid reproduction and appetite for plant sap starting from the larval stage, especially during spring, summer, and early fall.
Symptoms of Infestations

Spider mites are hard to spot with the naked eye because of their tiny size, which can range from less than 0.5 mm (0.02 inches) for eggs to less than 1 mm (0.04 inches) for adults. They also tend to hide underneath the leaves to feed on plant sap and hide from natural predators.
In most cases, spotting the symptoms of spider mite damage indicates moderate to severe infestations.
Let’s explore the symptoms of an infestation and how to confirm that spider mites are the culprit:
Early Signs
- Fine webbing on leaves and stems (most noticeable sign)
- Tiny yellow or white speckles (stippling) on leaves (from feeding damage)
- The specks turn red or brown
- Affected leaves gradually lose their color or turn yellow or brown
- Leaves feel rough or dry to the touch
- Wilting and/or curling of stippled leaves
- Leaf drop (severe infestations can cause defoliation)
Confirmatory Tests
You can confirm the presence of spider mites with the following tools or methods:
Flashlight or Mister
You can switch on a flashlight to search for tiny crawlers on leaf undersides or fine webs near the petioles.
Spraying the plant with a fine mist of water can also expose the webs. However, be sure to wipe the leaves dry with a clean cloth after inspection to prevent secondary problems with microbial infection due to excess moisture.
Magnifying Glass
A 10x hand lens or magnifying glass is sufficient to spot spider mites, the webs, and their eggs. Direct the tool toward webs and leaf undersides to look for clear eggs or spider-like yellow, green, red, brown, or black crawlers.
Alternatively, you can use your smartphone to take a photo of the webs and zoom in to look for different life stages of spider mites. Adult spider mites create webs to move between leaves and protect the eggs, so there’s a good chance you’ll find eggs, larvae, and adults.
White Paper Test
You may also confirm a spider mite infestation using a blank piece of white paper.
Here are the steps:
- Place a piece of paper underneath the plant (over the soil).
- Firmly shake or wiggle the stem to dislodge any crawlers from the leaves down to the paper.
- Inspect the appearance of the pests on the paper using a magnifying glass.
- Alternatively, roll a pencil or chopstick over the paper to squish any pest. They typically leave behind a green, orange, red, or black smudge over the paper.
Treatment
Immediately addressing and treating spider mite infestations prevents damage and protects plant health.
I once underestimated the urgency of treating a minor pest infestation on a jade plant a friend left in my care during her summer vacation. Caught up in my schedule, I simply watered it once and kept it isolated to prevent the pests from spreading.
Just 2 weeks later, when I checked on it again, the plant had developed yellow and brown specks, and nearly a third of its foliage had dropped. Through this experience, I learned firsthand that swift action is critical.
To save the plant and prevent further damage, I recommend the following steps:
Immediate Actions
Here are the first steps to take upon confirming a spider mite infestation:
- Isolate the affected plant to prevent further spread. Choose a location with similar light conditions to prevent relocation shock, which is common for already stressed plants. Pro tip: Choose a cooler room (around 70 °F or 21 °C) with moderately higher humidity (around 50-60%) and water your plant regularly to slow down mite reproduction.
- Prune heavily infested leaves and discard them safely. Use sharp sterile pruning shear or scissors to make a clean cut and prevent secondary microbial infection. Sanitize the blade with rubbing alcohol between cuts. More importantly, avoid removing more than 30% of the foliage to prevent shock.
- Clean and disinfect the area to prevent a re-infestation. Since spider mites can crawl between plants, you must wipe the old spot of the infested plant with soapy water to eliminate crawlers and protect the nearby plants. You may also use 70-90% isopropyl alcohol but be sure to keep the liquid off your plants’ foliage as it can cause tissue damage.
Physical Removal
Depending on the new environment (isolation area) or size of the plant, you may choose from the following methods to physically remove the spider mites:
- Wipe the leaves with a damp cloth. This method is the least invasive and works well for smaller plants, as it doesn’t take too much time. Focus on removing the webs and wiping the leaf undersides because these are the spots where the eggs are usually hidden.
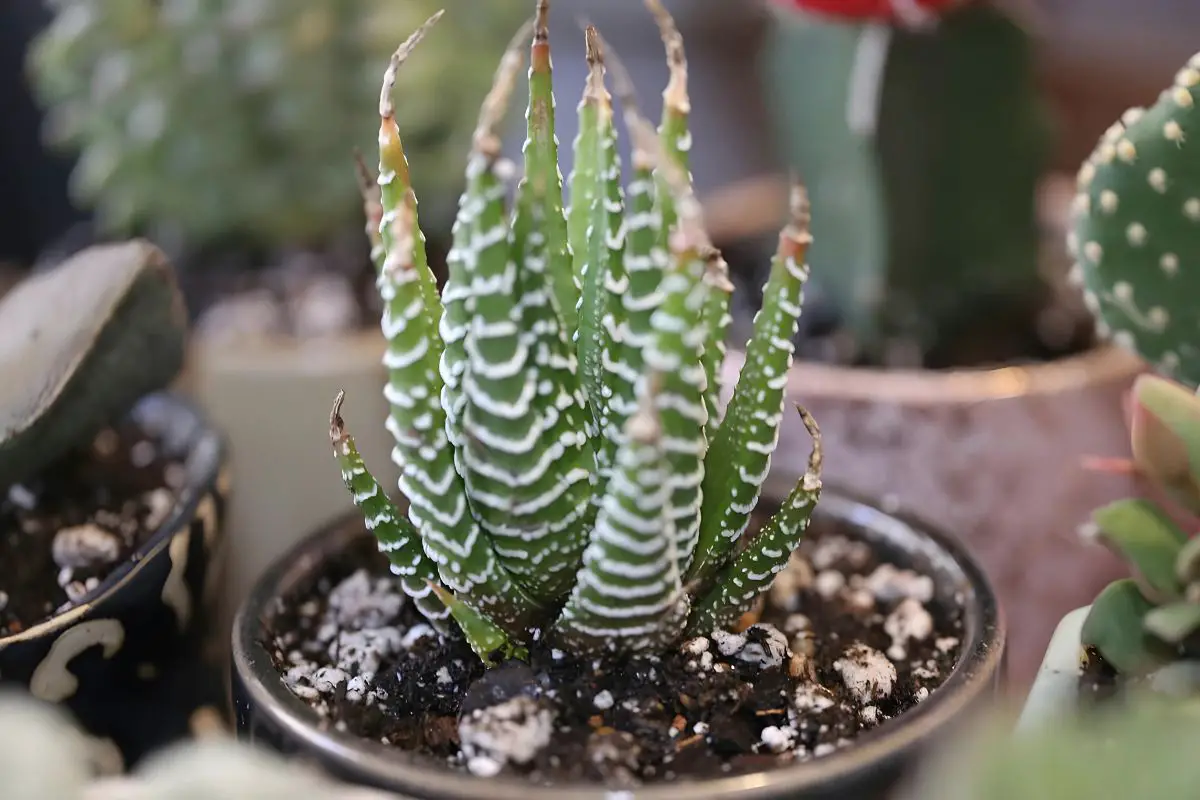
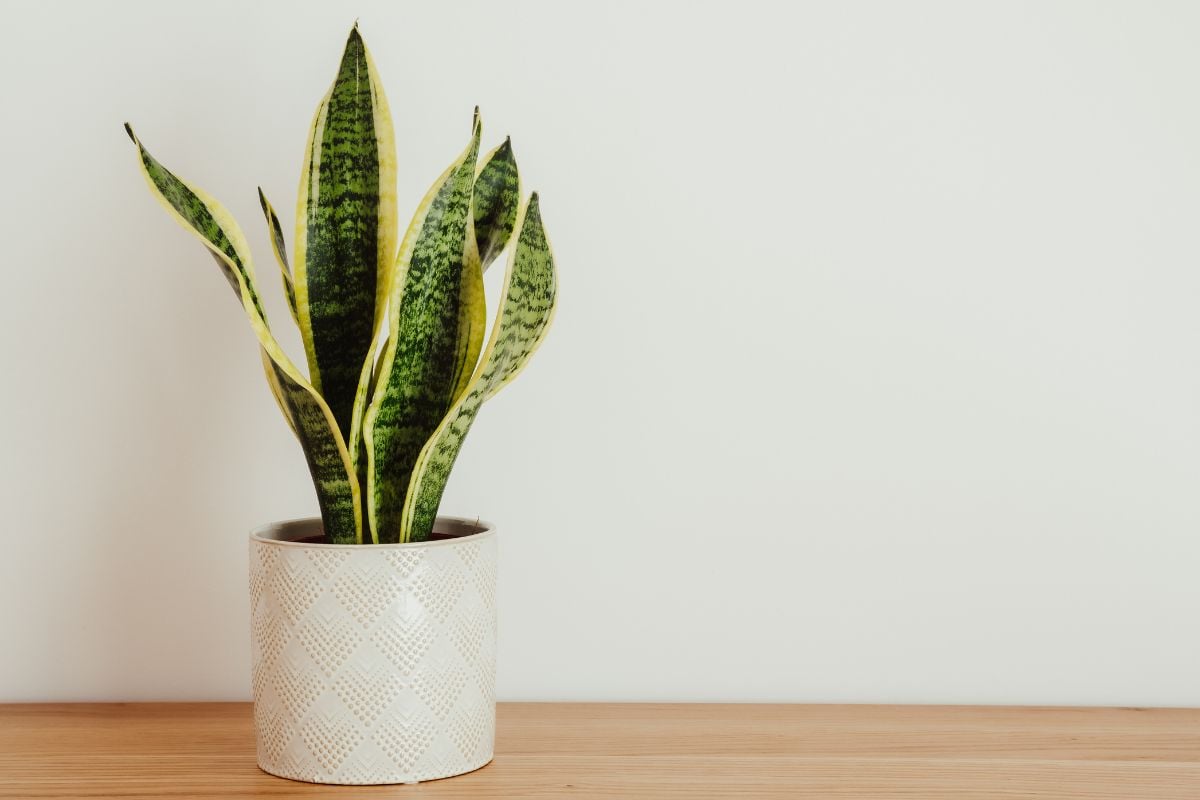
- Rinse the plant in a tub or under running water. This also works for smaller plants and yields faster results. Be sure to wet only the foliage and secure the soil to keep it from falling out of the pot, especially for succulents with loose substrate. I recommend this for plants with spiky leaves, such as zebra haworthias and snake plants.
- Hose down the plant with water. A strong blast from a showerhead or hose can knock mites off leaves. This method is best for hardy plants that like moist soil, such as monsteras and fiddle leaf figs. However, be sure to wipe the excess water off the foliage to prevent secondary bacterial or fungal infections.
Natural & Organic Remedies
After physically removing as many spider mites as possible, you may also target the hidden eggs and larvae using organic remedies like the following:
- Neem oil spray works as a miticide that disrupts a spider mite’s life cycle. You can make a homemade solution by mixing a tablespoon of neem oil, a teaspoon of liquid detergent, and a liter (0.26 gal) of water. Spray the solution all over the plant, especially the leaf undersides. Do this after sunset since the oil can make the leaves vulnerable to sunburn. Reapply once a week for up to 8 weeks or until there are no more signs of pests.
- Insecticidal soaps also work by breaking down the mites’ protective coating, causing dehydration. Be careful when using insecticidal soaps (especially homemade ones), as they can wash away the waxy coating on the leaves, resulting in tissue injury or dull leaves. Spray the liquid after sunset on the leaf undersides to avoid sun damage. Repeat this every 2-3 days for as long as you can see spider mites upon thorough inspection.
Pro tip: I recommend treating the other asymptomatic houseplants with neem oil spray once every 2 weeks to prevent the spread of pests or control an existing but mild infestation.
Biological Controls
In nature, beneficial bugs like lacewings, ladybugs, and predatory mites do an excellent job controlling pest populations.
However, I’ve had an unpleasant experience using predatory or beneficial bugs indoors to treat an infestation in my houseplants. They don’t often stay on your plant and can spread within your home, especially when the pests have been eliminated.
To help you weigh your options, here’s a guide showing the pros and cons of using predatory bugs indoors:
| Beneficial Bugs | Traits | Pros | Cons |
| Predatory Mites Amblyseius spp. Galendromus spp.Neoseiulus spp.Phytoseiulus spp. | Often larger with longer legs than spider mites Have more ovate abdomen | Voracious feeders and some species can feed on 5-20 spider mites (all life stages) per day. Widely available in the market with several species to choose from depending on your home conditions (type of pests, temperature, and humidity range) Can outlive spider mites since they can tolerate a wider temperature range and higher humidity Cannibalistic mites naturally deplete their numbers once the pests have been eliminated. | Pre-packed eggs can take 2-4 weeks to hatch. Pre-packed live adults have a short storage life (refrigerator conditions of up to 48 hours) and must be released right away for a normal life span (around 30 days), Note: Consult your supplier for the appropriate species that matches your needs. |
| Ladybugs | 1-10 mm (or bigger), depending on the species Orange or red wings with black dots | Can feed on other houseplant pests like aphids | Don’t readily feed on spider mites (they prefer aphids) Don’t stay on the plant once the pests are eliminated Can explore and hide in fabrics (curtains, couch covers) Stinky when dead Occasionally bite when threatened |
| Lacewings | Translucent body about ½ inches (1.3 cm) long Long, greenish, intricately veined wings up to ¾ inches (2 cm) long | Feed on common houseplant pests like aphids, mites, and insect eggs | Pre-packed eggs may take a long time to hatch (or not at all). Don’t primarily feed on spider mites unless there’s a shortage of food Larvae form can be cannibalistic, limiting their ability for pest control |
Note: Predatory bugs are vulnerable to horticultural spray (neem oil), insecticidal soaps, or chemical miticides. So, if you’re planning on using integrated pest management, which includes the use of natural or chemical insecticides and miticides, I don’t recommend using predatory bugs.
Chemical Treatment Options
A severe spider mite infestation can’t kill a full-grown plant with established roots and foliage right away. However, it can discolor and defoliate your houseplants and reduce their aesthetic value.
As a last resort, you may use chemical miticides to eliminate spider mites effectively.
I recommend using a spinosad spray because of the following features:
- Effective at low concentration
- Disables a pest’s nervous system, leading to death within 1-2 days
- Works on contact but up to 10 times more potent upon ingestion
- Low impact on predatory bugs
- Safe for edible plants, ornamentals, and grass
- Non-toxic to humans and animals when applied correctly
- Works on several hard-to-spot indoor pests, such as spider mites and thrips
Here are the tips to properly use spinosad on mite-infested houseplants:
- Read and follow the product-specific instructions regarding dosage and application frequency carefully. I usually apply it every 10-14 days in summer, which is the peak of spider mite infestation.
- Wear eye goggles, as the solution can cause mild eye irritation.
- Open the windows or switch on electric fans for 12-24 hours after applying the chemical.
In my observation, it usually takes at least two applications of spinosad spray before seeing improvements in houseplants—about a month after initial treatment.
Other chemical miticides that are effective against spider mites include:
- Sulfur sprays
- Plant-based horticultural oils (garlic, cinnamon, peppermint, rosemary)
- Mineral or petroleum-based horticultural oils
Note: Use commercially available chemical miticides with caution, as they can worsen plant health when applied incorrectly.
Check the product label and follow the instructions and indications (i.e., environmental temperature, frequency, dosage) for maximum effect against spider mites and minimal damage to your plant.
Signs of Recovery and Post-Isolation Steps

I usually treat severely infested plants for 6-8 weeks and monitor for signs of improvement, which include the following:
- Lack of new webs
- Absence of spider mites (egg to adult forms) upon close inspection using a magnifying glass or the white paper test
- New green growth without yellow or reddish-brown speckles
Give your plant time to grow new and healthy leaves to replace those that have fallen or have been pruned due to severe stippling. Monitor for any new signs of damage or infestation using a magnifying glass, a smartphone camera, or the white paper test.
If the leaves remain healthy and you can’t detect new pests after thorough inspections for the next 2 weeks, follow these post-isolation tips:
- Place the pot back to its usual spot.
- Clean the isolation room by mopping the floors with soapy water (one tablespoon of liquid detergent in a liter (0.26 gal) of water).
- Continue spraying the plant with neem oil spray at night once every 2 weeks until early or mid-fall. Any remaining spider mites naturally enter diapause during the cold season.
Pro tip: From early spring to late summer the following year after an infestation, proactively spray your houseplants with neem oil solution every 2 weeks to eliminate any remaining spider mites and effectively prevent a re-infestation.
Troubleshooting Common Problems
Spider mites are quite challenging to deal with because they’re so tiny that they usually go unnoticed until they reach alarming populations and cause severe leaf damage.
Here are some practical tips to manage common problems from a spider mite infestation:
Treating a Severe Infestation
Neem oil and insecticidal soaps are usually effective against spider mites, but they’re only minimally helpful in case of a severe infestation.
You can treat a severe infestation using spinosad, which was found to have a modest systemic effect against spider mites when applied directly to the roots as a soil drench. However, soil rich in organic matter or clay can retain spinosad and inhibit root absorption.
I recommend repotting the plant and introducing the spinosad treatment directly to the roots.
Here are some tips to effectively treat a severe infestation:
- Water the plant deeply 2 days before repotting.
- Prune severely damaged leaves but limit pruning to 10-30% of the foliage volume.
- Carefully unpot the plant to minimize damage to the roots.
- Remove as much old soil as possible using your hands or a hand cultivator. Some pests may be hiding within the soil.
- Rinse the plant (roots and foliage) under clean, tepid, running water to dislodge the pests. You may also hose down larger plants.
- Let the plant dry over a dry, clean towel or newspaper sheets. You can wipe excess moisture on the leaves using a clean cloth.
- Treat the roots and the leaves with spinosad spray to eliminate any remaining spider mites. The chemical may be absorbed by the roots for a longer-lasting systemic effect.
- Repot the plant in a moist, well-draining substrate in a pot with drainage holes. Ensure the soil type is appropriate for your plant.
Observe your plant for signs of re-infestation (i.e., webs and tiny crawlers) and wipe away new webs. After 10-14 days, reapply the spinosad spray on the leaves.
Note: I’ve tried unpotting infested plants, rinsing the leaves and roots, and spraying spinosad directly on the roots before repotting. This method was effective on my cast iron and jade plants, and the bugs didn’t return, allowing my plants to grow new and healthy leaves in the following months.
In contrast, spider mites occasionally returned to my houseplants without a thorough rinse and spinosad treatment, especially if the infestation was severe.
Realistically speaking, however, if over 50% of your plant is damaged, it can take weeks or months to see actual improvement, even with rinsing and repotting. Sometimes, the disappearance of the mites may be due to the cooling season in the fall, and you may be faced with a similar problem the following spring.
If severe infestation is present on multiple houseplants, consider discarding severely damaged plants, as the problem may persist as long as the spider mites have a host. You may then proactively use preventive measures on the remaining plants, like applying neem oil spray every 1-2 weeks.
Mites Keep Coming Back Despite Treatment
It’s crucial to employ integrated pest management to treat and prevent a recurring spider mite infestation properly.
I often use multiple methods in the following order:
- Inspection and confirmation: Check the damage pattern on the leaves and identify the pests responsible using a magnifying glass. It also helps to check the neighboring houseplants because it’s likely that they’re also infested.
- Isolation: Relocate the infested plants into a room with bright indirect light (ideally similar to the original spot) and water as needed to maintain plant activity. Ensure the room has cooler and moderately humid conditions (around 70 °F or 21 °C and 50-60% humidity) to slow down spider mite activity and reproduction.
- Pruning: Cut off severely damaged or infested leaves as they’re likely to contain numerous eggs and larvae. Pruning can also help improve your plant’s appearance and reduce the hiding spots for other pests.
- Initial treatment: Spray the plants generously with neem oil at night once a week for the next 4-8 weeks. When using insecticidal soap sprays, aim for the pests on leaf undersides and reapply every 2-3 days since they only work on direct contact and have no residual effect.
- Monitoring: Inspect the infested plants regularly and wipe away the webs with a damp cloth as soon as you spot them.
- Preventive measure: Since eggs hatch in cycles, continue reapplying the neem oil spray every 1-2 weeks to eliminate new generations of spider mites.
Other Plants Are Getting Infested
Spider mites can crawl from one plant to another or may be blown by the wind if there’s a fan in the room. Gardening tools can also carry the pests to other houseplants.
It’s important to properly isolate infested plants as soon as you identify spider mites. As discussed, the symptoms caused by spider mites typically appear when there’s already a moderate to severe infestation.
When you spot symptoms on previously unaffected houseplants, isolate them right away and treat them the same way using the abovementioned methods.
Even if the remaining houseplants don’t have symptoms yet, it’s best to treat them proactively with a neem oil spray every 1-2 weeks to inhibit spider mite reproduction and development.
Treatment With Homemade Remedies
I’ve had my fair share of frustrations with spider mites damaging my houseplants. Before trying the practical tips I shared above, I attempted several homemade remedies to deal with spider mites.
Here’s what my experience taught me:
- Alcohol spray – Not effective: Online sources suggest diluting rubbing alcohol in water in a 1:1 ratio. Most products contain around 70% alcohol, and adding water reduces the alcohol concentration. The liquid can temporarily immobilize the crawlers. As the moisture evaporates, you’ll find that the alcohol mix doesn’t kill spider mites. Even worse, alcohol draws moisture out from plant cells, causing tissue injury that can dull your plant’s appearance when applied directly on the leaves.
- Liquid soap spray – Moderately effective but not plant-safe: Like commercial insecticidal soaps, liquid dish soap diluted in water can destroy a spider mite’s protective shell and damage the cells. However, it can also do the same to the plant’s leaf cuticle and cells, resulting in dull leaves.
- Vinegar – Effective but not plant-safe: Horticultural vinegar (20% acetic acid) is a strong acid and can corrode mites and plant cells upon direct contact. It can also alter potting soil pH and kill good bacteria. Although weaker, white or cooking vinegar (5%) can also harm plants as it can damage plant tissue.
Preventive Measures
You can prevent a spider mite infestation or control an existing one with the following tips:
- Quarantine new plants: Make it a habit to isolate new plants for up to 8 weeks before introducing them to your indoor garden. This should be enough time to reveal any existing pest infestation or disease. Once the new plants clear the isolation time, inspect them with a magnifying glass before introducing them to your collection.
- Avoid overcrowding plants: Spider mites spread quickly when plants touch each other. Space the plants at about 6 inches (15 cm) apart to improve airflow. If plants are close together, rotate them regularly to expose all sides to air and light.
- Maintain warm temperatures: Most houseplants thrive at moderate temperatures of around 65-75 °F (18-24 °C). Avoid exposing your plants to high temperatures (over 80 °F or 27 °C), which promote rapid growth and reproduction in spider mites.
- Water plants regularly: Be mindful of your plant’s moisture needs and water regularly to prevent drought stress, which can invite spider mites.
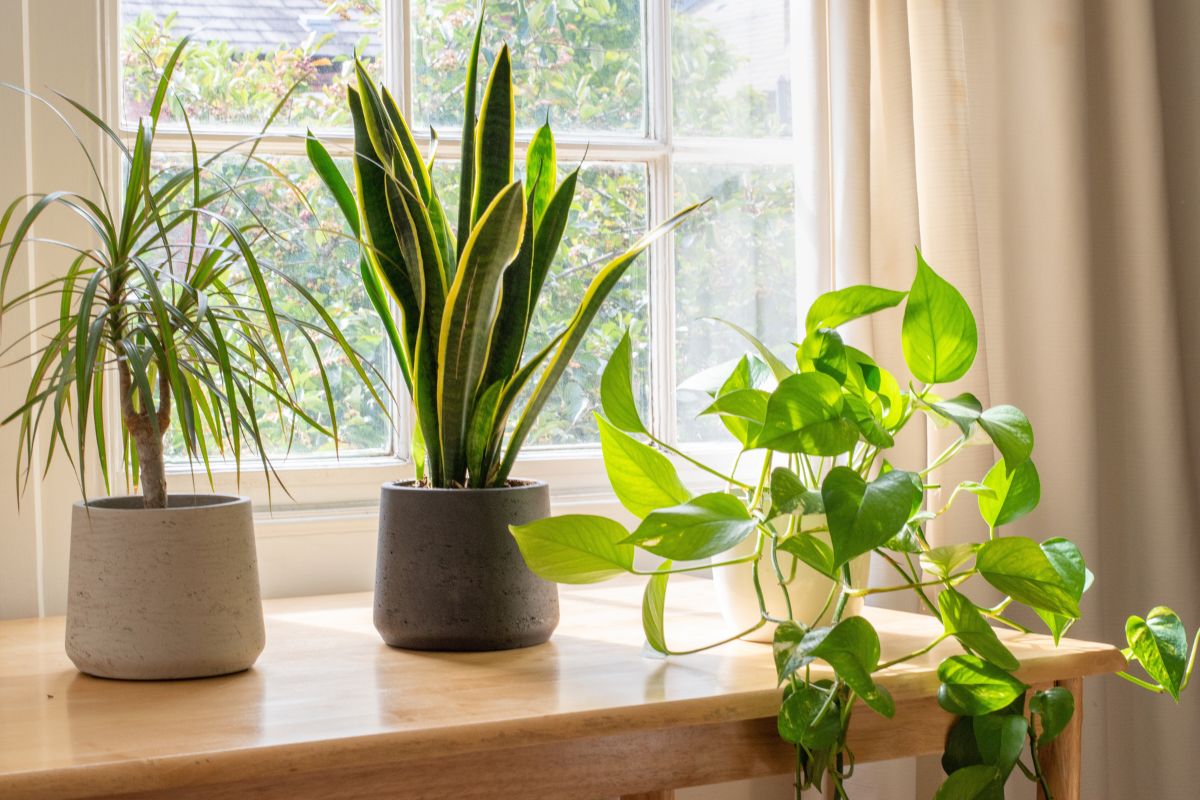
- Provide bright indirect light: The hot summer sun can raise indoor temperatures and promote spider mite growth and reproduction. Filter direct sunlight using sheer curtains at the peak of summer to protect even your sun-loving plants from sunburn and spider mites.
- Maintain moderate humidity: Keep humidity levels at around 50-60% using a humidifier or pebble trays. Although it can’t treat an existing infestation, it can prevent drought stress on plants and inhibit spider mite development. You can mist the plants weekly or every time you water to dislodge the pests, but be sure to wipe the excess moisture off the leaves to prevent microbial infection.
- Ensure regular inspections & maintenance: Check the undersides of leaves weekly or every time you water the plant. Wipe the leaves with a damp cloth to remove dust from the upper surface and potential pest eggs from the undersides. Prune and remove visibly infested or severely damaged leaves.
- Use natural repellents: Proactively use neem oil as a preventive spray every 2 weeks from spring to summer to deter pests or eliminate existing ones. You can double your protection by occasionally using commercial insecticidal soaps directly on visible pests. Although they don’t have preventive functions, they can eliminate pests on contact and prevent further damage.
- Feed the plant as needed: Use a plant-appropriate fertilizer every spring and/or summer to promote strong growth and resistance or tolerance to pest infestations.
Note: Other sources claim that winter heating and dry air can worsen a spider mite infestation. However, fluctuating indoor conditions with low nighttime temperatures (around 59 °F or 15 °C) can slow down spider mite development and make it unlikely to awaken diapausing females.
It also takes around 5 days of stable warm temperatures (75 °F or 24 °C) for two-spotted spider mite eggs to develop into adults.
Houseplants Prone to Spider Mite Infestations and Symptoms

Here’s a brief guide on houseplants commonly infested by spider mites and their corresponding symptoms:
| Plant Name | Symptoms |
| Aloe vera (Aloe vera or Aloe barbadensis – former name) |
|
| Anthurium (Anthurium andraeanum) |
|
| Cast Iron Plant (Aspidistra elatior) |
|
| Chinese Money Plant (Pilea peperomioides) |
|
| Elephant Ear Plant (Alocasia spp.) |
|
| Fiddle leaf figs (Ficus lyrata) |
|
| Heartleaf Philodendron (Philodendron hederaceum) |
|
| Jade Plant (Crassula ovata) |
|
| Lucky Bamboo (Dracaena sanderiana) |
|
| Money Tree (Pachira aquatica) |
|
| Monstera (Monstera deliciosa) |
|
| Peace Lily (Spathiphyllum spp.) |
|
| Pothos (Epipremnum spp.) |
|
| Prayer Plant (Calathea spp.) |
|
| ZZ Plant (Zamioculcas zamiifolia) |
|
Comparison to other Common Houseplant Pests
Although hardly visible, spider mites can cause distinct symptoms, making it easier to distinguish them from other common pests.
Here’s a guide showing the differences among common houseplant pests:
| Pest Name | Size and Appearance | Symptoms |
| Spider Mites |
|
|
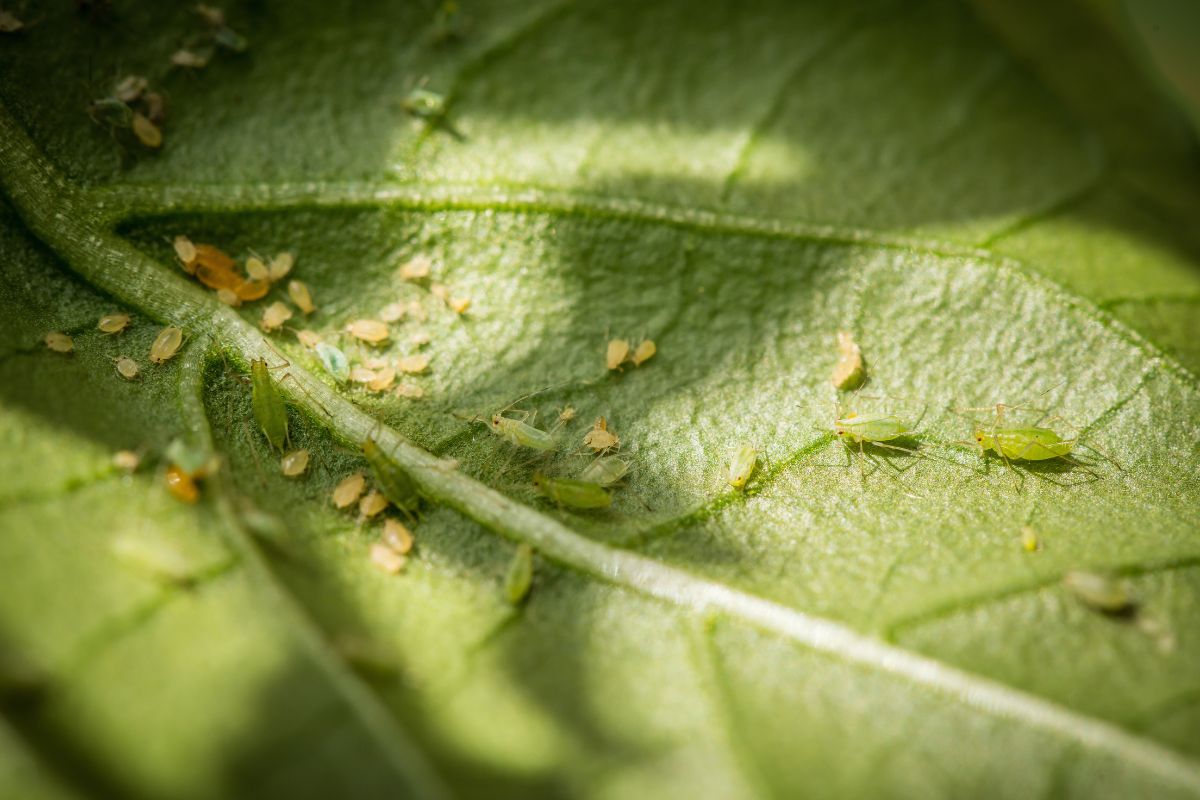
| Aphids |
|
|
| Flat Mites or False Spider Mites |
|
|
| Mealybugs |
|
|
| Scale Insects |
|
|
| Thrips |
|
|
Final Thoughts
Spider mites are dangerous and troublesome pests to deal with, as they can reproduce rapidly during warm and dry seasons and discolor or defoliate plants. They’re also generalist pests, affecting over a thousand plant species.
It’s crucial to treat a spider mite infestation promptly to prevent further damage that may lead to massive defoliation and plant death.
You can proactively treat and prevent a spider mite infestation using a combination of the following methods:
- Isolation of infested plants
- Physical removal by wiping or rinsing the foliage
- Treatment with neem oil or insecticidal soap (moderate infestation)
- Treatment with spinosad spray (severe infestation)
- Unpotting and spraying the roots with spinosad before repotting in fresh soil (severe infestation)
- Continuous application of neem oil spray every 1-2 weeks for prevention of recurrence
- Maintaining proper light, temperature, water, and humidity conditions
- Routine inspection and prompt treatment
Spider mite infestations can be alarming even to experienced gardeners because management methods can be tedious. If you’ve encountered this problem before, feel free to leave a comment to share your experience in battling spider mites or ask a question for more details.