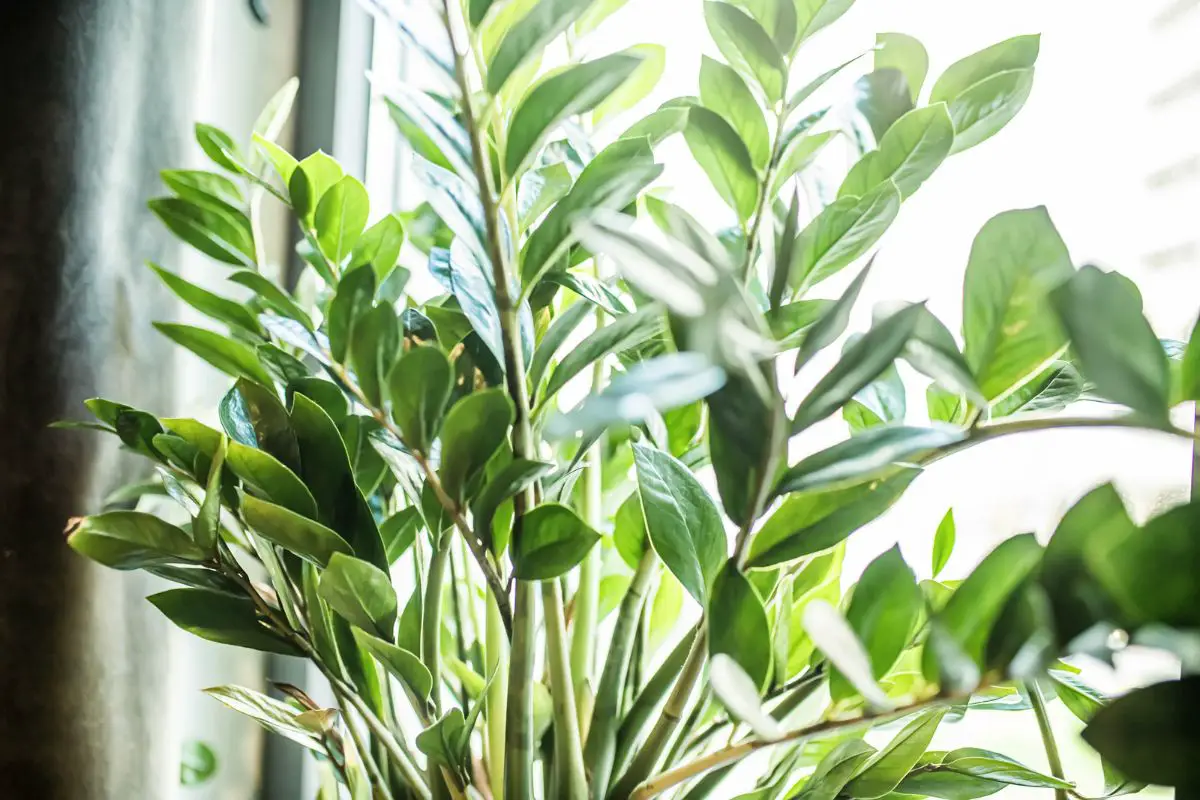
Zamioculcas zamiifolia, popularly known as the ZZ plant, is a low-maintenance houseplant valued for its glossy green leaves. It comfortably grows in low-light and low-water conditions, making it a dream come true for many indoor gardeners. It’s also not fussy about being rootbound and doesn’t require frequent repotting.
To repot a ZZ plant, you must prepare fresh, well-draining soil because its fleshy roots and rhizomes will rot in wet soil. In addition, use a breathable pot one size bigger than the old one. You can also use this opportunity to divide overgrown plants and increase your collection.
This article will discuss the repotting needs of ZZ plants. I’ll help you determine when your plant needs repotting and guide you through the step-by-step process. I’ll also share some post-transplant and long-term care tips to keep your ZZ plant thriving for several years.
ZZ Plants: An Overview
ZZ plants have low moisture requirements and thrive in low-light conditions. This makes them grow slowly, allowing them to remain in the same pot for up to 3 years. Although more slowly than other houseplants, ZZ plants will eventually outgrow their containers.
In their native habitat, ZZ plants spread through fleshy underground stems called rhizomes. Many gardeners call them bulbs because they look like potatoes. New shoots will then grow out from these rhizomes.
As new rhizomes and shoots develop, they will crowd the pot and displace most of the soil, reducing their access to moisture. That’s when the plant needs repotting or division.
Understanding When to Repot Your ZZ Plant
ZZ plants typically need repotting within 2-3 years. They can remain undisturbed in their containers longer than other houseplants.
I have two ZZ plants in the dimmer side of the room, sitting happily in their pots for a little over 3 years now without showing any signs of stress.
It’s a helpful skill to know when your plant needs repotting. It will prevent you from transferring your plant too soon or too late and improve its recovery rate from transplant shock.
Let’s explore the telltale signs your plant needs a new container.
Reasons and Signs Your Plant Needs Repotting
There are a few reasons you may need to repot your ZZ plant, including the following:
- Rootbound plant
- Overgrown plant ready for repotting
- Poor soil quality (i.e., poor drainage, hydrophobic, nutrient depletion)
The signs below will help you confirm that your plant needs repotting:
- Roots crowding or emerging from the soil or the pot’s drainage holes: This sign indicates the plant has grown too big and the pot can no longer accommodate the increasing root size.
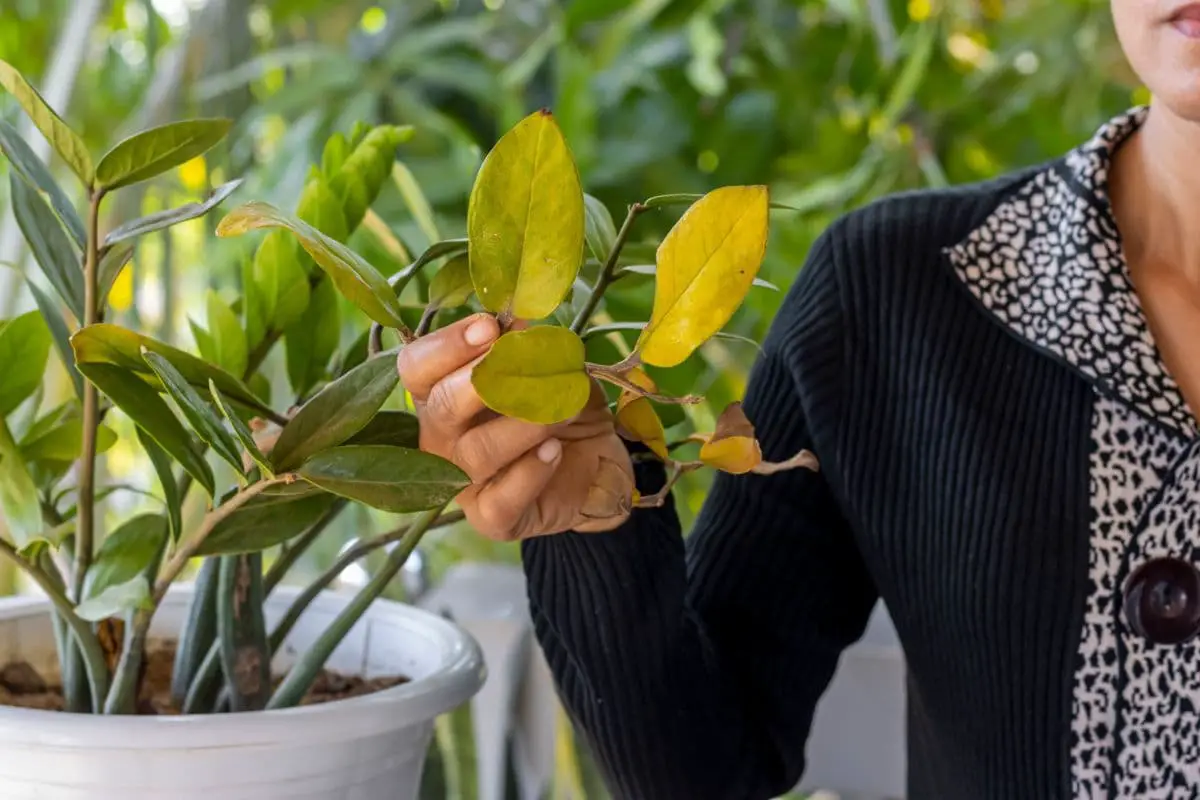
- Slowed or stunted growth, or visible decline in health: Yellowing or wilting leaves and a lack of new stem or leaf growth during the growing season can indicate a lack of soil space, nutrient depletion, or soil hydrophobicity.
- Crusty soil surface or soil pulling away from the pot: This is also a sign of hydrophobic soil. ZZ plants can’t survive for too long in such a soil condition because they can’t absorb enough water. The best option is to repot them in better-quality soil.
- Rhizomes or bulbs poking out of the soil surface: Exposed bulbs show that your plant has outgrown the container and may need to be divided. Moreover, ZZ plant bulbs should ideally be buried about an inch (2.5 cm) deep into the soil to prevent rapid moisture loss and protect them from physical damage.
- Constantly wet soil: ZZ plants have succulent stems, fleshy roots, and rhizomes that store moisture and nutrients, making them drought-tolerant. Excess moisture in the soil can cause root rot, fungal diseases, or pest infestation. Replacing the soil or container with better-draining materials is a practical solution.
Best Time of Year for Repotting
Spring is the best time to repot a ZZ plant. You can also do so early in the summer as long as the plant is still actively growing and the temperature is maintained below 85 °F (29 °C).
Avoid repotting during the cold season as the plant becomes less active in the winter. Since they’re slow-growers, ZZ plants might have a hard time recovering from transplant shock when moved during high summer heat or winter rest.
The only time you may need to repot ZZ plants during the cold season is when it shows signs of root rot. This condition can kill your plant within a week if left untreated.
I’ll discuss in more detail how to address root rot when repotting later in the article.
Choosing the Right Pot and Soil
The quality of the pot and soil are important factors in how long and how well your ZZ plant can live indoors.
Selecting the Ideal Pot
Below is my go-to guide when choosing a pot for my ZZ plants:
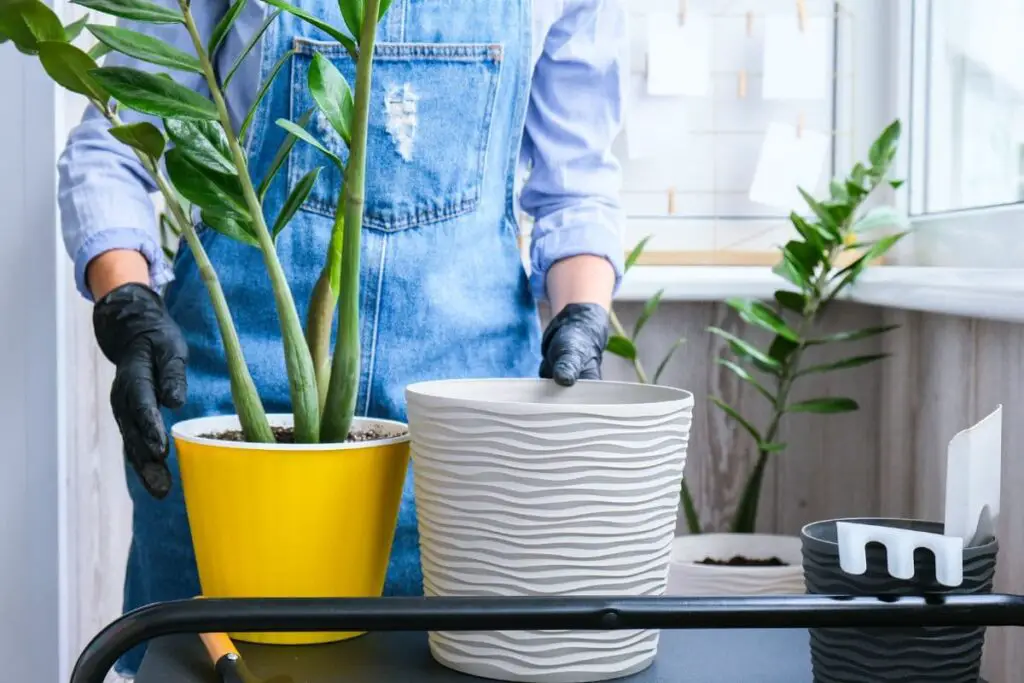
- Size: Go for a pot that’s only one size bigger than the old one. That means if the old pot is one gallon (3.8 l) or 8 inches (20 cm) wide, the new one should be two gallons (7.6 l) or 9-10 inches (23-25 cm) wide. It should also be around 2 inches (5 cm) deeper.
- Material: I prefer using a heavy pot like terracotta because it can support the plant’s weight as it becomes top-heavy.
- Design: Choose a pot whose mouth is wider than its base. This will make it easier for you to remove the plant later for future repotting or division.
- Drainage: Use a pot with drainage holes at the bottom to prevent waterlogging and root rot.
Pro tip: My personal favorite is an unglazed terracotta pot because its earthy color is an excellent contrast to the ZZ plant’s glossy green leaves. In addition, the breathable pot facilitates good air circulation within the soil and wicks away excess moisture.
You can also use decorative pots like plastic or ceramic for their aesthetic appeal. However, ensure that they have enough drainage holes and be mindful of your watering routine.
Whatever pot you choose, it should be sterile. You can clean it with a 10% bleach solution, rinse it thoroughly, and air-dry it a day before repotting.
Optimal Soil Mix
ZZ plants can sit more comfortably even in non-breathable pots if they have good-quality soil. They need loose soil rich in organic matter with a pH level of 6.0-7.0.
You can use commercially available cacti or succulent mix enriched with slow-release macro and micronutrients. However, they might be pricey.
For a homemade recipe, I recommend using a potting mix with equal parts compost and perlite or horticultural sand.
ZZ plants don’t require much fertilizer and the compost should be enough to provide organic matter and a slow release of essential nutrients for the first year after repotting. On the other hand, perlite or sand has a neutral pH and allows excellent drainage.

The Repotting Process
Once you’ve prepared the appropriate pot and soil, there are a few other things you need to prepare to ensure a smooth workflow.
Preparing Your Workspace and Materials
Choose a spot that you don’t mind getting messy, such as a garden shed or a bathroom.
You will then need to prepare the following tools and materials:
- Old newspaper or magazine pages
- Pre-collected rainwater or filtered water
- Plastic wash basin
- Flat knife or spatula
- Gloves
- Sterile shears or scissors
- 70% isopropyl alcohol
- Clean towels and cotton balls
- Face mask
- Hand trowel
- Drip tray
- Garbage bag
Step-by-Step Guide
- Water your plant 1-2 days before repotting. You must also moisten the new potting mix at the same time. Check the soil with your finger to confirm it’s no longer soggy before working on it.
- Spread old newspaper or old magazine pages over the workspace to protect it from dirt.
- On repotting day, perform the following steps early in the morning to give your plant enough daylight hours to recuperate.
- Cut the roots protruding from the drainage holes using sterile shears.
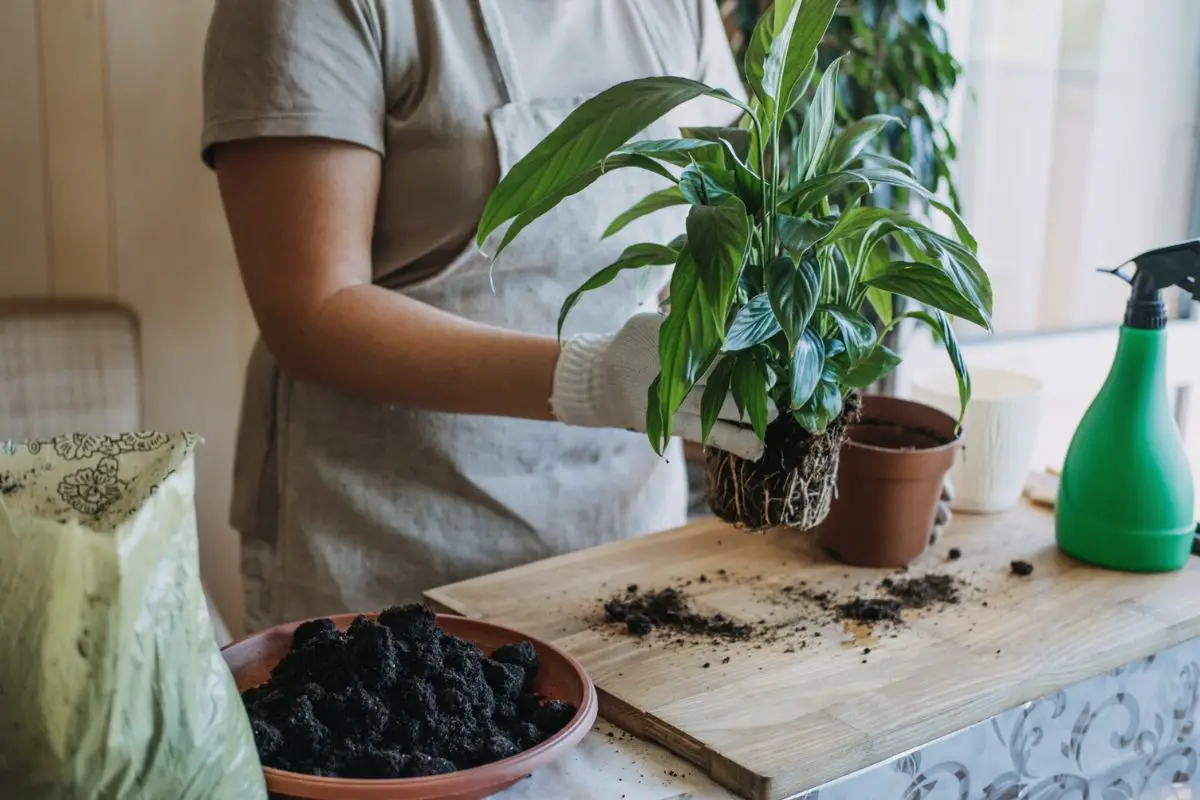
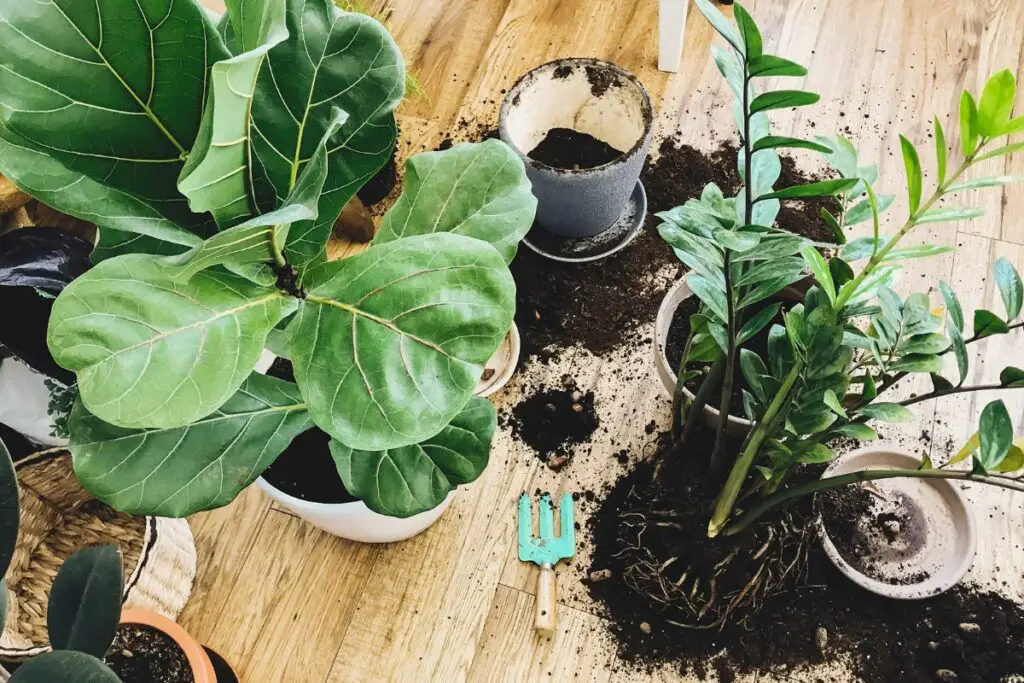
- Support the weight of the plant’s crown with one hand and tilt the pot to the side to slide the plant out. If it doesn’t readily come out, loosen the soil around the edges of the pot using a spatula or flat knife. Try sliding the plant out again.
- Remove the soil around the roots using your fingers. Be careful not to damage them. If the soil is too hard and dry or sticking to the roots, soak the rootball in a basin of water for 1-2 minutes.
- Fill the bottom of the pot with 2-3 inches (5-7.6 cm) of new and moist potting mix.
- Inspect the plant’s roots for signs of rot or damage, such as black, mushy, or decaying sections.
- Snip off the damaged part but limit it to less than a third of the root system. If the damage is more than that, consider dividing your plant to salvage the healthier parts. I’ll discuss this further in the following section.
- Wipe the shears with a cotton ball or towel soaked in alcohol to disinfect them before moving on to the next sections. You can also prune mushy stems or pluck off damaged or discolored leaves.
- Dispose of mushy and smelly rhizomes and potentially infected shoots in a garbage bag.
- Rinse the roots with clean water to remove old or infected soil and gently pat them dry with a clean towel.
- Place the roots over the fresh potting soil and cover it with more soil.
- Position the rhizomes so that they’re buried up to an inch (2.5 cm) below the surface. This will give your plant stability as it grows upright.
- Keep the crown and soil surface about an inch (2.5 cm) below the rim of the pot.
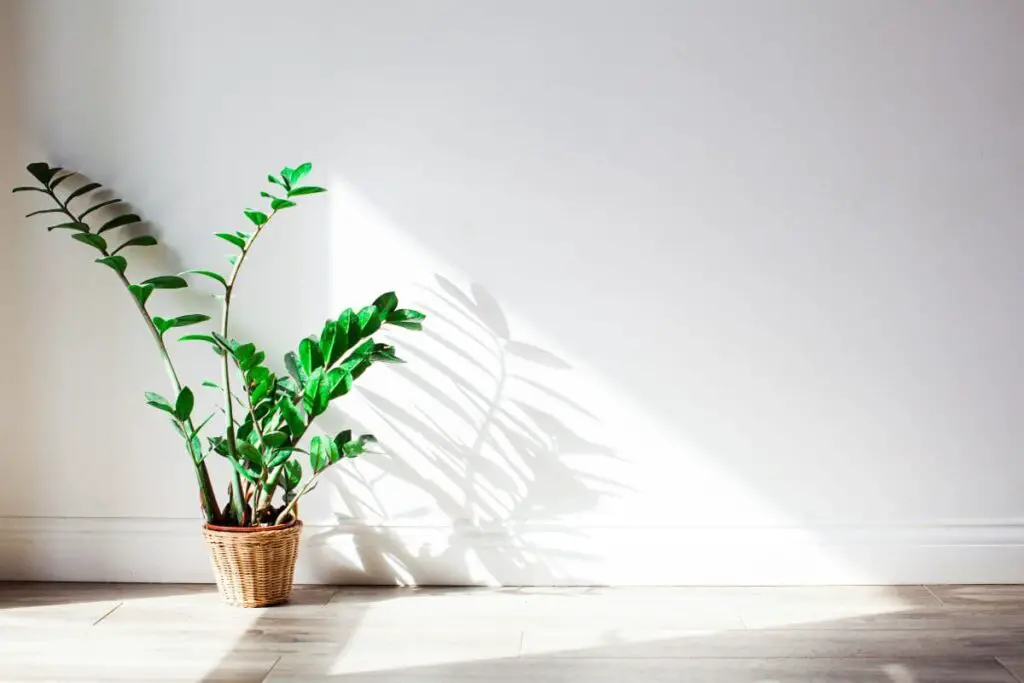
- Place the pot in an area with bright, filtered light, such as 4-8 feet (1.2-2.4 m) from a curtained eastern window. Consider moving it farther if you have a southern or western window.

Division and Propagation
If your plant has signs of rot, you can propagate it through leaf or stem cuttings. It’s easy to grow ZZ plants this way. However, the rooting process can take up to 3 months before your plant is ready for transplant into soil.
Here are the steps:
Leaf Cuttings
- Look for healthy leaves and pluck or cut them off with a piece of stem still attached.
- Leave them on a paper plate in a cool, dry room for a week until you see a callus on the cut end. Keep them beyond the reach of children or pets because they can cause stomach problems when ingested.
- Place the leaf in water with the bottom inch (2.5 cm) submerged. I recommend filtered water in a shot glass for each leaf.
- Keep the setup in a warm and bright room away from direct sunlight.
- Refill or replace the water regularly to keep it clean and at the same level.
Stem Cuttings
- Choose plump stems with short internodal spaces (1 inch or 2.5 cm) and perky leaves.
- Cut them close to the base at a 45° angle for better moisture absorption.
- Dip the cut end in rooting hormone, cinnamon powder, or pure honey. Any of these substances can help promote faster root development.
- Submerge the bottom 2-3 inches (5-7.6 cm) of the stem in a clean glass of water.
- Place the setup in a warm and bright room away from direct sunlight.
- Refill the water regularly to maintain the level and replace it as soon as it becomes cloudy.
Root Division
On the other hand, if your plant is overgrown, it’s best to divide it. It usually takes 3-5 years before ZZ plants grow enough healthy bulbs for division.
The process is similar to repotting, with a few additional considerations (between steps 6 and 7):
- After removing the old soil, look for easy division spots. A healthy bulb should be firm with 2-3 stems. You can also separate bulbs with a single stem but it will have lower chances for survival if the foliage dies.
- Carefully disentangle the roots to separate the bulbs.
- Plant them in smaller, separate pots, ideally 1-2 inches (2.5-5 cm) wider and 2-3 inches (5-7.6 cm) deeper than the rootball of each division.

Post-Repotting Care
After repotting, it’s common to see a few signs of transplant shock, including the following:
- Yellowing leaves
- Drooping leaves
- Lack of new leaf buds
These might seem like signs of underwatering, but avoid overwatering your plant to encourage it to bounce back. Otherwise, you risk exposing your plant to root rot.
Remember the following watering tips to properly care for your plant after repotting:
- If the plant has been treated for root rot, avoid watering it until half the pot is dry. The initial watering of the new potting mix should be enough to hydrate your plant for at least a week.
- If the plant was rootbound or the potting mix was hydrophobic, you must water your plant deeply after repotting. Let the pot sit over a drip tray for up to 15 minutes or until the excess moisture drains out of the holes completely.
- Wait until the upper half of the potting mix is dry before watering again. This can take 2-3 weeks during the cool spring season or 10-14 days in summer.
With proper timing and repotting strategies, your plant should show improvement after 2-3 watering sessions. Repotting in early spring will also result in new leaf buds or stems by late spring or early summer.
When repotting in the fall or winter, your plant may get by with watering every 4-6 weeks. Note that it will naturally grow more slowly during this time and you won’t see any new growth until spring.
Here are additional parameters to maintain to help your plant recover faster:
- Temperature: Keep temperatures between 65 and 85 °F (18 and 29 °C). A cold environment can force your plant to rest while hotter conditions will worsen the symptoms of transplant shock.
- Humidity: Maintain average indoor humidity (40-50%) around your ZZ plant. Higher moisture levels in the air can make your already weak plant more vulnerable to pest attacks.
- Light: If possible, keep your plant in the same light condition as before repotting. Avoid placing it in brighter conditions, which can increase the risk of sunburn and dehydration. Rotate the pot by 90-180° once weekly or at watering for even light exposure.
- Fertilization: Avoid fertilizing your plant soon after repotting. The compost in the potting mix (or the slow-release nutrients in commercial potting mixes) can nourish your plant during its first year in its new pot.
Long-Term ZZ Plant Care Tips
After your plant recovers, you can add the following to your routine ZZ plant care:
Fertilizing Schedule
A year after repotting (ideally in spring or early summer), replenish the nutrients in the potting mix using a 10-10-10 slow-release NPK fertilizer. Make sure the bulbs are not exposed before you sprinkle and water in the granules.
Routine Checks for Pests and Diseases
ZZ plants are rarely attacked by many pests and diseases because they’re usually kept relatively dry compared to other houseplants.
If you overwater your plant, you may have problems with root rot, which you can fix by adjusting your watering routine or using the repotting tips above.
It also helps to keep an eye out for a pest infestation in your indoor garden, especially if you have a large plant collection. Aphids, mealybugs, and scale mites might be attracted to the succulent stems and leaves of ZZ plants.
Pruning and Grooming Tips
You will seldom need to prune your ZZ plants, especially right after propagating or dividing.
Pro tip: Groom your plant by misting and wiping the dust off the glossy leaves once every 2 weeks or right before watering. That way, you can avoid feeding your plant excess moisture.
After repotting mature plants, on the other hand, you may need to cut back awkward-looking shoots.
Here are some tips:
- Stems at the outermost side of the pot may lean if the plant is overcrowded. You can cut them close to the soil and they won’t grow back. If you want to propagate them, remember to cut them at an angle.
- Leggy stems with larger internodal spaces (over an inch or 2.5 cm) may look unsightly, especially if you want a bushy plant. I don’t recommend propagating them, so it’s best to cut them back to soil level.
- Old stems that are longer than the rest can be pruned from the top to maintain your plant’s bushy appearance.
Common Mistakes to Avoid
Overpotting
ZZ plants like to be snug in their pots. Avoid an oversized pot, which can retain too much water and lead to root rot. Although ZZ plants like coarse soil, they also require organic matter, which can retain excess moisture that’s bad for the fleshy roots.
Selecting a Pot Without Drainage Holes
Due to their succulent stems, rhizomes, and fleshy roots, ZZ plants don’t need too much moisture in the soil. The lack of drainage holes can trap the water within the pot, keeping your plant constantly sitting in wet soil and increasing the risk of root rot.
A ZZ plant requires a pot with drainage holes because it’s more tolerant of underwatering and root rot may be irreversible.
Although you can propagate the surviving leaves and stems, the rooting process can take several months. It can also take years before your plant grows to its full size.
Using the Wrong Soil Type
ZZ plants like well-draining soil rich in organic matter, making the half-compost, half-sand/perlite mix a safe recipe. Your plant can handle having more coarse materials if you increase the watering frequency accordingly.
However, using too many moisture-retaining materials can make the roots and rhizomes more susceptible to rot.
Overwatering
It’s widely recommended to water your plant a few days before repotting so that the roots, stems, and leaves are well-hydrated and can adjust better to the new environment.
For ZZ plants—which have moisture-retaining parts—overwatering right after repotting will keep them sitting in waterlogged soil, unable to absorb the excess moisture.
The constantly wet soil will become home to rapidly growing fungal populations that can cause the roots to decay. This can eventually kill your plant.
Overfertilization
ZZ plants grow slowly, so they can’t metabolize excess nutrients quickly enough. If you overfertilize the plant soon after repotting, the excess salts will accumulate in the soil, causing fertilizer burn to plant roots and shoots.
The salts in the soil will suck out the water from the plant’s roots and dry them out. Without efficient moisture storage, the leaves will start showing signs of dehydration, such as yellowing or wilting.
Wrong Timing
Except for issues with root rot, ZZ plants are best repotted or propagated in spring. Their slow-growing nature requires a long growing season to recover from transplant shock and put out new growth.
Repotting them in colder seasons will take the cut parts longer to heal. They also won’t be able to rest enough during winter and might grow even more slowly the following spring.
Wrong Placement
ZZ plants naturally require partial shade or dappled light. During the sensitive period post-transplant, it’s important to keep them in the same light condition as before but never brighter. Otherwise, they will be more likely to suffer from heat stress and dehydration.
It’s also worth remembering that ZZ plant leaves contain calcium oxalate, which can be toxic when ingested by kids or pets. It can cause vomiting, diarrhea, and dizziness.
Place them on high-wall shelves to keep them away from kids or dogs. If you have cats, keep them in a separate room inaccessible to your pets.
Final Thoughts
ZZ plants need repotting typically every 2-3 years and division every 3-5 years. They don’t mind being snug and a bit rootbound in their pots before repotting. They might show signs of stress from dehydration or nutrient deficiency when left too long.
Use well-draining soil enriched with organic matter like compost for your ZZ plants. They’ll stay for up to 3 years in the new pot, so choose one that’s heavy enough to support its weight as new shoots grow. It should also be breathable and have drainage holes.
ZZ plants are sturdy and can survive with a little bit of neglect. However, they’re slow-growing plants that might have difficulty recovering from transplant shock when repotted incorrectly or outside their growing season.
Follow the tips discussed in the article for a successful repotting. Reach out for any questions or suggestions about ZZ plant care.