10 Common Problems With ZZ Plants (and How to Fix Them)
ZZ plants (Zamioculcas zamiifolia) are low-maintenance indoor plants because of their tolerance to infrequent watering and low-light conditions. However, constant neglect can present a myriad of problems, even for the most resilient plants.
Here is a list of common ZZ plant problems:
- Yellowing leaves
- Mushy leaves, stems, or bulbs (Root rot)
- Drooping or wilting
- Browning leaves or brown spots
- Leaf curling or wrinkling
- Dropping leaves
- Leggy growth
- Stunted growth
- Exposed bulbs
- Pests
The rest of the article will explore these problems in more detail. I’ll also provide practical solutions to keep your ZZ plants thriving and looking their best.

ZZ Plants: An Overview
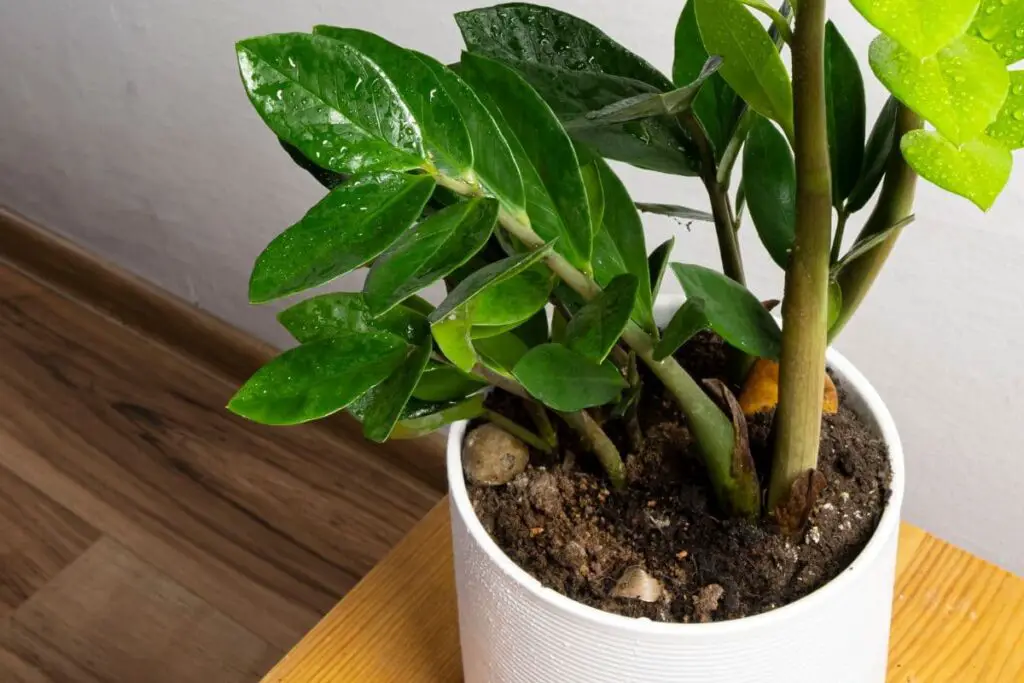
ZZ plants are famous for their glossy, waxy leaves, which they can maintain more efficiently than other houseplants because they are succulents. The waxy coating prevents rapid moisture loss, keeping the leaves vibrant for longer.
They also have thick, fleshy vertical stems and potato-like underground stems called rhizomes or bulbs. These two types of stems allow the plant to store extra moisture and nutrients to support the plant during periods of drought.
These adaptations stemmed from the dry, sandy environment of East and South Africa where ZZ plants originally came from. The infrequent rains and fast soil drainage influenced the plant’s efficient moisture and nutrient storage.
Ideal Growing Conditions
ZZ plants have moderate care requirements once the following parameters are met:
- Temperature: 65 and 85 °F (18 and 29 °C). Ensure winter temperatures indoors remain above 60 °F (15.6 °C) to maintain plant health.
- Humidity: 40 and 50%. This is also the optimal range for human health, as it prevents mold and mildew buildup indoors.
- Light: 4-8 feet (1.2-2.4 m) away from an eastern window where it can receive bright, indirect light. You can also place it at the same distance from a curtained western or southern window or next to an unobstructed northern window. Turn the pot by 90-180° every time you water the plant to ensure balanced growth and prevent sunburn.
- Water: Water as soon as the top half of the potting mix is dry—approximately 2-3 weeks in spring and 10-14 days in summer. In fall and winter, cooler indoor temperatures (below 65 °F or 18 °C) and drier conditions can slow down the plant’s metabolic activities, reducing the water requirement. During this time, your plant may only need rehydration every 4-6 weeks.
- Soil: High-quality succulent mix or a homemade soil mix containing equal parts compost and perlite/horticultural sand. This formula provides a gentle boost of nutrients and excellent drainage.
- Pot Size and Material: 1-2 inches (2.5-5 cm) wider and 3 inches (7.6 cm) deeper than the rootball. Choose a heavy, breathable pot (like terracotta) with drainage holes.
- Fertilizer: Slow-release 10-10-10 fertilizer with micronutrients once a year in spring.
- Repotting and Division Frequency: Repot every 2-3 years. Divide every 3-5 years.
Common Problems and Fixes
Minor deviations from the conditions and care requirements listed above won’t cause lasting damage to ZZ plants, especially when amended promptly.
However, prolonged exposure to suboptimal conditions can lead to the following problems:
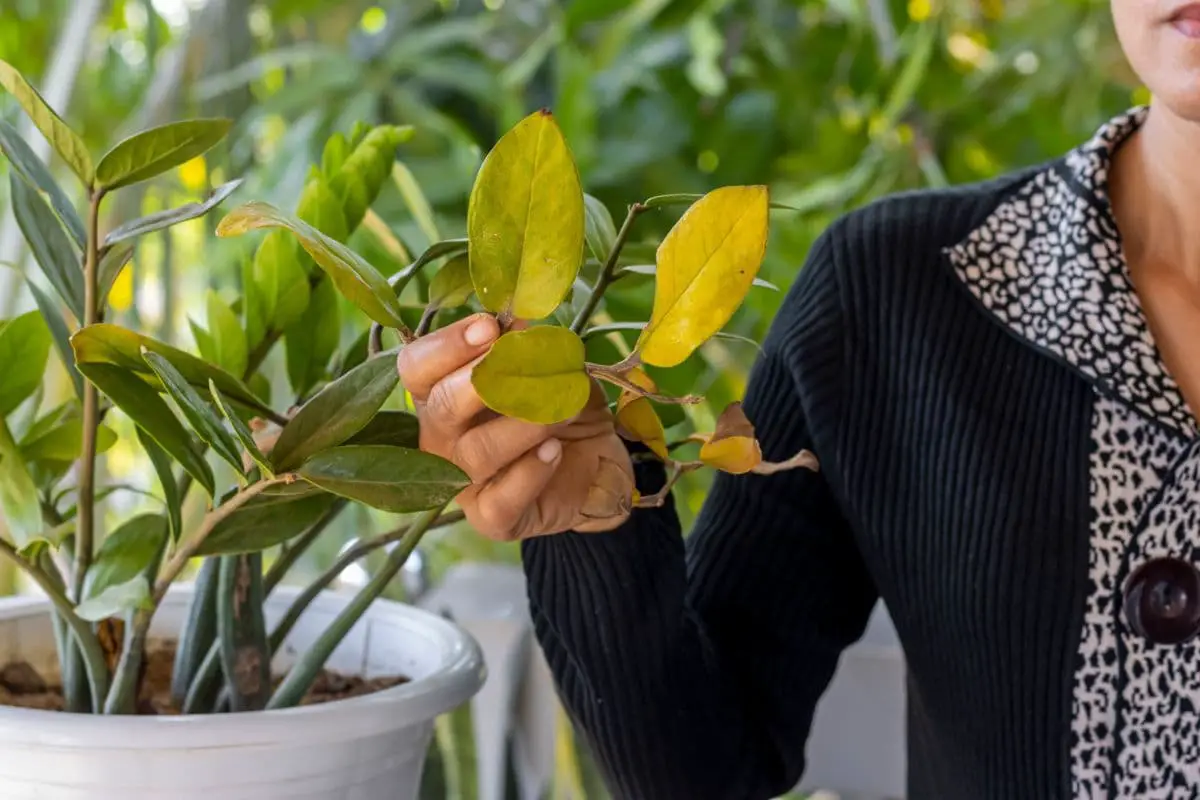
1. Yellowing Leaves

ZZ plant leaves are typically emerald green and darken with age. The ‘Raven’ variety, on the other hand, has dark purple to almost black leaves.
Yellowing leaves clearly indicate that your plant has care or environmental problems.
Here’s a brief outline of the possible causes of yellowing, their mechanisms, and corresponding fixes.
| Cause | Mechanism | Fix |
| Overwatering | Constantly wet soil from frequent watering can suffocate the roots and prevent proper moisture or nutrient transport to the leaves. | Check the soil 10-14 days after watering to confirm if the top half of the pot is dry. You can use a wooden chopstick, but be careful not to puncture the rhizomes. Water the soil only when the top half is dry. |
| Underwatering | Although drought-tolerant, ZZ plants can become dehydrated when left un-watered for a long time (months). A potting mix rich in sand can turn hydrophobic when frequently left to become bone dry. Without enough water, the roots can’t deliver essential moisture and nutrients to the leaves. | Check the soil moisture 1-2 weeks after watering, especially if the soil has few moisture-retaining materials like compost. Don’t wait until the soil is bone dry before watering your plant. Water your plant deeply to properly rehydrate the roots and bulbs. Avoid shallow-watering. |
| Poor Soil Drainage | Dense soil will hold too much moisture and lead to overwatering problems. You can confirm this is the problem by checking if the soil remains wet even a week or so after watering. | Repot your plant in a fast-draining substrate, such as a standard succulent mix. |
| Nutrient Deficiency | Lack of nitrogen will make the older leaves turn yellow. Iron or magnesium deficiency will cause interveinal chlorosis, where the veins remain green while the rest of the leaf surface turns yellow. | Fertilize your plant in spring using a slow-release 10-10-10 NPK fertilizer in spring. Choose a product that contains micronutrients like iron and magnesium. |
| Over-fertilization | Excess fertilizer salts in the soil will prevent roots from absorbing water and cause them to release moisture. Dry roots will lead to symptoms similar to underwatering (i.e., yellow or brown leaves with crisp tips). | Fertilize your plant only once in spring using a slow-release fertilizer—ideally the year after repotting. ZZ plants are not heavy feeders, and they can feed off the nutrients from the high-quality compost used during repotting or initial transplant. |
| Insufficient Light | Lack of light energy will result in poor chlorophyll generation, leading to yellow leaves. | Move your plant closer to the light source (but out of direct sunlight). Alternatively, switch on a full-spectrum grow light 6-12 inches (15-30 cm) directly above the plant for 10-12 hours daily. |
2. Mushy Leaves, Stems, or Bulbs (Root Rot)

A healthy ZZ plant should have perky leaves and firm stems and bulbs.
If your plant is chronically overwatered or the soil has poor drainage, the leaves may have water-soaked or mushy spots, and the stems may feel squishy. These symptoms also mean that your plant has root rot.
Constantly wet soil can prevent the roots from getting oxygen, weakening them and preventing proper water transport. A wet environment can also increase fungal populations in the soil, which can feed on the roots and cause them to rot.
Other symptoms of root rot include:
- Black, soggy roots
- Smelly roots
- Mushy bulbs
To fix the problem, follow the steps below:
- Carefully remove the plant from the pot to prevent further damage to the roots.
- Loosen the soil and inspect the roots to confirm the extent of the damage. If the bulbs are still firm and less than half of the roots are rotten, you can still save the plant.
- Prune the damaged sections using sterile shears.
- Rinse the roots with gentle running water to remove the contaminated soil.
- Repot the ZZ plant in fresh soil and a sterile pot.
However, if most of the roots are rotten and the bulbs and stems have become mushy, it means the rot has spread so much that repotting won’t save your plant.
The best option in this case is to collect the remaining healthy leaves on the terminal end of the plant and propagate them.
Here’s how:
- Choose healthy, green leaves without holes or yellow or brown spots.
- Pluck them off the stem or use a sterile knife to ensure there’s a bit of stem attached.
- Leave the cuttings in a cool, dry area overnight to form a callus.
- Bury the bottom half inch (1.3 cm) of the leaf in moist coco peat or compost/perlite mix. Alternatively, soak it in filtered water in a clear shot glass. The cutting will need about a month to form roots or rhizomes in moist soil or about three months in water.
- Transplant the cuttings into 3-inch (7.6 cm) pots when the bulb is at least ½ inch (1.3 cm) in diameter and the roots are an inch (2.5 cm) long.
3. Drooping or Wilting
If your ZZ plant’s leaves and stems droop or wilt, it’s most likely due to underwatering. Lack of moisture can cause the plant cells to shrink, leaving your plant with a dehydrated look. A thirsty ZZ plant may also have wrinkled leaves or brown, crisp leaf tips.
Chronic overwatering that has led to root rot can also cause drooping or wilting, but these symptoms will most likely be preceded by yellowing leaves and soggy soil.
Adjust your watering routine accordingly based on the tips discussed in the table above.
4. Browning Leaves or Brown Spots on Leaves

You can distinguish the cause of browning in ZZ plant leaves based on the following:
- Underwatering: Brown, crisp leaf tips
- Overwatering: Brown, water-soaked, or mushy spots on the leaves
- Sunburn: Brown, crisp spots on leaf surfaces exposed to sunlight
- Pest attack: Tiny holes with brown margins looking like brown spots
Once you confirm the root cause of the discoloration, you can choose from the fixes below:
- Adjust your watering routine accordingly depending on whether the plant is overwatered or underwatered.
- Move the plant a few feet (0.6 m +) farther from the window or hang sheer curtains to filter the light.
- Rotate your plant weekly or at watering to evenly distribute the light and prevent extended exposure to bright light.
- Manually remove the pests and eliminate them by dropping them in soapy water.
- Prevent further pest attacks by spraying your plant with neem oil solution at night once a week.
5. Leaf Curling or Wrinkling
Underwatering, low humidity, and high temperatures can dehydrate your ZZ plant faster. If the plant doesn’t get enough water, its leaves may curl or appear wrinkly and turn yellow.
You can fix the problem with the following tips:
- Inspect the soil regularly because you may need to water your plant more frequently, especially on hot and dry days.
- Keep your plant away from heating vents or appliances that can heat up the space when in use.
- Hang sheer curtains against bright windows during hot days.
- Place your ZZ plant along with other houseplants that share similar light, humidity, and temperature needs (e.g., African violets in low-light areas; spider plants or jade plants in moderate light). This will create a moderately humid microenvironment for your plants.
6. Dropping Leaves
ZZ plants may occasionally drop leaves when stressed. It doesn’t matter whether the leaves are yellow, brown, or green. This is the plant’s defense mechanism to preserve its energy and stay alive.
Here are the common causes of leaf drop in ZZ plants:
- Underwatering: Dry petioles lose their cellular structure and droop. The weight of the leaves may be too heavy for the weaker petioles so they shed them.
- Overwatering: When the rot spreads upward, the mushy stems or petioles can no longer hold on to the leaves.
- Temperature stress: Temperatures above 90 °F (32 °C) or below 50 °F (10 °C) for extended periods can stress ZZ plants. They will stop growing and may shed their leaves to try to survive.
- Transplant or relocation shock: A newly transplanted or purchased ZZ plant may shed leaves due to stress from a new environment.
Here are some tips to help your plant recover from these stressors:
- Adjust the watering frequency, making sure that the soil is dry enough before watering again.
- Maintain the temperature around your ZZ plant within optimal range.
- Keep your plant away from areas with fluctuating temperatures, such as drafty windows, doorways, or heating vents.
- Gradually acclimate your plant to the new environment. Avoid suddenly introducing it to significantly different conditions. For instance, if you want to give your plant brighter light, move it closer to the window by only 6-12 inches (15-30 cm) per day. Be sure to keep it away from direct sunlight.
7. Leggy Growth
ZZ plants can handle low light conditions better than other houseplants. However, if they don’t get enough light energy, they will become leggy. The stems will naturally lean toward the window and the leaves will be sparse.
Here are the steps to fix this issue:
- Prune the leggy growth to soil level because they won’t revert to normal appearance.
- Move your plant closer to the light source but be sure to do so gradually (as discussed above).
You may also use full-spectrum grow lights to supplement your plant’s lighting needs.
Here’s how:
- Place the light 6-12 inches (15-30 cm) directly above your plant. This will encourage the new stems to grow vertically.
- Keep the light on for 10-12 hours daily. The longer exposure is necessary because grow lights don’t produce as much energy as the sun.
- Adjust the height of the grow light as your ZZ plant grows taller to prevent contact, which can cause leaf burns.
8. Stunted Growth
Numerous factors can cause your ZZ plant to have stunted growth, including the following:
- Insufficient light
- Temperature stress
- Too much or too little water
- Poor soil quality and drainage
- Lack of nutrients
- Pests
- Plant age
You can refer to the previous tips on how to address the first six issues.
On the other hand, plant age is beyond your control, as plants gradually lose vigor as they age. Instead of trying to revive your old plant, you can divide it and plant the younger bulbs in new pots.
Alternatively, you can propagate your plant through leaf cuttings. It can take several years before the young plants reach a good size, but this will ensure that you can enjoy them for many more years.
9. Exposed Bulbs (Rhizomes)
ZZ plants typically grow slowly and can stay in the same pot for 2-3 years. During this time, they spread laterally through rhizomes or bulbs, which will each produce new shoots. As the roots grow longer, the bulbs are pushed above the soil surface and become exposed.
Many ZZ plant owners don’t mind this. Some even intentionally leave the bulbs partially exposed to make it easier to check the soil moisture.
However, prolonged exposure can cause rapid moisture loss, physical damage, and pest attacks. The new shoots growing out of the bulbs may also lean outward.
You can fix this through the following tips:
- Top up the soil to keep the bulbs an inch (2.5 cm) below the surface. This will prevent them from drying out too quickly and support the new shoots to grow vertically.
- To avoid spilling water every time you feed your plant, leave at least half an inch (1.3 cm) of space between the pot rim and the soil surface.
If there’s not enough space in the pot, it’s best to divide the rhizomes.
Here are the steps:
- Water your plant deeply 1-2 days before repotting.
- Loosen the soil edges using a flat knife.
- Tilt the pot and slide the plant out while catching it with one hand.
- Remove the soil around the roots using your fingers.
- Find division points between bulbs and carefully disentangle the roots. Well-hydrated roots should come apart easily.
- Plant each division in fresh, moist soil and sterile container 1-2 inches (2.5-5 cm) wider and 3 inches (7.6 cm) deeper than the rootball.
- Keep the bulbs an inch (2.5 cm) below the soil surface.
- Wait until the top half of the new potting mix is dry before deep watering.
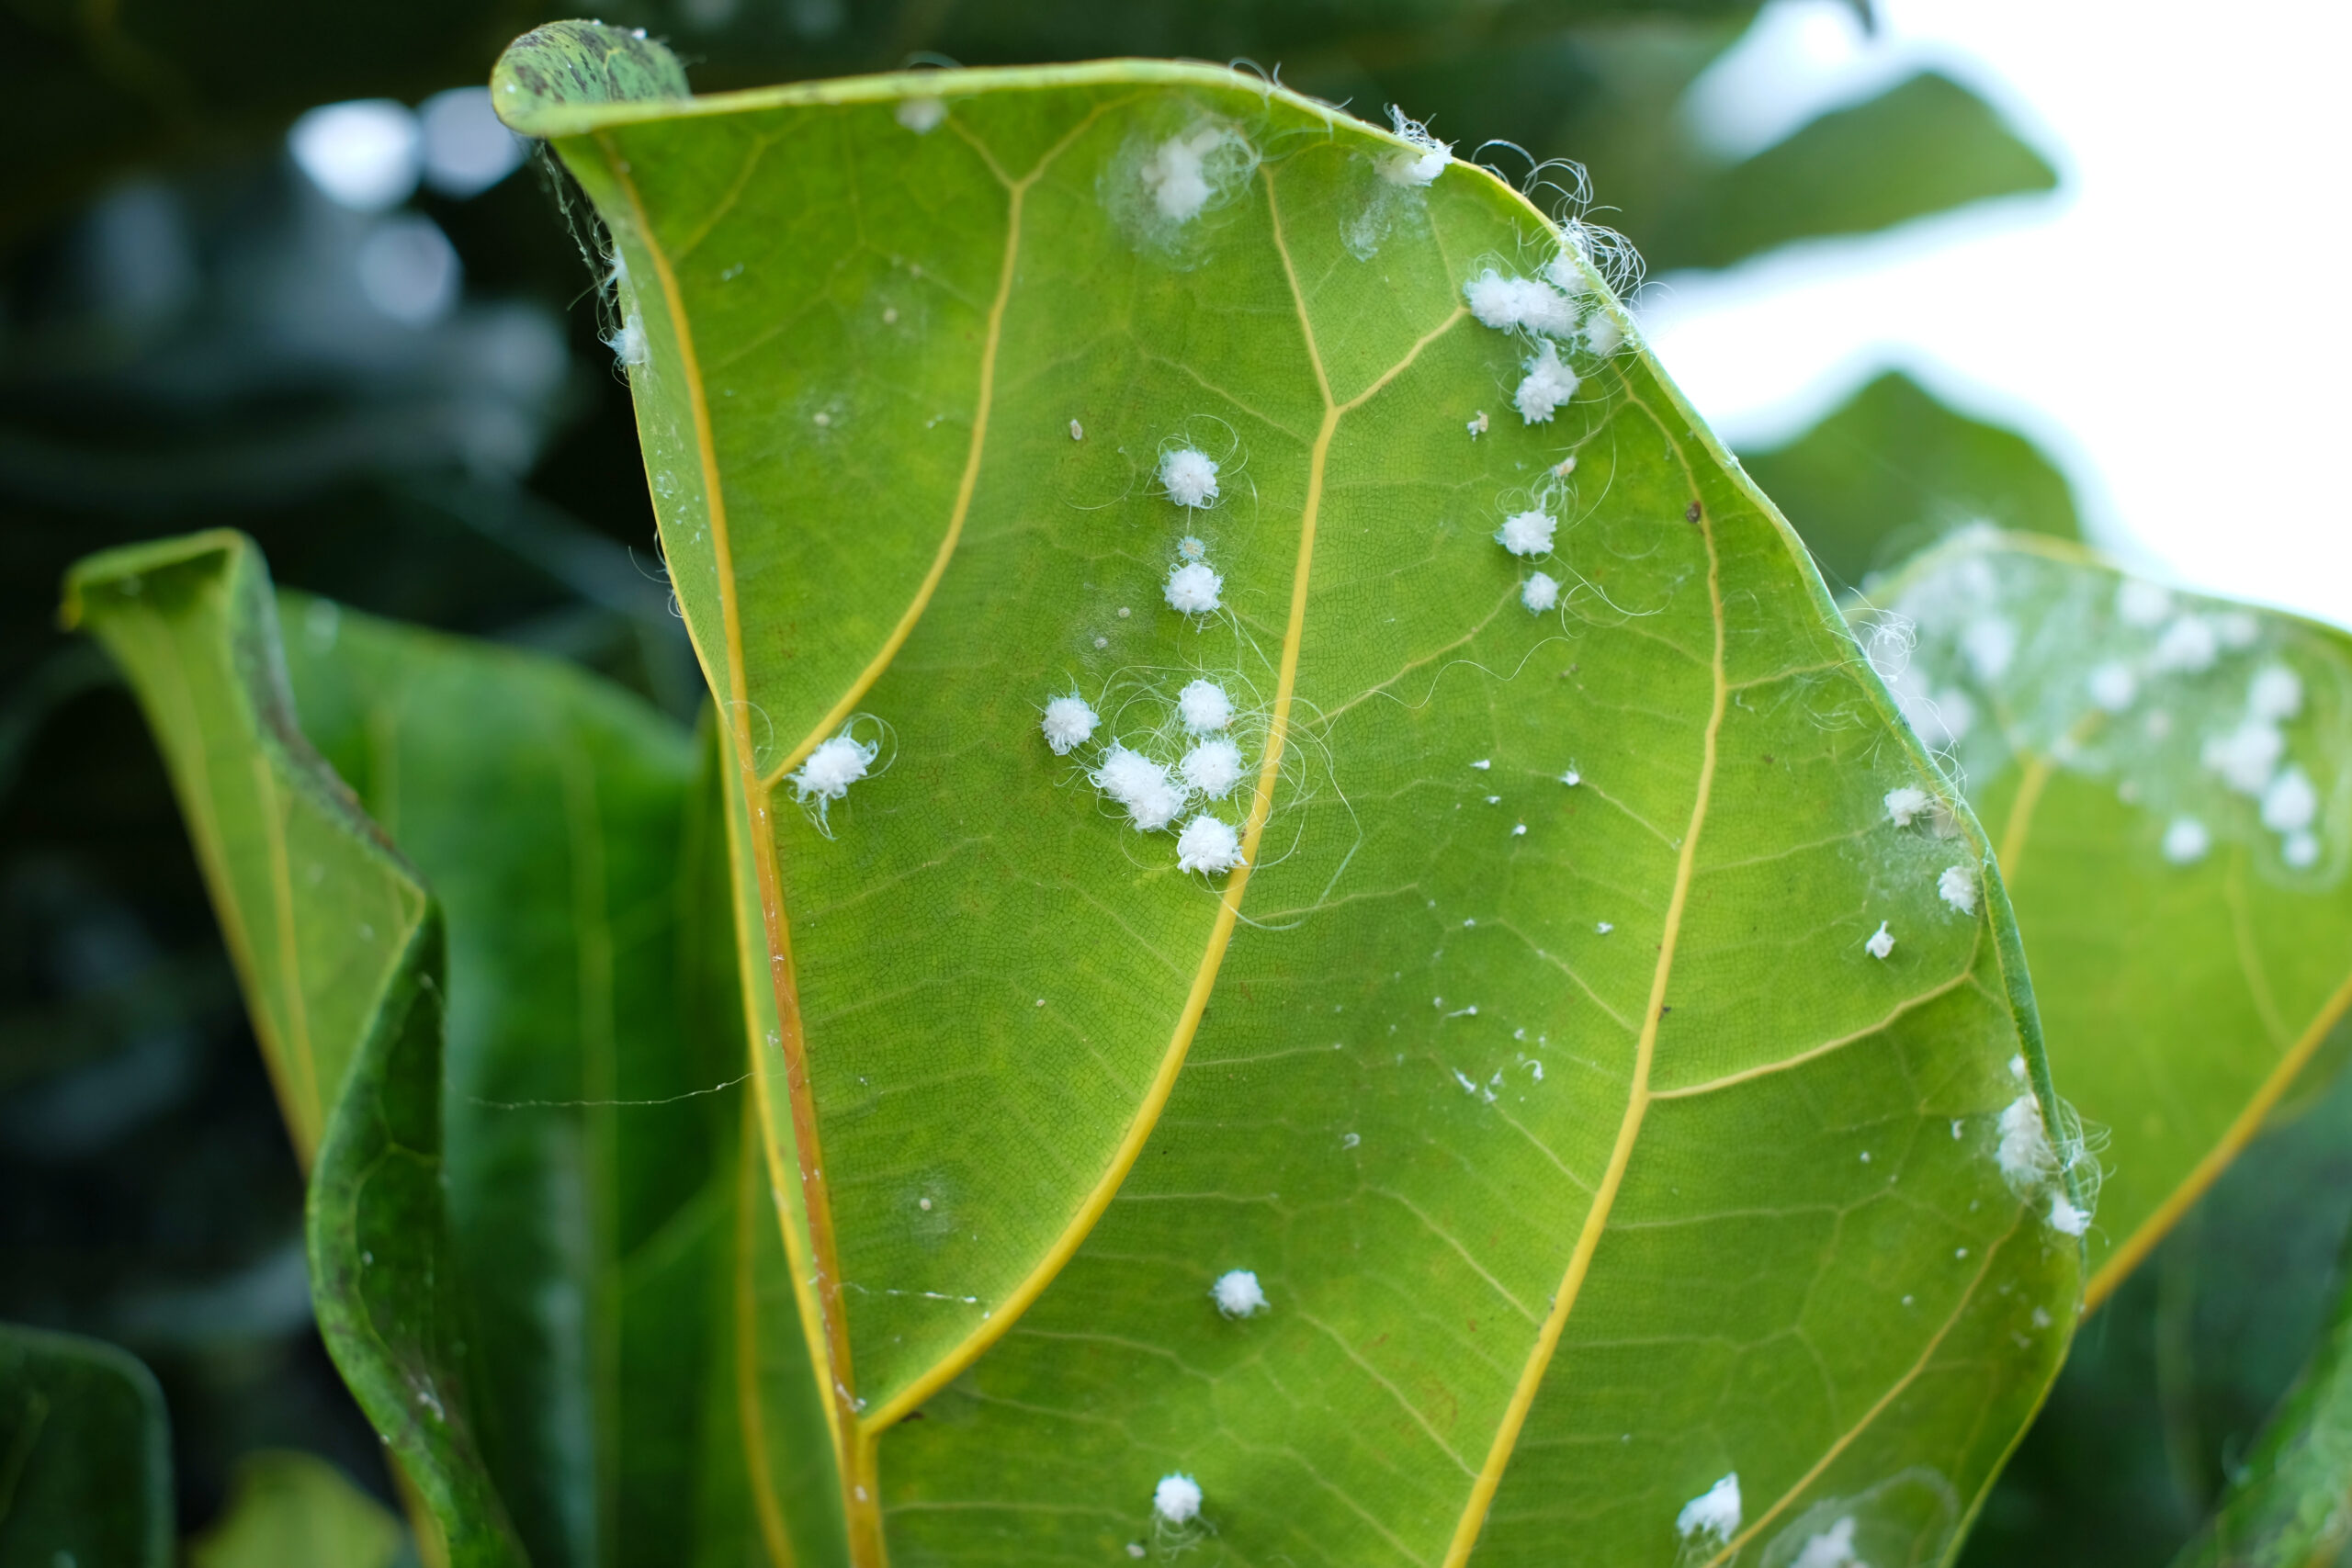
10. Pests
Common houseplant pests can suck on the sap of the ZZ plant leaves, sometimes causing tiny holes that look like brown spots.
You can identify the pests based on the following traits:
- Aphids: Tiny, translucent, green or brown insects that hide on leaf undersides.
- Scale insects: Small, immobile, brown bumps along the stems or petioles.
- Mealybugs: Tiny insects with a cottony white waxy covering on leaf undersides.
These pests secrete a clear, sugary liquid called honeydew, which invites sooty mold to grow on the leaves. Once the sooty mold expands and covers the leaf surface, it can hinder access to light and photosynthesis.
You can fix the problem with these steps:
- Pick up the insects using tweezers or cotton swabs. Scale insects can be tougher because they stick to the stems. Avoid using a knife because you may injure the stems.
- Drop them into a tub of soapy water.
- Wipe the sooty mold off the leaves using a clean, moist cloth.
- Spray the plant generously with neem oil solution. Do this at night once weekly for the next 4-6 weeks until all pests are gone.
- Continue spraying once every 1-2 weeks for prevention.
- Inspect your plant at the same time you inspect the soil moisture to keep pest populations under control.
Final Thoughts
A ZZ plant’s environmental requirements are relatively easy to provide because they’re similar to comfortable levels humans like indoors. For instance, temperatures of at least 65 °F (18 °C) and humidity levels of 40-50%.
Its drought tolerance also makes it convenient for laidback gardeners to be lenient with the watering schedule. You can also do routine inspections, cleaning, and pot rotation on the same day.
That said, it’s important to meet a ZZ plant’s basic care requirements from the get-go to ensure it remains happy and to prevent common problems effectively.
Keep an eye on your plant’s stress symptoms so you may address them promptly and accordingly. With proper care, ZZ plants can be a long-lasting and rewarding addition to any indoor garden.