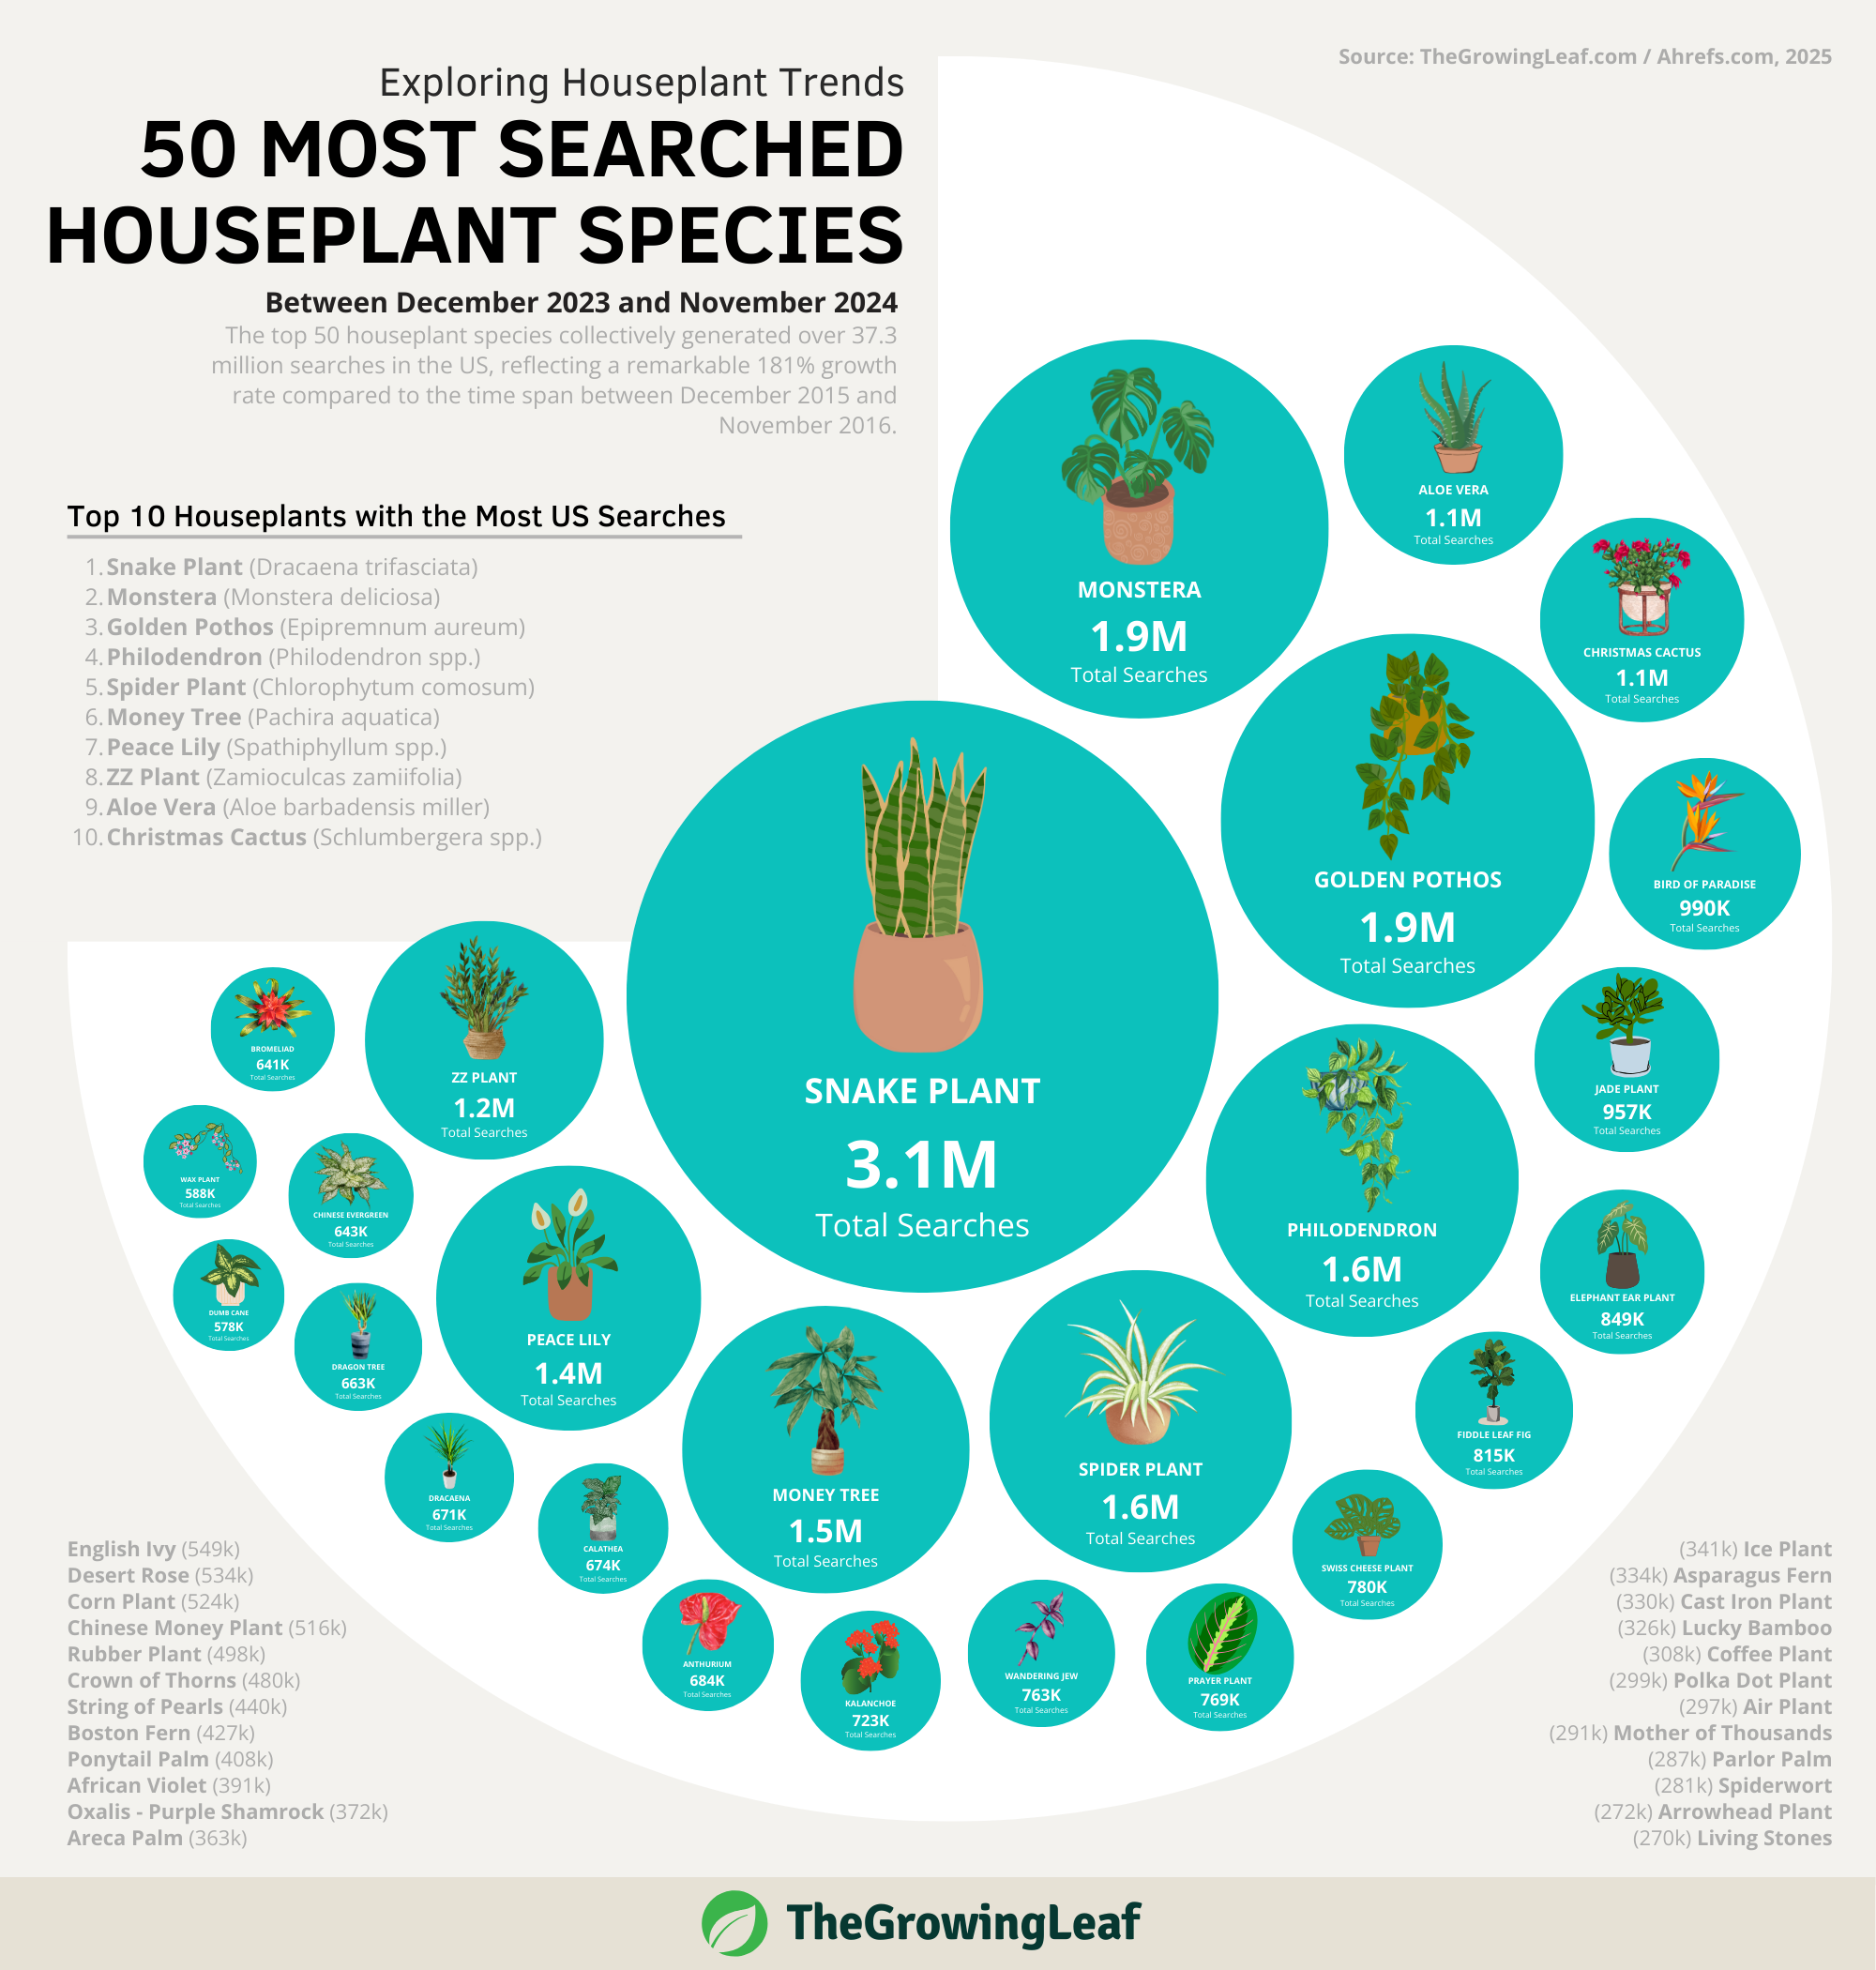
How to Propagate Fiddle Leaf Figs (Using 3 Methods)
Fiddle leaf figs have been gaining popularity among home gardeners despite their reputation as fussy and demanding. A large and healthy plant is hard to find at gardening stores and can be quite expensive. Luckily, they’re easy to propagate.
Here are the propagation methods for fiddle leaf figs:
- Rooting stem cuttings in soil (Soil Method) is the simplest and fastest method. The roots typically form within a month of adequate care.
- Rooting stem cuttings in water (Water Method) allows you to observe root development directly, making it a rewarding and engaging option.
- Air layering (Notching and Peeling off) involves encouraging stems to root while still attached to the mother plant. It’s highly reliable, but it can take several months for roots to develop fully.
Propagating fiddle leaf figs is a cost-effective way to increase your plant collection. In this article, I’ll guide you through everything you need to know to propagate fiddle leaf figs successfully.

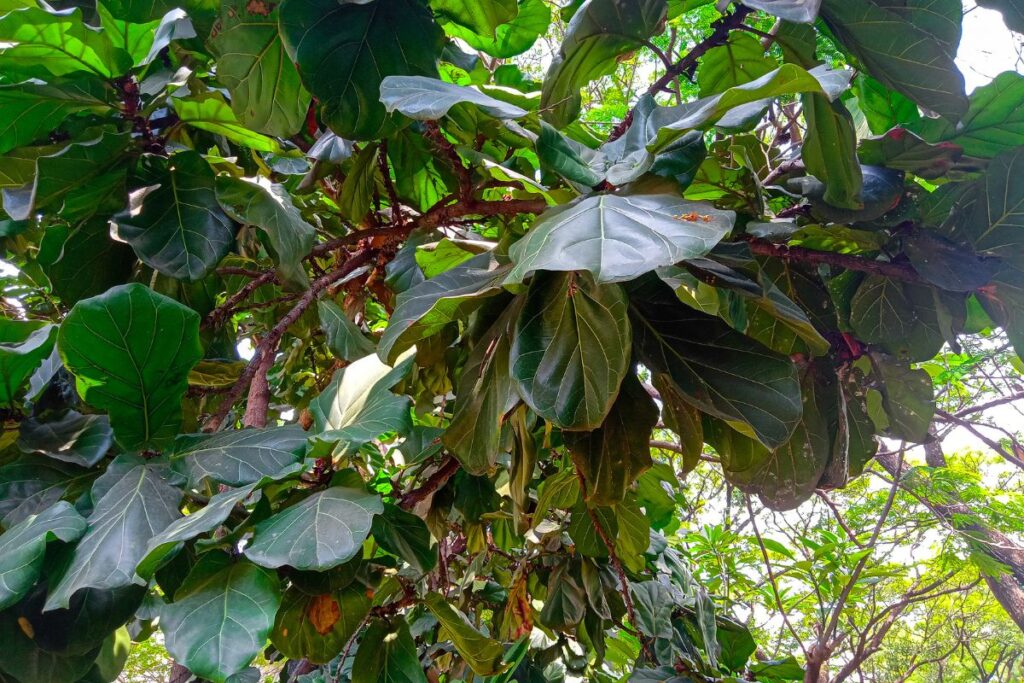
Natural Spread
Fiddle leaf figs (Ficus lyrata) are flowering and fruit-bearing trees native to tropical regions of Central and West Africa.
They naturally spread through the following ways:
Seed Dispersal
Members of the Ficus genus have a unique pollination process, which involves the following steps:
- The plant produces a syconium, a spherical fruit that contains the male and female flower parts.
- A species-specific Agaonidae wasp enters the syconium through the ostiole (an opening) to lay eggs. In F. lyrata, the pollinating wasp is Agaon spatulatum.
- The male wasps hatch earlier and mate with unhatched female eggs.
- The male wasps dig tunnels to exit the syconium and eventually die.
- Once the female wasps hatch, they try to exit the syconium through the same tunnels, unintentionally carrying some pollen with them.
- The female enters another syconium to lay eggs, consequently pollinating the flower.
- The seeds then develop within the syconium.
Birds feed on the fruits of fiddle leaf figs and disperse the seeds. Those that fall to the ground can germinate and grow naturally as trees.
On the other hand, seeds that land on neighboring tree trunks can grow roots and live as hemi-epiphytes, which is typical of banyan figs. This epiphytic behavior makes Ficus lyrata potentially invasive.
It’s extremely rare for fiddle leaf figs to bear fruits indoors in the U.S. due to the rare occurrence of Agaon spatulatum in North America. In addition, indoor conditions can inhibit the plant from reaching reproductive maturity, making them unable to propagate through the natural or wild way.
Although there are several personal reports of fiddle leaf figs bearing fruits indoors, these incidences are unusual and may require further studies to confirm the alternative means to pollinate the fruits.
Vegetative Reproduction
Fiddle leaf figs can also reproduce vegetatively in nature. Damage from strong winds or squirrels can defoliate fiddle leaf figs. The fallen leaves and branches can form roots if the soil remains adequately moist.
Single leaves without sufficient node tissue can form roots but won’t grow into a new plant. On the other hand, branches with multiple nodes can successfully grow into a new tree.
A fiddle leaf fig’s propensity for vegetative reproduction in the wild makes it easy to propagate in an indoor garden.
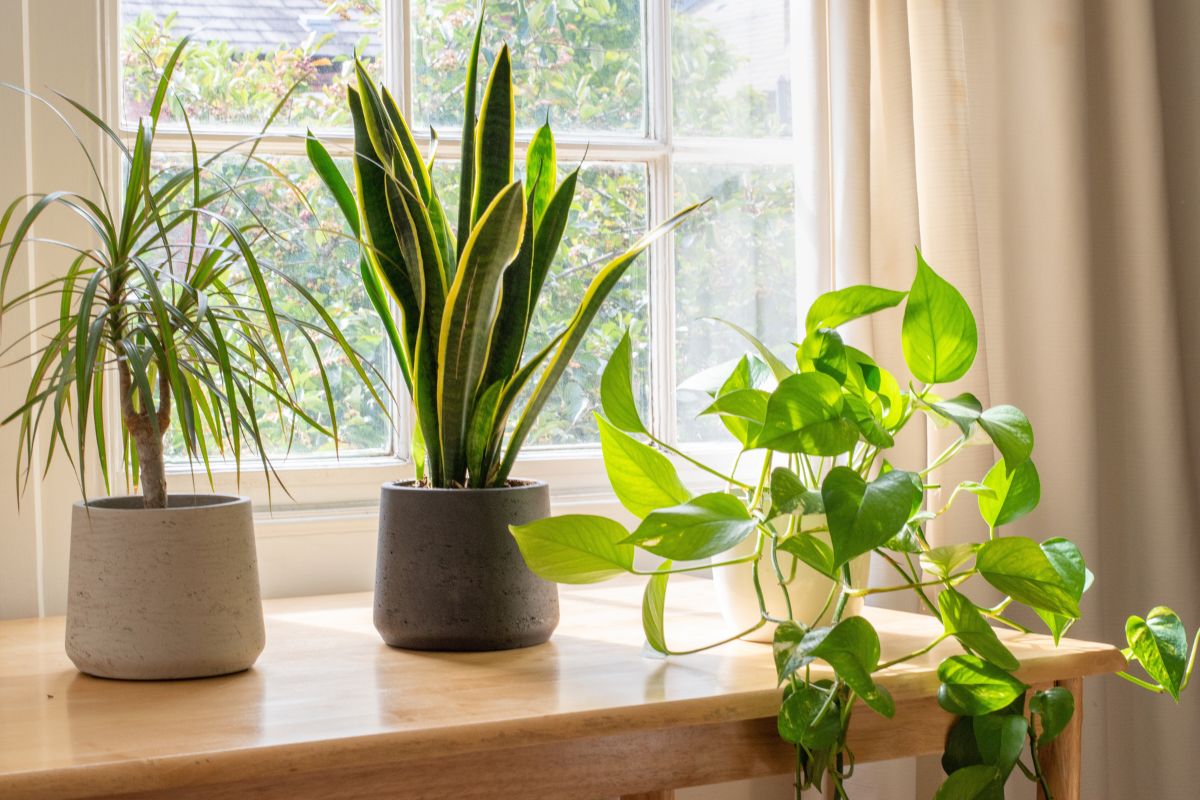
Types of Propagation Methods
You can propagate indoor fiddle leaf figs (FLFs) using the following methods:
- Rooting stem cuttings in soil (Soil Method)
- Rooting stem cuttings in water (Water Method)
- Air layering
Note: Propagating FLF leaf cuttings will result in blind cuttings that may form roots when planted in water. However, they won’t develop further or grow into a new plant because they lack the cellular or genetic capacity to differentiate into new shoots.
Although the rooted leaf cuttings can survive for a long time, they’ll never grow into full plants. I’ve tried this before, and the rooted leaf remained alive and green in water for over 8 months before I finally gave up and proved FLF leaf propagation doesn’t work.
In very rare cases, leaf cuttings with a bit of stem (not just a node) attached may develop into a new plant. However, I don’t recommend this method, as it has a very low success rate.
Let’s explore the differences of viable FLF propagation methods below:
| Method | Description | Implication |
| Soil Method | Stem cuttings from a mature plant readily grow roots when planted in soil (or soilless substrate) and kept in warm, bright, and humid conditions. | FLF stem cuttings can develop roots within 4-6 weeks when planted in soil. The soil has to be consistently moist, and the room must be humid (around 60%) to prevent the large leaves from drying out. Pro tip: You can cut the leaves in half to reduce the surface area and moisture loss. |
| Water Method | Stem cuttings can form roots when placed in water, warm temperatures, and bright natural light. | Water propagation reduces the risk of the leaves drying out—even at lower humidity. The roots can form within 6-8 weeks under optimal light and temperature conditions. |
| Air Layering | Cut a notch on the stem (below a node) and wrap it with moist sphagnum moss to prompt the growing tip of the stem to develop roots while still attached to the mother plant. Alternatively, you can peel off the bark and cambium layer to reveal the white layer underneath before wrapping it with moist sphagnum moss. | This method has a higher success rate because the growing tip is still attached to the mother plant and can get adequate moisture. You can also get a larger plant. However, it can take 2-3 months to form enough roots for transplant (or up to 12 months when started outside the growing season). |
Best Time for Propagation
Fiddle leaf figs normally don’t enter dormancy in the wild because they’re accustomed to tropical conditions and warm temperatures all year round. They may, however, grow more slowly during the dry season when there’s a large interval between rainy days.
In colder climates like the U.S., indoor fiddle leaf figs noticeably grow more slowly in the fall and winter due to lower light levels, cooler temperatures, and less frequent watering. They may even shed some leaves during the cold season.
Therefore, it’s best to propagate your plant in early to mid-spring when they’re actively growing. This will give them enough time to develop roots and adjust to being repotted in new soil before the cold season sets in.
The cuttings need sufficient natural light and stable warm temperatures to prompt photosynthetic and metabolic activities that fuel root development and growth. During the fall and winter, lower light and colder conditions can delay or even inhibit root growth.
In addition, you must also check the following conditions before propagating:
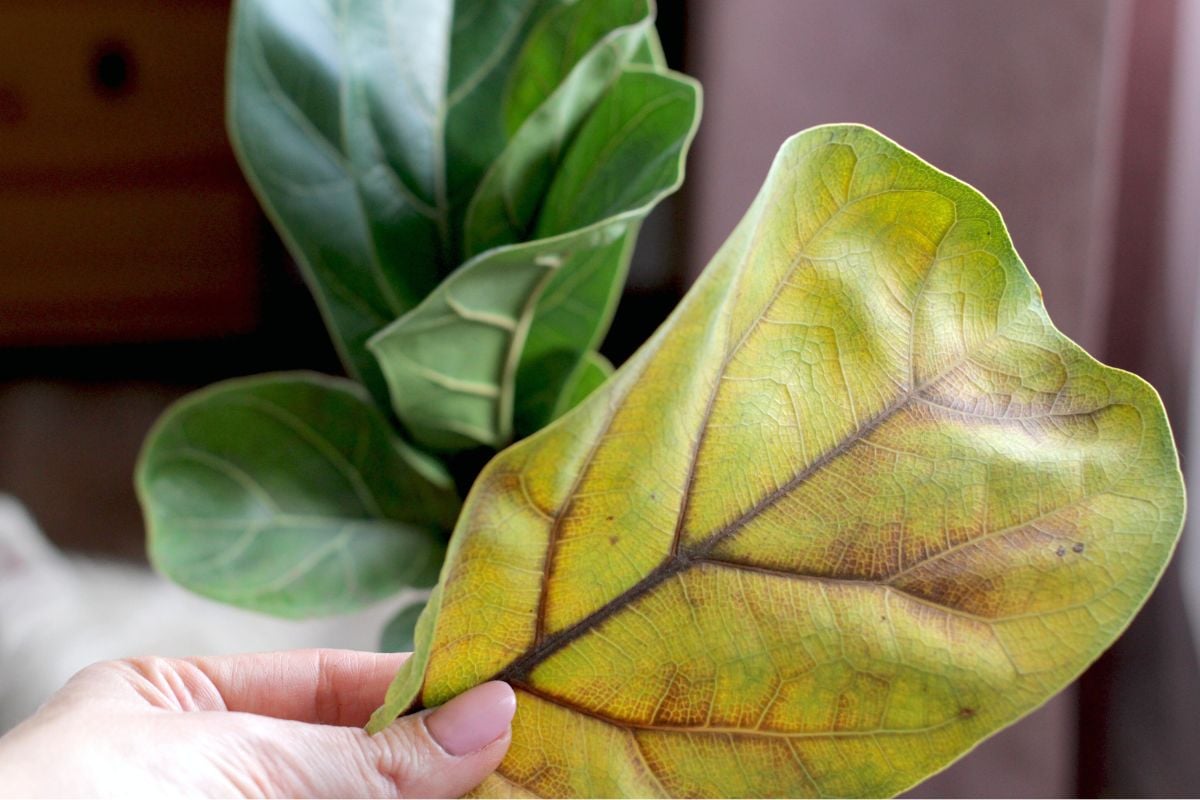
- Inspect the plant for signs of stress, such as yellowing, browning, or wilting leaves. Propagating a healthy plant will increase the success rate. If the plant is stressed, I recommend identifying and addressing the underlying cause first. Propagate your plant after it’s recovered and put on healthy new growth.
- Wait until indoor temperatures can easily be maintained around 75 °F (24 °C) and the season has predominantly clear skies. Fiddle leaf figs root better during warm weather with plenty of bright, natural light.
- Ensure moderate humidity levels (40-60%) to prevent the leaves from drying out during rooting.
Note: You can propagate your plant from stem cuttings to save it from severe root rot. If the problem occurs during the cold season, you don’t have to wait until spring to save your plant because it can take only 1-2 weeks for a full-grown plant to succumb to root rot.
You may need to use space heaters and full-spectrum grow lights to replicate spring-like temperatures and light conditions indoors to help the cuttings root faster.
Environmental Requirements
Newly rooted and transplanted plants require the following environmental conditions for at least one season (3 months) to establish their roots in the new pot:
- Temperature: 65-85 °F (18-29 °C)
- Light: At least 8 hours of bright indirect sunlight from a southern window (rotate by 90-180° weekly)
- Water: Deeply water as soon as the top inch (2.5 cm) of the soil is dry (let the excess drain from the drainage holes)
- Humidity: 40-60% (maintain 50-60% during hot and sunny days to prevent the leaves from drying out)
- Fertilizer: If transplanted within the growing season, you can feed your plant a quarter-strength 3-1-2 liquid fertilizer 1-2 months later at 2-week intervals until 2-4 weeks before the first fall frost. You can use the frost forecast to adjust seasonal care similarly to the mother plant.
Stem Cuttings
Propagation using stem cuttings is the fastest way to grow new fiddle leaf figs, and you can typically see results within 1-2 months.
You can use this method after pruning overgrown plants in spring.
Materials
You’ll need the following materials:
Cutting Collection
- Sharp, sterile pruning shears
- Gloves
- Clean cloth (at least two)
- 70% isopropyl alcohol in a spray bottle
- Rooting hormone (optional)
- Cinnamon powder
Soil Propagation
- 4-inch (10 cm) nursery or terracotta pot with a drainage hole
- Equal parts perlite and vermiculite/coco peat (choose a substrate with balanced moisture retention and drainage)
- Plastic dome or clear plastic bag
- Spray bottle with filtered or distilled water
Water Propagation

- Colorless mason jar or glass tall enough to submerge the bottom node of the cutting (preferably a tall one to keep the cutting from touching the bottom of the container and a narrow neck to keep the leaves from touching the water)
- Filtered or distilled water
- Heating pad (optional)
Collecting Stems
Follow the steps below to collect viable cuttings:
- Water the plant deeply 1-2 days before collecting a cutting to ensure the leaves are well-hydrated.
- Wear gloves to protect your skin from the sap, as it can cause itchiness.
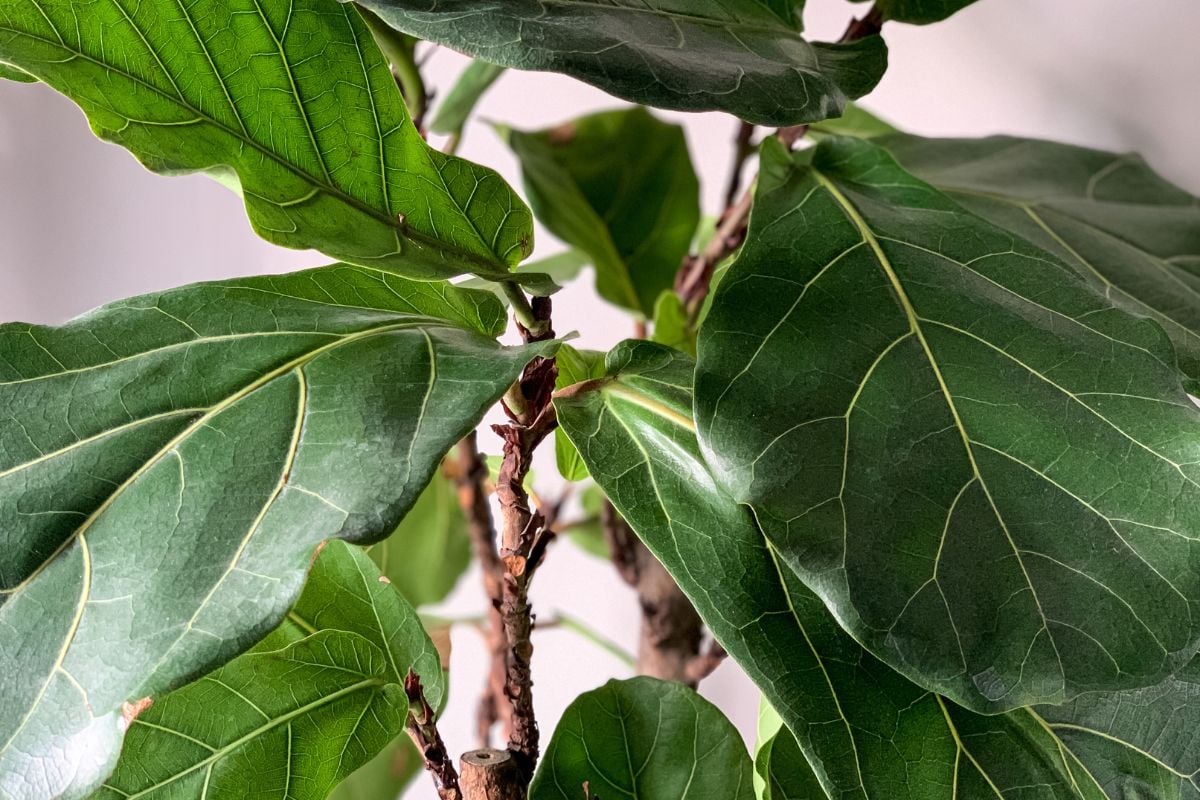
- Locate a section with at least three leaf nodes from the growing tip, 2-3 green leaves, and no signs of pests. The roots will develop at the bottom node, and there should be enough nodes on top with leaves for photosynthesis, which will help sustain the growing roots. New branches will also come out of the upper nodes as the cutting grows into a new plant.
- Cut just below the leaf node at a 45° angle using sharp and sterile pruning shears.
- Wipe the milky sap off the cutting and the stump.
- Brush a bit of cinnamon powder over the stump on the mother plant to prevent infection.
- Spray the pruning shears with alcohol and wipe them dry with a clean cloth.
- Cut the leaves from the bottom node, and peel off the developing leaf buds (brown) to expose the node.
- Optional: Dip the cutting in rooting hormone up to the bottom node to encourage faster root development.
Rooting Process
You can then root the stem cuttings in soil or water with the following steps:
Soil Method
- Fill the 4-inch (10 cm) pot with 3 inches (7.6 cm) of your chosen substrate.
- Poke a hole in the middle using your finger, a pencil, or a wooden chopstick to avoid dislodging the rooting hormone from the bottom of the stem cutting. The hole should be deep enough to bury the bottom node at least ½ inch (1.3 cm) down.
- Place the cutting into the hole and tamp the soil firmly around it.
- Spray the soil with water to keep it evenly moist.
- Optional: Cut the leaves in half to reduce the surface area for moisture loss through transpiration.
- Spray a plastic dome with water and place it over the pot to keep the cutting in humid conditions and prevent the leaves from drying out. Ensure the base of the dome is over the soil so the condensation can slide back into the soil and keep it moist.
- Keep the pot in a warm room (75 °F or 24 °C) with at least 8 hours of bright indirect light.
- Remove the dome for 10-15 minutes to aerate the plant every 2 days to prevent mold growth. Spray the dome with water before placing it back over the pot.
After 4-6 weeks, give the plant a gentle tug. If there’s a bit of resistance, it can indicate positive root growth. In addition, you may notice a tiny new leaf bud sprouting.
At this point, you can remove the dome and water the newly rooted plant deeply when the soil’s top ½ inch (1.3 cm) is dry.
Water Method
- Fill the glass or jar with enough water to submerge the bottom node.
- Place the cutting into the water while keeping the leaves from getting wet.
- Place the glass in a warm room with at least 8 hours of bright indirect light daily. You can set it on a heating pad to keep the water warm (around 75 °F or 24 °C).
- Ensure the bottom node is submerged.
- Refill the water as needed or replace it every 3-5 days when it becomes murky. This will help maintain oxygen levels and prevent algae growth or root rot during water propagation.
The roots should start growing within 6-8 weeks.
Initial Repotting
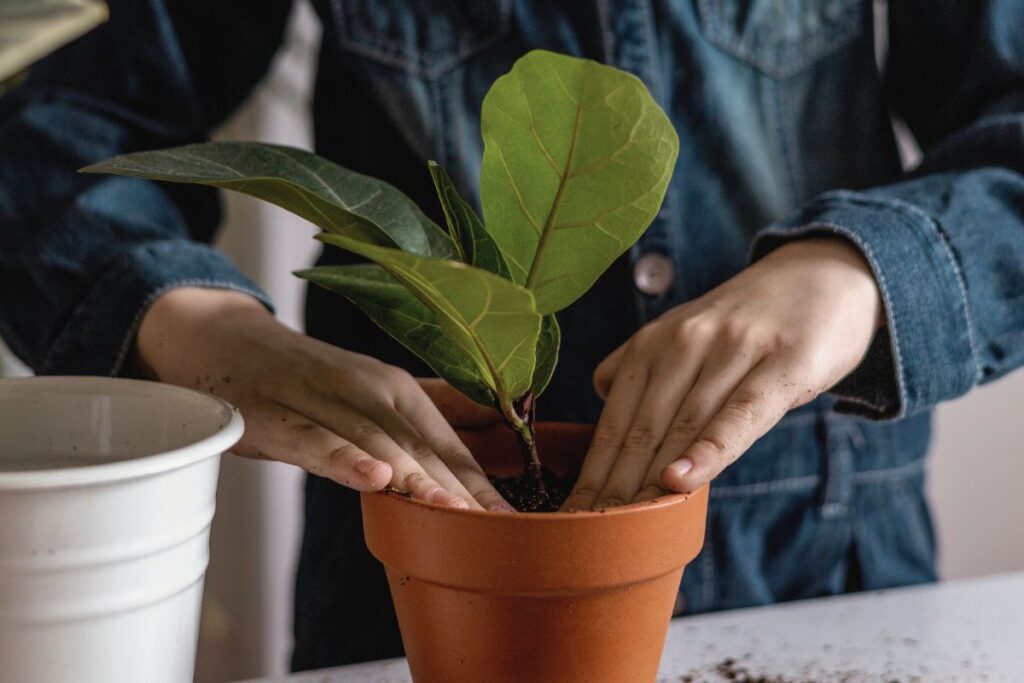
You can transplant the rooted cuttings once they show signs of growth (new leaf buds) and healthy white roots at least 2 inches (5 cm) long.
Here are the steps:
- Prepare a 4-6-inch (15 cm) terracotta pot with a drainage hole. Avoid using too large pots, as they can retain too much water, which can lead to root rot.
- Place a wire mesh over the drainage hole to prevent soil loss every time you water or the formation of soil plugs that can inhibit drainage over time.
- Fill the bottom 2-3 inches (5-7.6 cm) with your usual fiddle leaf fig soil mix. I recommend 2 parts standard potting soil and one part cactus mix or perlite. You may also add 10% compost for a gentle dose of nutrients.
- Spread the roots over the soil mix and bury them an inch (2.5 cm) deep. Tamp the soil around the stem to keep the plant upright.
- Water the soil deeply until the excess drips from the drainage hole.
- Place the pot in a warm room with bright indirect light.
- Maintain moderate humidity of around 50%. You can place the pot over a pebbled tray with water or switch on a humidifier during midday.
- Water the plant again as soon as the soil’s top inch (2.5 cm) is completely dry. Check the moisture by digging a finger (up to the first knuckle) into the soil.
Pro tip: Avoid fertilizing the newly transplanted plants right away, as it can shock or burn the sensitive roots. The high-quality soil mix with compost should help gently nourish the plant as it settles into the new pot.
You can start fertilizing with a half-strength 3-1-2 liquid fertilizer the following spring. Feed your plant every other time you water to promote continuous growth during the growing season.
Propagating Via Air Layering
Air layering is another widely practiced propagation method for fiddle leaf figs.
I’ve tried two methods that work on fiddle leaf figs:
- Notching or creating a notch on the stem: This less invasive method works on younger fiddle leaf figs with stems less than an inch (2.5 cm) thick and an internodal space less than 2 inches (5 cm) at the point of layering.
- Peeling off or removing the cambium layer at the internode: This method is more invasive yet more effective. It’s best for older plants with thicker stems and longer internodal spaces because it’s easier to work around the stem and peel off the bark and cambium layer.
I’ll discuss these methods further below.
Materials
You’ll need the following materials:
- Sharp, sterile knife
- Pruning shears
- 70% isopropyl alcohol in a spray bottle
- Clean cloth or cotton ball
- Toothpick (for notching method)
- Rooting hormone
- Sphagnum moss (pre-soaked and squeezed to the consistency of a wrung-out sponge)
- Clear plastic or sandwich bag
- Twist ties or zip ties
- Cinnamon powder
- 6-inch (15 cm) terracotta pot with a drainage hole
- Standard FLF soil mix
Wounding Method
Follow these steps to wound the mother plant properly:
Notching
- Choose a branch with at least four nodes and green, healthy leaves on the two distal nodes. If your plant has a singular stem, measure 6-18 inches (15-45 cm) from the growing tip. Ensure it has at least four leaf nodes.
- Cut the leaves from the two bottom nodes using sterile shears. Sterilize the blade with alcohol between cuts.
- Position the sharp, sterile knife for an upward incision through the bottom node. Make a 1-1.5-inch (2.5-3.8 cm) incision at a 20-30° angle to open up ¼-⅓ of the stem. Warning: Don’t peel off the bark or cut off the chunk as it can cause the branch or the growing tip to break and fall over.
- Insert a toothpick through the cut to keep it open. You can cut the opposite ends of the toothpick, but be careful not to dislodge it when wrapping the wound with sphagnum moss later.
- Brush a small amount of rooting hormone on the exposed tissue layer.
Peeling Off
- Measure 12-18 inches (30-45 cm) from the growing tip.
- Cut the leaves from the two nodes at the point of layering. Between cuts, clean the blades with alcohol.
- Lightly press the knife horizontally through the bark just above the bottom node and run it around the stem.
- Make a similar circular cut 1.5-2 inches (3.8-5 cm) above it (just below the next node).
- Make a shallow vertical cut to connect the two rings. This should allow you to peel off the bark.
- Carefully scrape the soft inner tissue or cambium layer until you see the white woody layer.
- Brush the peeled-off layer and the node above it with rooting hormone. New roots will grow out of the said node.
Wrapping and Rooting
Here are the steps to properly wrap the wounds and promote root development:
- Grab a handful of moist sphagnum moss and wrap it around the wound and the nodes above and below it. The moss should be around 4 inches (10 cm) thick to ensure adequate coverage and hydration.
- Wrap the moss completely with plastic and secure the top and bottom with twist or zip ties.
- Continue caring for the mother plant as you normally do.
- Check the moss every week. If it reverts to its original pale color, it means it’s dry and requires rehydration.
- Remove the ties and plastic to spray the moss with filtered water.
- Squeeze the moss to remove the excess moisture and wrap it again with plastic and ties.
In my experience, it typically takes 2-3 months for the roots to grow long enough (at least 2 inches or 5 cm) for transplant.
Admittedly, there were times when the air-layered section didn’t root at all, and the wound just formed a scab. I’ll discuss this further below.
Initial Transplant
Some good signs the layer is ready for transplant include roots poking through the sphagnum moss layer and new leaf buds forming on the growing tip. Sometimes, new leaf buds or branches also sprout from the node below the layer.
You may then sever the rooted layer from the mother plant and plant it separately.
Here are the steps:
- Using sterile shears, cut just below the plastic wrap.
- Wipe the sap off the stump on the mother plant with a clean cloth, and brush it with cinnamon powder to prevent infection.
- Carefully unwrap the plastic from the moss. Pro tip: Keep the moss around the young roots to avoid damaging them.
- Inspect the roots and cut the wounded stem just below them.
- Prepare the 6-inch (15 cm) pot and fill it with 3 inches (7.6 cm) of soil mix.
- Spread the moss and roots over the soil and bury them firmly an inch (2.5 cm) deep to keep the plant stable and upright.
- Water the soil deeply to help the newly rooted plant adjust to the new environment.
- Place the plant in similar conditions as the mother plant.
- Water the plant again as soon as the top inch (2.5 cm) is dry.
Common Challenges and Solutions

As hemi-epiphytes or banyan figs, Ficus lyrata or fiddle leaf figs can readily form roots from their nodes. Severed branches also root in the wild when exposed to adequate moisture. These traits make them practical to propagate from stem cuttings or through air layering.
Still, you may encounter the following problems when propagating fiddle leaf figs indoors:
No Root Growth
Stem cuttings may root very slowly or not at all under the following conditions:
- Dry soil and low humidity: Fiddle leaf figs have large leaves that can lose moisture quickly through transpiration. Soil-propagated cuttings must be kept in moist soil and humid conditions until they develop enough roots to draw moisture. Spray the plastic dome with water every 2 days or as soon as the condensation inside noticeably decreases. You can also cut the leaves in half to slow down moisture loss.
- Cold temperatures: Low temperatures can inhibit enzyme activities that promote root growth. The medium (soil or water) should be maintained at 70-75 °F (21-24 °C). You can place the pot or glass over a heating pad to keep the rooting medium warm.
- Insufficient light: As sun-loving plants, fiddle leaf figs require plenty of natural light to form roots. Ensure the cuttings receive at least 8 hours of bright, indirect sunlight by placing them near a south-facing window (4-8 feet or 1.2-2.4 m).
On the other hand, air-layered plants may also fail to root due to the issues below:
- The notch closed and the wound scarred: The wound must remain open to draw moisture from the sphagnum moss and develop roots at the node above it. If the notch has closed, you may need to repeat the process at the internode right above it so the new plant doesn’t have the scarred tissue when severed. Check the toothpick every time you rehydrate the moss to ensure it’s still in place.
- Insufficient moisture: Ensure the sphagnum moss remains moist to promote root growth.
- Slow root development: Although air-layered fiddle leaf figs usually take 2-3 months to grow roots, some may take up to 12 months, depending on the plant’s health and environmental conditions. Be patient and maintain warm temperatures, moderate humidity, bright light conditions, and moist sphagnum moss. As long as the foliage above the air layer remains green and healthy, the node will eventually root.
Transplant Shock
Due to transplant shock, some newly rooted cuttings may wilt or droop after the initial transplant.
It may be caused by one or a combination of the following issues:
- Insufficient moisture: Keep the soil moist and water as soon as the top inch (2.5 cm) dries out to encourage continuous root growth.
- Low humidity: The tiny new roots might not be able to keep up with the moisture requirements of the large leaves. You can cover the young plant with a plastic dome to maintain humid conditions. Gradually expose the plant to lower humidity (50%) by poking holes through the plastic before removing it completely after new growth appears. Continue to boost the humidity using a pebbled tray with water or a humidifier.
- Intense sunlight: Young fiddle leaf figs exposed to brighter light conditions require higher humidity to inhibit rapid moisture loss from the leaves and soil. Ensure the plant receives only bright indirect or filtered light for the first 1-2 years after propagation. Otherwise, the leaves will have brown spots from sunburn and wilt.
- High temperatures: Prolonged exposure to temperatures over 85 °F (29 °C) can stress and dehydrate fiddle leaf figs, especially when inadequately watered. This can cause the large leaves to wilt or droop.
Stem and Root Rot
Air layers are vulnerable to rot when exposed to the following issues:
- Contaminated cutting tools: Always use sharp and sterile tools and spray or wipe them with alcohol between cuts.
- Wet sphagnum moss: The sphagnum moss should have the consistency of a wrung-out sponge. Dripping wet moss can cause decay to the young roots and wounded stem.
The air layer will have mushy brown spots on the leaves and black, mushy, and smelly roots.
You must cut off the air layer immediately below the plastic wrap and wipe off the sap from the stump. Brush the stump with cinnamon powder to prevent the spread of the infection to the mother plant.
On the other hand, new transplants may also suffer from root rot if the soil is constantly wet. Remember that fiddle leaf figs love moist soil and humid conditions, but the roots will drown if the soil is soggy and has poor drainage.
You must carefully unpot the plant and prune the rotten roots. This may be a risky move, considering the plant is too young. However, leaving the plant with root rot will certainly kill it.
You can improve the chances for recovery by keeping the following potting tips in mind:
- Use an appropriate soil mix with adequate moisture retention and drainage. I recommend two parts standard potting soil, one part cactus soil, and one part perlite.
- Avoid oversized pots that can extra soil and retain unwanted moisture. Choose a pot that’s 2 inches (5 cm) wider and deeper than the rootball.
- Use an unglazed terracotta pot to wick excess moisture through the walls and drainage holes.
Browning and Leaf Drop
Stem cuttings or air layers may dry out and shed leaves if they don’t receive adequate moisture from the air and the rooting medium (water, soil, or sphagnum moss). Leaf drop may be preceded by browning, wilting, or drooping, indicating that the leaves are dehydrated.
You can save the remaining leaves by following these tips:
- Maintain humidity levels above 50%.
- Keep the medium (soil or moss) moist.
- Replace the water regularly for water-rooted cuttings to ensure it’s clean and completely submerges the bottom node.
- Keep the plant away from heating vents or drafty areas to maintain moderate temperatures (around 75 °F or 24 °C).
- Keep the cuttings away from direct sunlight to slow down moisture loss from evaporation and transpiration.
- Ensure the mother plant is well-hydrated (for air layers).
Slow or Stunted Growth
Under optimal conditions, I observed that young fiddle leaf figs typically put on around 1-2 feet (0.3-0.6 m) and five or more new leaves within a year after propagation. I’m still amazed at how quickly they grow.
On the other hand, poor environmental conditions can lead to slow or stunted growth.
You can promote faster growth with the following care conditions:
- Water: Deep watering as soon as the soil is dry one knuckle (1 inch or 2.5 cm) deep
- Light: At least 8 hours of bright indirect light from a southern window. They also like 4 hours of direct but gentle morning sun from an eastern window.
- Temperature: 65-85 °F (18-29 °C) with a sweet spot around 75 °F (24 °C)
- Humidity: 40-60%. Small plants are okay sitting over a pebbled tray with water, especially when it’s twice the width of the pot. However, they may need help from a humidifier when temperatures rise at midday.
- Fertilizer: You can feed a newly rooted stem cutting 1-2 months after transplant. Use a quarter-strength 3-1-2 liquid fertilizer for faster absorption. Apply it at 2-week intervals or every 3rd or 4th time you water your plant during the growing season.
Final Thoughts
Fiddle leaf figs are generally easy to propagate indoors using stem cuttings or air layers. Ensure the plant is in excellent health with no signs of stress before propagating for a higher chance of success.
Young fiddle leaf figs are quite expressive when they are unsatisfied with the care conditions. Keep an eye on your plant’s symptoms and follow the tips above to ensure it thrives and grows into a magnificent indoor tree.
The environmental conditions after the initial transplant can be quite tricky to get right. Still, don’t be discouraged to propagate your overgrown fiddle leaf figs. They might take some time to root, but they’ll show results with patience and consistency in your care routine.
The experience may also help you discover which propagation method and care practices work best for you. Please leave a comment if you have questions or expert tips that can make fiddle leaf fig propagation more exciting and rewarding.